 FREE 1 to 3-Day Delivery on Orders $149+ Details
How to Install a Steeda Tubular Radiator Support on Your 2005-2010 Mustang
Installation Time
1 hours
Tools Required
- Floor jack
- Jack stands
- 3/8" ratchet
- Sockets: 8mm, 15mm deep, 18mm deep
- Wrenches: 8mm, 11mm, 18mm
- 5.5mm socket or wrench
- Torque wrench with 15mm and 19mm deep sockets
Installation
1. Raise the vehicle and remove both front wheels. If you are planning to keep the front sway bar, it isn't necessary to remove the front wheels, but you will probably still want to remove them for easier access while doing the radiator support install.
*NOTE: IF YOU ARE GOING TO KEEP YOUR FRONT SWAY BAR, SKIP STEP 2 AND GO DIRECTLY TO STEP 3.
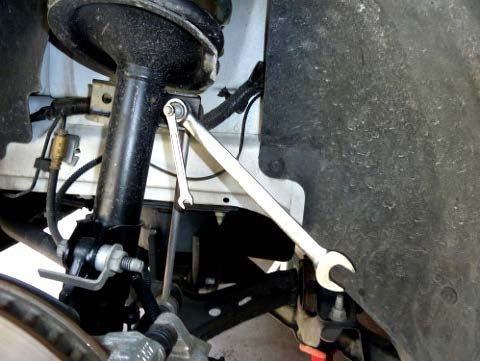
2. Remove the nuts that attach the sway bar end link to the struts on each side. The nut is 18mm, so use an 8mm socket or wrench to hold the bolt to prevent it from turning as you loosen the 18mm nut (see Picture 1). Once both nuts are removed, the end links should come out of the strut. If they stick, you can lightly tap the end of the bolt and it will come out. At this point, the sway bar should move freely up and down.
3. Using the 15mm deep socket, remove the (4) nuts that secure the sway bar bushing clamps to the factory radiator support (see Picture 2) and then the clamps will slide off the bushings. If you are removing your sway bar, you can now pull it down and forward out of the car. If you are going to retain the front sway bar, push it toward the back of the car and then down, so it clears the bolts and hangs free and out of the way.
4. Remove the front splash pan. It is held on by (7) 5.5mm bolt head screws. Remove these bolt head screws and pull the splash pan down and back so they are free of the car.
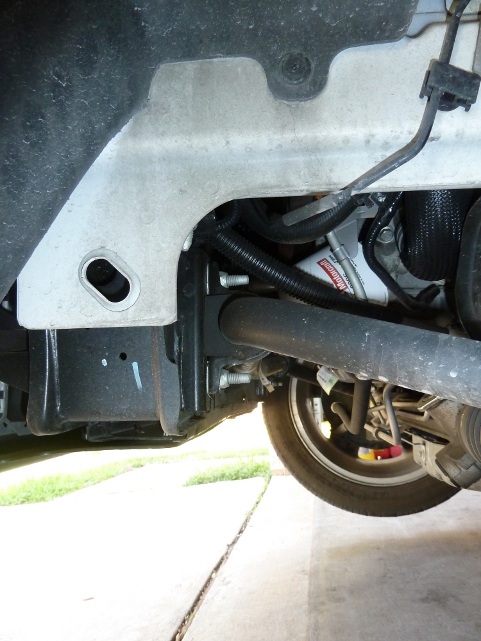
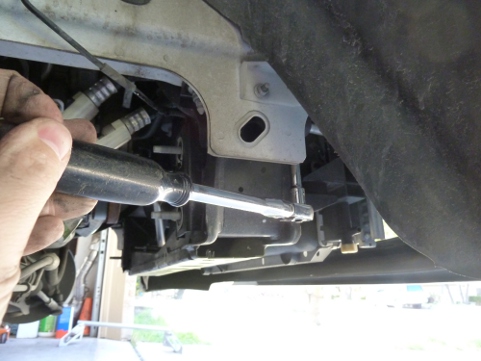
5. Using an 18mm deep socket, loosen the (4) 18mm nuts that secure the factory radiator support. Only loosen them at this time; do not remove. There are (2) on each side (see Picture 3). On the passenger side, you may find it helpful to use a short extension on the ratchet to clear the frame (see Picture 4).

6. You will need to remove a few things attached to the factory radiator support:
- A brake line is held on with (2) clips. Pull it free by lightly prying the clip while pulling the line free.
- An AC line is held in place with a bolted clamp. Remove the 11mm nut that secures the line and push it free.
- A plastic clamp holds the power steering line with a plastic push pin. Remove that as well. You may find it easier to wait until you are lowering the support to remove this.
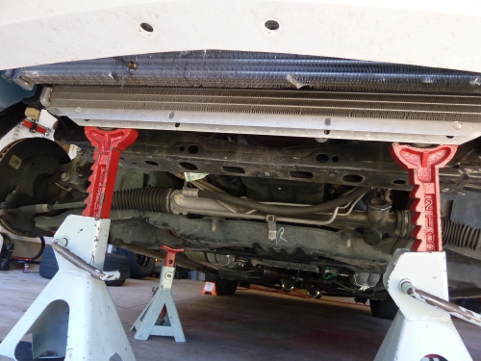
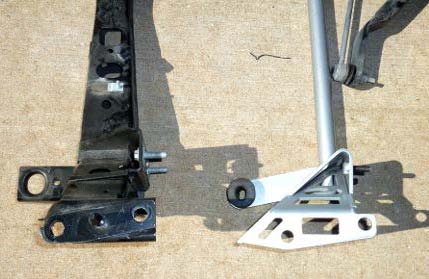
7. Support the radiator using jack stands or a jack (see Picture 5) and remove the (4) 18mm nuts that you loosened in Step 5 and lower the radiators down and out of the car. Check to verify that the rubber bushings (see Picture 6) located where the radiator slides into the support have come off with the support. If they didn't, then remove them by just pulling them off. Insert the bushings into the Steeda radiator support as seen in Picture 6.
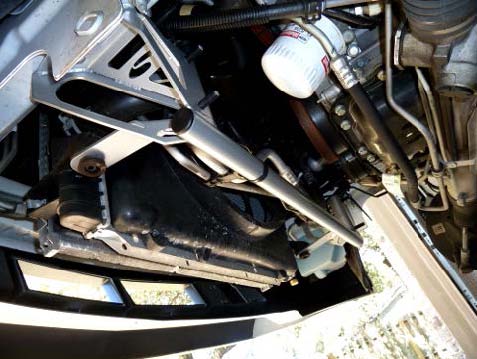
8. Lift the Steeda support into place, making sure that the (2) pins of the radiator go into the rubber bushings. Slide the support over the ($) bolts on the frame and then install the (4) 18mm nuts that hold the support to the frame. Using the torque wrench, tighten these to 85 ft/lbs (see Picture 7).
9. Using the provided zip ties, secure the lines that you removed from the factory support to the Steeda support.
*NOTE: IF YOU ARE REMOVING YOUR FRONT SWAY BAR, SKIP STEP 10 AND GO DIRECTLY TO STEP 11.
10. Lift the front sway bar back into place and slide the clamps back over the bolts on the support. Tighten them to 52 ft/lbs.
11. Re-install the front splash pan. Use (4) 5.5mm screws on the front and secure the rear of the splash pan to the Steeda support using the provided zip ties.
12. Take a moment to look your work over and ensure that all bolts are tightened and all lines are secured. If you kept the sway bar, re-check the torque on the (4) 15mm nuts that hold the sway bar bushing clamps, as well as the (4) 18mm nuts that secure the support to the frame. Then take the vehicle for a short test drive.
NOTE: If you removed the front sway bar, the handling may see some significant changes, so it may take a little while to get used to the way the vehicle now reacts.
Installation Instructions written by AmericanMuscle customer Dave Birt 3.23.12

