 FREE 1 to 3-Day Delivery on Orders $149+ Details
How to Install a Steeda ProFlow Cold Air Intake on your 2011-2013 Mustang V6
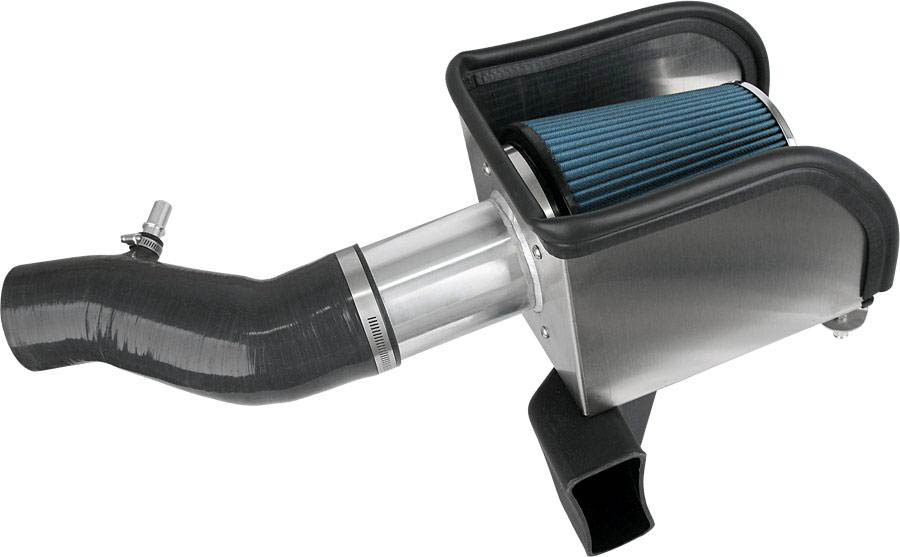
STEEDA COLD AIR INDUCTION KIT
2011 Mustang V6
Instructions for part #555-3159
***NOTE***
This kit is only to used on cars that have had their PCM tuned for this intake system! Using this kit without the proper engine tune can cause serious damage to your engine! Steeda will not be held liable for use without a tune!
Removal of factory air intake system
1. Remove the factory intake assembly by first loosening the hose clamp securing the intake tube to the throttle body. Also disconnect the hose for the PCV system, and secondary brake booster hose (found on automatic transmission vehicles only). These hoses are indicated in figure 1.
2. Disconnect the electrical connector for the mass air flow sensor and unclip the wire harness from the airbox. Unbolt the lower half of the airbox assembly from the fender as seen in figure 2. Gently pull up on the airbox and dislodge the rubber grommets from the holes in the fender and the cold air intake feed duct underneath. Then gently pull the intake tube off of the throttle body and lift out the entire assembly in one piece.
3. Remove the rubber grommets attached to the bottom of the airbox and insert them into the holes where they were originally located in the inner fender as shown in figure 3.
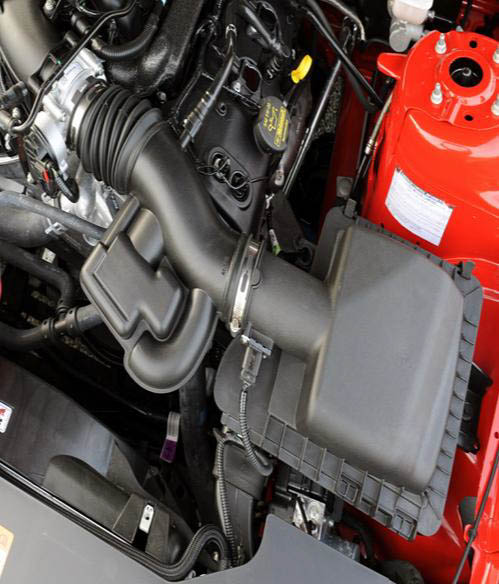
Figure 1
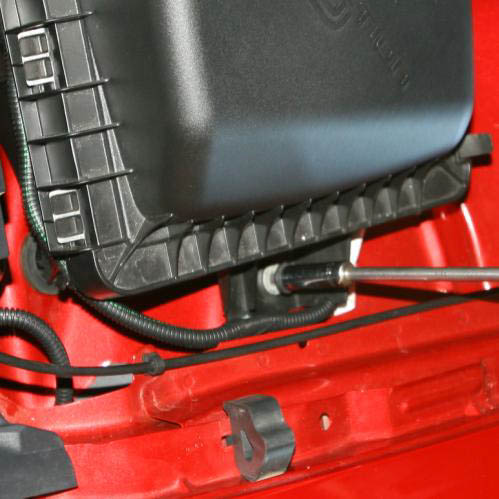
Figure 2
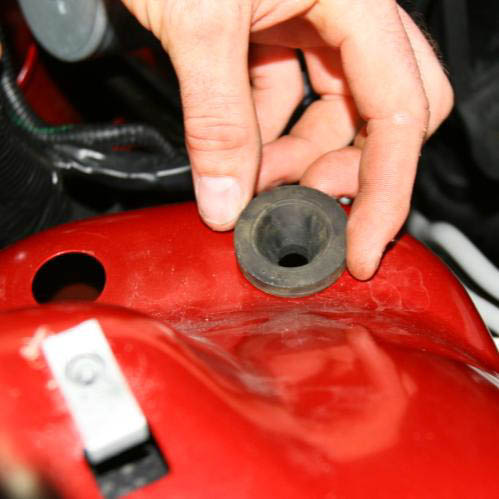
Figure 3
Assembly of the Steeda Cold Air Induction Kit
4. Remove the PCV liner from the outside of the shield.
5. Bolt the lower cold air feed duct to the shield with the provided #10 x ½” button head Allen screws and associated Nylon lock nuts and flat washers as seen in figure 4.
6. Attach the mass air flow sensor pipe to the shield assembly by passing the pipe through the hole in the shield and orient it as seen in figure 5. Secure it with the provided ¼” x 3/8” button head Allen screws and ¼” flat washers.
7. Attach the supplied cone air filter to the velocity stack by sliding it over its outer flange and securing it with the attached hose clamp as seen in figure 6.
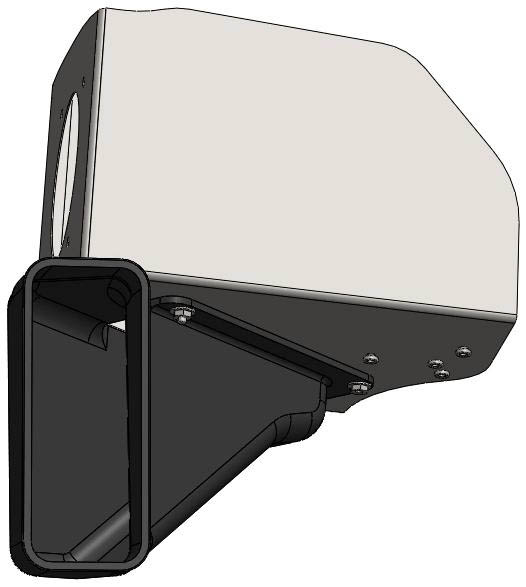
Figure 4
8. Bolt the attachment brackets to the shield with the supplied #10 x 5/16” button head Allen screws as seen in figure 7. The bracket with the large hole in it needs to have the grommet and bolt used on the factory airbox transferred over.
9. Screw the provided aluminum dowels into the bottom of the larger bracket, as also seen in figure 7. Use the provided ¼” x 5/8” Hex head bolts and ¼” flat washers.
10. Install the rubber trim around the edges of the shield as shown in figure 8. The larger trim with the bulb should go around the top of the shield to seal against the hood liner, and the smaller trim should go around the lower part of the shield.
11. Remove the mass air flow sensor from the factory airbox lid by removing the two torx screws securing it. Now carefully transfer the sensor into the aluminum mass air flow sensor pipe in the same orientation as it was in the factory airbox lid. Use the two provided #8 x 5/16” button head Allen screws to secure it to the pipe.
12. If you have a vehicle with a manual transmission, install the provided rubber plug in the hole in the bottom of the MAF pipe. If you have a vehicle with an automatic transmission install the rubber grommet and barbed hose elbow into the hole in the bottom of the MAF pipe.
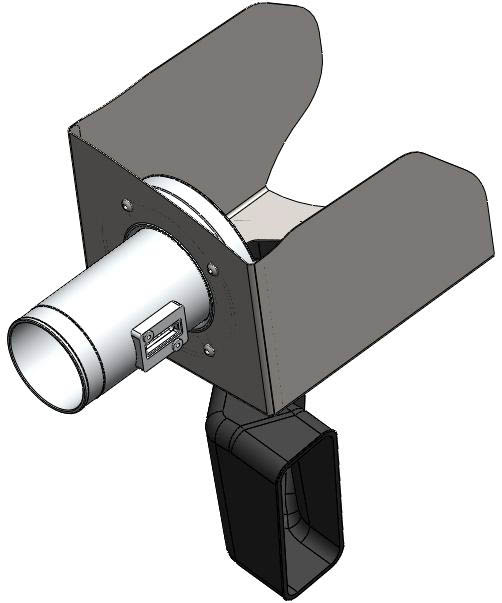
Figure 5
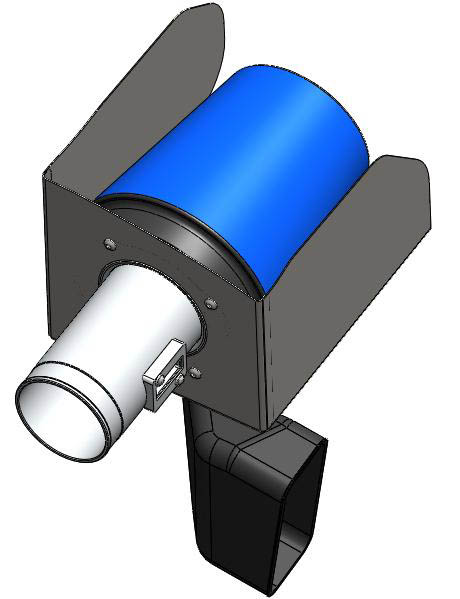
Figure 6
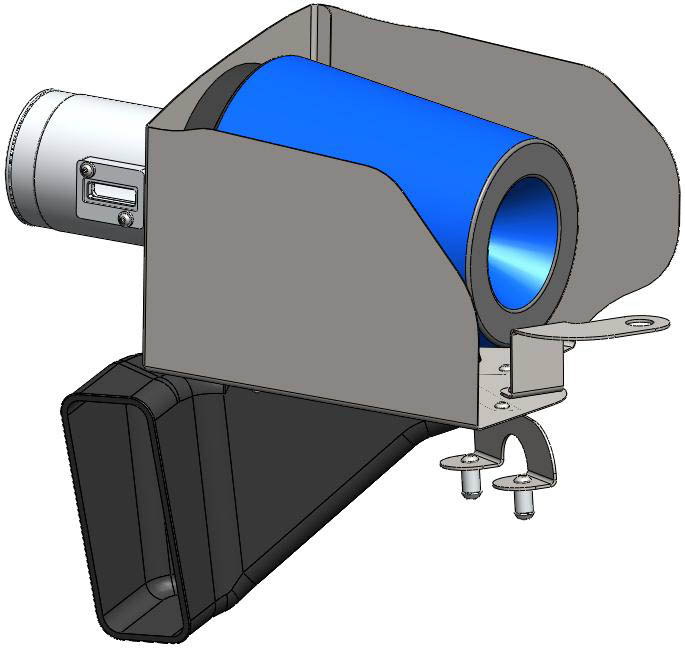
Figure 7
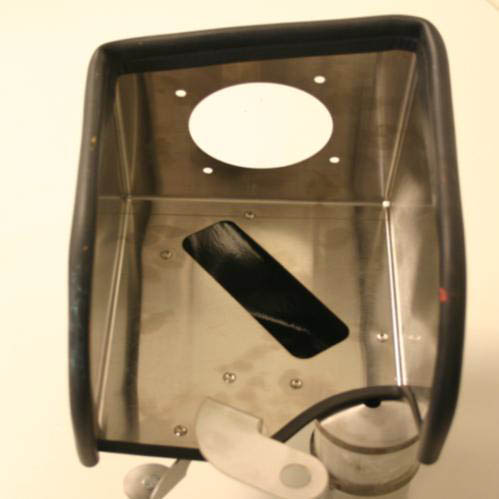
Figure 8
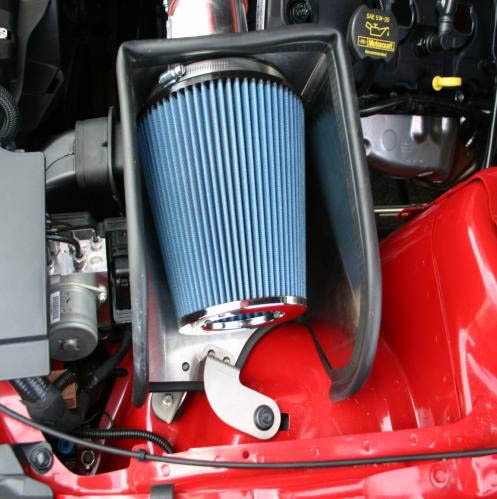
Figure 9
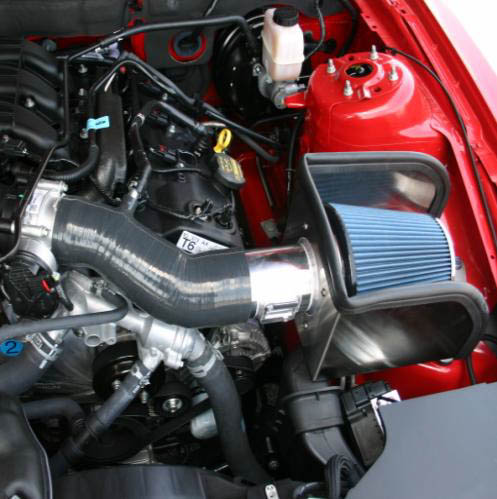
Figure 10
Installation of the Steeda Cold Air Induction Kit
13. Fit the shield assembly into the car in the same location and orientation as the factory airbox as seen in figure 9. Be sure to locate the dowel pins, in the bottom bracket of the shield, into the rubber grommets you placed back in the holes in the inner fender. Also reinstall and tighten the bolt used to secure the factory airbox into the bracket which you transferred the rubber grommet into. Note; make sure that the lower cold air feed duct fits tightly and properly in the same intake duct as the factory lower airbox.
14. Install the two large hose clamps over the ends of the silicone intake tube. Use the largest clamp on the end with the largest diameter (the mass air flow sensor pipe end) and the smaller hose clamp over the smaller diameter (the throttle body end). Fit the new intake tube in place by first setting the larger diameter end over the mass air flow sensor pipe. Then install the smaller end over the throttle body. Be sure the hose is over the entire throttle body, and covering at least one inch of the mass air flow sensor pipe. Tighten down the hose clamps.
15. Install the aluminum PCV hose adaptor into the small boss on the side of the silicone intake tube. Secure it with the last provided hose clamp and reinstall the factory PCV hose over the adaptor. Make sure it snaps into place.
16. If you have an automatic transmission vehicle, install the secondary brake booster hose over the barbed plastic elbow you installed in the bottom of the MAF pipe. Trim the hose to length, if so desired.
17. Reconnect the mass air flow sensor.
18. You are done with the installation! The finished assembly should look similar to figure 10.
19. You now MUST tune the engine computer to be able to operate the car with the Cold Air Induction kit installed. If you do NOT have the engine tuned after installing the Cold Air Induction kit the air:fuel ratio could become very lean and could damage the engine!! Steeda will not be held responsible for damage caused by this CAI kit when used without a proper tune.
Helpful Tips
► Put a small cut in the bottom of the trim pieces where they make transitions around corners to aid fitment with the shield.
► If the trim will not stay in place following installation, apply a small amount of contact cement (or similar adhesive) to ensure the trim stays in place.
► For future air filter maintenance please visit http://www.steeda.com/store/air-filter-cleaning-kit-for-ford-mustang.html
