 FREE 1 to 3-Day Delivery on Orders $149+ Details
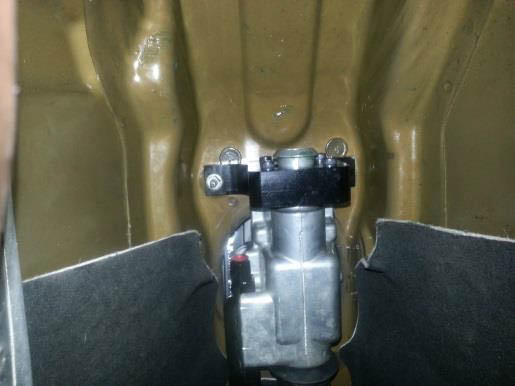
How to install an SR Performance Shifter Bracker on your 2011-2014 Mustang GT V6
1. Jack the vehicle up and support the vehicle on jack stands for your safety.
2. Locate the shifter bracket at the rear of the shifter assembly.
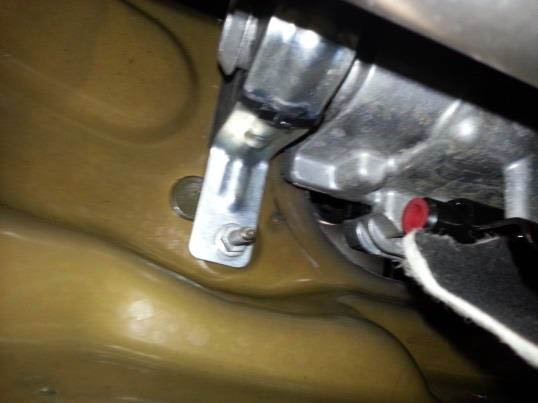
3. Remove the (2) 10mm nuts holding the bracket to the floor pan of your vehicle.
4. Pull the bracket down and back to slide it off of the snout of the shifter assembly.
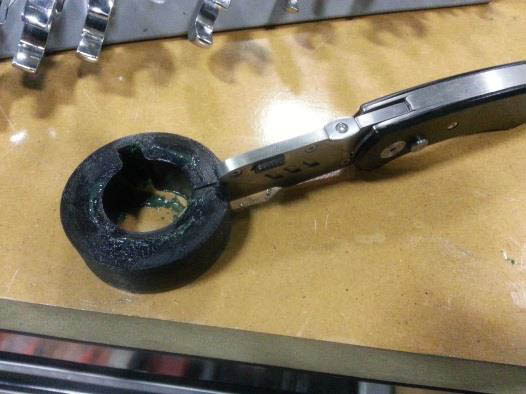
5. Disassemble the shifter bushing by removing the 4 allen bolts holding it together and slide the pieces apart.
6. To install the new shifter bushing, first cut the bushing to allow it to wrap around the shifter assembly snout.
7. Now, slide the thin metal piece of the bushing assembly onto the snout of the shifter.
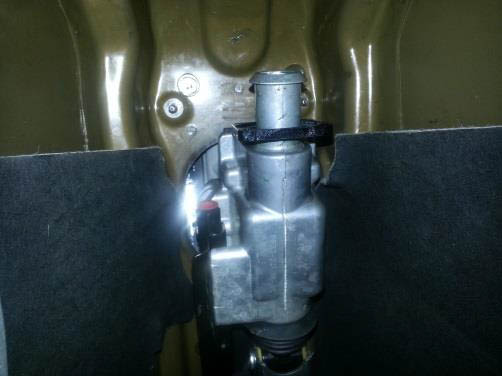
8. Next, wrap the bushing around the snout so that it matches up with the metal retaining plate installed in step 7.
9. Slide the thicket part of the bracket over the bushing, mate it with the rear plate, and bolt the assembly back together.
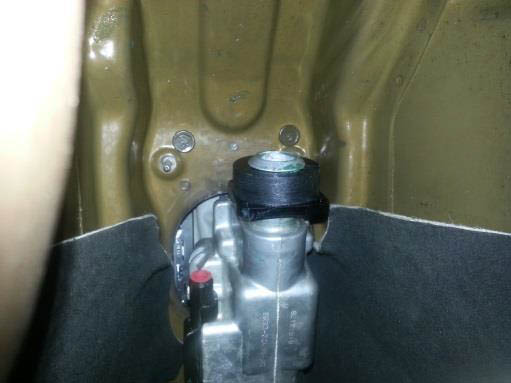
10. Reinstall the (2) 10mm nuts and tighten the assembly to the vehicle.
