 FREE 1 to 3-Day Delivery on Orders $149+ Details
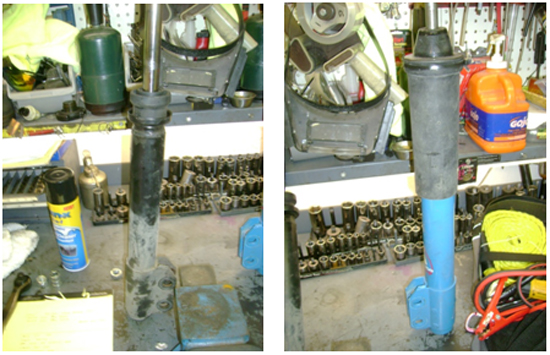
Tokico HP Series Front Strut ('94-'04) - Installation Instructions
Installation Time
30 minutes
Tools Required
- 24mm Socket
- 21mm End wrench
- Floor Jack
- Jack stands (2)
- Drive ratchet
- Impact gun is recommended if available
Installation
Front Struts Installation:
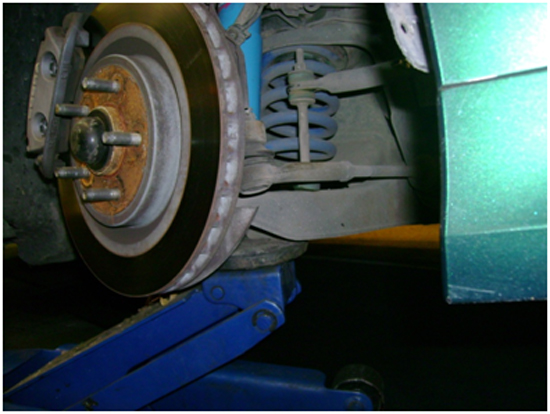
1. Jack the front end up and place jack stands securely on the frame rails. (Suggestion: Jack on the pinch weld in order to place the jack stands on the frame rail as shown)

2. Remove the front wheels
3. Place a floor jack under the control arm and put a slight load on it.
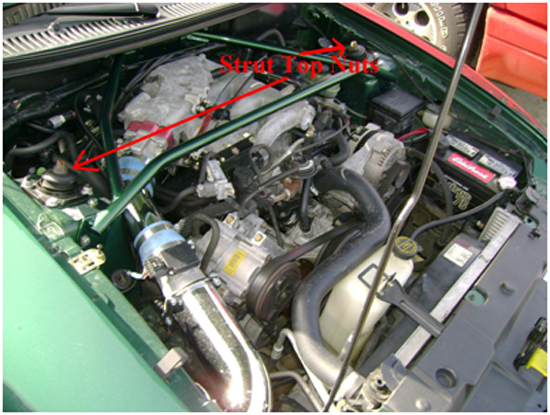
4. Remove the strut top nut using your 21mm socket. (You will not need to keep this. You should receive a new nut with your struts)
5. Once the nut is removed, slowly lower the floor jack to relieve the pressure causing the strut to lower.
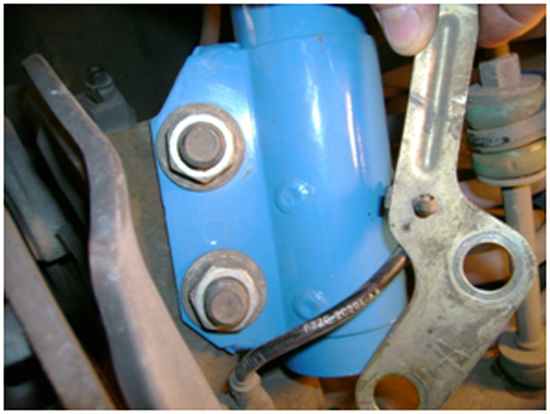
6. With the 24mm socket, remove the single nut holding the bronze bracket to the strut.

7. Move the bracket aside to get access to the lower two nuts holding the strut to the lower control arm.
8. With the 24mm socket on the nut, and the 21mm wrench holding the bolt, remove the lower two nuts and bolts.
LEFT: Use the 24mm Socket Here
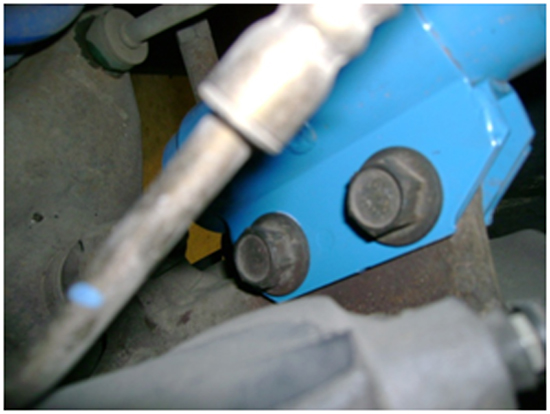
RIGHT: Use the 21mm Socket Here
9. Once the bolts are removed, take the factory strut out of the car.
10. Now take the rubber bushing with the dust shield attached off of the factory strut and replace it on your new Tokico strut. It is highly recommended that you also replace the factory bushings at this time. If you choose to do this you will need to separate the dust shield from the bushing. I have chosen to do this here. Also, you will not need the rubber stopper shown (LEFT) The Tokico strut has one built in.
11. Once the bushing with the dust shield is installed onto your new strut, take the strut and place the top end through the hole in your camber plates.
12. Take your floor jack and put some pressure back on the control arm to help you line up the bottom holes in the strut and the strut bracket on the control arm.
13. Now, line up the lower holes and place both lower bolts through.
14. Make sure you have both bolts through before tightening the nuts or it will be almost impossible to line them both up. The bolt heads should be facing the rear of the car and the nuts should be going on from the front of the car.
15. Tighten the two nuts and bolts together. They should bevery tight.
16. Then replace the bronze bracket over the two bolts.
17. Now you can replace the nut that holds the bracket. Hand tight will do for this nut.
18. Put on the new top nut that came with your new struts andtighten firmlywith the 24mm socket.
19. Remove the floor jack and double check that the top nut is secure.
20. Repeat the process for the other side of the vehicle.
21. Replace the wheels and torque them to proper specifications.
22. Remove your jack stands and lower the car back down.
23. Now you should test drive your car and listen for any abnormal or new noises.
24. Also make sure that the car drives as it did before the installation.
25. Enjoy your new Tokico HP Struts!
Installation instructions provided by AmericanMuscle customer Andrew Tamlyn 9.20.09
