 FREE 1 to 3-Day Delivery on Orders $149+ Details
How to Install Venom High Performance Fuel Injectors on Your 1989-2004 Mustang
Installation Time
2 hours
Tools Required
- Paper towels
- Flat head screwdriver for intake clamps
- Pliers
- Motor oil
- Ratchet with 4 to 6"extension
- 8mm deep socket
Installation
NOTE: I installed these on a 2004 Mustang GT 4.6 SOHC. Installation is basically the same on most fuel injected mustangs. Differences may include fuel rail orientation, how the rails are mounted to intake manifold and other components such as what may have to be removed to access the injectors, like your air intake system.

Installation Instructions:
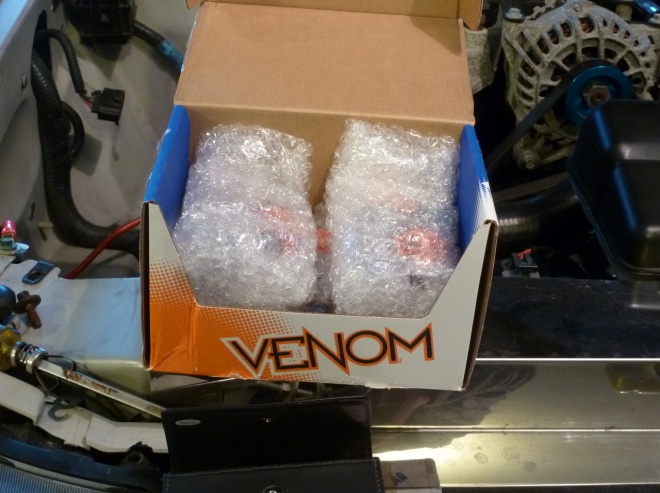
1. Start by opening your package from AmericanMuscle and looking over the new injectors.
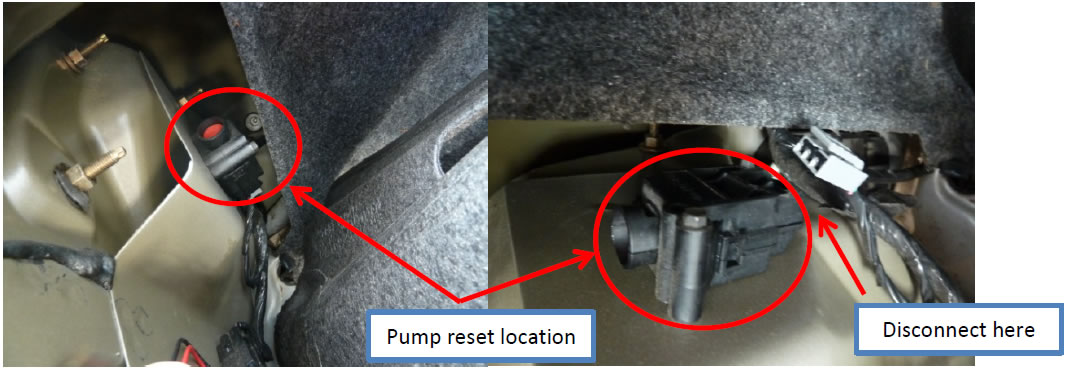
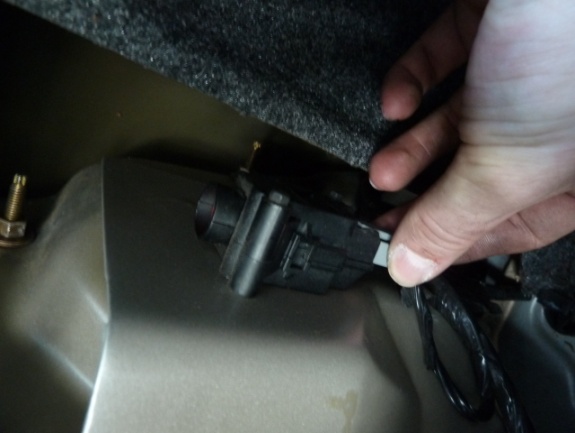
2. Next while your engine is running, disconnect an electrical connection that operates your fuel pump. I disconnected the fuel pump reset button located in the truck on the driver’s side next to the wires that go to the taillight. If you do not have one of these (older models), you can pull the fuse to the pump. This step allows the engine to drain the fuel that is pressurized in the fuel rails. This will cause codes and make your check engine light to come on. These codes will be: low fuel pressure, lean conditions bank 1 or 2 and maybe an injector fault. These are fine; you will just have to clear them after your install.
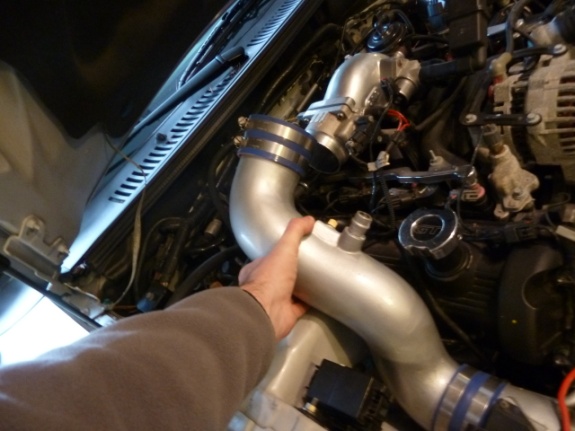
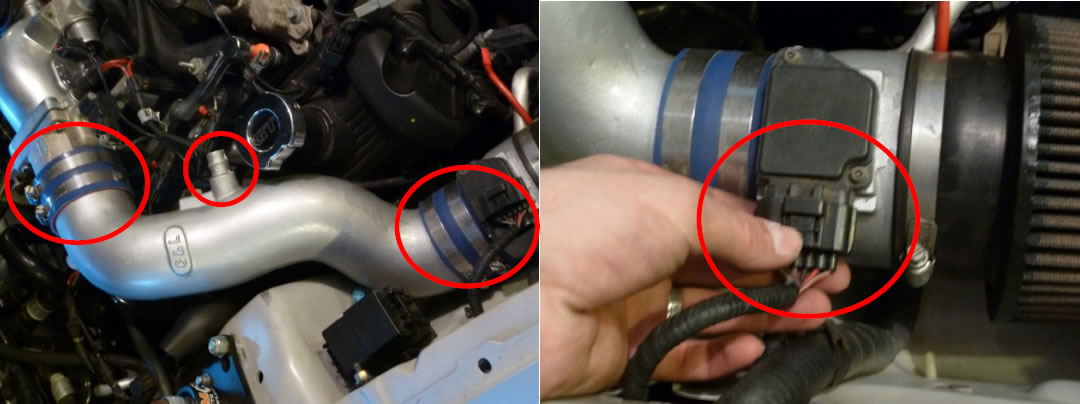
3. Next, remove any components that are in the way of getting to your injectors. For me, it was only my air intake system. I needed a flathead screwdriver to loosen the clamps holding the intake to the throttle body and MAF housing.
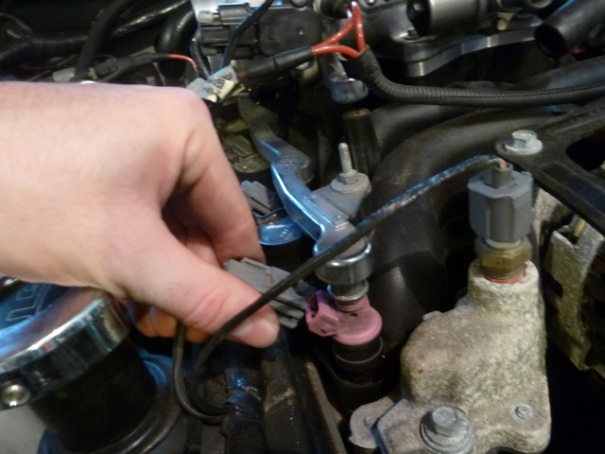
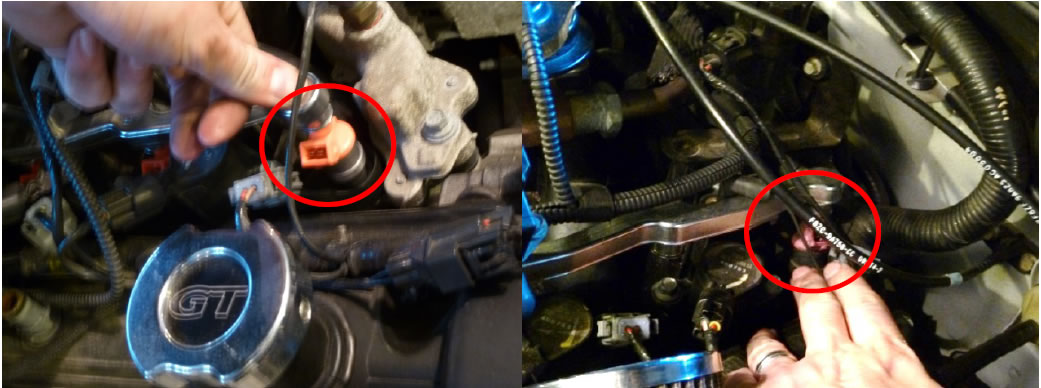
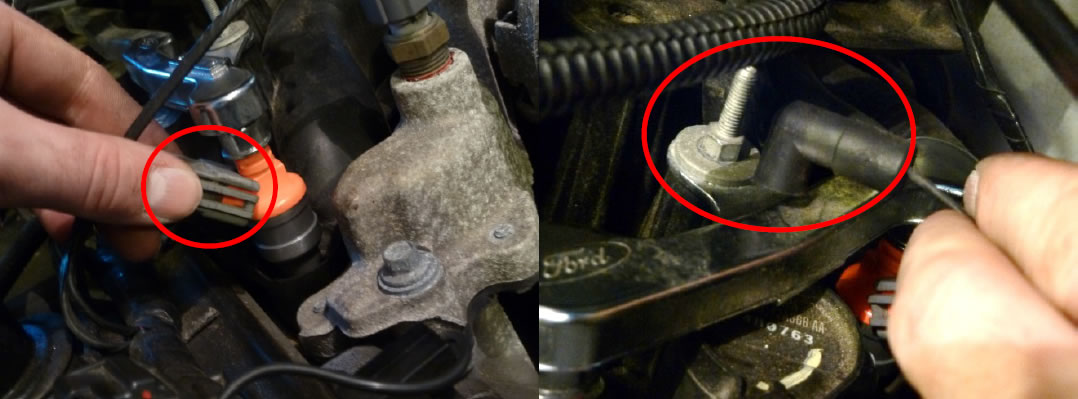
4. After removing your intake and other tubing you may have, disconnect the electrical connections to the fuel injectors.
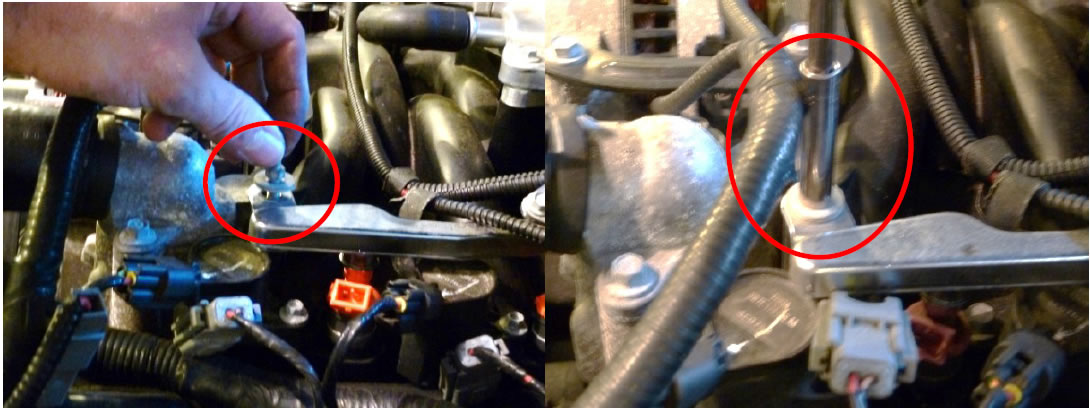
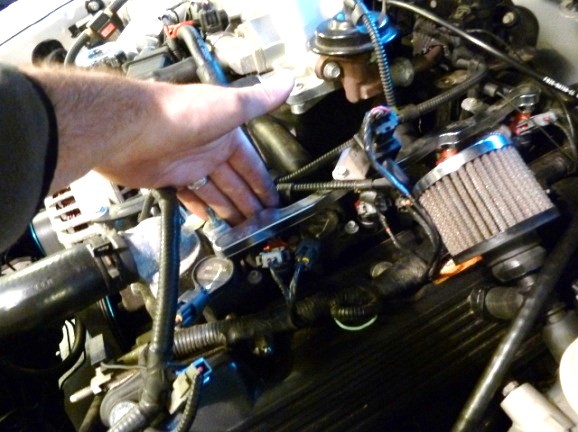
5. Using your 8mm deep socket, remove the bolts/studs holding the fuel rails to the intake manifold. There will be (2) for each side, (4) in total.
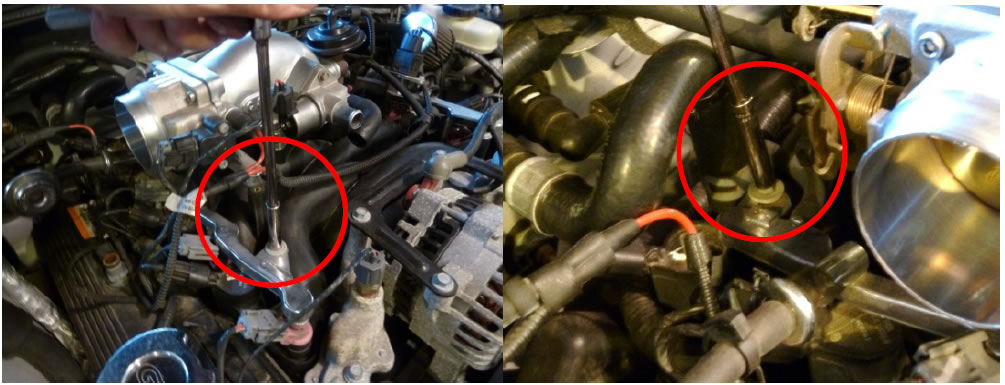
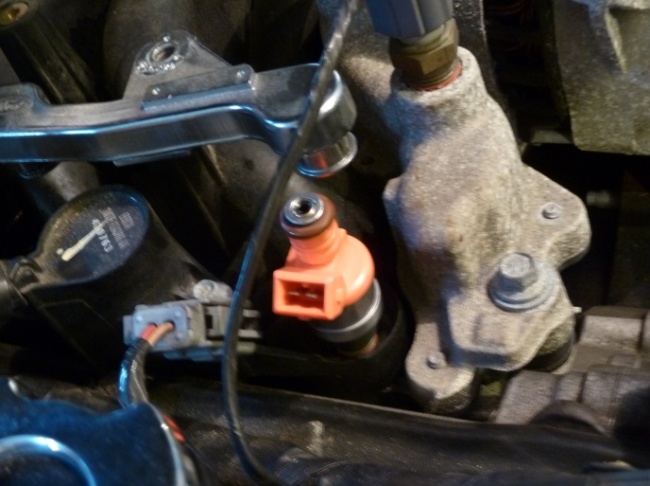
6. Get your paper towels ready for the next step. There will be some fuel left in the rails even after the engine stalls out and this fuel will be under pressure. Carefully lift the fuel rail and wiggle out the first injector, which one you do first is up to you. I did the passenger side front because it is the easiest to reach and easiest to catch remaining fuel after the injector is pulled out of the rail.
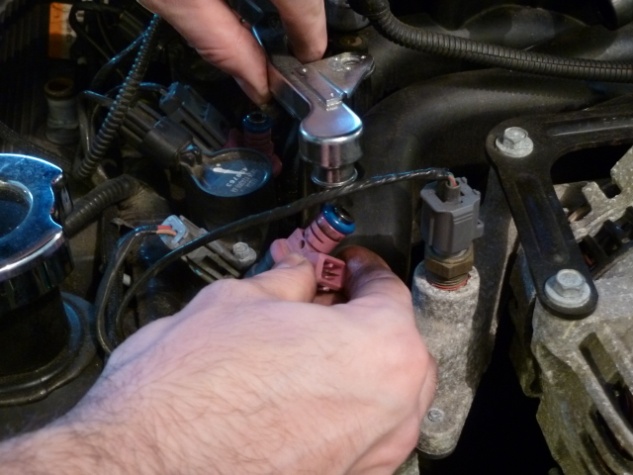
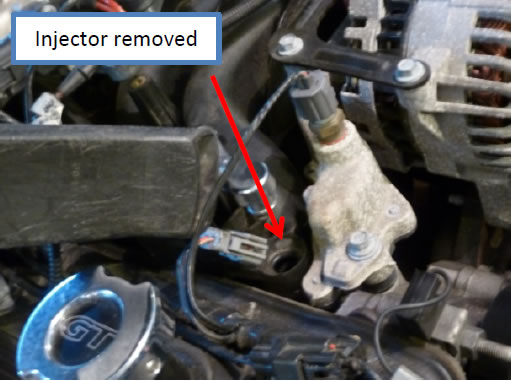
7. Carefully remove all (8) injectors and catch any fuel with paper towels. Next, I used a vacuum to suck out any dust that may have been on the injector seats.
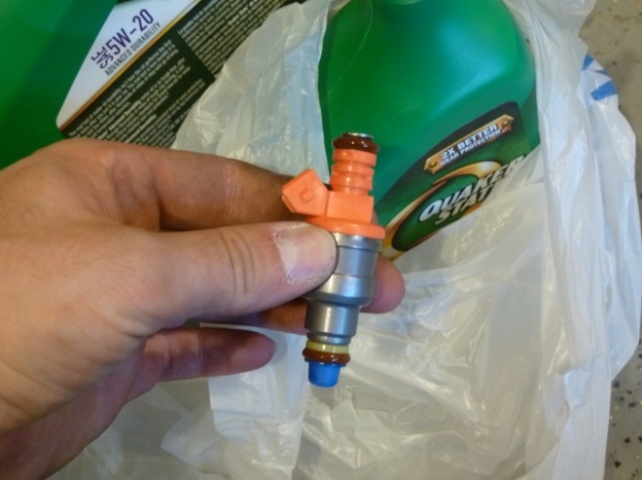
8. Now it’s time to prep your new injectors. Dip your finger into some clean motor oil and using a very, very small amount and lubricate the O-rings on the fuel injectors. This is to prevent any damage or cracking while the injector is pushed into the intake manifold seat and also the fuel rail. Just a precaution that takes a few seconds.
9. One at a time, place your new injector into the manifold injector seats. NOTE: Do not push down on them yet; just place them into where they sit in the manifold. You want the electrical connection facing outward (toward you) so you can connect it later.
10. Gently line up the fuel rail on top of each set of 4, doing one side at a time. Make sure the tops of the injectors are lined up with the ports on the rails and the bottoms are still in the manifold seats. Very gently push down on the fuel rail on each end and then in the middle to secure the rail to the injectors. You will feel them “clip” in. Don’t push too hard; they will fully seat when you bolt down the rails. Repeat this on both sides.
11. Replace the bolts for the fuel rails and tighten them down, alternate tightening between the front and rear bolt. Remember, the bolts are going into a plastic manifold so don’t over-tighten them. Repeat on the other side.
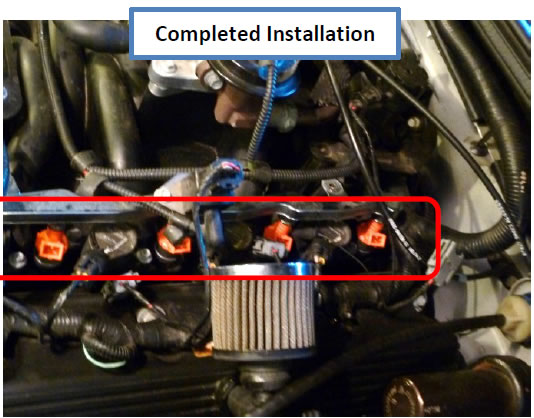
12. Reconnect the electrical connections to the new injectors and other connections that you may have had to remove from the fuel rails.
13. Reinstall your air intake and corresponding hoses, hardware and electrical connections.
14. Reconnect the electrical connection that you had severed to shut down the fuel pump (fuel pump reset switch in the trunk for this install).
15. Next, turn your key to the ON position; do not START. This will prime and re-pressurize the fuel lines. Now that the rails have pressure, you can check to see if there are leaks. The fuel pressure should be about 45psi; if you have a leak you will know. Check each injector for fuel spraying out; run your hand around each one to see if you feel anything.
16. Start your car and recheck your injectors for leaks, then clear any codes that you may have. I used my SCT hand held tuner; if you don’t have one, a local auto parts store will typically clear a code for you. Using larger injectors may require a custom/dyno tune or at least a recalibration of your computer’s fuel parameters. Check with your local dyno shop.
Installation Instructions written by AmericanMuscle customer Alan Johnson 12.28.11

