 FREE 1 to 3-Day Delivery on Orders $149+ Details
How to Install Whiteline Rear Lower Control Arm Relocation Brackets on your 2005 to 2013 Mustang
Installation Time
1 hours
Tools Required
- 22mm Wrench
- 22mm Socket
- 19mm Wrench
- 18mm Wrench
- 15mm Wrench
- Pry Bar

Shop Parts in this Guide
Kit Includes:
• Relocation Brackets - 2
• Tube Spacers – 2
• 8mm Spacer
• Yellow 100mm Bolts 8.8 – 2
• Silver 100mm Bolts 10.9 – 2
• Nyloc Nut - 4
• 30mm Bolts – 2
• Fine Thread 30mm Bolt – 1
• Fine Thread Nyloc Nut - 1
Tools Required:
• 22mm Wrench
• 22mm Socket
• 19mm Wrench
• 18mm Wrench
• 15mm Wrench
• Pry Bar
WARNING: Whiteline Products are designed to for easy installation but professional installation by a Whiteline Performance Center is recommended. Please drive carefully and accustom yourself to the improved handling characteristics of the vehicle.
1. Lift vehicle and place jack stands under rear axle.
2. Starting with the passenger side, remove the axle damper weight if the vehicle has them installed. (Figure 1)
3. Remove the Lower Control Arm bolt using an 18mm socket or wrench.
4. Slide passenger side bracket into place and align the holes, then reattach the axle damper. Do not fully tighten bolt. If your vehicle did not come with the weights installed, use the 2 supplied 30mm bolts. In some cases slight modification may be required of the weight to retain it, including grinding a small amount of the “stem”.(Figure 2)
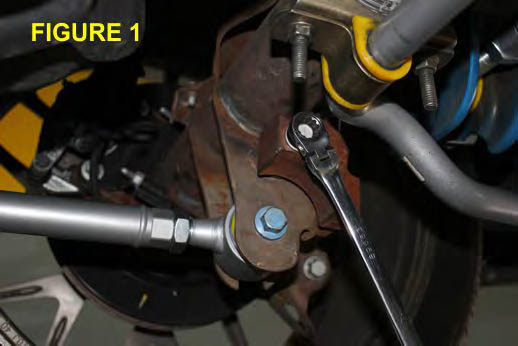
FIGURE 1
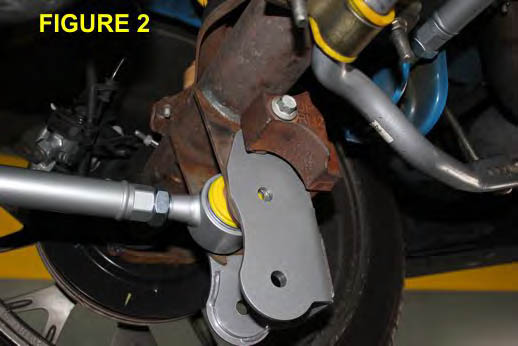
FIGURE 2
5. Install one of the supplied gold tubes with the Yellow 100mm 8.8 bolt and Nyloc nut in the middle hole as show in Figure 3, do not tighten yet.
6. Install the 30mm fine thread bolt and nut on the upper rear of the bracket (Figure 4). Tighten to 129 ft/lb, tighten center bolt from step 5 to 129 ft/lb .
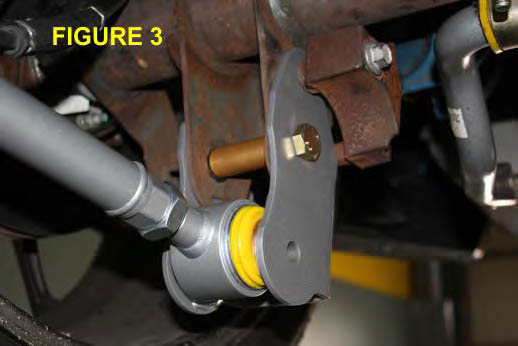
FIGURE 3
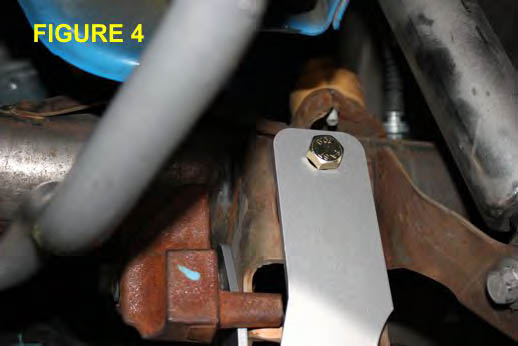
FIGURE 4
7. Position arm in the lower hole and insert the Silver 100mm 10.9 bolt with the nyloc nut on the outside facing the wheel. Positioning may require use of pry bar. Tighten bolt to 129 ft/lb.
8. Switch to the driver’s side; if the car came equipped with weights, use a 15mm wrench and remove the weight, then use an 18mm wrench and remove the lower control arm bolt and move the control arm out of the way. (Figures 5 and 6)
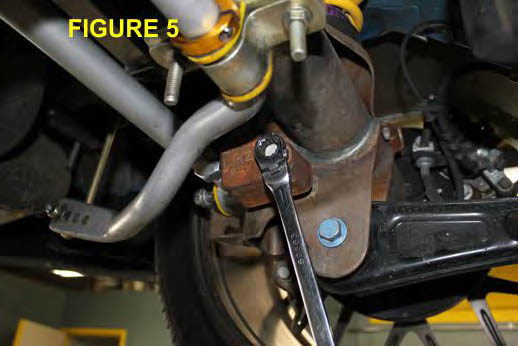
FIGURE 5
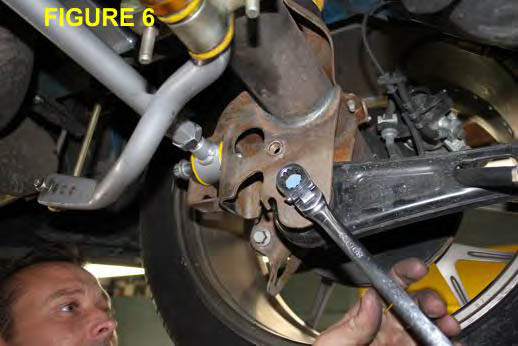
FIGURE 6
9. Use an 18mm wrench to remove the panhard bolt so you can insert the bracket.
10. Inset Whiteline bracket over the stock bracket. Install the remaining supplied Yellow 100mm 8.8 bolt, gold center tube and nyloc nut as shown. Do not tighten yet.
11. Re-install the panhard bolt, positioning the bolt as shown in figure 8. Tighten to 129 ft/lbs.
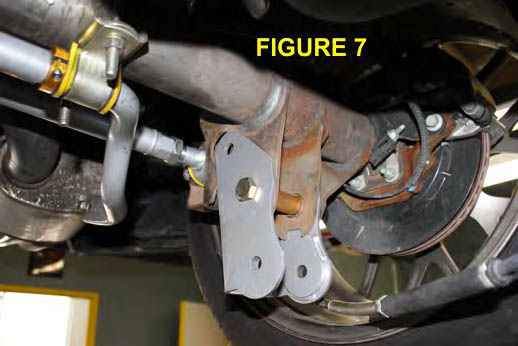
FIGURE 7
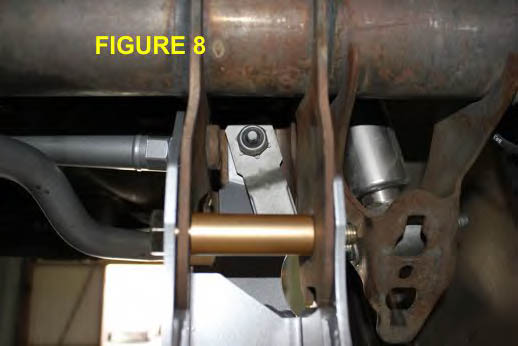
FIGURE 8
12. Insert the 8mm spacer into the upper hole as shown in figure 9 and reinstall the factory weight, if your car did not come with weights, use the supplied 30mm bolt. Tighten to 129 ft/lb.
13. Reposition the Control Arm in the lower hole and insert the Silver 10.9 bolt. This may require use of a pry bar. Position as shown with the nut facing the outside towards the wheel. Tighten to 129 ft/lb.
14. Lower Vehicle. Check and re-tension all fittings again after 100 miles.
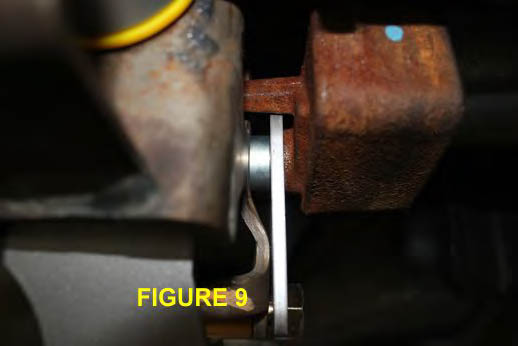
FIGURE 9
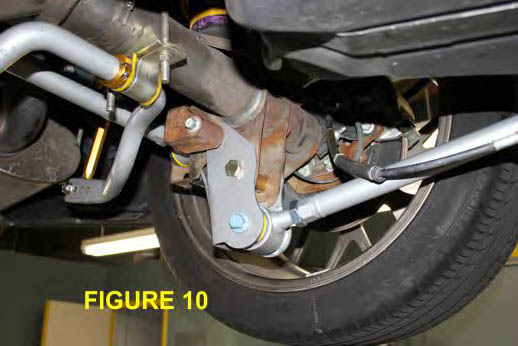
FIGURE 10
For specialist assistance in North America:
Website: www.WhitelineUS.com
Email: [email protected]
Phone: (909) 476-2860
All other countries please email [email protected]

