 FREE 1 to 3-Day Delivery on Orders $149+ Details
How to Install a JLT CAI and Bama Tuner On your 2011-2014 Mustang GT
Installation Time
1 hours
Tools Required
- 10mm socket
- ratchet with extension
- T-20 torx driver
- phillips head screw driver
- flat head screw driver
- ½ drill bit
- pliers (slip joint, tounge-and-groove, or something similar should work)
Installation
Please read the instructions in its entirety before proceeding with installation. This guide is intended for use with the JLT Cold Air Intake and Bama Performance Tuner Combo Kit used on a Mustang GT 2011-2014.
1. Inspection
1. Verify you have received all of your parts in your performance kit. Check for broken pieces.
2. Check that you have all the tools necessary to perform the job before starting.
2. Prepare the new JLT Cold Air Intake (Automatic Cars Only)
1. If your car is a manual, SKIP to step 3. If it is automatic, use the ½” bit to drill a hole approximately a ½” above the pcv insert on the tube. (I recommend you measure to be sure because you don't want the two rubber grommets to overlap if the hole is to close to the pcv insert)
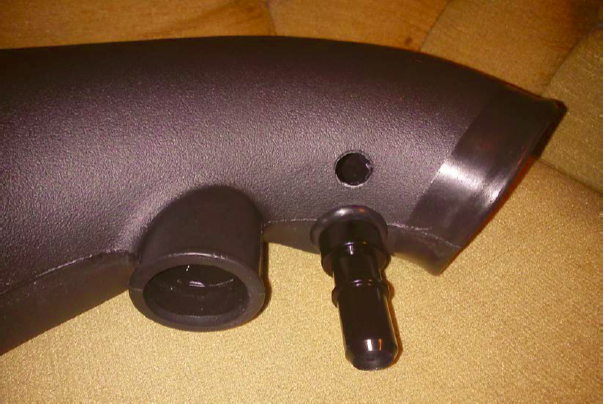
2. Gently roll the grommet into the hole. Make sure it is secure on the inside and outside.
3. Insert the fitting into the rubber grommet. It will be a tight fit. Continue to step 3 when finished.
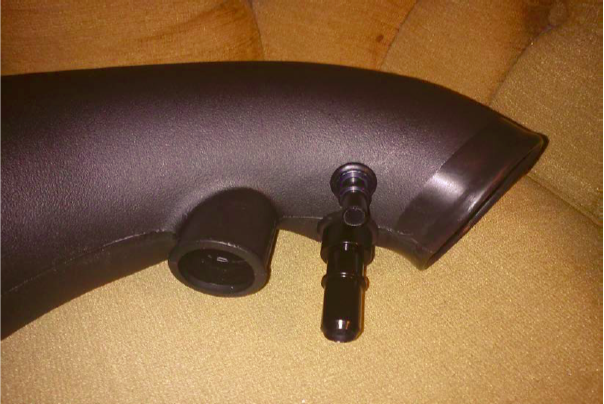
3. Prepare the new JLT Cold Air Intake (Continued)
1. Attach the rubber coupler to the end of the tube that has the pcv attachment. Put both hose clamps on and tighten slightly. Leave them loose so you can adjust accordingly when you attach to throttle body.
2. Attach the filter to the other end. Secure it by tightening the hose clamp with your flat head screw driver.
Tip: This is a personal preference, but I chose to rotate the filter so that the horizontal silver line of the filter that holds it together is on the opposite side of the letters JLT. It looks better when the silver is hidden.
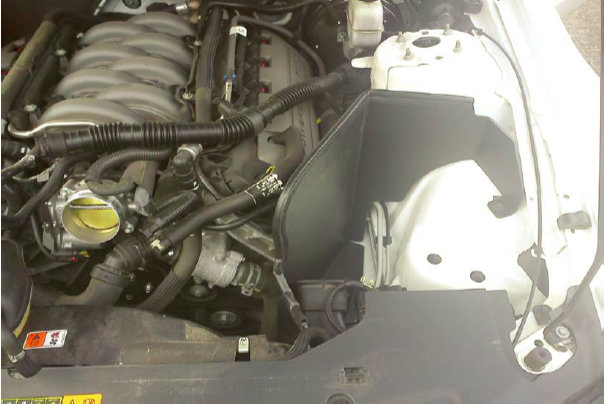
4. Remove the stock air intake
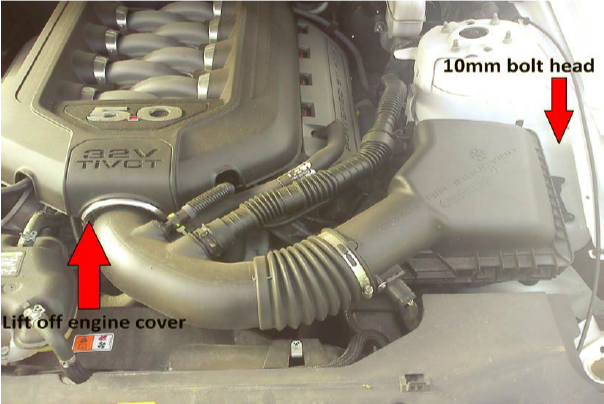
1. On the GT model, remove the engine cover by gently pulling up. It should pop out with little resistance.
2. Remove the bolt connecting the stock intake to the frame of the car. Save the bolt for future use.
3. Remove the sound tube from the intake. This is the biggest hose connected to the intake and pliers are needed to remove. Simply crimp the metal band and slide off hose.
4. If your car is automatic, remove the hose located above the pcv hose. It is the smallest hose. (I had to use a small screwdriver to assist in removing the small clip. Push from bottom on one side while pulling on top.)
5. Remove the pcv hose from the intake.
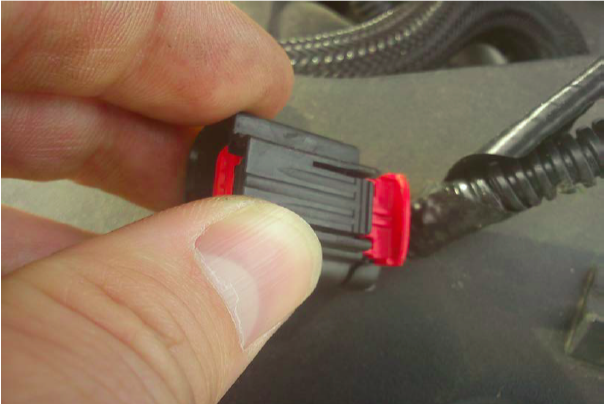
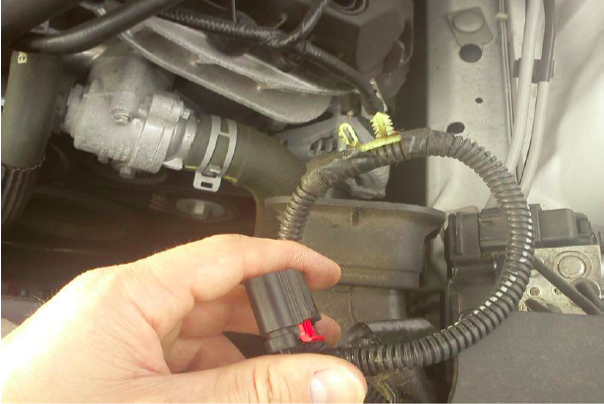
6. Unplug the Mass Air Flow Sensor. There is a red tab underneath that pulls out, then slide off the connector.
7. Loosen the hose clamp at the throttle body and pull away intake tube from throttle body.
8. Now remove the entire assembly by lifting up. Be aware that the Mass Air Flow Sensor connector is attached to the unit by 2 pegs. While lifting out pull the tabs out.
5. Clean Throttle Body (optional step/preventive maintenance)
This is a good time to clean your Throttle Body. Over time carbon build up can accumulate and cause a “STICKY” gas pedal. For improved/most efficient throttle response I recommend cleaning now if your vehicle has over 20,000 miles.
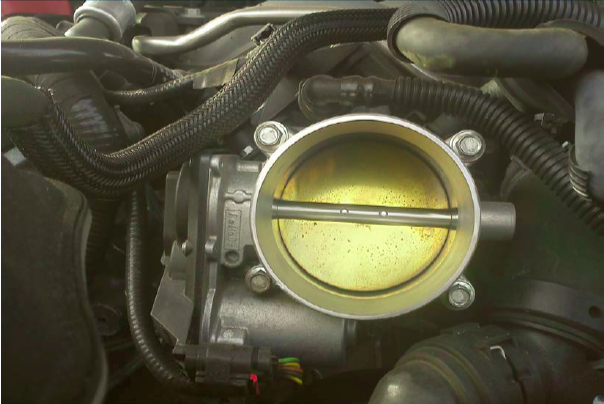
1. Hold a rag underneath the throttle body to prevent run-off.
2. Spray the cleaner and rub off the carbon build-up.
3. Hold the butterfly open and clean around the edges thoroughly. This is where most build-up is, where the butterfly opens and closes.
6. Move the Mass Air Flow Sensor from the old intake to the JLT intake
1. Remove the stock sensor with a torx bit.
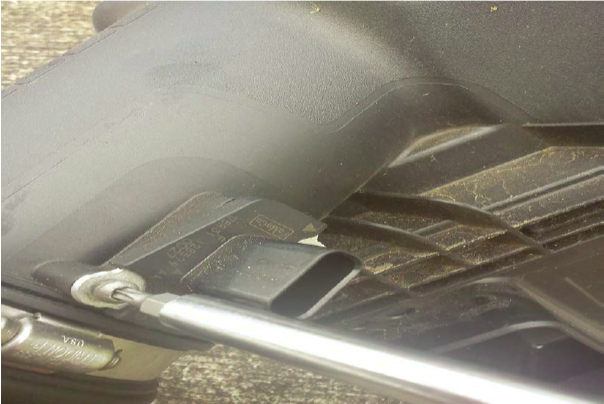
2. Place the sensor into the JLT tube. Be careful, it looks expensive.
3. Secure the sensor with the supplied screws that came with the package.
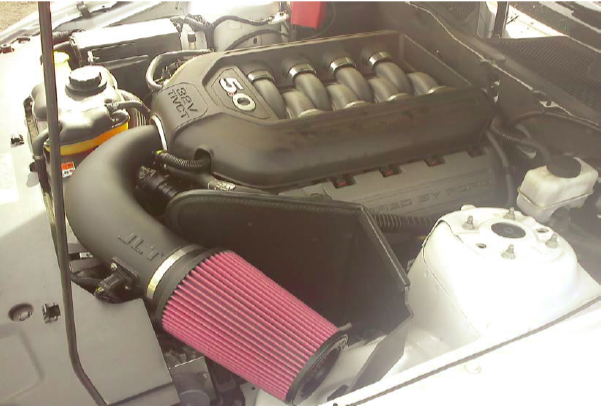
7. Install the JLT intake
1. Place the supplied heat shield into place. Slide it underneath the inlet air duct.
2. Use the stock intake 10mm bolt to secure the heat shield to the frame.
3. Use the supplied nut to secure the shield to the fan shroud.
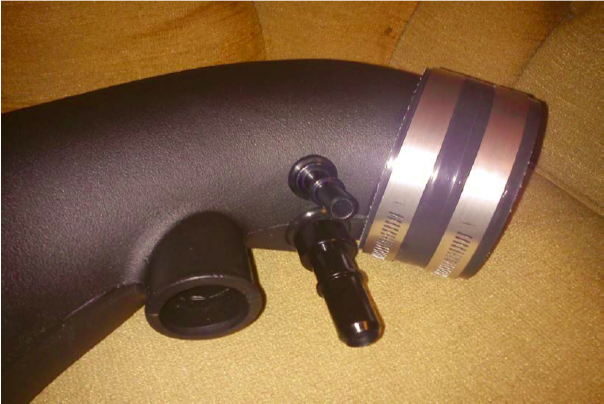
4. Grab your JLT tube and place the non-filter end onto the throttle body. Hand tighen the hose clamps.
5. The tube should lay slightly onto the heat shield.
6. Attach the pcv and sound tube (and the third tube if you have a automatic). Be careful when crimping the metal band on the sound tube to install. You could easily scratch your new intake.
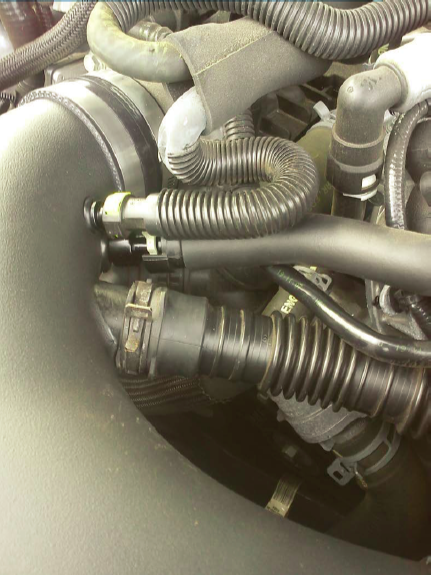
7. Attach the Mass Air Flow Sensor connector.
8. If you own a 2013 or above and have the vents in the hood, JLT provides a placement to prevent water from entering.
9. The new intake will produce more sound than the stock so some may want to block the sound. The package includes two plugs, one for the JLT tube where the sound tube connects and one for the firewall.
Here is the complete install
8. Install the Bama Performance Tune
note: Have your car keys available. You have to turn the ignition on/off during the process.
1. Plug the tuner into the port underneath the dash. Its in the general area of the hood release.
2. Once plugged in, the screen will illuminate. Select “Program vehicle”.
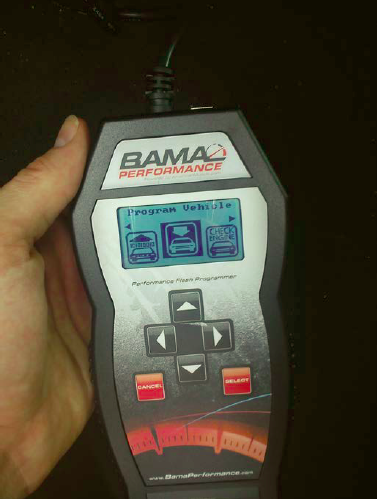
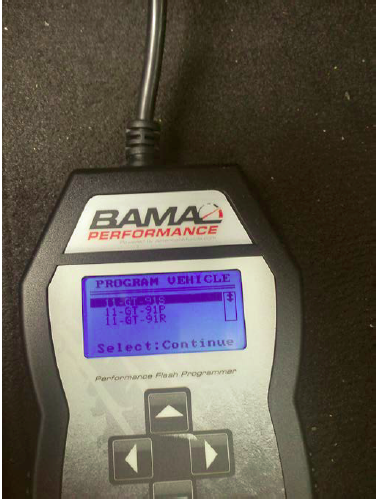
3. Select one of 3 tunes available.
4. Begin the program and download the tune. You will be presented with loading bars to represent the progress.
5. You will be notified when the download is complete.
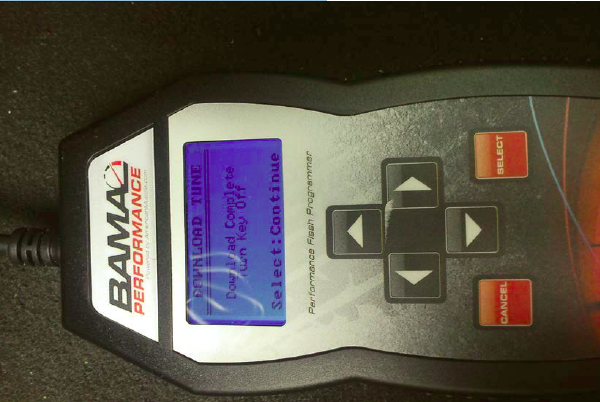
6. Unplug the tuner.
Installation Instructions Written By AmericanMuscle Customer Jacob Yates 4/05/2013
