 FREE 1 to 3-Day Delivery on Orders $149+ Details
How to Install J&M Stainless Steel Teflon Brake Lines - Rear on Your 2005-2012 Mustang GT or V6
Installation Time
3 hours
Tools Required
- Jack
- (4) Jack Stands
- 13mm Open Ended Wrench
- 10mm Socket or Open Ended Wrench
- 11mm Box Wrench
- Vice Grip Pliers
- 2’ Plastic Tube (3/8" ID)
- Empty Bottle
Shop Parts in this Guide
Installation
Parts Needed:
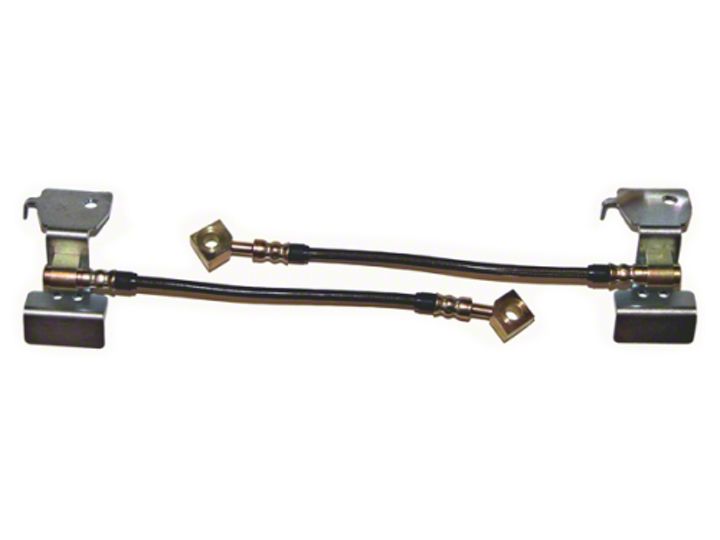
- J&M Rear Brake Lines
- (2) New Copper Washers (Ford Part # EOAZ – 2149-B)
- New Brake Fluid
- (2) New Banjo bolts - optional
Torque Specifications:
- Bleeder screw – 89 inch-lbs
- Banjo bolt – 30 foot-lbs
- Hard line connection – 13 foot-lbs
- Bracket bolt – 11 foot-lbs
Instructions:
- Loosen the lug nuts on both rear wheels.
- Raise the vehicle into the air with jack. Place the jack stands in safe positions to properly support the vehicle.
- Remove both rear wheels after all of the tires are off the ground and supported by jack stands.
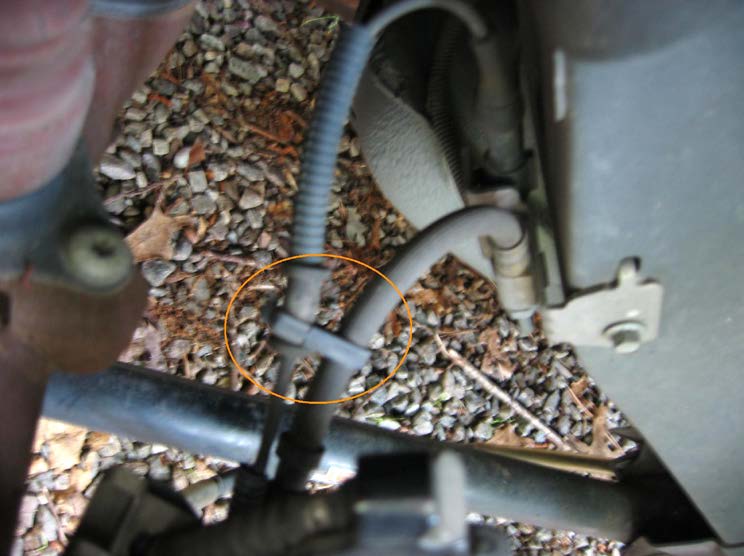
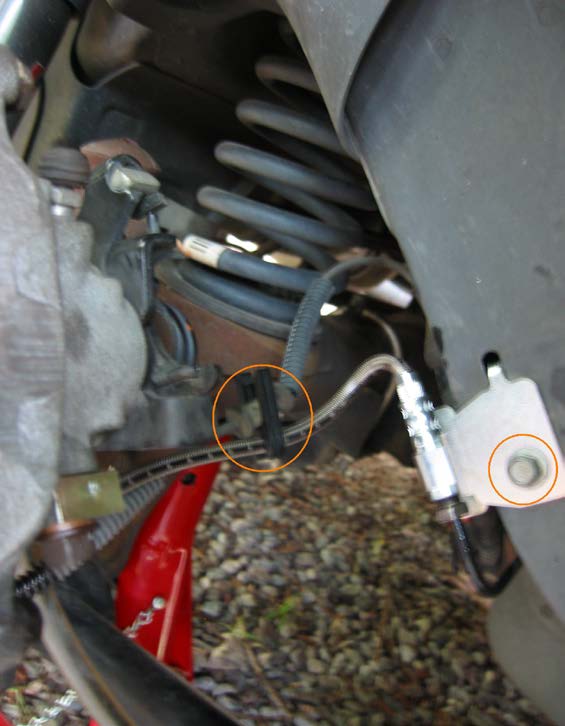
- The rear passenger side line should be replaced first. There is a plastic clip which attaches the wheel speed sensor to the brake line. Remove the wheel speed sensor from this clip by spreading the clip open with your fingers.
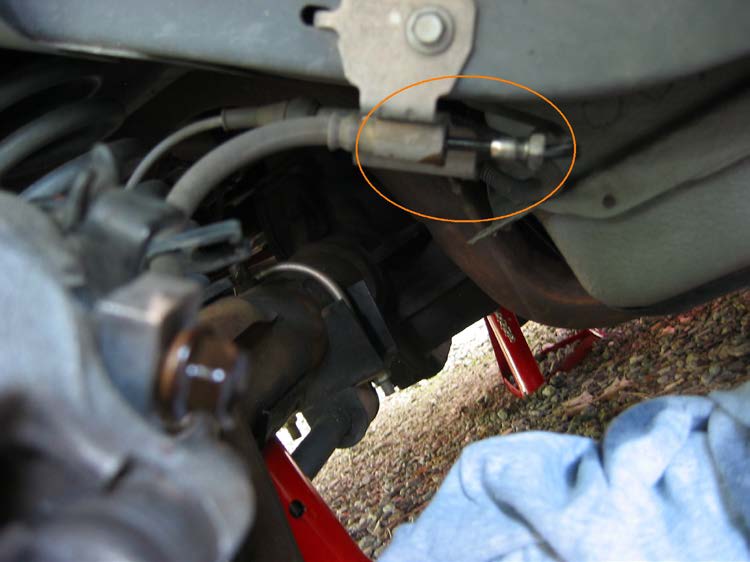
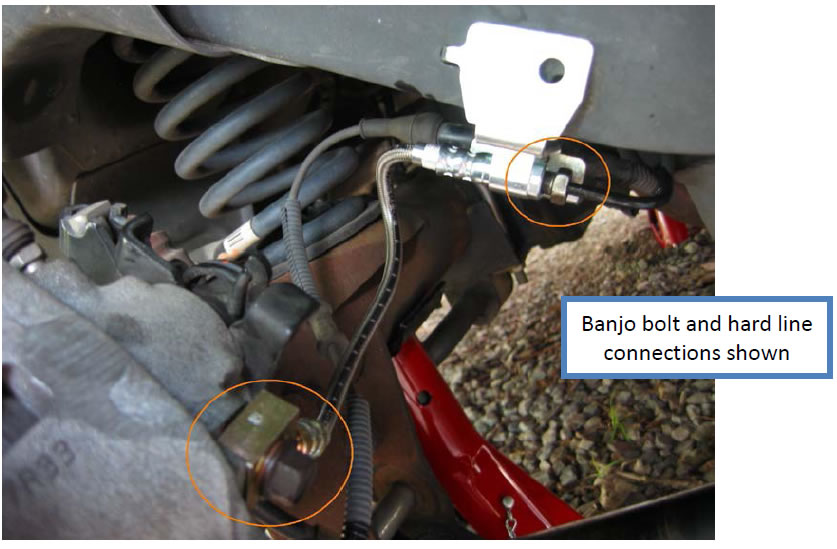
5. Use a 13mm open ended wrench to loosen the connection of the rubber line to the hard brake line, as shown below.
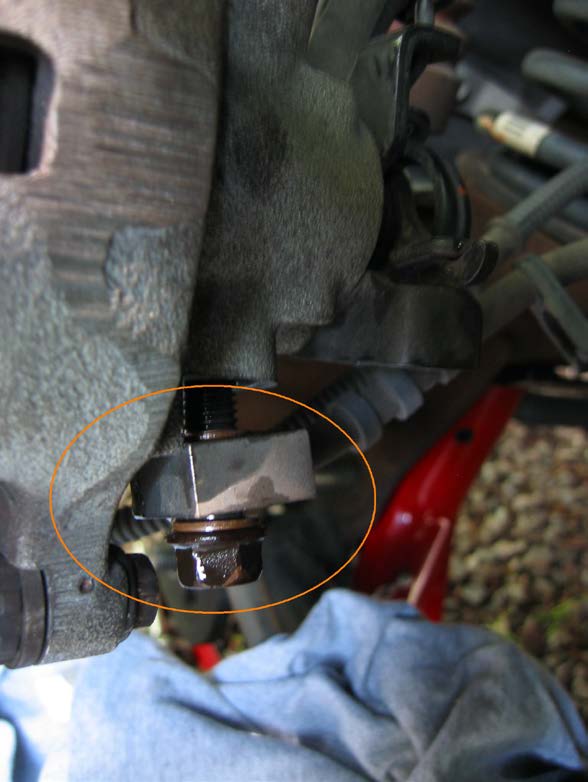
6. Use a 13mm open ended wrench to loosen the banjo bolt connection on the brake caliper.
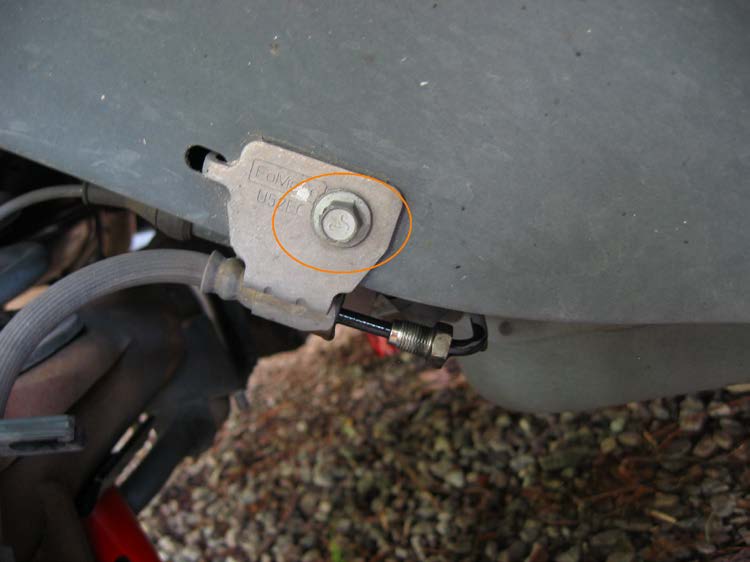
7. At the end of the brake line closest to the front of the car is a bracket, which mounts the brake line to the body of the car. Use a 10mm open ended wrench or 10mm socket wrench to loosen this bolt, which is shown in the picture below.
8. Remove the stock brake line from the car. If you did not buy new banjo bolts, then use the vice grip pliers in order to remove the lower copper washer from the banjo bolt.
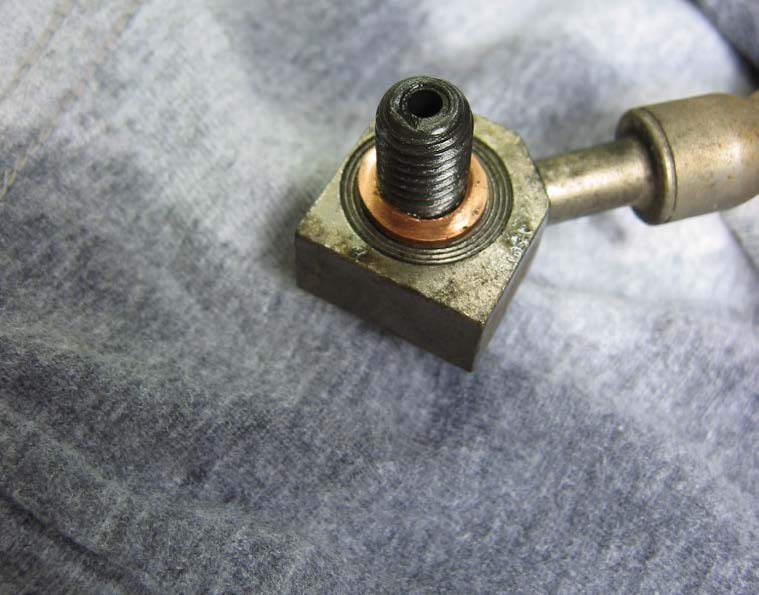
9. Remove the banjo bolt from the stock brake line and place it into the new brake line. Place a new supplied copper washer on the end of the banjo bolt.
10. Connect the new line using the banjo bolt to the brake caliper and connect the other end of the new line to the hard brake line. Only tighten the connections hand tight for now.
11. Reuse the stock bolt and a 10mm socket to mount the new brake line bracket. Use the supplied brake line clips to secure the new stainless brake line to the wheel speed sensor line. Use the 13mm wrench to fully tighten the banjo bolt and hard line connections.
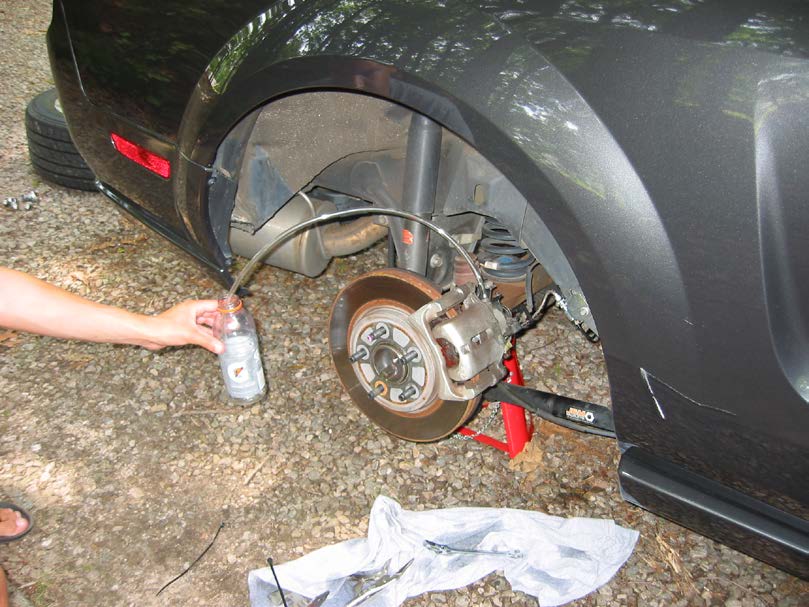
12. Use the 11mm box wrench, some plastic tube, an empty bottle, and a friend to bleed the brake line until only fluid comes out of the line. Be sure to add fluid to the brake reservoir as necessary.
Steps for properly bleeding brakes:
1. Place open ended wrench over brake bleeder screw.
2. Place tubing over brake bleeder screw and place the other end into an empty container.
3. Have assistant go inside the car and pump the brake pedal until it becomes hard; then keep pressure on the brake pedal.
4. Loosen the brake bleeder screw until the brake fluid comes out.
5. Your assistant should keep pressure on the brake pedal as it goes to the floor.
6. When the fluid flow slows down, tighten the brake bleeder screw.
7. Have your assistant pump the brakes again until hard.
8. Continue bleeding the system until no air bubbles come out in the brake fluid.
9. Remember to top the brake reservoir off periodically during the bleeding process to prevent the reservoir from running dry.
10. Remove plastic tubing and open ended wrench.
11. Properly dispose of extra brake fluid.
13. Now move to the driver side brake line and repeat steps 4 through 12.
14. Put the rear wheels back on the vehicle and lower the vehicle to the ground.
Installation Instructions written by AmericanMuscle customer Joseph Hudson 11.14.11
