 FREE 1 to 3-Day Delivery on Orders $149+ Details
How To Install A Steeda Cold Air Induction Kit on your 2005 4.0L V6 Mustang
Installation Time
1 hours
Tools Required
- Wrench with extension and/or nut driver
- 10mm socket
- 8mm socket (optional)
- Flat head screw driver
- 20T Torx wrench (looks like a small screwdriver with a star shaped head)
- 7/32 Allen Key
- Small clean rag (to cover battery terminals)
- Larger rag/cloth (to use as a work surface)
*Note:
This Cold Air Kit was designed for use with a computer upgrade.
Do not install this unit without retuning the factory computer.
Instructions for part # 555-3124
Removal of factory air filter assembly
1. Disconnect the mass air meter wiring harness by depressing the red tab and pulling away the plug from the meter.
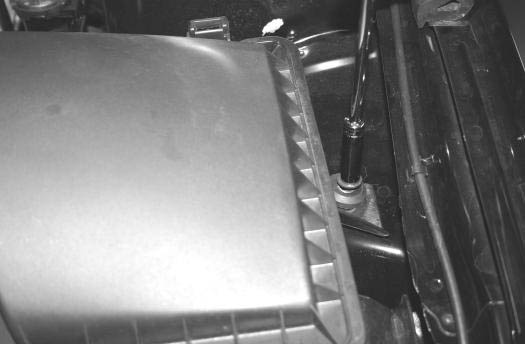
2. Remove the bolt that holds the air filter assembly to the inner fender. Figure 1
1
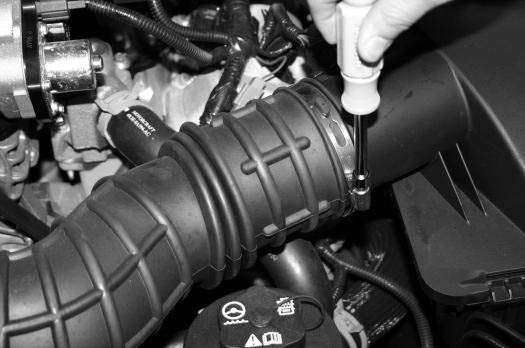
3. Loosen the hose clamp that attaches the factory flexible intake tube to the meter. Figure 2
2
4. Remove the factory air filter box assembly.
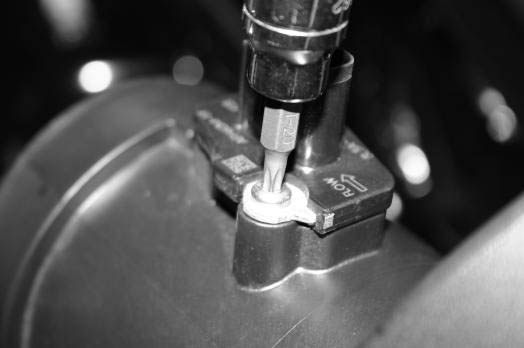
5. The mass air meter sensor is attached to the factory air filter box cover and must be removed for re-use in the new Steeda meter. Using a 20T Torx wrench, remove the factory mass air meter sensor from the air filter cover assembly and set aside.
Figure 3
3
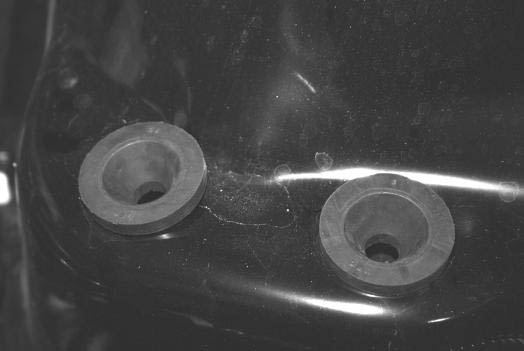
6. Remove the two rubber grommets on the bottom side of the factory air filter assembly mounting studs. Reinstall these into the holes in the inner fender. Figure 4
4
Installation of the Steeda Cold Air Induction Kit
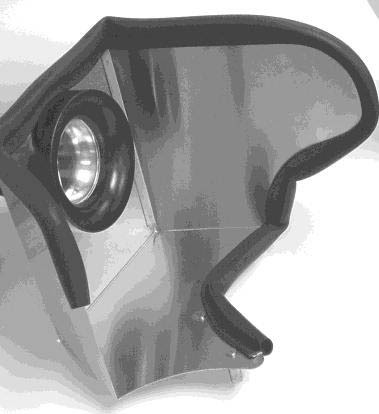
7. To assemble the new Steeda cold air kit you must attach the Steeda billet meter to the provided shield and air guide by passing the .” bolts through the meter flange bolts holes, through the provided gasket, through the shield and screwing them into the mounting holes of the air guide. Take care to insure the air guide, meter and shield are all indexed so the air passages all match. Figure 5
5
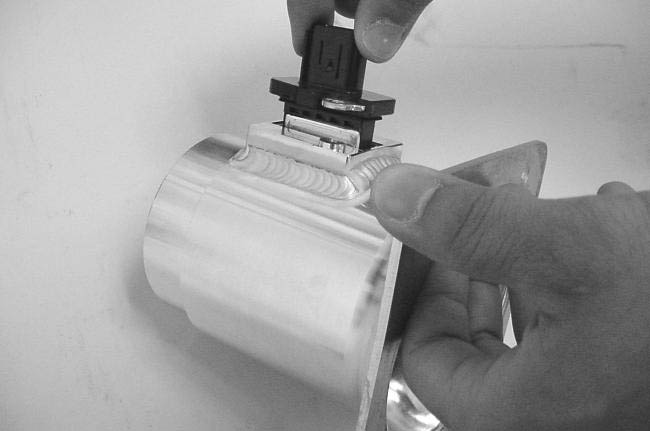
8. Install the mass air meter sensor (removed in Step 5) into the Steeda billet aluminum meter body using the factory Torx screws. Take care to install the sensor with the exposed metering wires facing the incoming air flow (toward the air filter). Figure 6
6
9. Install the included edge molding along the top half of the heat shield. Figure 5
10. Install the Steeda cold air assembly into the factory location by inserting the studs on the underside of the Steeda shield into the grommets installed in Step 6. Make sure the studs on the bottom side of the shield pass through the factory rubber grommets, with the shield completely seated. Relocate any wires that will prevent the cold air shield from completely seating in the grommets.
11. Re-install the factory flexible intake tube and tighten the hose clamp.
12. Re-insert the wiring harness connector into the mass air meter sensor.
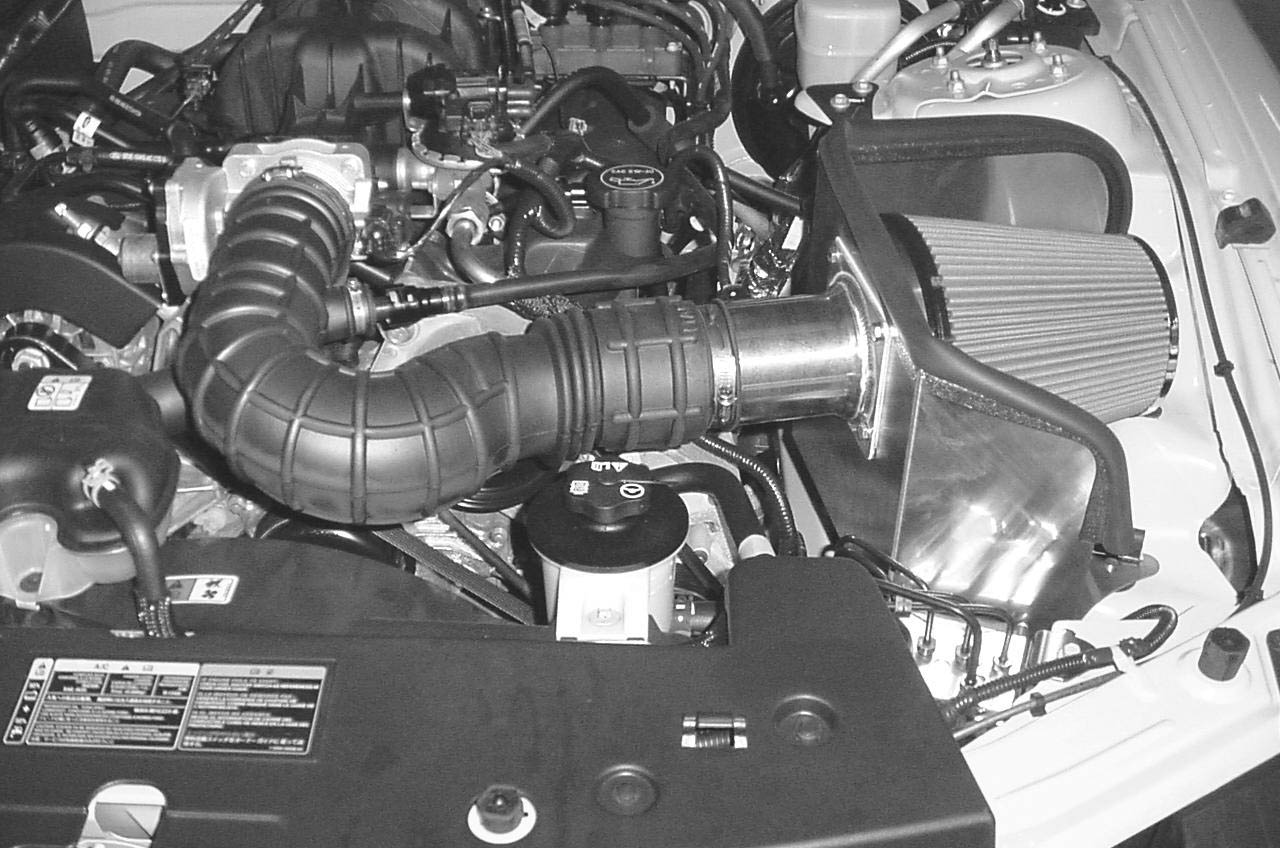
13. Re-check all clamps, bolts and the connector before starting your engine. Be sure to remove the plastic protective shipping cover around the provided filter prior to starting the engine. Figure 7
7
Thank you for choosing STEEDA. Any questions and/or comments on these instructions please contact us at (954) 960-0774 or e-mail us at [email protected]
Steeda Autosports Inc. All Rights Reserved 2005
2005V6ColdAirKit.doc 3/05
