 FREE 1 to 3-Day Delivery on Orders $149+ Details
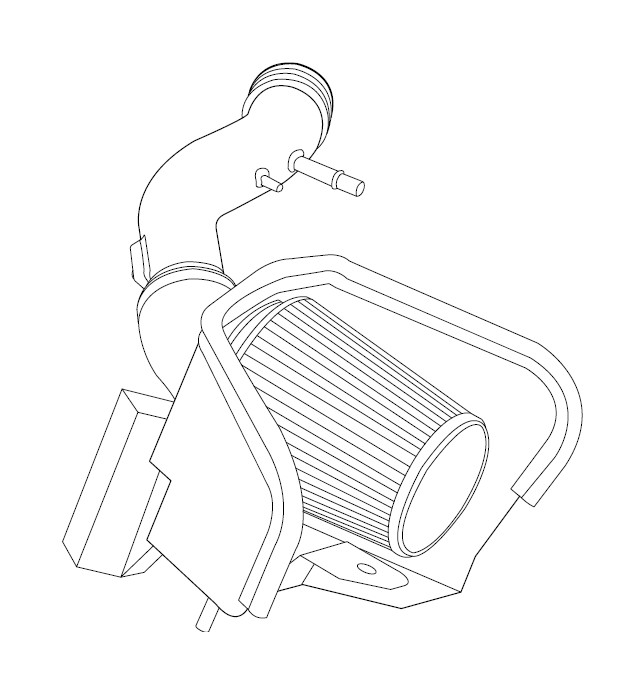
How to Install AFE Magnum Force Stage 2 Pro Dry S Cold Air Intake - Polished (11-14 V6) on your Ford Mustang

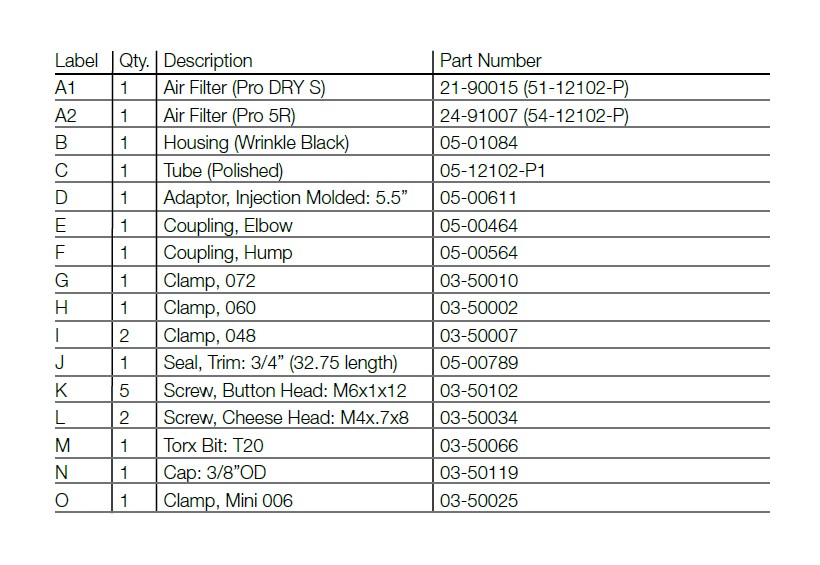
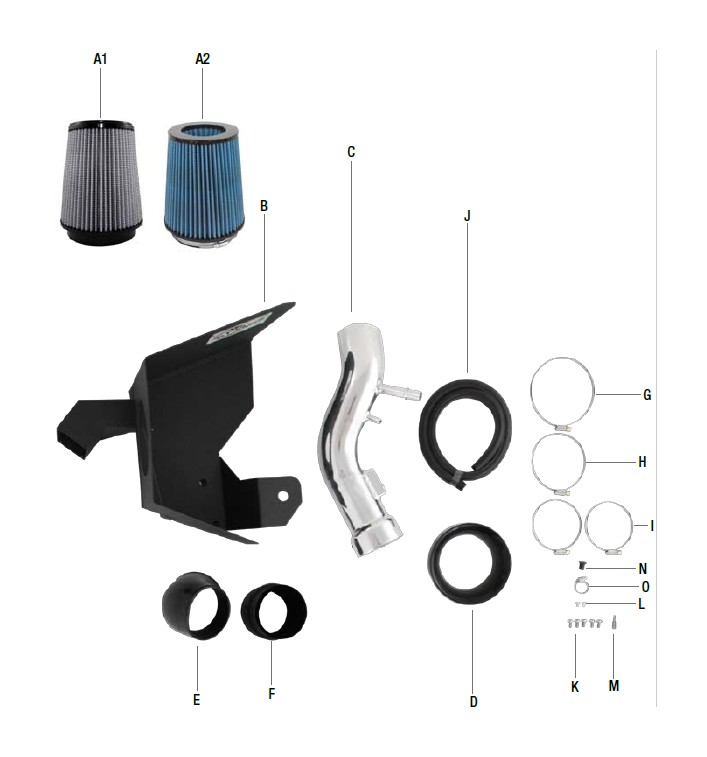
Shop Parts in this Guide
• Please read the entire instruction manual before proceeding.
• Ensure all components listed are present.
• If you are missing any of the components, call customer support at 951-493-7100.
• Ensure you have all necessary tools before proceeding.
• Do not attempt to work on your vehicle when the engine is hot.
• Disconnect the negative battery terminal before proceeding.
• Retain factory parts for future use.

Refer to Figure A for steps 1-4
Step 1: Disconnect the MAF sensor vent. 1
Step 2: Un-clip the crank case vent. 2
Step 3: Loosen the throttle body clamp using an 8mm nut driver. 3
Step 4: Un-clamp the top portion of the stock airbox. Remove the tube and stock airbox cover together in one piece. 4
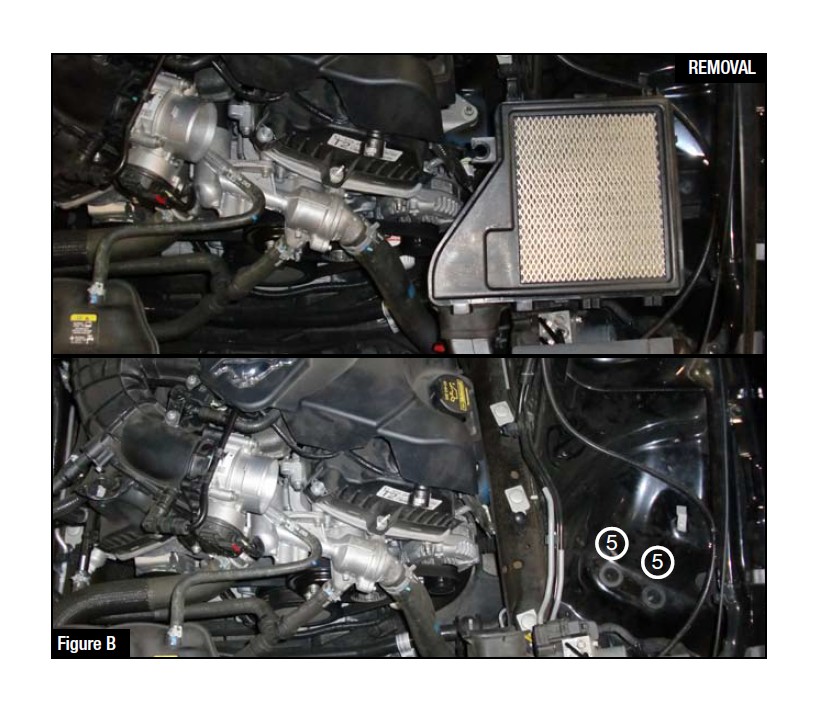
Refer to Figure B for steps 5-7
Step 5: Remove the (OE) stock air filter.
Step 6: Remove the bolt holding down the lower portion of the stock airbox using a 10mm nut driver.
Step 7: Remove the lower portion of the stock airbox. (Make sure that the OE grommets stay in their location, the aFe housing will need them to secure in place.) 5
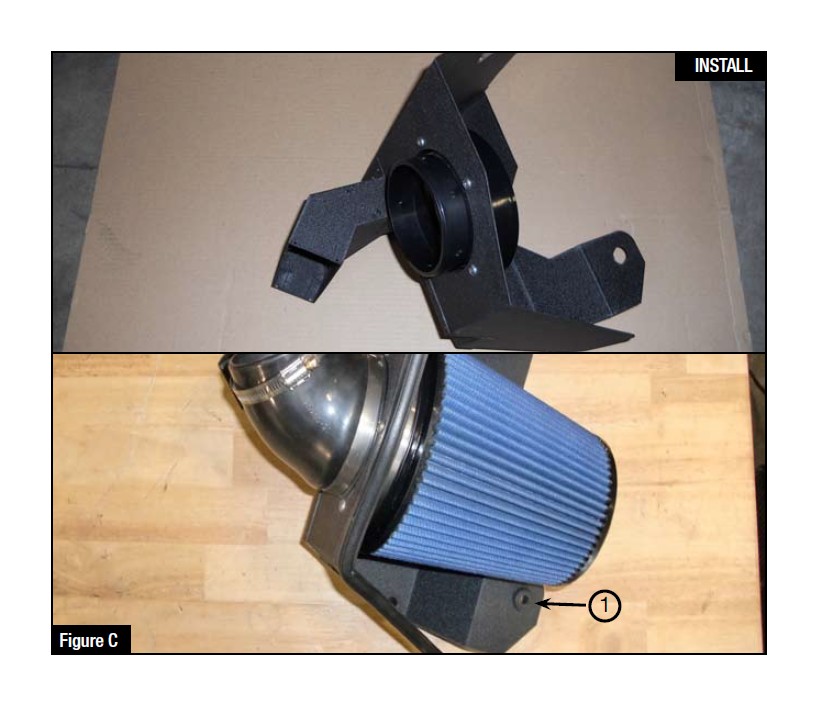
Refer to Figure C for steps 8-11
Step 8: Pre-assemble the aFe housing. Remove the grommet located in the lower portion of the stock airbox and place on the aFe housing. 6
Step 9: Install the injection molded adaptor to the aFe housing. Use the M6 screws, then tighten down the adaptor using a 4mm allen hex key.
Step 10: Pre-assemble the angle coupling and secure by using the clamps provided, do not tighten down.
Step 11: Install air filter using an 8mm nut driver.
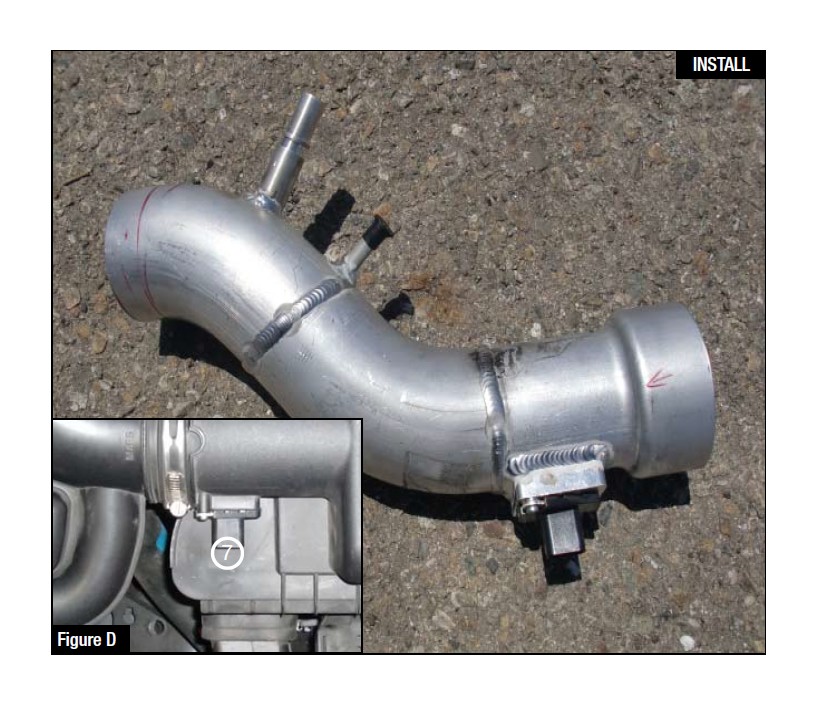
Refer to Figure D for steps 12-13
Step 12: Remove the MAF sensor from the stock airbox cover using a t-20 torx bit (provided). 7
Step 13: Install the MAF sensor into the aFe intake tube using the supplied hardware. Tighten down using a flat head screw driver.
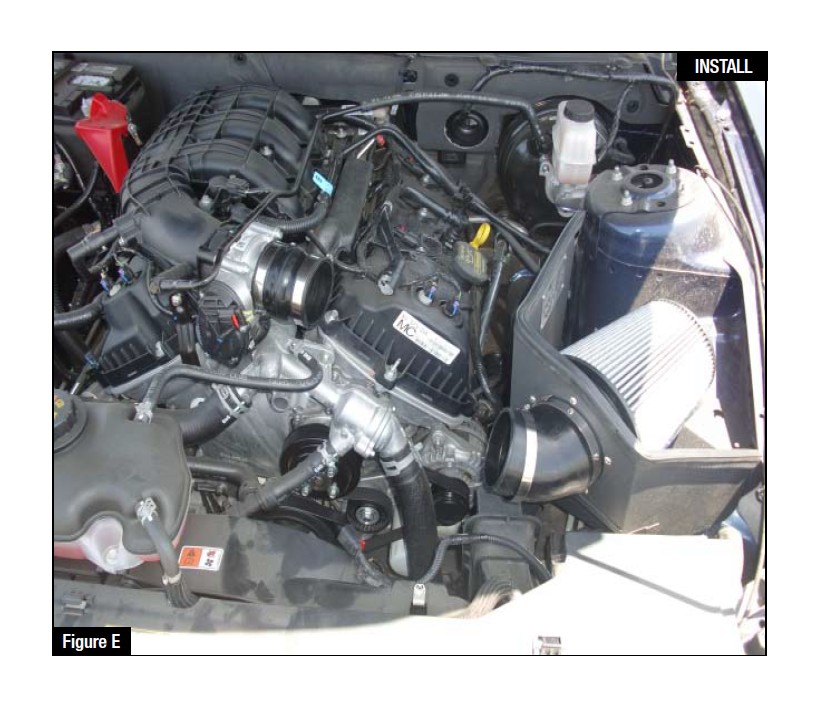
Refer to Figure E for steps 14-15
Step 14: Install the pre-assembled aFe housing. Bolt down using factory bolt from lower portion of the stock airbox. Tighten down using a 10mm nut driver.
Step 15: Loosely place clamps on hump coupling and place part onto the throttle body. Do not tighten down.
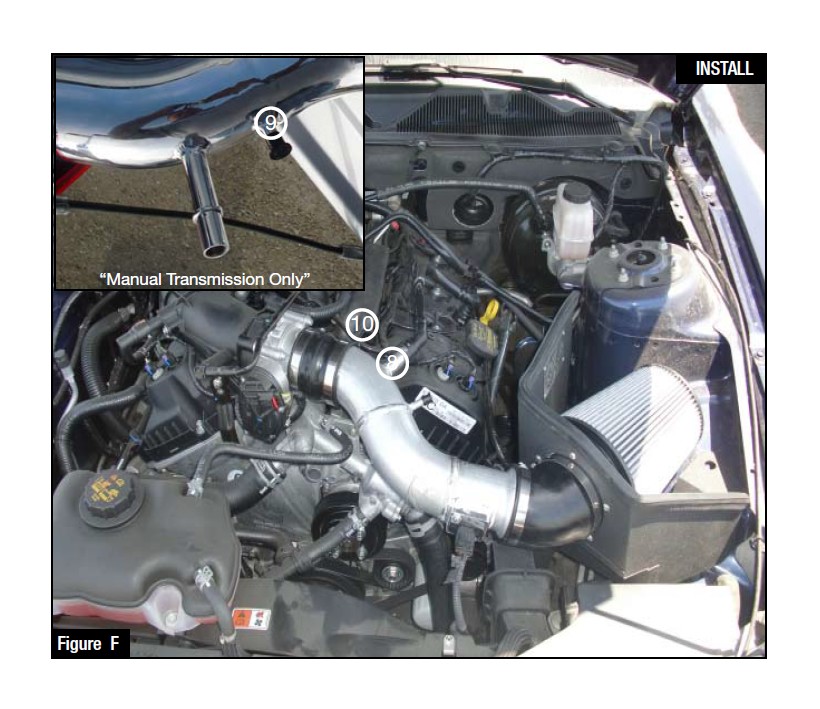
Refer to Figure F for steps 16-21
Step 16: Install the intake tube. Adjust the couplings for best fit.
Step 17: Tighten the coupling clamps using an 8mm nut driver.
Step 18: Plug in the MAF sensor plug.
Step 19: On automatic transmission applications reconnect rubber hose with clamp. 8
On manual transmission applications use sealing cap. 9
Step 20: Reattach crankcase vent tube. 10 Your installation is now complete, enjoy!
Step 21: Secure all clamps. Your installation is now complete, enjoy!
Note: Re-tighten all connections after approximately 100-200 miles of initial installation.
