 FREE 1 to 3-Day Delivery on Orders $149+ Details
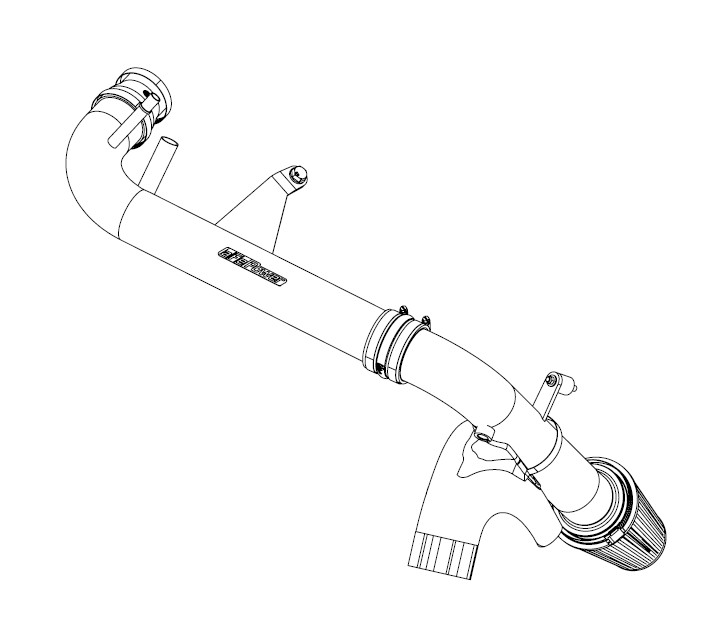
How to Install AFE Magnum FORCE Stage-2 Pro 5R Cold Air Intake (15-17 EcoBoost) on your Ford Mustang

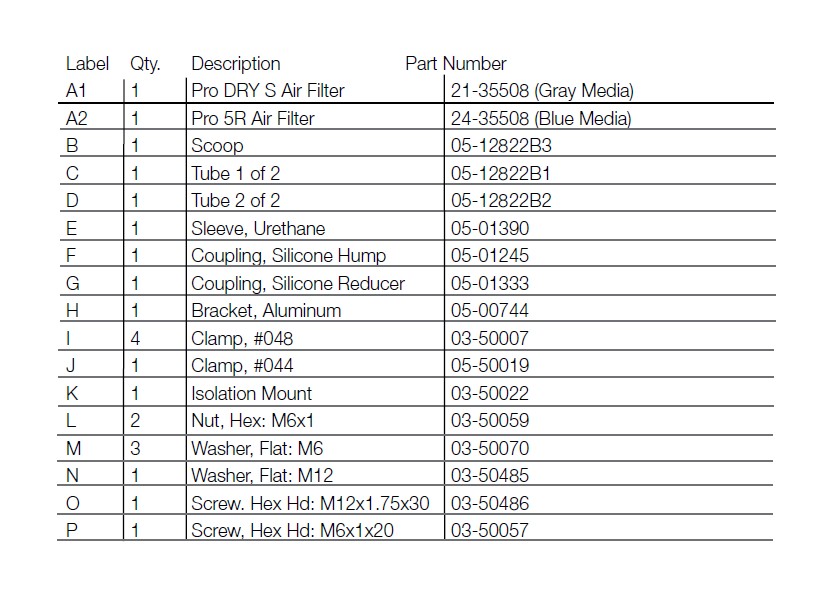
Shop Parts in this Guide
• Please read the entire instruction manual before proceeding.
• Ensure all components listed are present.
• If you are missing any of the components, call customer support at 951-493-7100.
• Ensure you have all necessary tools before proceeding.
• Do not attempt to work on your vehicle when the engine is hot.
• Disconnect the negative battery terminal before proceeding.
• Retain factory parts for future use.

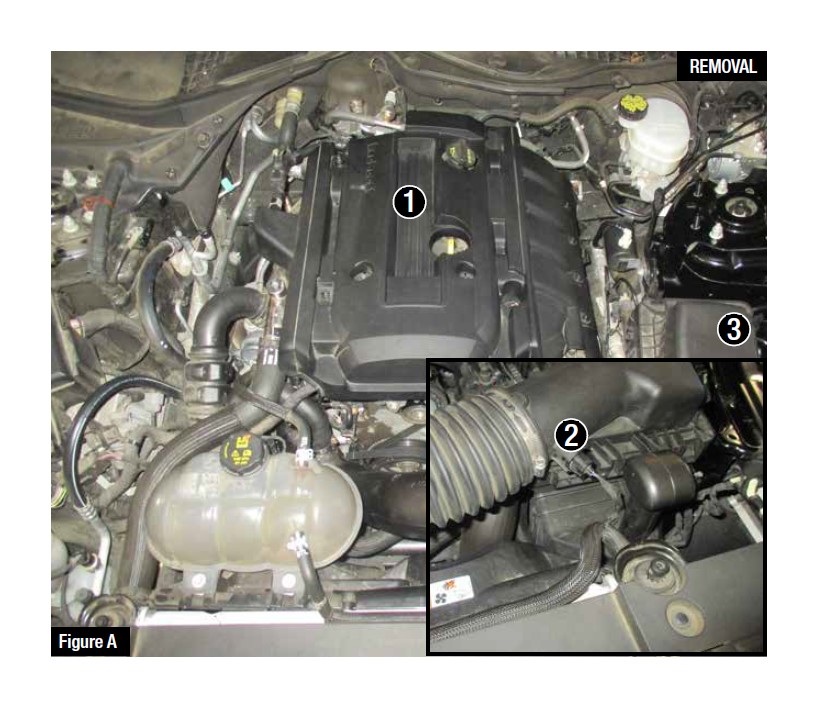
Refer to Figure A for Steps 1-6
Step 1: Remove the engine cover 1 .
Step 2: Detach the temperature sensor from the stock air box 2 .
Step 3: Loosen the clamp on the recirculating hose and detach from stock intake tube, Along with crank case hose.
Step 4: Loosen the clamp on the stock intake tube connecting to the turbo with a 7mm nut driver.
Step 5: Remove the 10mm screw securing the stock air box 3 .
Step 6: Remove the stock intake system by pulling it upwards out of the vehicle.
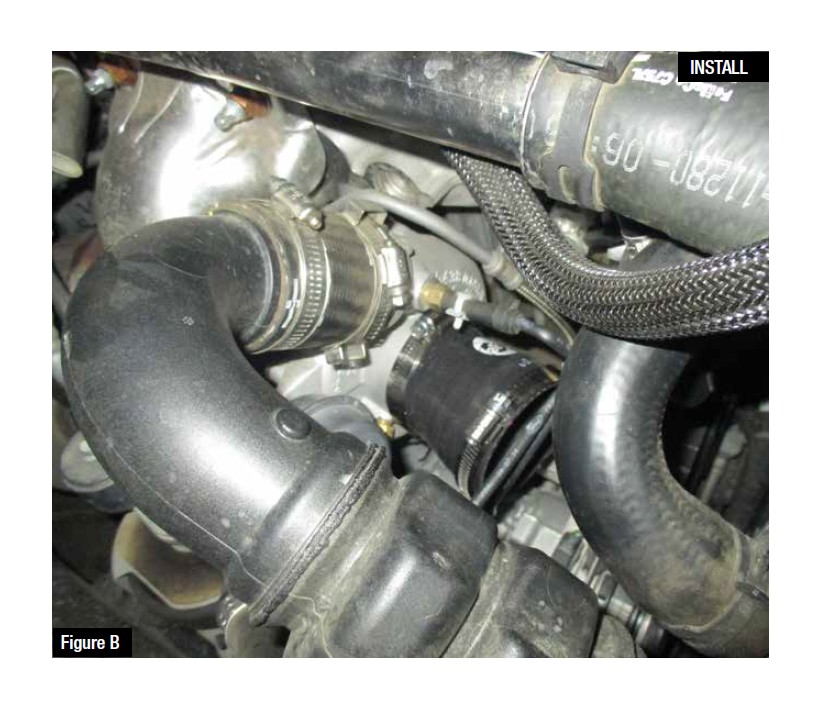
Refer to Figure B for Step 7
Step 7: Install the aFe reducer coupling with clamps onto the turbo inlet tube, do not tighten clamps at this time.
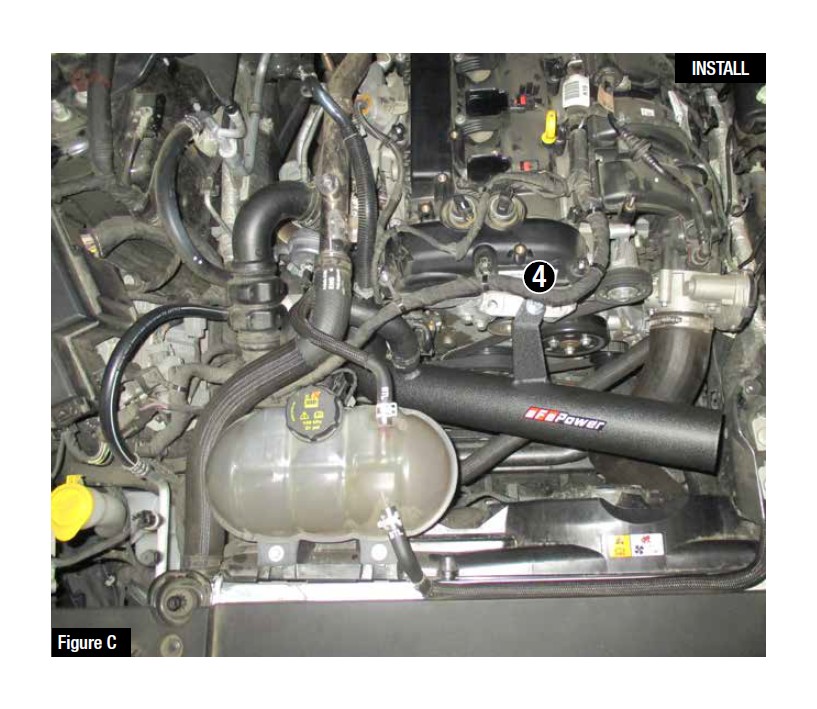
Refer to Figure C for Steps 8-9
Step 8: Install the aFe tube into the coupling and with the supplied M12 bolt 4 and washer loosely secure the tube bracket to the engine and slide the hump coupling with clamps onto the end of the intake tube.
Step 9: Re-connect the crank case fitting along with the recirculating hose.
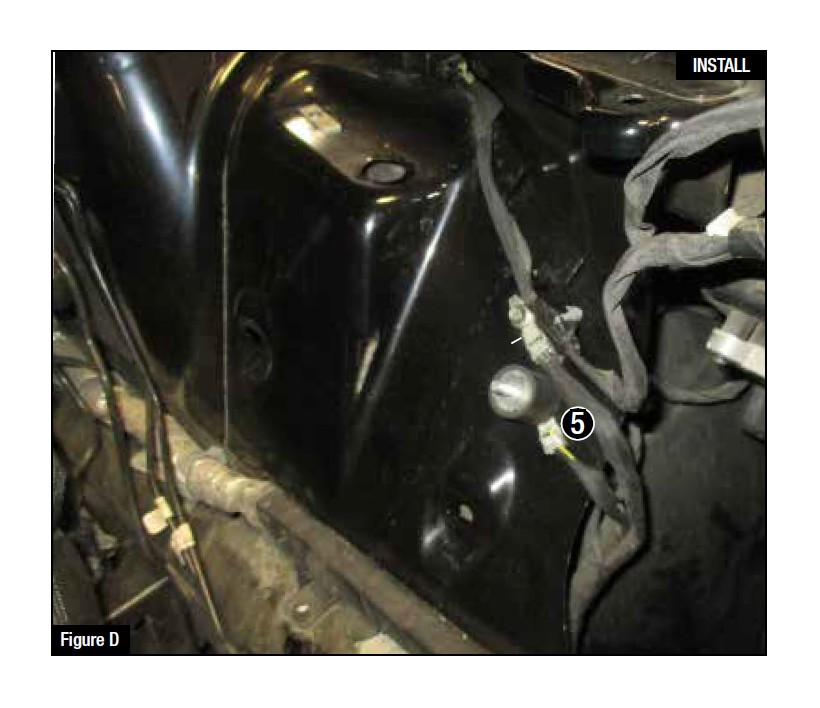
Refer to Figure D for Step 10
Step 10: Remove the chassis ground bolt and replace with the supplies isolation mount 5 .

Refer to Figure E for Step 11
Step 11: Remove the push clips and screws holding the driver side splash pan guard to gain access into the inner fender well and bumper 6 .
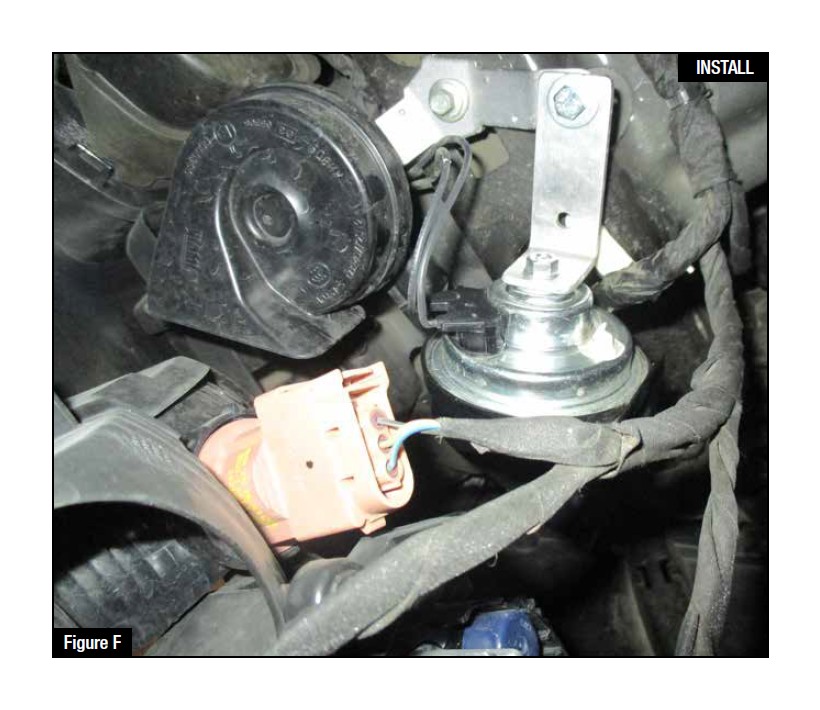
Refer to Figure F for Step 12
Step 12: To make room for the filter, relocate the horn closest to the firewall with the supplied bracket, screw, washers and nut.
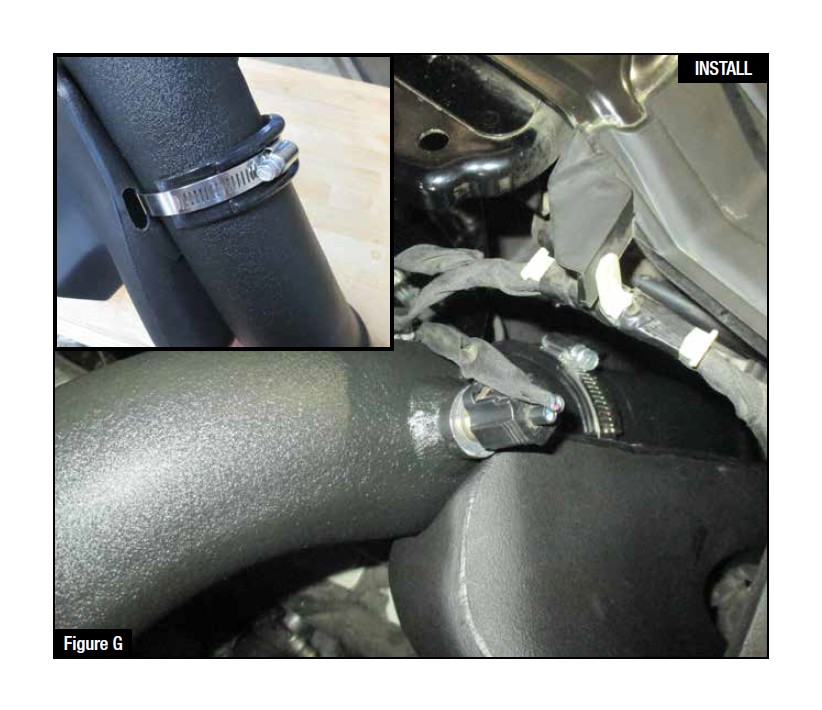
Refer to Figure G for Steps 13-17
Step 13: Open the supplied clamp and slide through the slots on the aFe air scoop.
Step 14: Install the aFe air scoop into the vehicle over the stock air intake inlet location.
Step 15: Install the filter intake tube into the vehicle in the hump coupling and isolation mount with washer and nut, do not tighten clamps and nut at this time.
Step 16: Insert the aFe urethane sleeve between the intake tube and clamp to avoid damaging the powder coat on the intake tube. Close off the clamp but do not fully tighten at this time.
Step 17: Insert the temperature sensor into the aluminum fitting, secure it by turning clockwise.
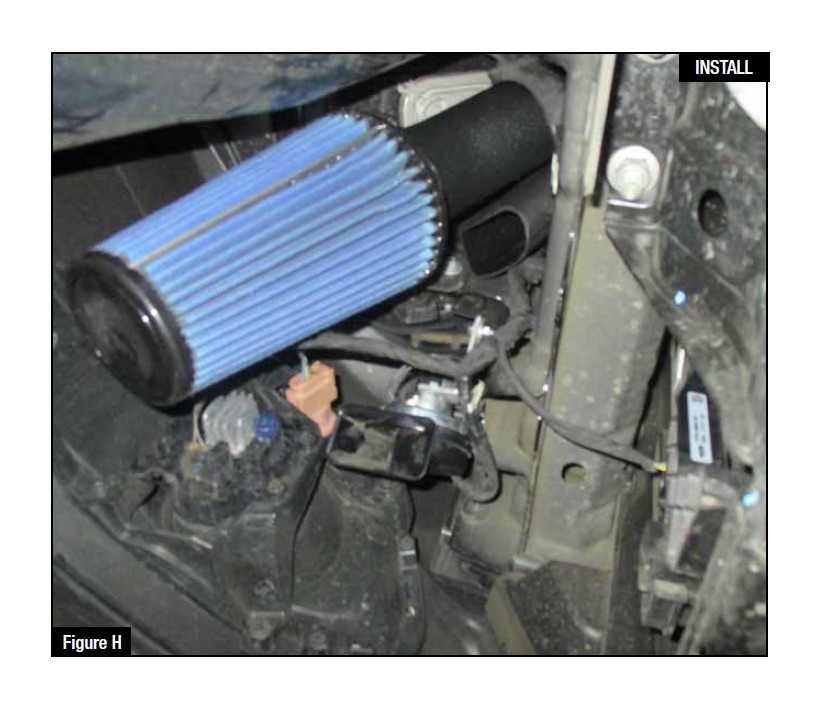
Refer to Figure H for Steps 18-19
Step 18: Install the aFe filter from the bottom opening of the vehicle onto the intake tube and tighten filter clamp.
Step 19: Re-install the splash pan guard, refer to Step 11.
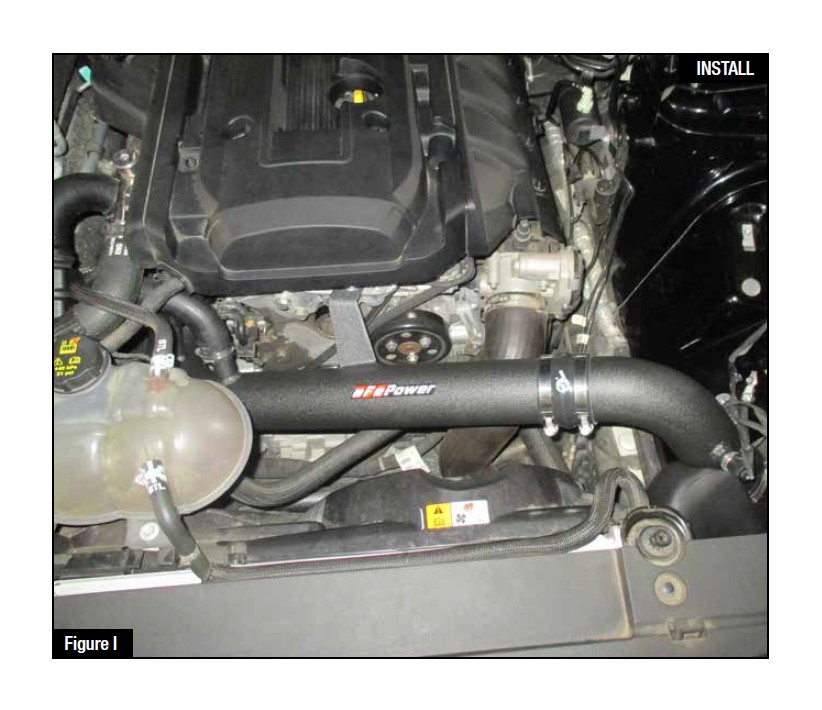
Refer to Figure I for Steps 20-23
Step 20: Alight tubes and start tightening all clamps starting with the turbo inlet coupling along with M12 bolt and nut on isolation mount.
Step 21: Re-install the engine cover.
Step 22: Verify all clamps, screws and nuts are tight.
Step 23: your installation is now complete. Thank you for choosing aFePower!
NOTE: Check all bolts, clamps and connectors after 200 miles.
