 FREE 1 to 3-Day Delivery on Orders $149+ Details
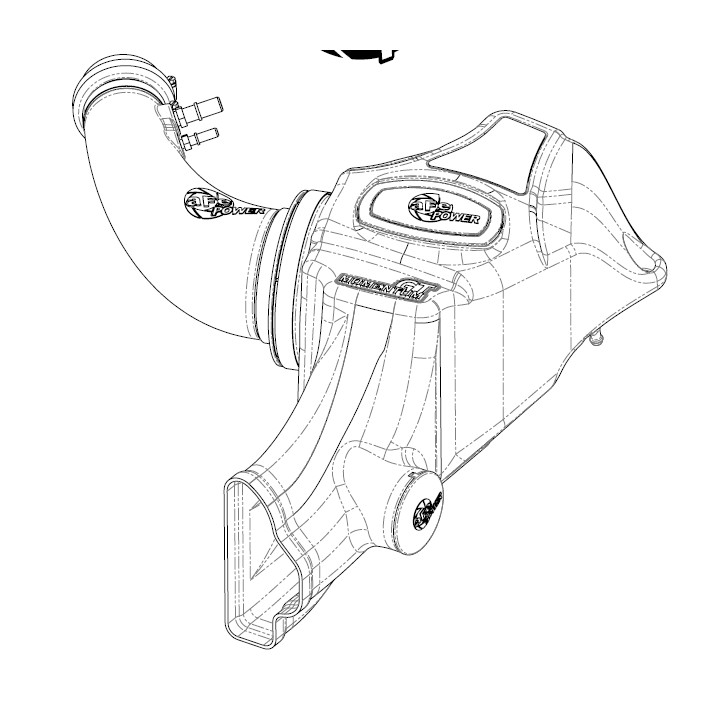
How to Install AFE Momentum GT Pro DRY S Cold Air Intake (15-17 V6) on your Ford Mustang
Tools Required
- 8mm nut driver
- 7mm nut driver
- 10mm deep socket & driver
- 11mm deep socket & driver
- adjustable wrench

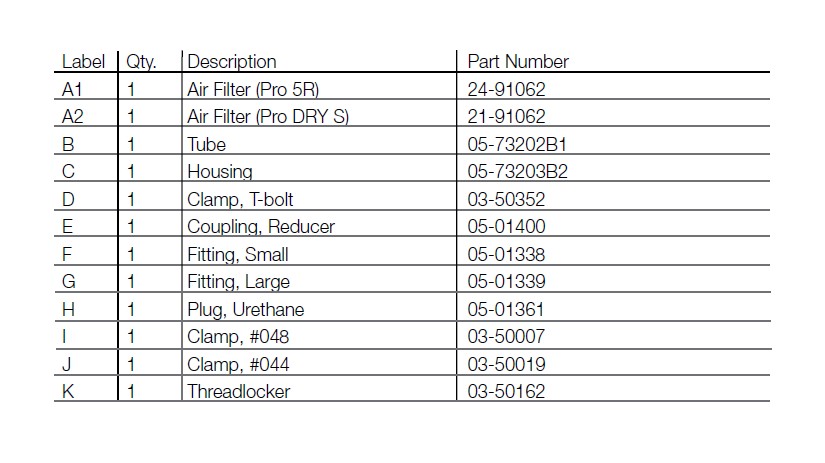
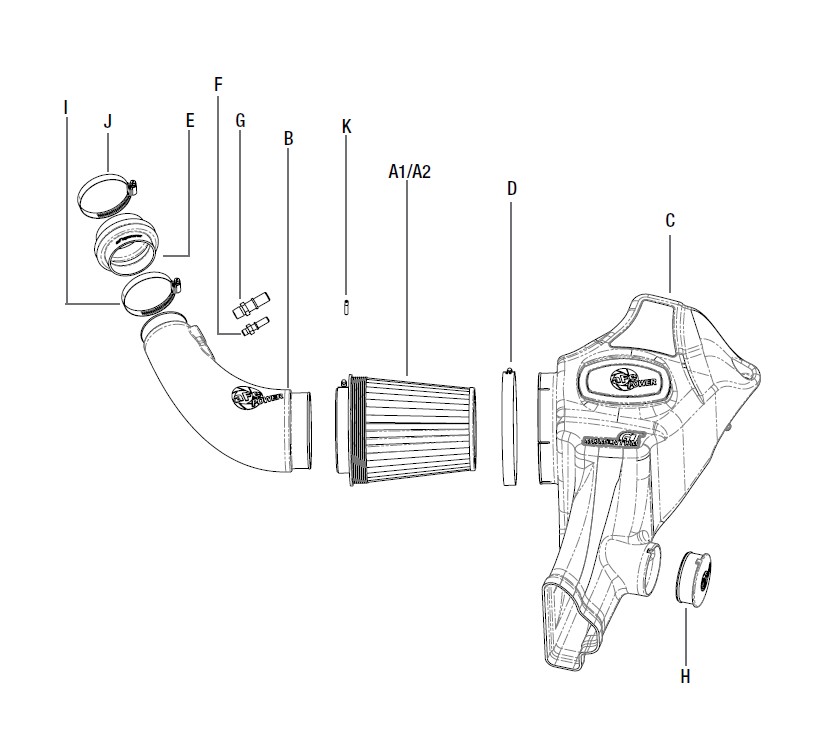
Shop Parts in this Guide
• Please read the entire instruction manual before proceeding.
• Ensure all components listed are present.
• If you are missing any of the components, call customer support at 951-493-7100.
• Ensure you have all necessary tools before proceeding.
• Do not attempt to work on your vehicle when the engine is hot.
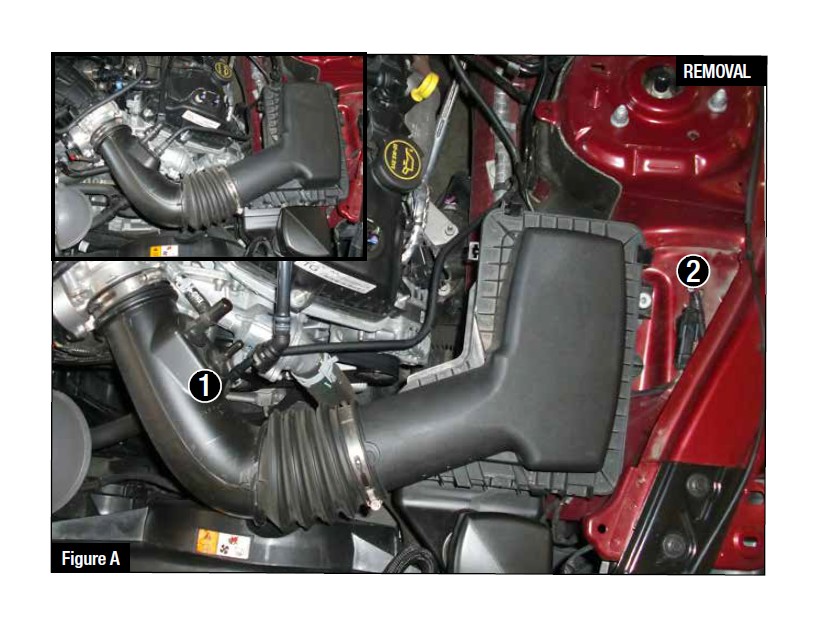
Refer to Figure A for Steps 1-3
Step 1: Loosen the clamp at the throttle body (7mm nut driver).
Step 2: Unclip the two vent hoses connected to the intake tube. 1
Step 3: Remove the bolt that secures the housing with a 10mm socket and driver. Lift up and remove the entire intake assembly as one unit. 2
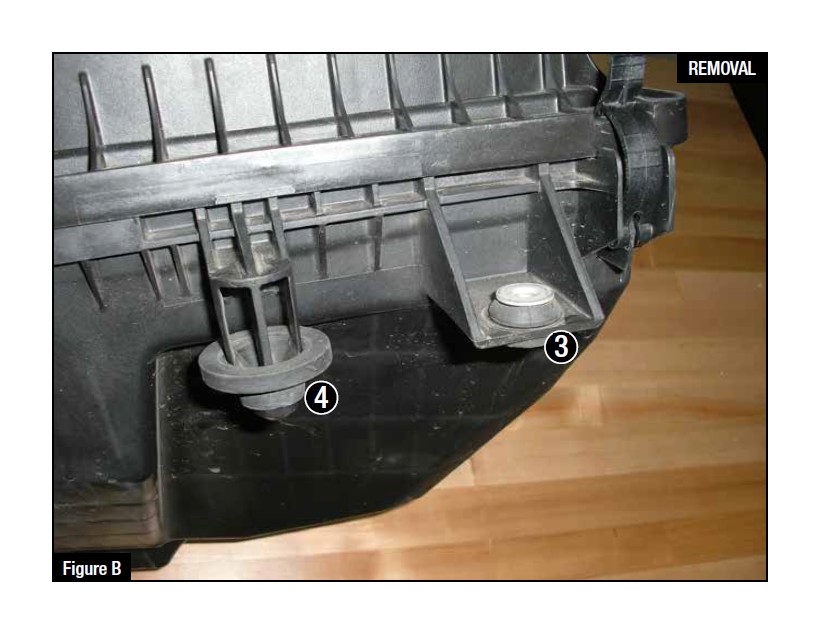
Refer to Figure B for Steps 4-5
Step 4: Remove the metal sleeve and grommet from the stock housing.
Step 5: Remove the locator grommet from the stock housing.
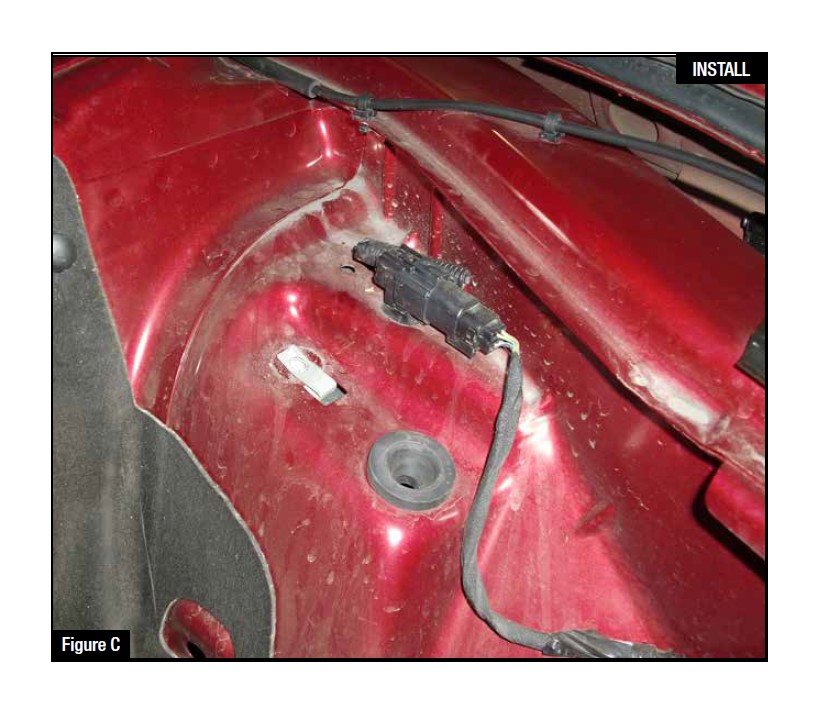
Refer to Figure C for Step 6
Step 6: Install the locator grommet into the hole in the fender-well.
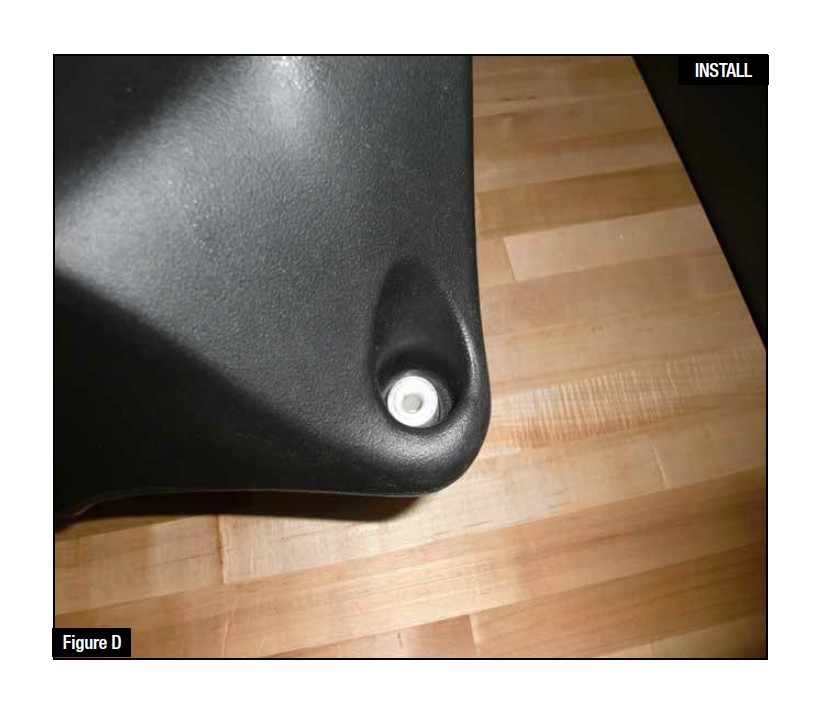
Refer to Figure D for Step 7
Step 7: Install the grommet and metal sleeve into the new aFe air box as shown.
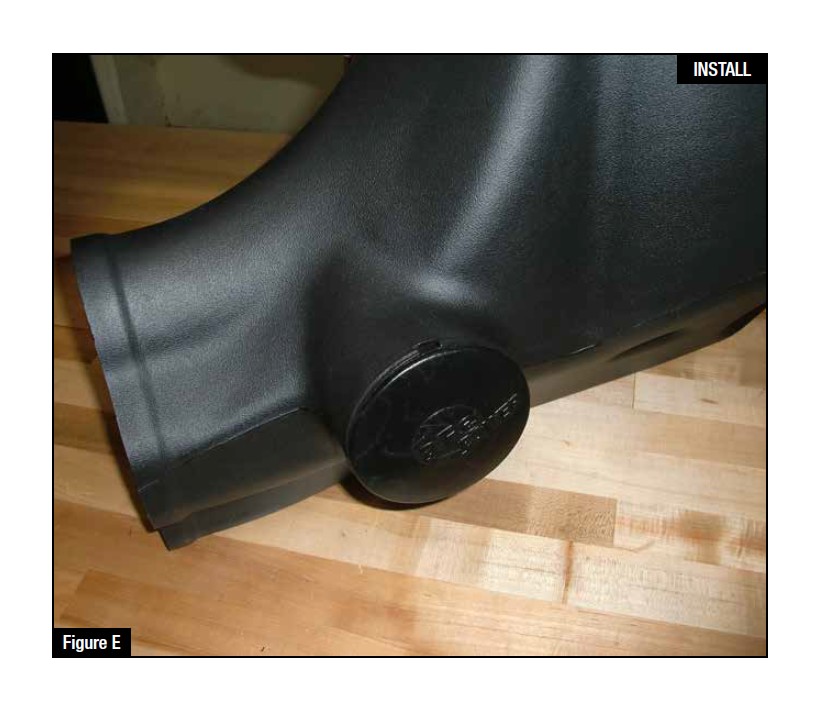
Refer to Figure E for Step 8
Step 8: (Optional) If you would like to use the provided plug for the air box then it is easier to install this now. The plug can be installed/removed from the housing after the intake is installed, but it is easier to install at this time.
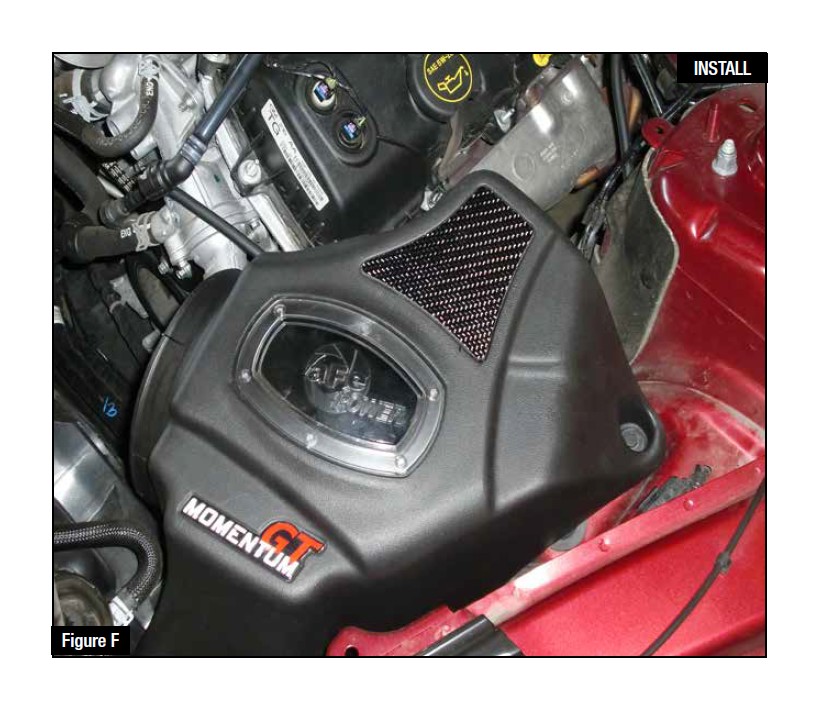
Refer to Figure F for Steps 9-10
Step 9: Install the housing into the vehicle. Make sure that the scoop in the front of the housing lines up with the stock air duct on the vehicle.
Step 10: Secure the housing to the car by reinstalling the factory with a 10mm socket & driver screw to the fender-well.
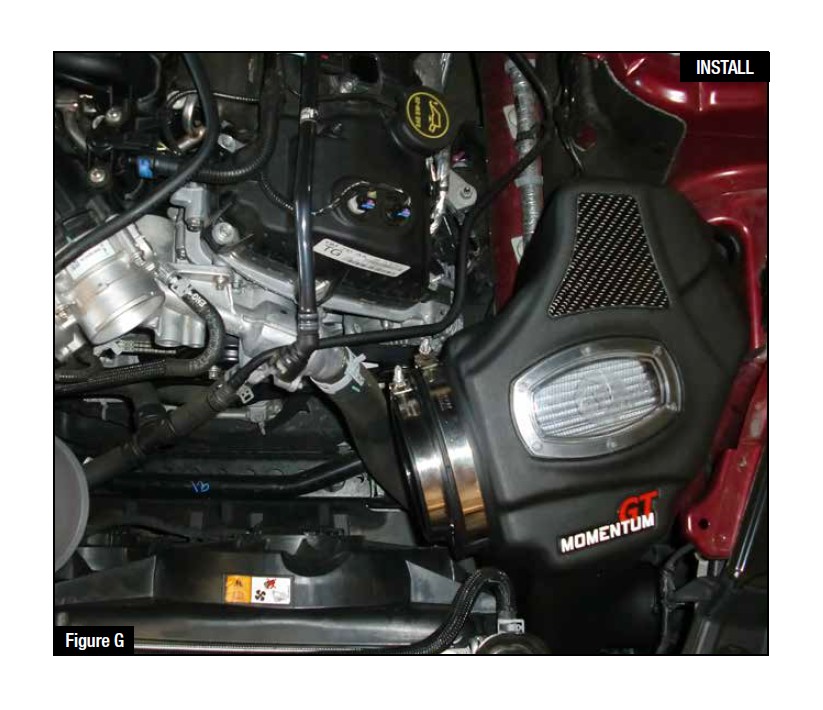
Refer to Figure G for Steps 11-12
Step 11: Install the large clamp over the flange on the housing.
Step 12: Install the aFe air filter into the housing and make sure to leave both clamps loose at this time.
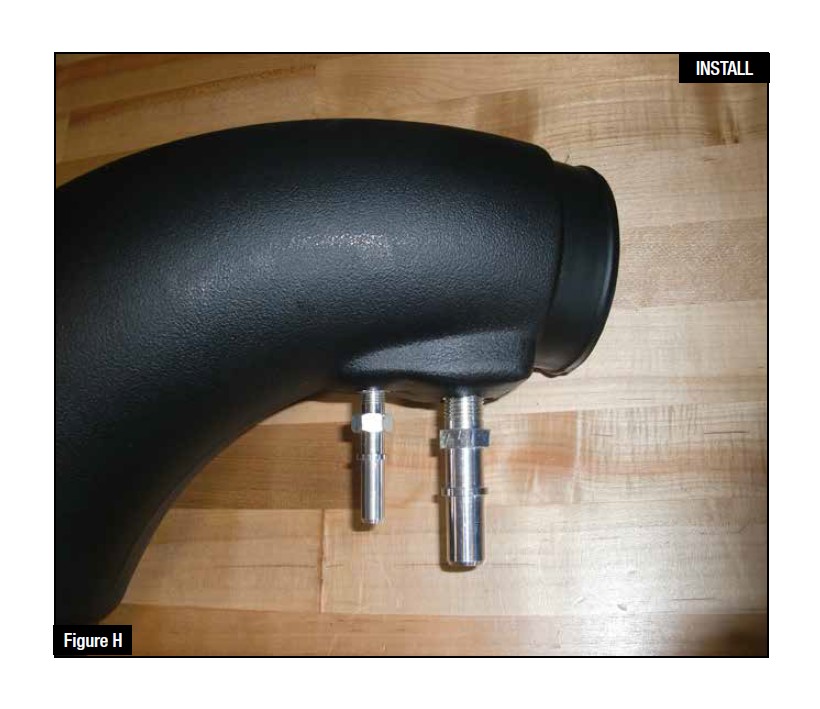
Refer to Figure H for Step 13
Step 13: Install the two provided aluminum adaptors into their respective locations on the new aFe intake tube. Apply some of the furnished thread locker to guarantee a perfect seal.
NOTE: Caution: Do NOT over tighten these NPT fittings. There will be a gap between the tube and the fitting when fully tightened.
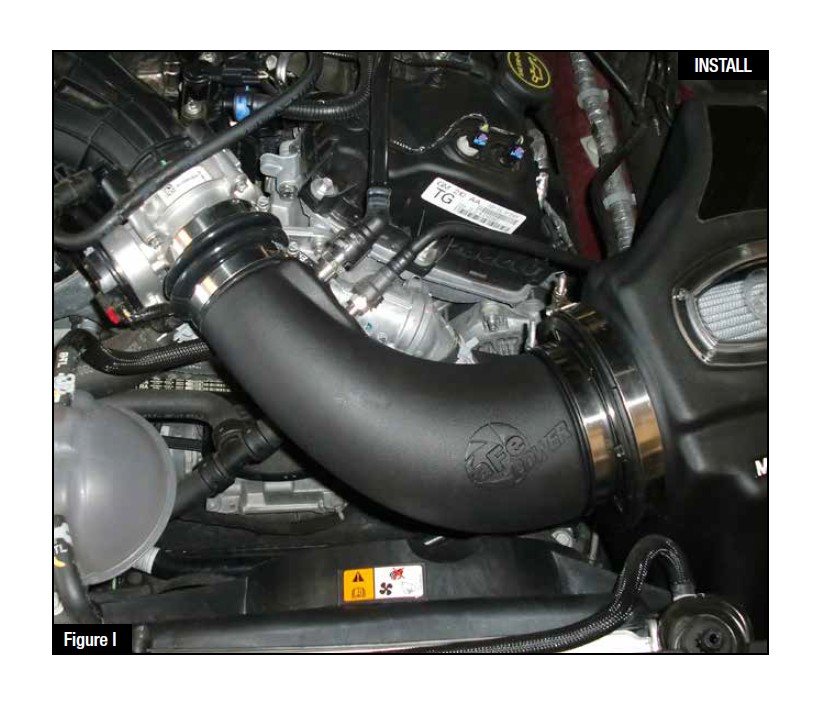
Refer to Figure I for Steps 14-16
Step 14: Install the intake tube with the coupler and clamps into the vehicle as shown.
Step 15: Re-connect the two vent fittings to the intake tube.
Step 16: Tighten all of the clamps at this time.
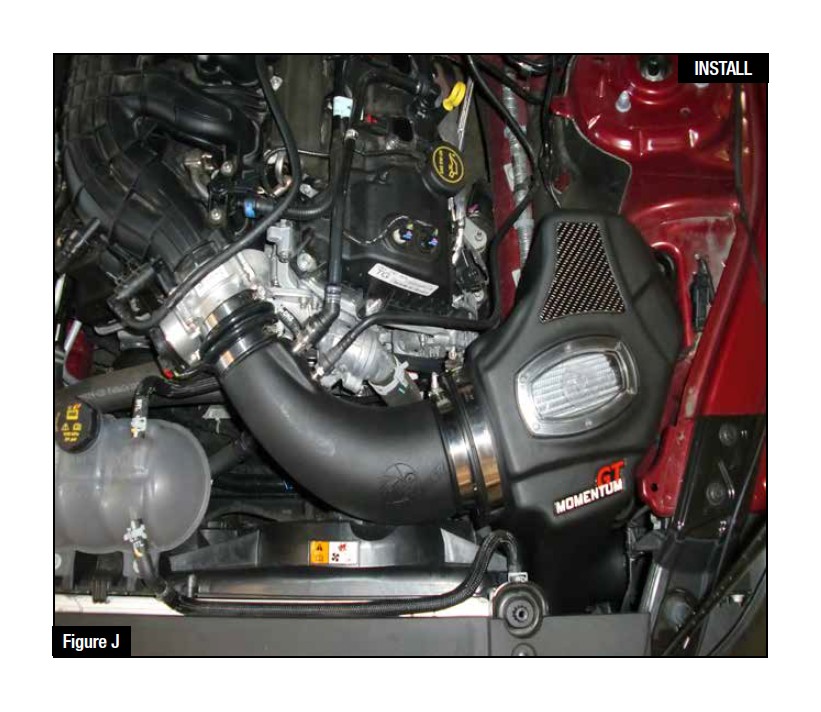
Refer to Figure J for Step 17
Step 17: Make sure all clamps and connections are secured. Your installation is now completed.
NOTE: Check all bolts, clamps and connectors after 200 miles.
