 FREE 1 to 3-Day Delivery on Orders $149+ Details
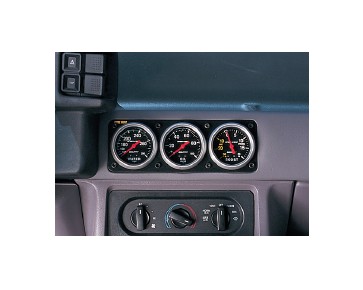
How to Install Auto Meter Black Gauge Cage - Triple 2-5/8 in. (87-93 All) on your Ford Mustang

Shop Parts in this Guide
- Auto Meter Gauge Cage Triple Gauge Pod Mount; 2-5/8-Inch; Black (87-93 Mustang)
- Auto Meter Gauge Cage Dual Gauge Pod Mount with Vents; 2-5/8-Inch; Black (87-93 Mustang)
- Auto Meter Gauge Cage Dual Gauge Pod Mount without Vents; 2-5/8-Inch; Black (87-93 Mustang)
- Auto Meter Gauge Cage Dual Gauge Pod Mount; 2-5/8-Inch; Silver (87-93 Mustang)
- Auto Meter Gauge Cage Dual Gauge Pod Mount; 2-5/8-Inch; Carbon Fiber Look (87-93 Mustang)
NOTE
Due to normal manufacturing processes you may have “flashing” (small fibers of plastic) around the pod holes. Once the gauge(s) are installed in the pod you will not be able to see the “flashing.”
Installation
The Gauge Works Gauge Cage is designed to directly replace the two ventilation outlets in the center of the dash of your Mustang. Gauge Cages with vents will require a slightly different install, refer to step (3). Follow the instructions carefully and make sure you do not overtighten any screws.
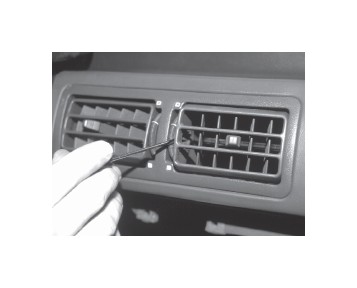
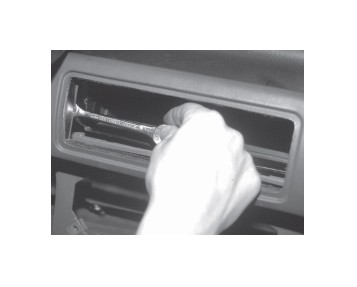
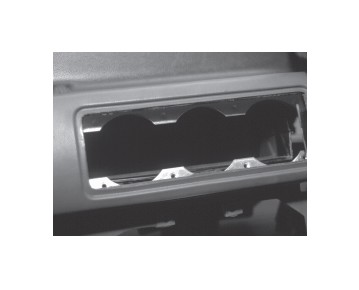
1. Remove Air Registers
Insert a screwdriver between the air register and the side of the vent housing. Carefully pry the register forward and pop it out. You may need to pull the register with your fingers to remove it. Remove both registers. Be careful to not pry the aiming wheels off their mounts and lose any of their pieces.
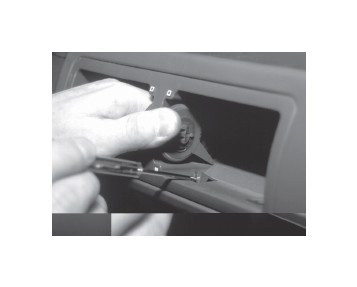
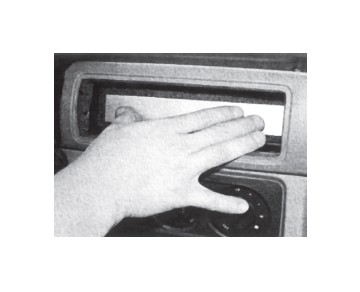
2. Remove Vent Housing
The vent housing is held in place with (8) plastic clips (4 on top and 4 on the bottom). To remove the vent housing, pull outward on housing. While pulling out, pry each clip up. The clips will stay up as long as outward pressure is applied to vent housing. Pull vent housing out from dash.
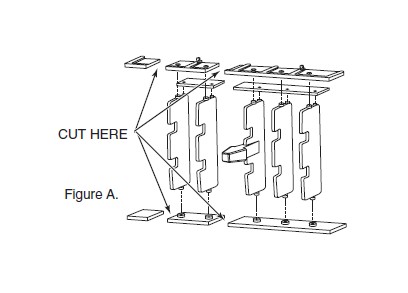
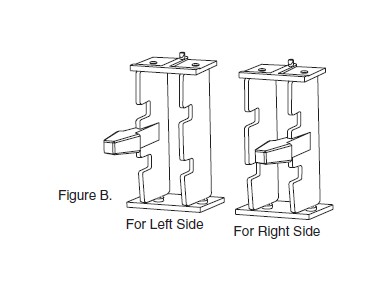
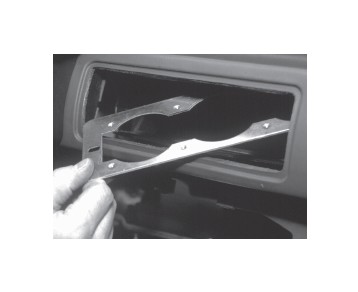
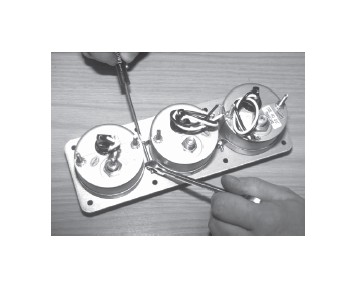
3. Prep Air Registers (For Gauge Cages with vents)
Disassemble the register as shown in Fig. A. Using a utility knife, cut the areas specified in the illustration. Repeat these steps for the other register so that you have a pair of them. After cutting them, reassemble the pieces so they resemble the registers shown in Fig. B.
4. Prep Vent Opening
Inside the vent opening and to the left is a dashpad nut. Remove nut and keep it for later use. Trim a quarter to half-inch from the left side of the duct using a utility knife. This allows the instrument leads to pass between the instruments and the duct.
5. Insert Foam Backing (For non-vent models)
Insert provided foam into air duct so that the metal backing strip is facing you. This redirects air traveling to the front vents into the side vents. Skip this step for Gauge Cages with vents. This allows the center air vents to remain functional.
6. Insert Backing Plate
Turn the bracket sideways and insert it in the vent opening. The slot in the bracket should be to the left when properly installed.
7. Position Bracket
Pull bottom edge of bracket down and into position. Then pull top edge up into position. When properly installed, slot on left side of bracket will fit over bolt. Replace nut which was removed earlier.
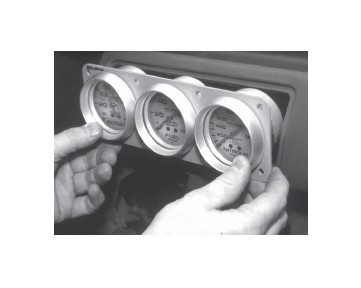
8. Mounting Instruments in Face Plate
Insert the instruments into the face plate. Place the binder ring over the gauges. Slide the ring down to the face plate until snug. Make sure it is positioned correctly before tightening the screws. The binder ring will hold the gauges secure against the face plate to prevent them from rotating out of position.
9. Wire and Mount Instruments in Dash
Make all necessary electrical connections. The instrument leads must be bent to the left to clear the dash interior. Some gauges may require angle fittings. Place the assembly into dash. Install the six allen head screws and tighten them until they are snug.
DO NOT OVERTIGHTEN SCREWS!
While Tightening Screws:
• Make sure the face plate is positioned so that it is running parallel to your dash pad.
• Use a standard screwdriver. DO NOT USE AN ELECTRIC SCREWDRIVER!
• Hand tighten screws only until snug.
• Only tighten screws until face plate is flush with recessed area of dash.
• DO NOT OVERTIGHTEN SCREWS! You risk deforming or damaging the face plate.
• Check the screws occasionally and retighten as needed.

