FREE 1 to 3-Day Delivery on Orders $149+ Details
How to Install Auto Meter Dash Top Gauge Pod - Dual 2-1/16 in. (94-04 All) on your Ford Mustang

Shop Parts in this Guide
NOTE
Due to normal manufacturing processes you may have “flashing” (small fibers of plastic) around the pod holes. Once the gauge(s) are installed in the pod you will not be able to see the “flashing.”
1. Disconnect Negative battery cable.
2. Remove OEM clock pod by pushing up on the top lip. This will release the pod clips.
3. Remove clock wiring and insulate wires properly.
4. Attach aluminum bracket to pod using the 2 supplied Allen screws. Place the small aluminum washer on the screw between the pod and the forward facing end of the bracket.
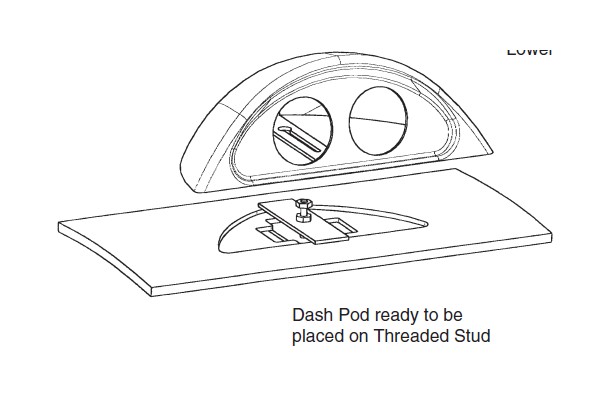
5. Insert Lower Mounting Plate (see illustration) in dash hole with Threaded Stud extending vertically out of hole. DO NOT DROP PLATE OR LET PLATE FALL IN HOLE.
6. Insert Threaded Stud in hole of Upper Mounting Plate.
7. Start Nut on Threaded Stud and tighten Nut secure. (Do not over tighten nut ! This may cause damage to dash board .)
8. Start Nylon Locknut on Threaded Stud. Do not tighten it.
9. Insert wires from one gauge through one of the gauge holes.
10. Carefully press gauge in hole (It will be a tight fit). Press gauge in until bezel is secure with face plate of Dash Pod.
11. Insert wires from second gauge through remaining gauge hole. (Do not press gauge in hole.)
12. Insert wires from both gauges through hole in dash.
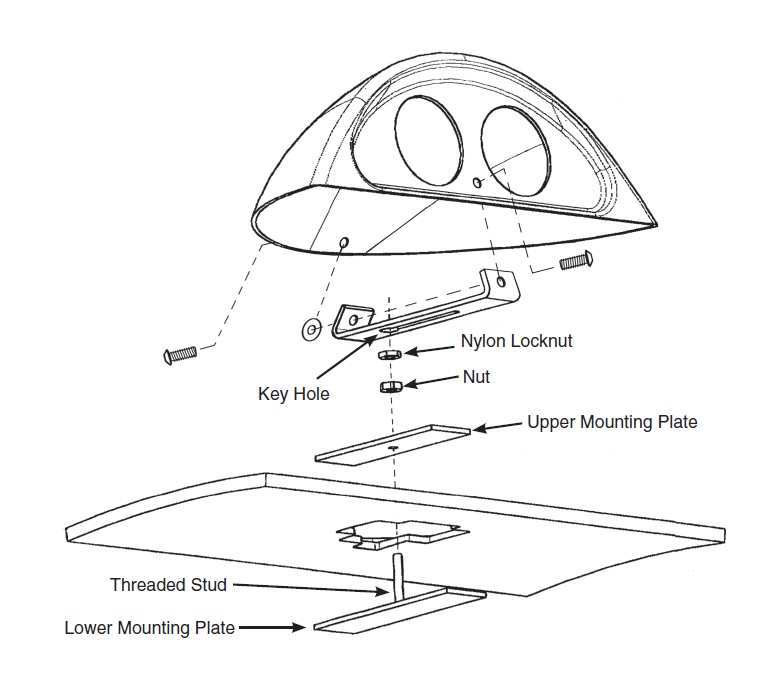
13. Insert Threaded Stud and Nylon Locknut through Dash Pod’s, Key Hole (see illustration).
14. Place Dash Pod in position.
15. Tighten Locknut until snug. (do not over tighten nut! This may cause damage to dash board and nut)
16. Carefully press second gauge in hole (It will be a tight fit). Press gauge in until bezel is secure with face plate of Dash Pod.
17. Wire gauges according to instructions supplied with gauge.
18. Reconnect Negative battery cable.