Installation Time
(approx) 2 Hours
Difficulty Level:
Light to Moderate mechanical skill required.
FREE 2 or 3-Day Delivery on Orders $119+ Details
$895.00 (kit)
FREE Shipping Market Price $942.11 You Save 5% ($47.11)Add Local Shop Installation
Saved - View your saved items
We're sorry. We couldn't save this product at this time.
or use
Jake: Jake here for AmericanMuscle. And today, I'm taking a look at the AWE Track Edition Axle-Back Exhaust with the Quad Chrome Silver Tips for the 2016 and newer Camaro SS with the NPP Dual Mode Exhaust. If you wanna make some serious noise with a high-quality axle-back that isn't gonna ruin your budget, then look no further than the Track Edition set up from AWE. This is a slick, high-quality axle-back package that's gonna wake up your Camaro's exhaust and give you a lot more sound all at a price that undercuts some of the other options in the category.Now, AWE has been making high-quality exhaust for decades and this system certainly does that reputation justice. They've also been known to bring the volume, which this system does as well. No getting around it, this one is loud. We're gonna give this a four out of five on our rattle-the-windows loudness meter, and let's just say that your neighbors are definitely gonna know that something is different about your car.Surprisingly though, it is not as intrusive inside of the cabin as you might expect, but it's still gonna have a lot of volume. But man, it just sounds so good. As you heard from the clips at the beginning of the video, even for an axle-back, this has got a great sound to it. It's deep, it's bubbly, it's aggressive. It really sounds like a true muscle car inside and out. And I think it really brings a lot more character to the Camaro. Now, since this is an axle-back system, this is not going to eliminate your stock catalytic converters, resonators, or mid pipes. This is only gonna swap in place of the mufflers in the rear of the car. So, it still will make a big difference in sound. And since this is the Track Edition as well, as you can see, there are no resonators like you get with some other axle-backs. This one just goes straight through.Now, like I mentioned already, and as you can probably see from this one that I got in my hand, this is a really high-quality system. The whole thing is made from 3-inch T304 mandrel bent stainless steel. And that means it's gonna provide excellent corrosion and rust resistance in addition to excellent exhaust flow. The whole thing is CNC laser cut to provide precise fitment, and the welds are of really nice quality too. It's even made here in the U.S. and that's a nice added bonus. Now, of course, you get some cool exhaust tips to finish the whole thing off. Set up to mimic the stock dual exit exhaust on the Camaro are these quad chrome exhaust tips. So these are each 4 inches in diameter, and they have this really high-polished, almost mirror-type finish that really adds a nice visual pop to the rear end of the car.Can't go wrong with a set of polished tips on something like a muscle car. These are also gonna set in a staggered formation, just like your stock exhaust. So they're gonna fit really nice and flush with the bottom of your bumper as well. And they have that aggressive slash cut, somewhat like your original tips too. This is just enough for people to notice, but not so much that it's gonna draw their eye. People are really gonna hear it before they see it, but once they notice the difference, they'll be able to tell. It adds a little extra something, I think, to what is otherwise not a very subtle exhaust. It really set the rear of the car off nicely, and they're the perfect finish to this pretty killer setup. And who doesn't like a nice set of mirror tips?Now, pricing for this system is gonna come in at around $925, which is not exactly a drop in the bucket, but it does far undercut some of the other axle-back systems out there on the market. However, again, you aren't sacrificing quality here, which is the most important part. Unfortunately, part of the cost savings does come from the loss of that dual-mode exhaust setup, but with how good this one sounds, I don't really know if that's too much of a loss. You could also, of course, go with a less expensive option than this, but then you're gonna run into lower-quality materials. And if you want something that's really gonna last or that's just simply not your style, this is gonna be an excellent option for you. Installation is gonna come in at a two out of three on our difficulty meter, and it should take you about two hours to get everything completed.Now, there is some cutting required in order to remove those stock mufflers from the car, but there are only two cuts, they're very easy to make, and you get instructions on how to measure it out included with the kit. You're also gonna have to remove the actuators for the exhaust balances, but that's also a simple one-bolt job. Once those two things are done, you're gonna get these new pipes with the tips installed and you can use the included hardware to get everything tightened up. These are also gonna use your stock exhaust hanger locations, so there's no additional modifications needed to the car itself. But enough talking about it. With that, let's head on over to the install bay now, and we'll show you just how to get it all done.Man: Tools required for this install include an impact gun, an electric ratchet, a hand ratchet, an exhaust hanger removal tool, a wire wheel, a 5/16 ratcheting wrench, a 3/8 to 1/4-inch adapter, an extension, 7, 11, 13, 15, and 16-millimeter sockets, a pair of safety glasses, a marker, a tape measure, a couple of zip ties, and a Sawzall. What's up, guys? Today, we're gonna be installing an exhaust on our Camaro, so let's get started. So, our first step to removing our exhaust is gonna be to disconnect our valves. Now, these are gonna be found on the outside of each side tip, so we'll get the harness, press the tab, and disconnect them. So, now our first step's gonna be to disconnect the wiring harness to our valve controller. So, to do that, we're gonna remove these two 7-millimeter bolts to clear up some access.You're gonna have to take these out later on eventually because we're gonna have to slide our exhaust back this way and the valves are gonna slide under this. So, I'll get a 7-millimeter socket to get these off. Then we can push that back out of the way and then reach in there and disconnect our wire harness. And then we'll do that same thing on the other side. So, the factory exhaust system has six hangers. We have two here, two here, and then two by our tips. So, we're gonna remove the inner four here, that way we can still have our two hangers in the back holding our exhaust up while we disconnect our flanges up front. So we can get the two on our passenger side first. So I'll grab an exhaust hanger removal tool and pop off this isolator. And then on this one, the hanger on our pipes are little longer than the one from our chassis, so we'll pop off our top isolator, and then we can pop it off at the bottom and slide it back on the top.Now we can do the same thing on our driver's side.Now our next step is to remove our brace here. We have five 13-millimeter bolts holding that in. So, I'll get a 13-millimeter socket on an impact gun to get these off. Now our next step's gonna be to disconnect our O2 sensors on both sides. Now you can do this either by unscrewing the O2 sensor or simply just unplugging the harness. We're gonna unplug the harness. So there's a white tab that you're gonna push up and then push in, and then it'll separate our connector. We'll take our white tab, push up on it, and then we can press down, and slide our connector out. Now, this side's gonna be the same thing, it's just a little deeper in there. Pull back on that tab, and then disconnect our connector.So now, we can work on our two flanges, we'll get those disconnected with a 15-millimeter socket. I've got a pole jack here to hold the exhaust in place so it doesn't drop down once we disconnect it. And then once we have our two flanges disconnected, we'll grab a buddy to help us pull the whole exhaust out of the car. So now on this side we don't have much clearance, so I'm gonna get a 15-millimeter socket with a ratchet on this side, and then we can use our impact gun on this side. So I've got some penetrating lubricant I sprayed on here just to make it a little bit easier to get these off. Now, on this side, we can use a 15-millimeter socket on an impact gun to loosen this clamp. So now I have a pole jack set up underneath our muffler to keep it in place, and then we're gonna be removing the two bolts on our hanger on both sides to release the muffler.So now we can take a 15-millimeter socket on a ratchet to get our two nuts off. And then we'll do that same thing on the other side. So now would be a good time to grab yourself a buddy, and you can take one end while your buddy takes the others, and then we'll just simply slide it out and remove it from the car. So now with the exhaust removed from our car, we can take our valves off and we'll be using a 5-16-inch ratcheting wrench to remove this. And then we can repeat that same process on the other side. And now we can remove our final two hangers on our stock exhaust using an exhaust hanger removal tool.Now, before we start installing our new exhaust, it's important to note that this kit does not allow you to retain your factory valves. AWE does make a valve actuator simulator, which is basically just a bracket that goes on here, so you can mount it and plug it in, that way you don't get any check engine lights. You can find those on the site, but they aren't included in this kit. So, what we're gonna do is just zip tie this up out of the way to a harness, that way we can still plug it in, and not get our check engine lights. We just have to make sure that we're not zip-tying over the silver piece because this will still be spinning. So, we can take our zip tie and fish it up over our wire harness here. And then we'll take our actuator, we can plug that in and push our tab down here, and lock it in place. And then we'll just pull down on our zip tie and making sure to keep it away from our silver piece that we'll still be spinning.And then we can take our heat shield and bend that back up in the position and reinstall our two 7-millimeter screws. And then we'll take our 7-millimeter socket to tighten these down. And then we can repeat that same process on the other side. So now with our stock exhaust removed, we're gonna come to right behind the rear muffler where we're gonna make our cut for our new exhaust. So now we can grab our tape measure and a marker, and we're gonna measure out 8 inches from the rear muffler back. Eight inches, puts us right here, so we'll make our line. And then we'll do the same thing on the other side, measure out our 8 inches and mark our spot. So, now with our measurements made, and our cut lines in place, you can grab yourself a Sawzall or your cutting apparatus of choice and a pair of safety glasses, and we can make our cuts.And now that we have our exhaust flipped over to the other side to make it a little bit easier to cut, we can make our cut on our other pipe. So now with our cuts made, we're gonna take a wire wheel to clean up our edges a little. So now with our exhaust cut and our edges cleaned up, now's a good time to grab yourself a buddy to help you line up the secondary cuts in the front while you get the hangers into the isolators. Now, we'll reinstall our two 15-millimeter nuts on our passenger-side secondary cut. Now, we'll take a 15-millimeter socket going back and forth tightening these down to put even pressure on our flange. And then we'll take a 15-millimeter socket to tighten down the clamp on our driver's side.And now we can reconnect our O2 sensor harness. So we're gonna slide that up out of the way so it doesn't hang on anything hot or moving, and we'll just click it in like that. And now we can reinstall our brace with our five 13-millimeter bolts. And then we'll just make sure all of our holes are centered. And then take our 13-millimeter socket to tighten these bolts down.Now, our next step is to install our tailpipes, but before we can do that, we have to install our tailpipe adapter. Now, this is a 2-3/4-inch to 3-inch adapter that's gonna slide over our stock exhaust pipe, and then our aftermarket tailpipe will slide right over this adapter. So now we can take our adapter and we're gonna slide that over the edge of our stock exhaust. And then we'll take our 3-inch clamps. And now we can grab our tailpipe, we're gonna be putting our hanger into our isolator first, and then we can slide that over our adapter.And then once we have that in place, we can grab our clamp, slide that over the edge of our pipe, and then we'll take a 16-millimeter socket to tighten this down. Next, we can install our hanger bracket. So, we're gonna slide this over our hanger first, and then we'll raise it up to line up with the studs. And then we can grab our two 15-millimeter nuts and put on to our studs. And then we'll grab our 15-millimeter socket to tighten these down.So next, we can install our tips. So we have our bolt here that's gonna lock into the square groove, and then we can grab our nut for the other side. And then once we have that threaded on, we can slide our tip into place. And then we're gonna be using an 11-millimeter socket on our nut to tighten that down. And then we'll do that same thing for our other tip. And then once we're done with this side, we can do the same thing on the other side.So that'll wrap up this review and install of the AWE Track Edition Axle-Back Exhaust with Quad Chrome Silver Tips for your 2016 and newer 6.2-Liter Camaro with NPP Dual Mode Exhaust. Thank you for watching. And remember, for all things Camaro, keep it right here at americanmuscle.com.
Subscribe to our YouTube Channel
Features, Description, Reviews, Q&A, Specs & Installation
Brand | AWE |
Exhaust System Type | Axle-Back System |
Exhaust System Material | Stainless Steel |
Exhaust System Tip Finish | Chrome, Polished |
Exhaust System Tubing Diameter | 3.00 Inch |
Exhaust Loudness | Loud |
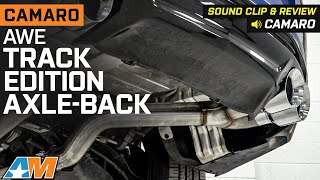
Fierce and Confident Rumble. Expect a more powerful growl coming from your Chevrolet Camaro with this AWE Track Edition Axle-Back Exhaust with Quad Chrome Silver Tips. The throaty sound intensifies as your muscle car accelerates on the road, exuding an impressive level of power and class without excessively firing up the track.
Enhanced Engine Power. Using this Track Edition Axle-Back Exhaust will let you experience a significant performance boost. The smooth transition bends facilitate a more efficient movement of the exhaust gases that allow for low turbulence. Furthermore, this enhanced flow results in an additional 9 horsepower, 10 pound-feet torque gains, and enhanced throttle response.
Rust-Proof, High-Grade Steel. AWE utilizes premium, T304L stainless steel that exhibits high strength and excellent structural properties for long-lasting functionality. This Track Edition Exhaust system can withstand high temperatures and other harsh outdoor elements. It is also furnished with 4.50-inch, double-walled, quad chrome silver exhaust tips for reinforced corrosion resistance and extra visual appeal.
Straightforward, No-Drill Installation. This Track Edition Axle-Back Exhaust is designed for a bolt-on installation that reuses your vehicle’s mounting slots, there is some cutting required. The straightforward installation process completes using standard hand tools and requires moderate mechanical skills.
Application. This AWE Track Edition Axle-Back Exhaust with Quad Chrome Silver Tips is intended for use on all 2016 to 2023 6.2L Chevrolet Camaro with NPP Dual Mode Exhaust models.
Fitment:
AWE 3020-42067
CA Residents: WARNING: Cancer and Reproductive Harm - www.P65Warnings.ca.gov
Installation Info
Installation Time
(approx) 2 Hours
Difficulty Level:
Light to Moderate mechanical skill required.
What's in the Box
10 More Questions