 FREE 1 to 3-Day Delivery on Orders $149+ Details
How to install a BBK Cold Air Intake on your 2011-2012 GT Mustang
Installation Time
1 hours
Tools Required
- 13, 15mm sockets
- ratchet
- ¾" wrench
- 22mm wrench

Shop Parts in this Guide
TOOLS REQUIRED- 8, 10mm socket, small screwdriver, ratchet, 2.5mm allen wrench. Torx T-20 screwdriver.
STEP 1
Disconnect negative battery cable.
STEP 2
Remove plastic radiator cover by prying up the center of the plastic pin heads at the slots cut on each side. Pull pins out to remove. Lift cover off and set aside. FIG. 1
STEP 3
Remove strut tower brace. Remove engine cover by pulling up on it to release it’s mounting pins from the grommets on the intake manifold.
STEP 4
Unhook the breather hose and sound hose from the inlet tube. Loosen clamps on inlet tube at throttle body and airbox. Unplug Mass Air Sensor by sliding the red tab back towards you then pushing in on black tab while pulling plug off sensor. Remove inlet tube.
STEP 5
Remove bolt on right side of air box that mounts it to the inner fender.
STEP 6
Detach air box from lower inlet tube on the side of the radiator as you lift the box out to remove. Detach Mass Air Meter wire harness from side of air box by slightly pulling on the harness at each barbed mounting pin. Remove the two rubber grommets from the bottom of the air box. FIG. 2
STEP 7
Remove the stock air inlet tube on the side of the radiator by pulling up and towards the engine.
STEP 8
Remove the two bolts that retain the driver side radiator mount. Remove the mount.
STEP 9
Assemble the two aluminum pins to the bottom of the BBK air filter shield using the supplied ¼-20x ½” Phillips screws. Install the stock rubber grommets onto the pins. FIG. 3
STEP 10
Route sound tube under plastic breather hose, so sound tube will pass under BBK filter shield.
STEP 11
Use stock rubber clamp to retain sound tube to bottom of filter shield. FIG. 4,5,6
Install the BBK air filter shield into place and position over the radiator mount peg with the rubber grommets seating into their holes in the inner fender. Install the stock bolt back into the small tab on the shield and tighten bolt. Reinstall the upper radiator mount and tighten the bolts. FIG. 7
STEP 12
Remove the Mass Air Sensor from the stock air box tube. Install in the chrome BBK inlet tube with the two supplied 4mm buttonhead screws. The meter will only mount the correct way. FIG. 10
STEP 13
Install the two blue hose connectors to the BBK inlet tube. Install tube thru hole in filter shield then onto the throttle body. Connect sound tube to 1 ½” tube on bottom of inlet tube. FIG. 8
STEP 14
Install the BBK air filter onto the air filter adapter. Connect to the inlet tube hose connector. Make sure the filter adapter is pushed all the way up against the end of the inlet tube. Tighten clamps. FIG. 9
STEP 15
Reconnect the breather tube to the BBK inlet tube.
STEP 16
Install the supplied sponge seal to the top of the air filter shield and trim off any excess. FIG.11
STEP 17
Reinstall the engine cover, strut tower brace and radiator cover. Reinstall mounting pins for radiator cover. Plug in Mass Air Sensor plug to sensor.
STEP 18
Reconnect negative battery cable.
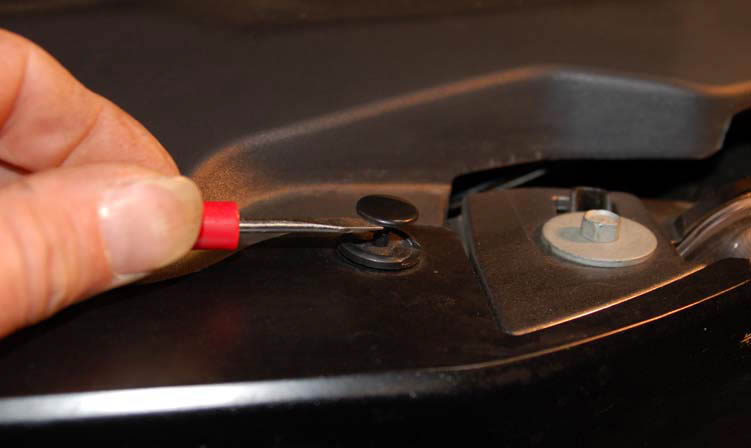
FIG. 1
Use small blade screwdriver to lift pins out and remove pins to remove radiator cover.
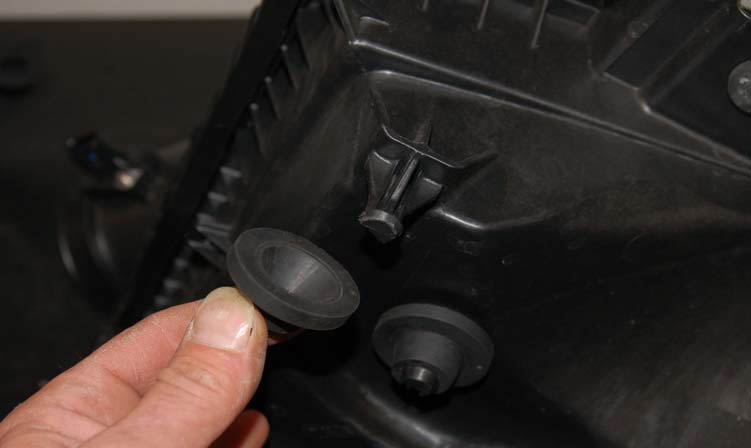
FIG.2
Remove grommets from bottom of stock air intake box.
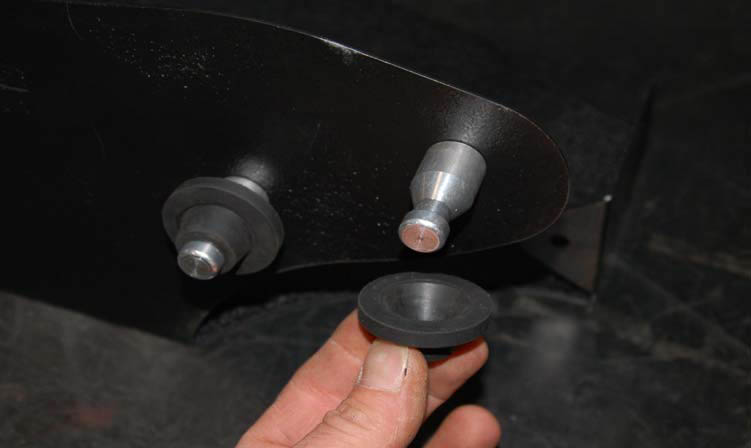
FIG. 3
Place grommets on supplied aluminum pins installed on the bottom of BBK shield.
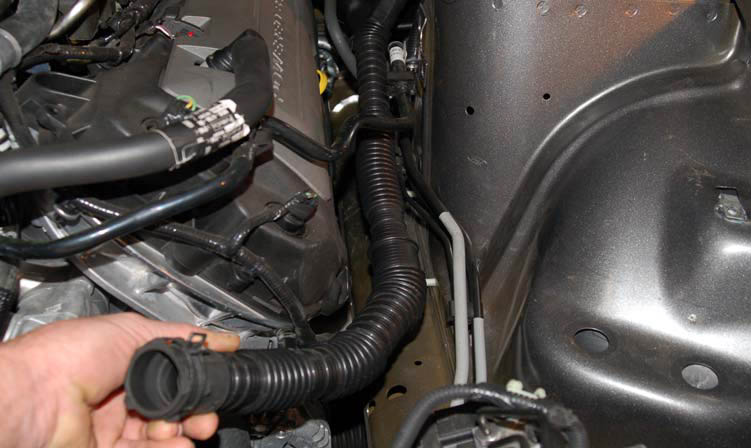
FIG. 4
Route sound tube under plastic breather tube.
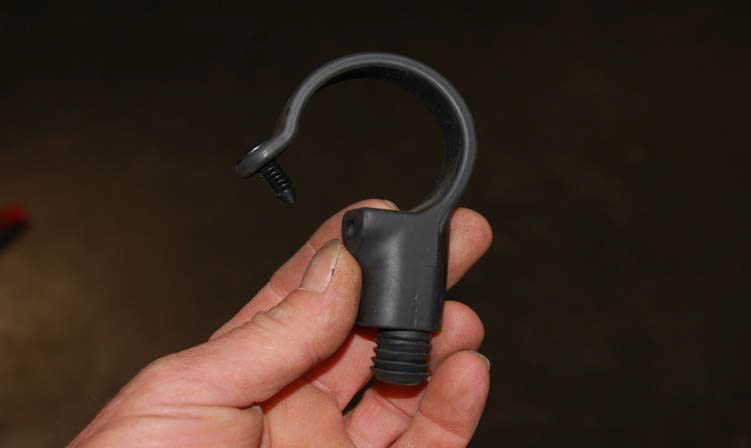
FIG. 5
Sound tube clamp. Install in the 5/8” hole on bottom of BBK filter shield.

FIG. 6
Sound tube clamp installed and holding sound tube that now runs under the filter shield.
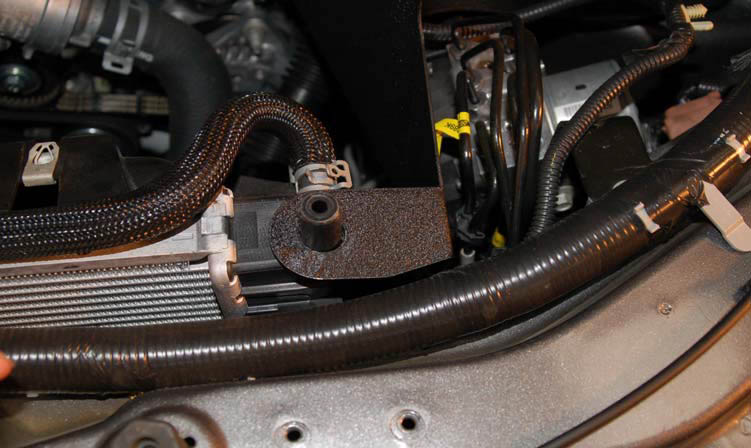
FIG. 7
BBK filter shield mounting tab shown in place, over mounting peg of radiator. Reinstall stock steel mounting bracket.
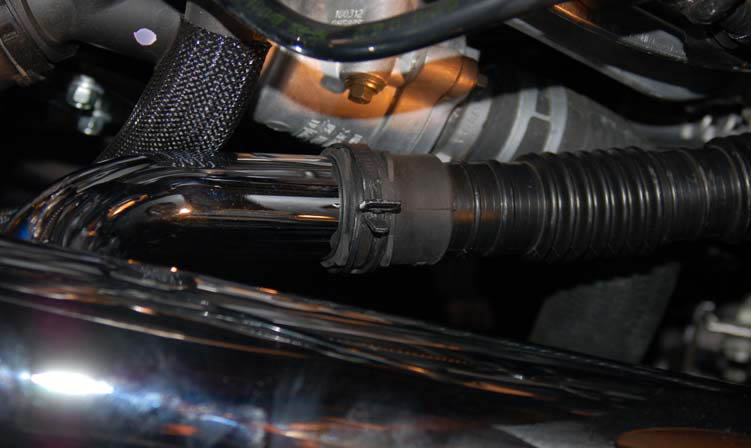
FIG. 8
Sound tube shown attached to BBK inlet tube.
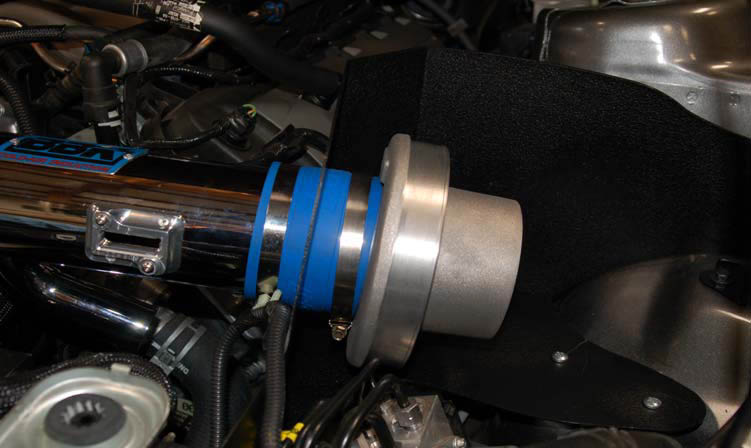
FIG. 9
Cast aluminum filter adapter shown installed.
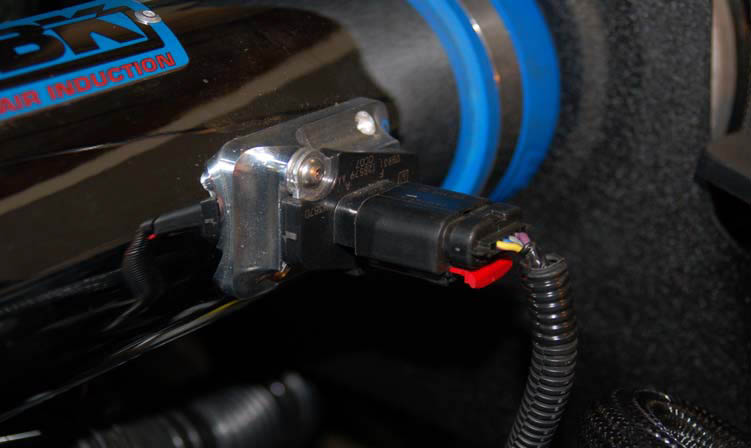
FIG. 10
Stock Mass Air Meter shown installed and plug connected. Sensor will only mount the right way.
