 FREE 1 to 3-Day Delivery on Orders $149+ Details
How To Install a BBK Caster/Camber Kit for your 1987-1993 Mustang
Installation Time
4 hours
Tools Required
- Floor Jack
- Impact Wrench or breaker bar
- Rubber Mallet
- Jack Stands
- 15/16 socket (option)
- 3/4 socket
- 1/4 Allen wrench
- 16/15 wrench
- Socket wrench
- Vise Grip or large screw driver

Shop Parts in this Guide
Installation Instructions
1. Place the car in park or 1st gear and put the E-brake on. Loosen the lug nuts for the wheels just a little.
2. Using your floor jack lift the car up high enough to have the wheels off the ground and then place the jack stands under the car.
3. Finish removing the lug nuts on the front wheel and take them off.
4. Using an Impact Wrench with 15/16 socket to remove the bolt from the shock on top the factor camber plate. (I was unable to get my off it just spun the shock shaft. If this happens you can do one of two things. Take the brake rotor, caliper and dust shield off so you can get at the bottom bolt for the shock. Take the whole thing out after you take the nuts off the camber plates or the other option is to grind the nut off. I had to do both because I took both of them out and put in a vice. One I was able to get the nut off the other I still was not and had to grind it off.)
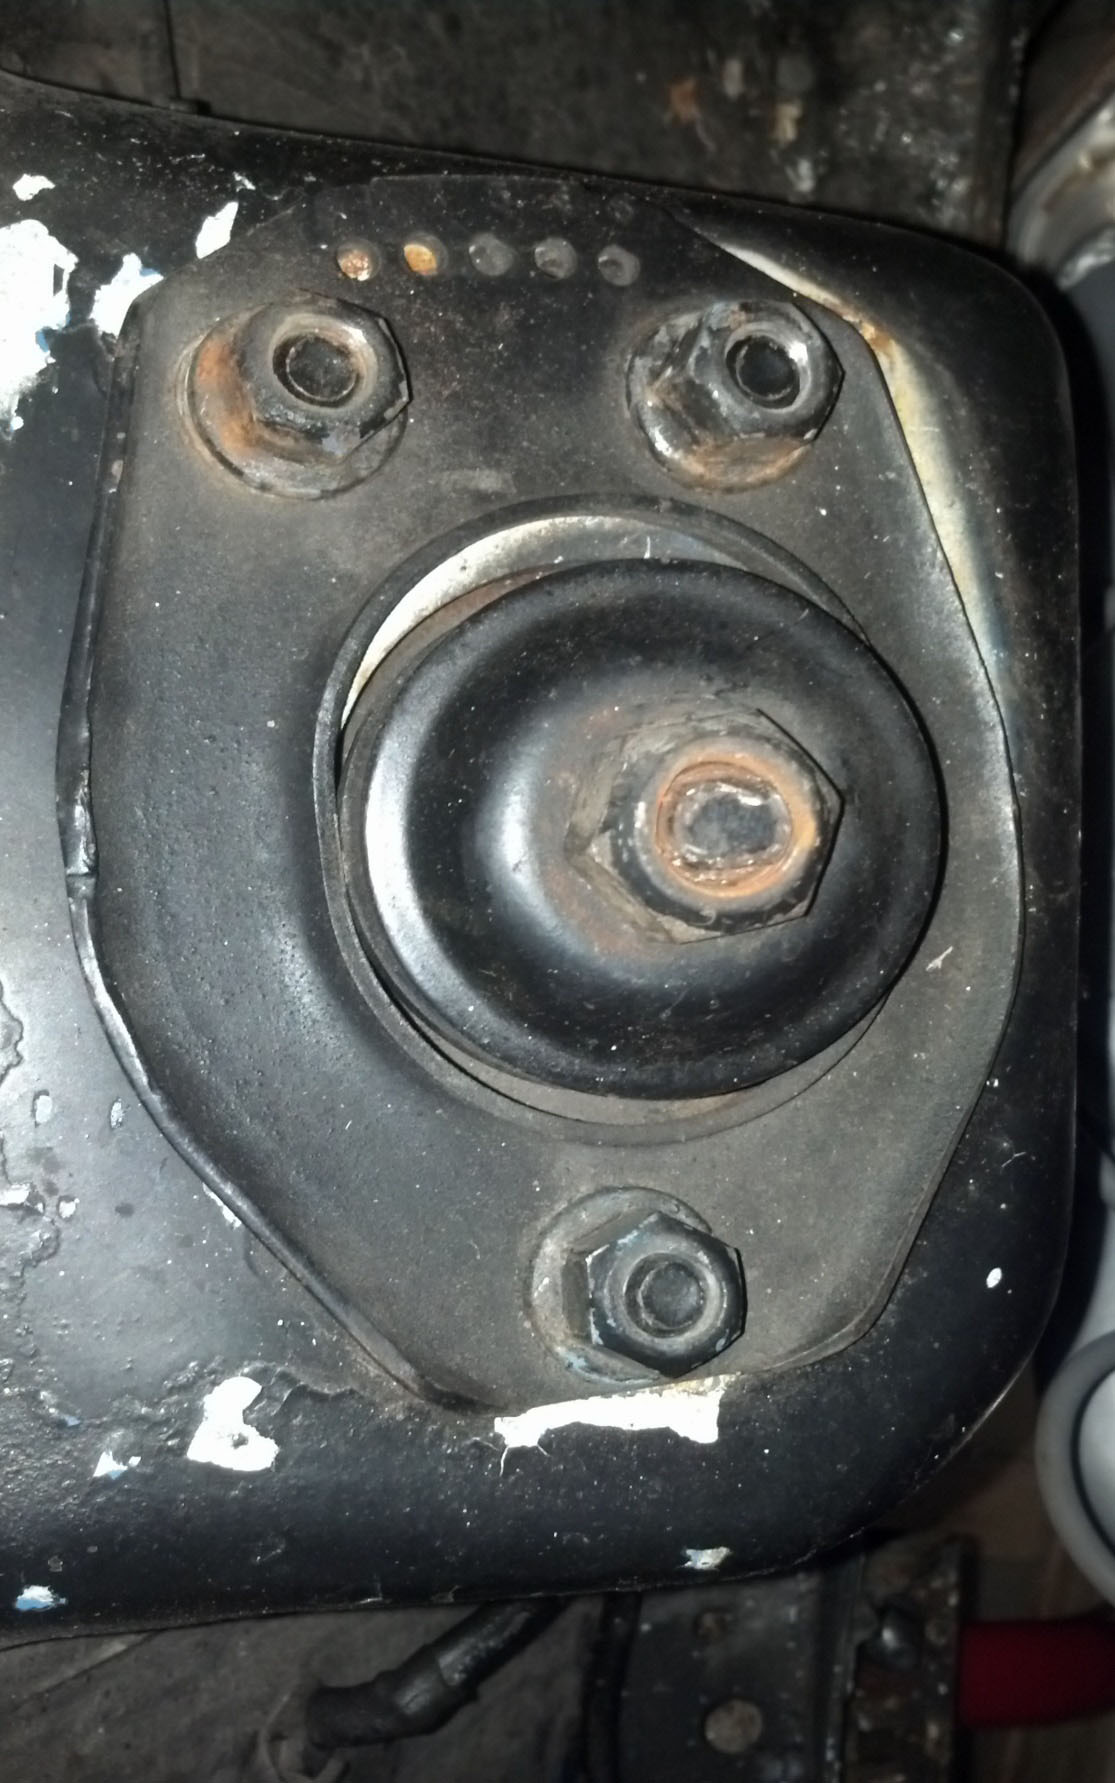
5. Using a 3/4 socket remove the 3 nuts for the camber plate. You can lift the top of the camber plate off.
6. You will need to remove the dust cover from the shock because it will have to be modified. If you can pull the shock down enough to get it off do that. If not see if you can get an impact wrench with a 15/16 socket on it in there to remove the nuts holding the shock on. If they will not come off with in an impact you will need to remove the brake caliper, rotor and dust shield to be able to use a wrench and breaker bar to loosen them. (This is what I had to do because mine were very rusted on)
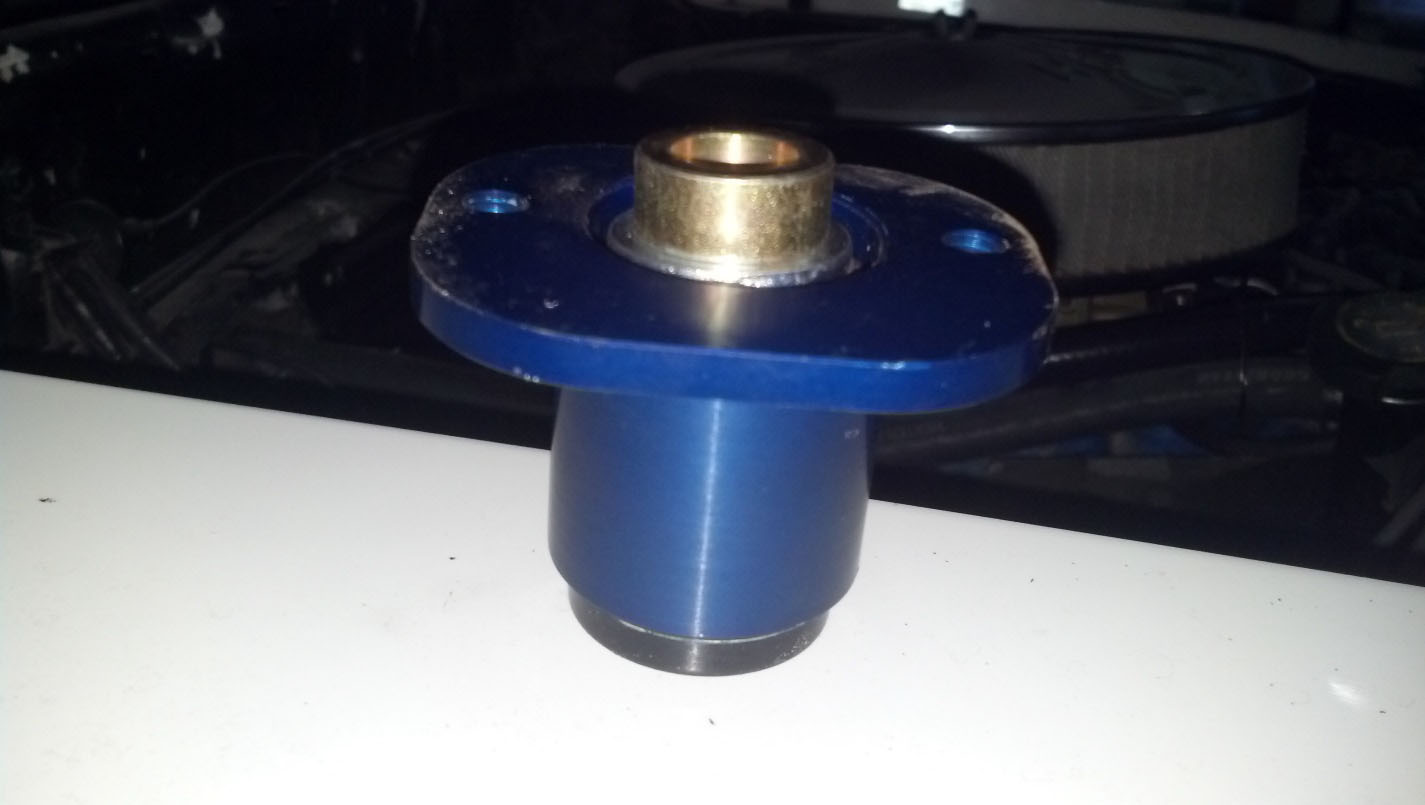
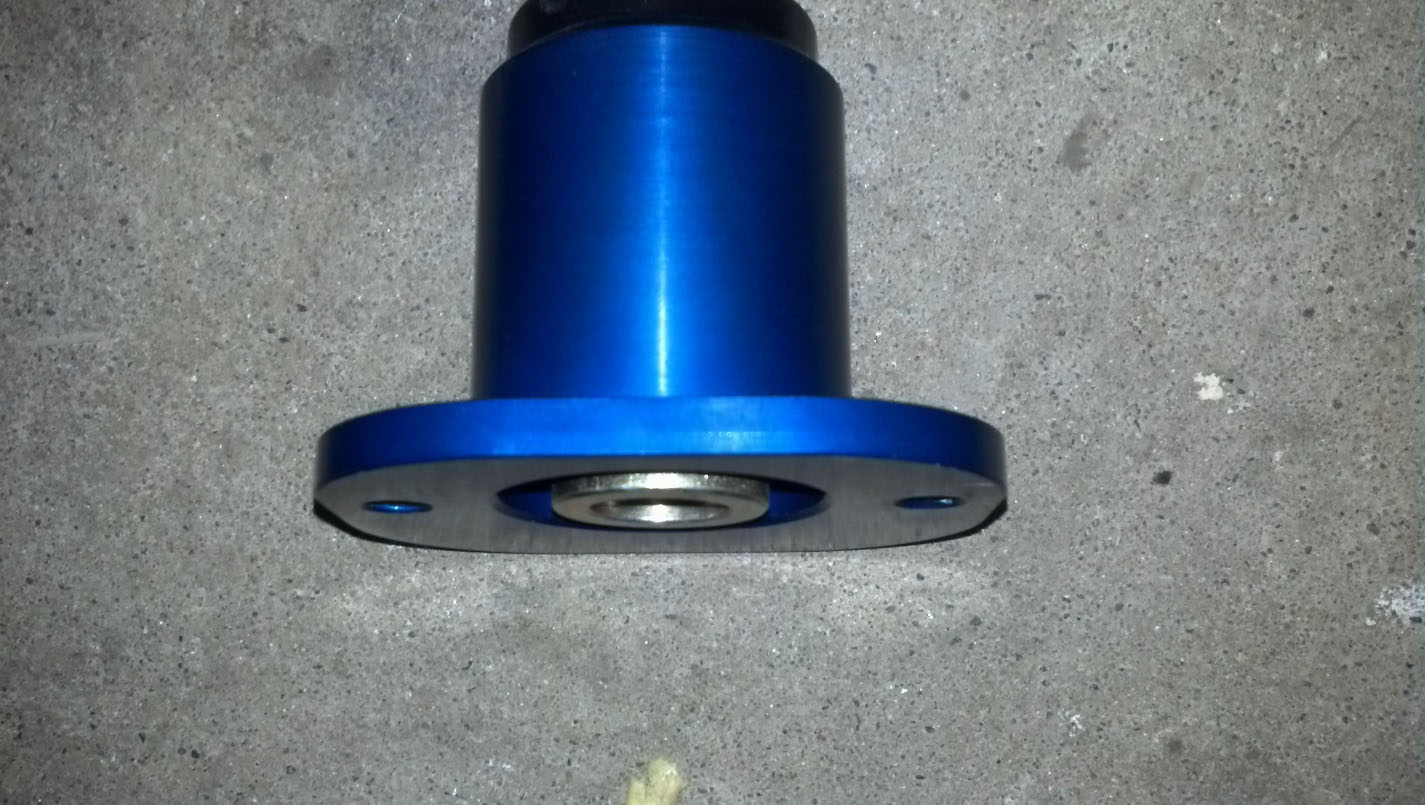
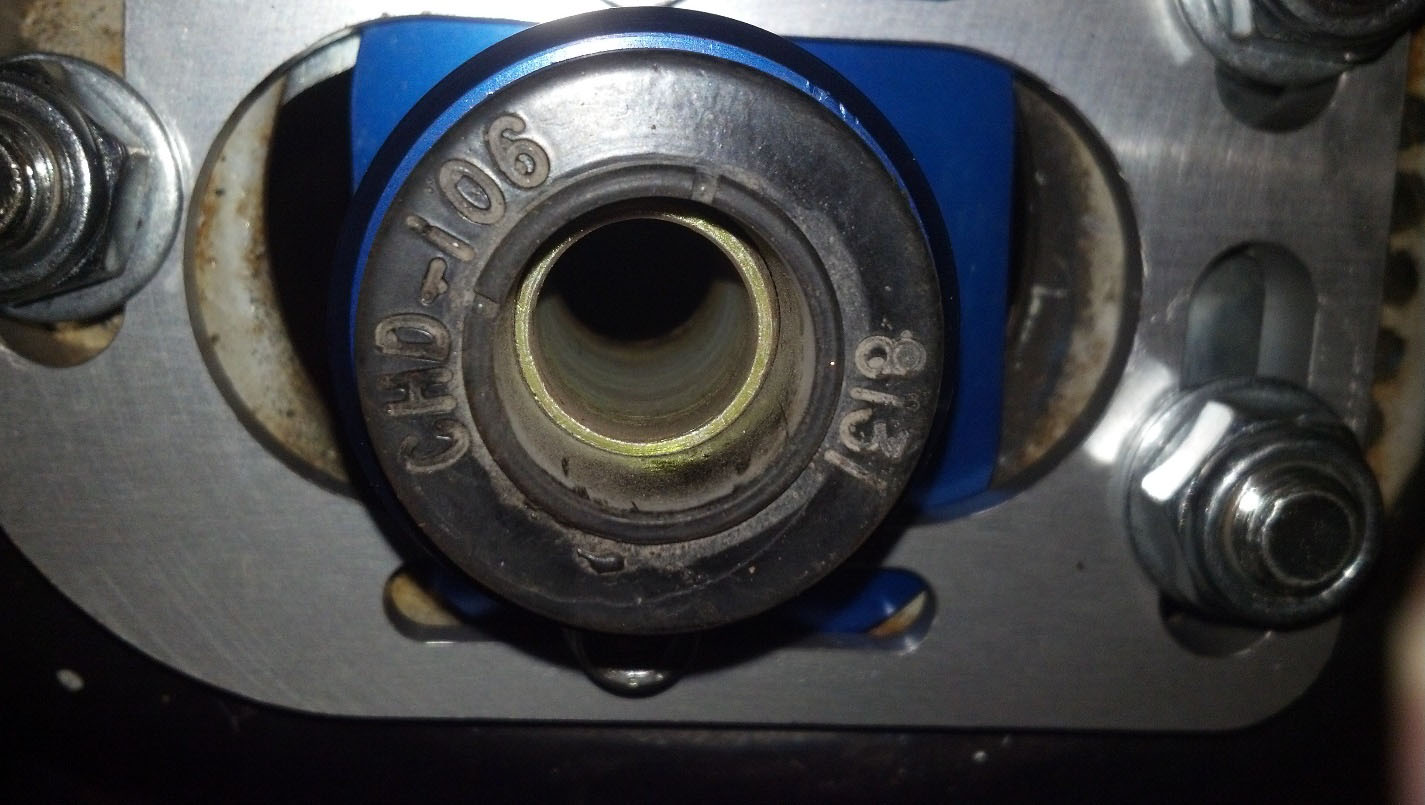
7. Assemble the new Caster/Camber plate. Take the bushing sleeve and put the small washer over it. Then slide the polyurethane bushing over that the sleeve and down to the washer. Push that info the strut mount. Put the other polyurethane bushing on the top of the strut mount and push it into place. At this point it should look something like the picture below.
8. Use a rubber mallet to drive the bushing sleeve all the way in so it is even with the bottom of the strut mount and the top of the bushing sleeve is touching the bottom of the upper bushing.
9. Use the Allen head bolts to attach the strut mount assembly you just completed to the aluminum plate.
10. Slide the L-Bracket into the wholes from the stock plate. (If they don’t fit is right you may need to use a dermal tool or a large drill bit to widen the wholes)
11. Attach the top plate with the mount to the lower L-Bracket. Use a 3/4 socket to tighten down the nuts a little but not too much so you can still move the plate around. It should not look like the second picture in step 8.
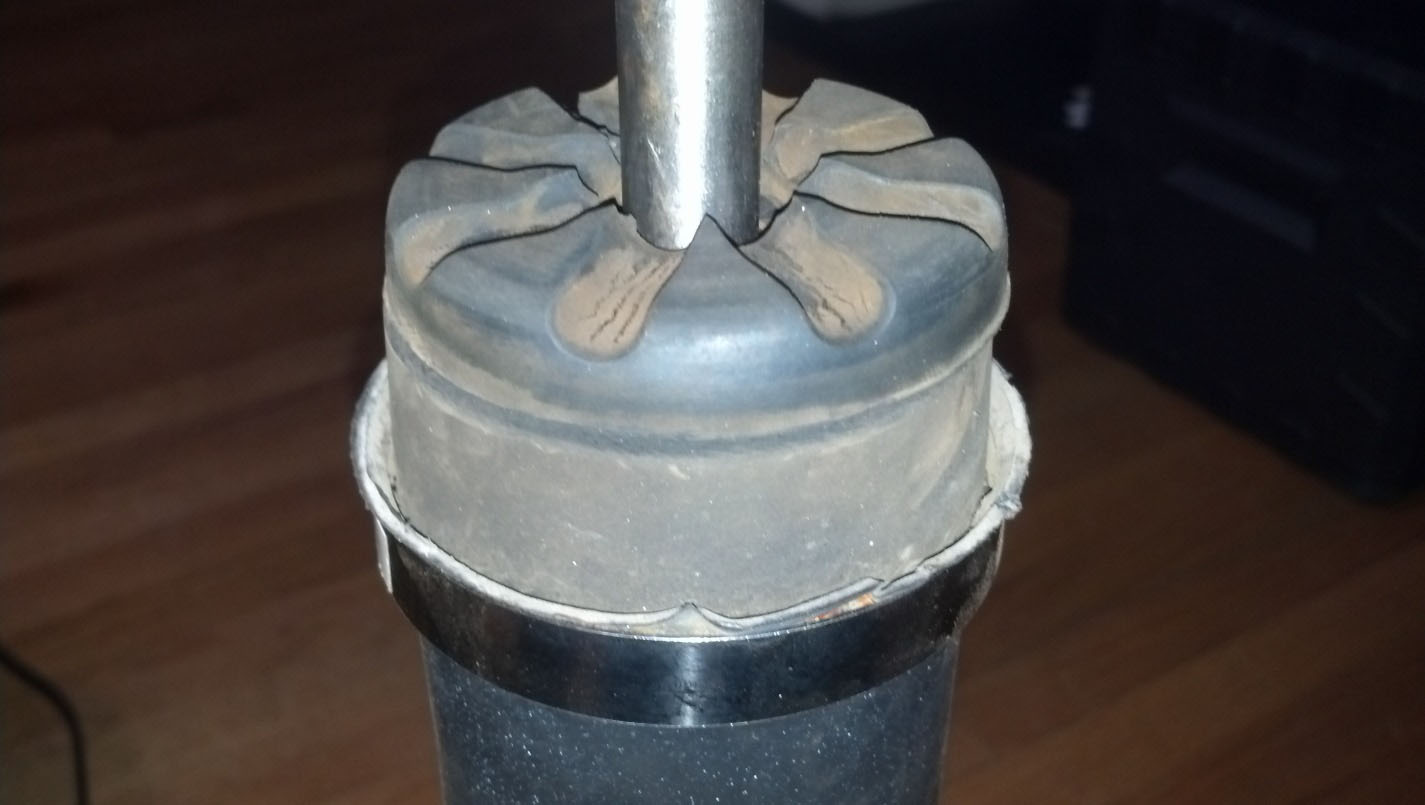
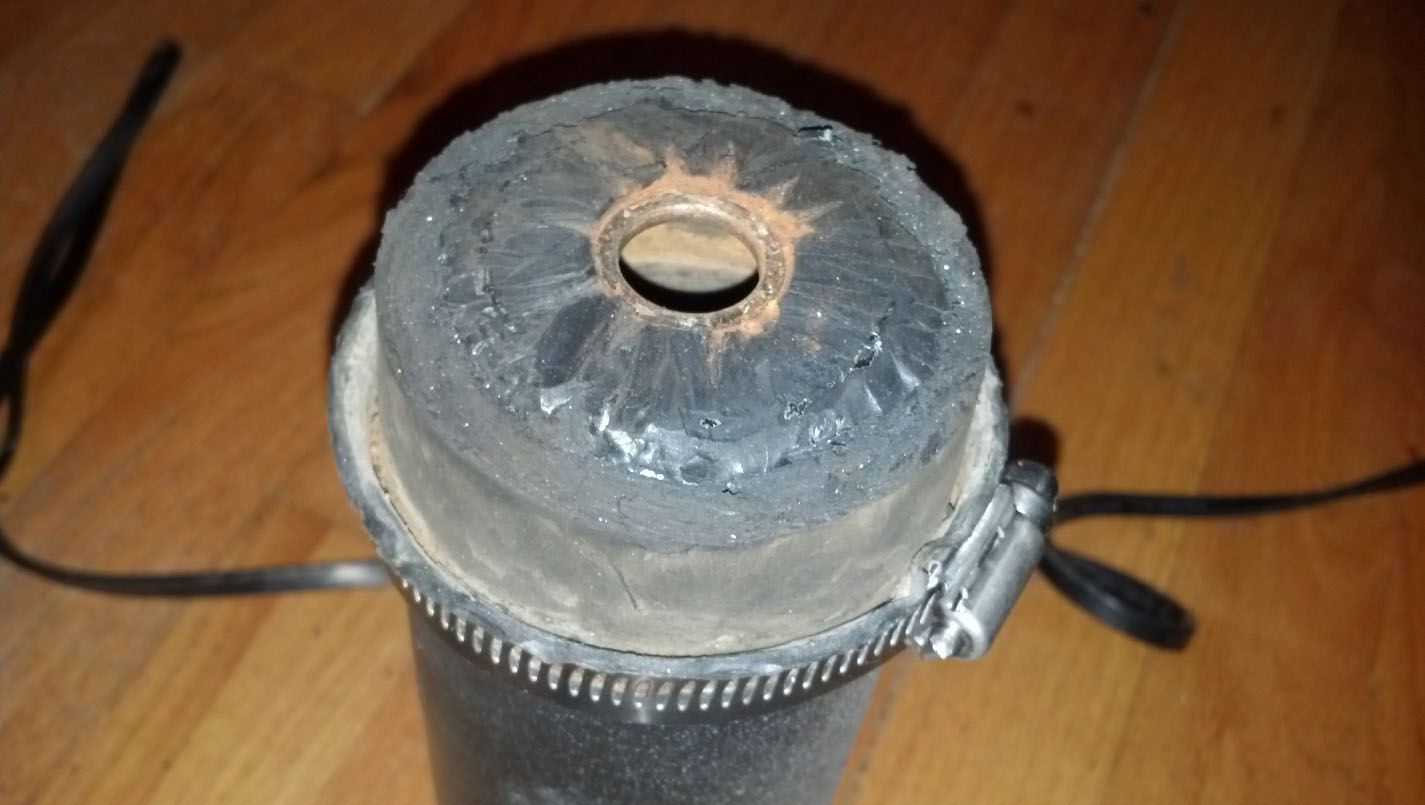
12. Will need to modify the bump stop on the top of the dust cover. This needs to be done so the shaft will be able to get high enough to put the top told on. If you look in the picture below you will see just a little bit down from the top there is a line. That is where the top of the rubber piece stop and the metal part starts. You will want to us a hacksaw or something similar to cut the rubber piece off. It is not straight and does slant up a little bit. After you can us a knife to get any of the rubber off if you didn’t get down to the metal all the way. The second picture is what it should look like when done.
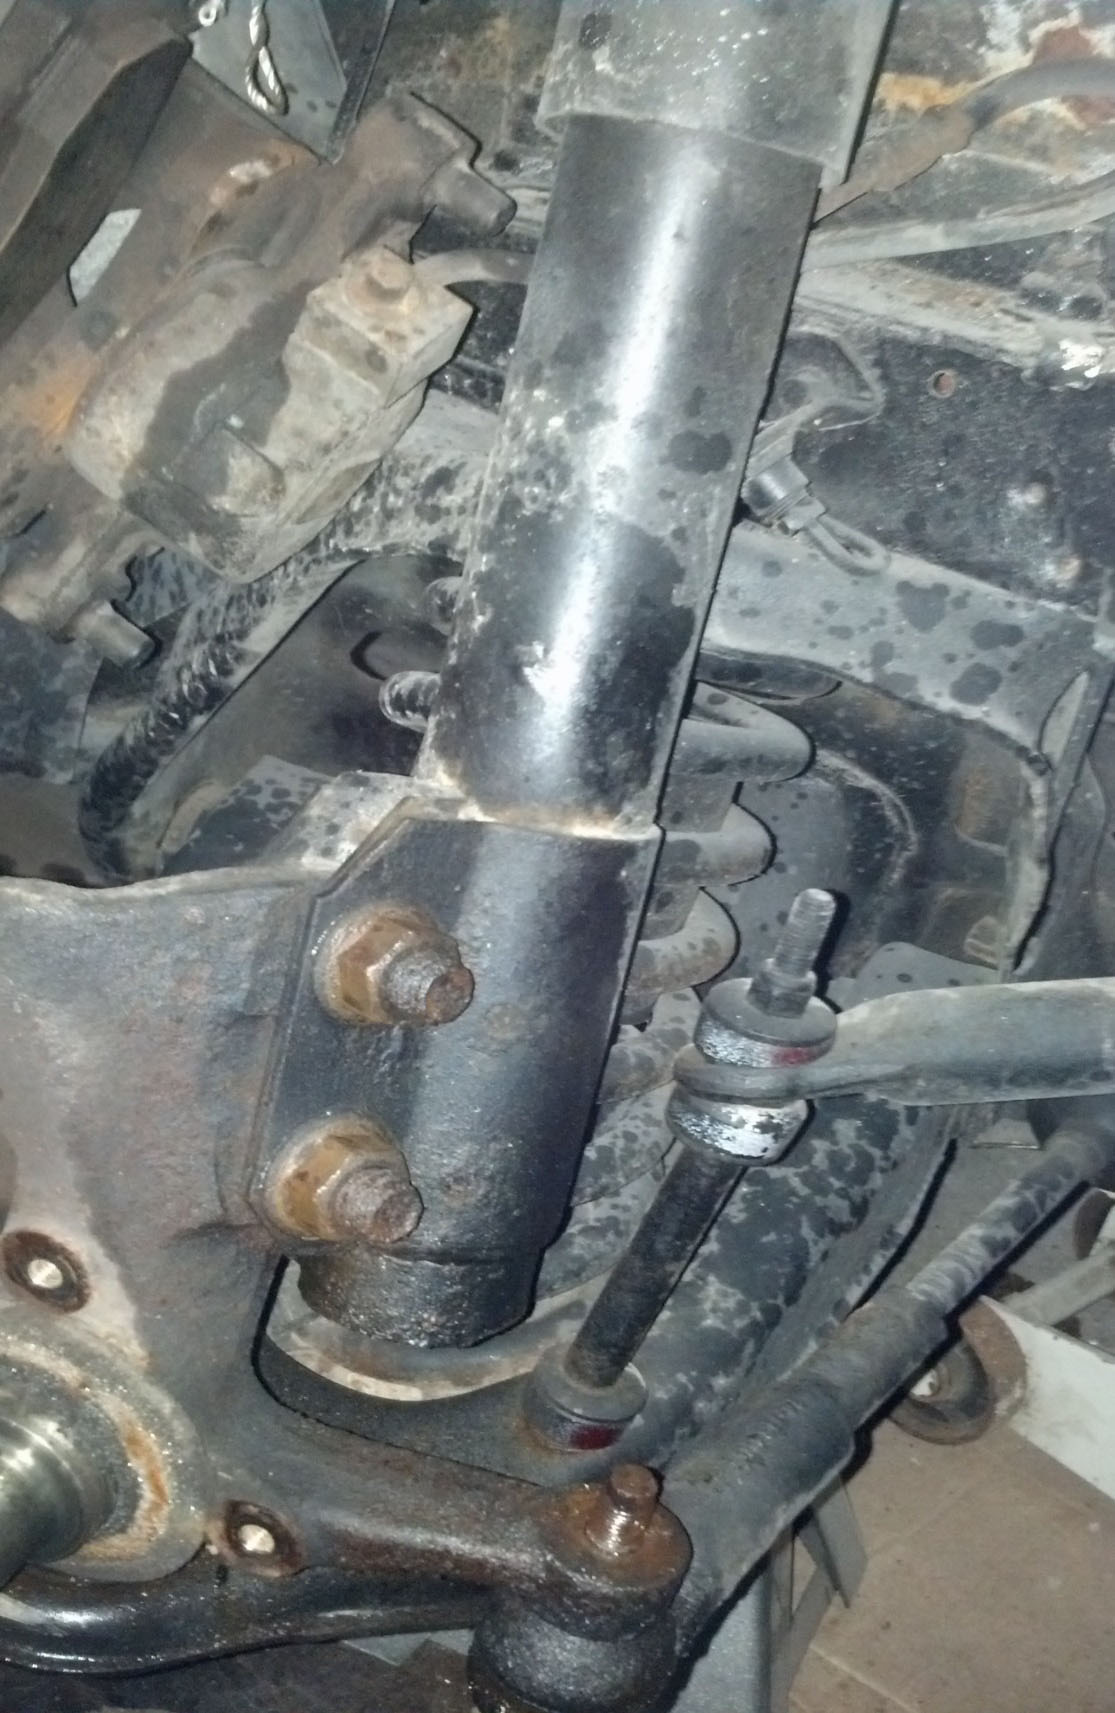
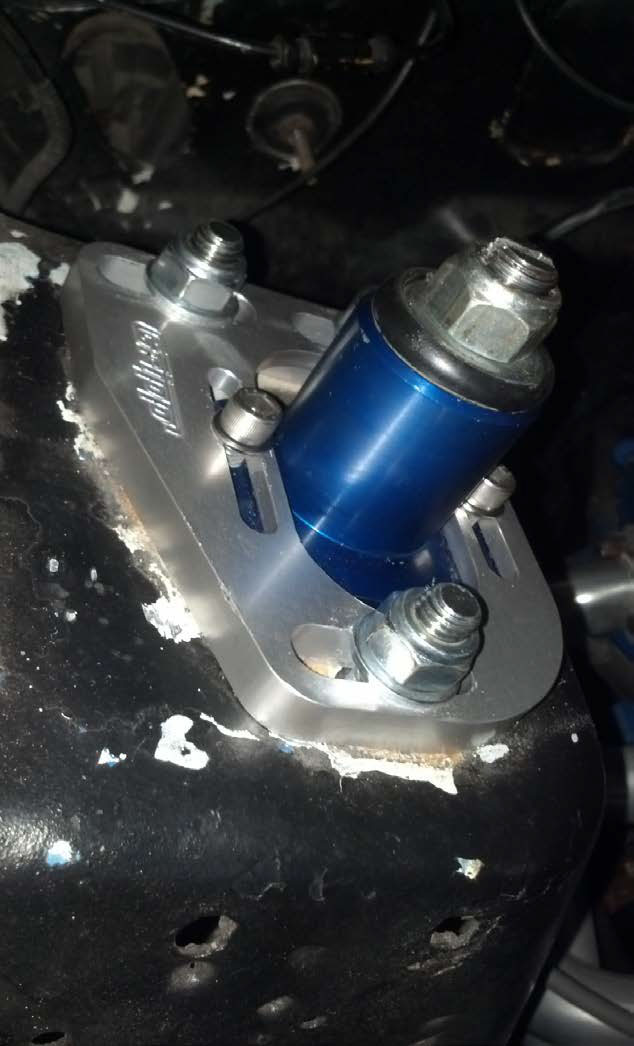
13. Put the dust cover boot with the modified bump stop back on the shock. Slide the shaft up through the new caster/camber plate. The kit does also come with a little spacer for each side. This is supposed to be for later year foxbody’s. I didn’t use it but you might be able to. Check and see if you can use it and still be able to get the top nut on. If not then don’t use it. It goes on the top of the bump stop. You may have to slide it around a little bit so you get a straight shot up in. Once that is done if you had to take the shock off you can rebolt it to the spindle arm and tighten the bolts down with 140 – 200 foot pounds of torque. Take the large washer and slide it over the top of the shaft and then put on the nut you took off at the beginning. Tighten down to 55 – 92 foot pounds of torque with a 15/16 wrench and a vise grip or large screw driver to hold the shock staff from moving. Tighten down the 3 bolts on the new camber plate with a 3/4 socket. It should now look like the picture below. (If you had to take the caliper, rotor and dust shield off put them back on and torque down to specs.)
14. Remove the jack stands and lower the car back down with your floor jack.
15. You are done. You will want to have your alignment check to make sure it is ok. With putting in the new caster/camber plates and since they have more adjustments then the factor ones this is a very good idea to get them dialed in correctly.
Installation Instructions written by AmericanMuscle customer Martin Lecy 03.14.14
