 FREE 1 to 3-Day Delivery on Orders $149+ Details
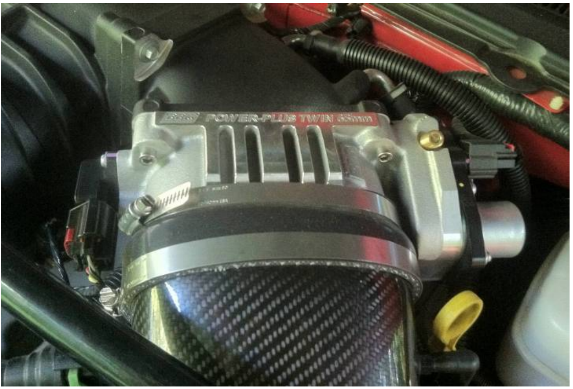
How to Install BBK Twin 65mm Throttle Body (07-12 GT500) on your Ford Mustang
Installation Time
2 hours
Tools Required
- Ratchet and Extension
- 1⁄2” Socket
- Needle-Nosed Pliers
- Large Flathead Screwdriver
- Blue Thread Locker
- 13/32” Socket
- T-20 Torx Bit
- 5mm Allen Wrench
- 5/16” Wrench
- 5/16” Socket

Shop Parts in this Guide
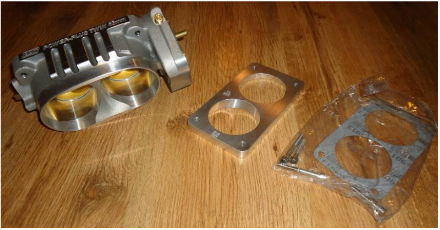
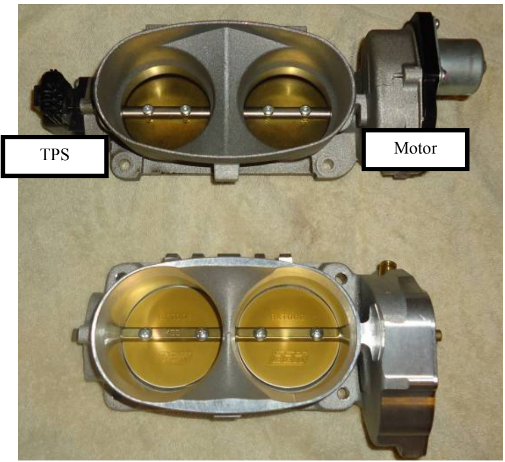
1. Check the contents of the box. You should have:
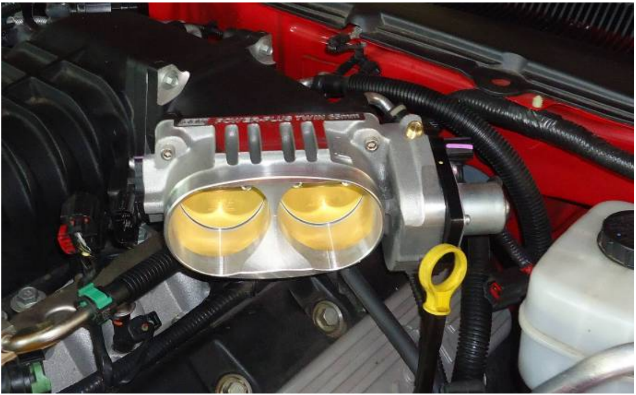
• Dual 65mm Throttle Body
• 4 socket head cap screws (only the 2 short ones will be needed)
• Spacer (not needed, this is for the V-10 truck application
• Gasket (also not needed)
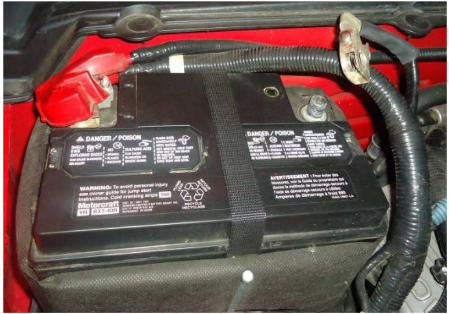
2. Pop the hood and disconnect the negative battery terminal with your 5/16” wrench. **WARNING!** Make sure not to open and shut your doors while the battery is disconnected! Because the auto-down and –up feature of the windows will not work with the power disconnected, you risk damaging your tint, or worse, the windows themselves!
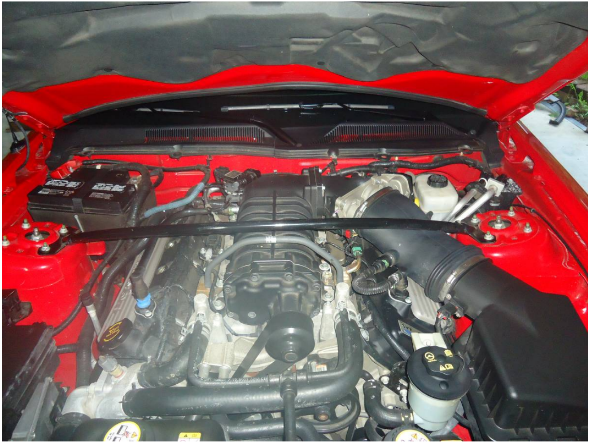
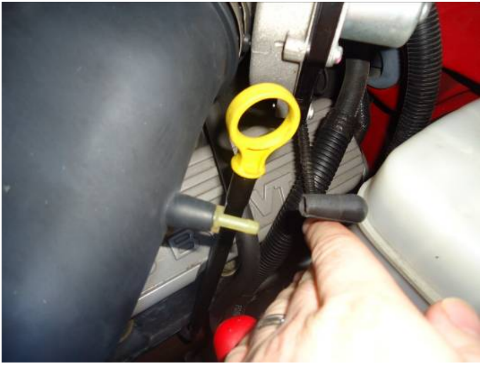
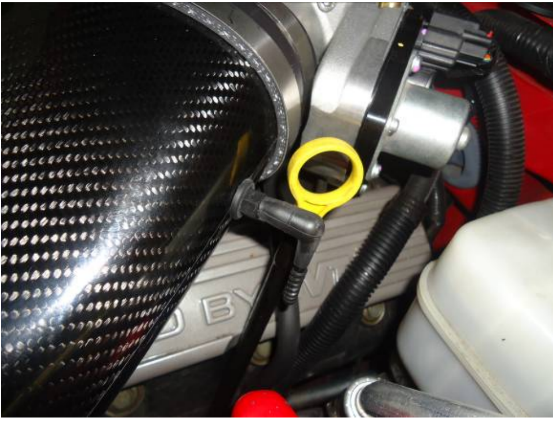
3. Use the 1⁄2” socket to remove your strut tower brace. It will be very tight, so be sure not to strip any of the threads as you pull it off.
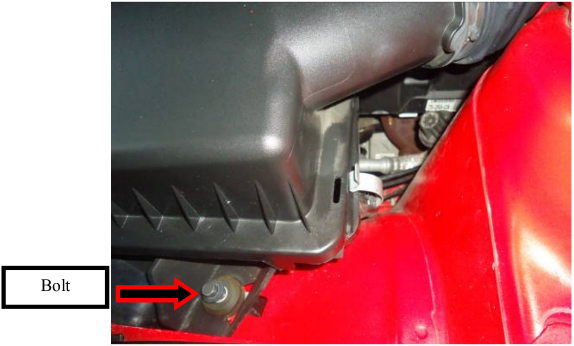
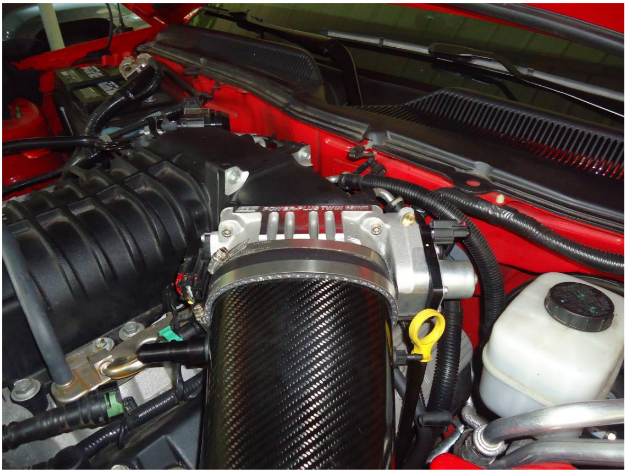
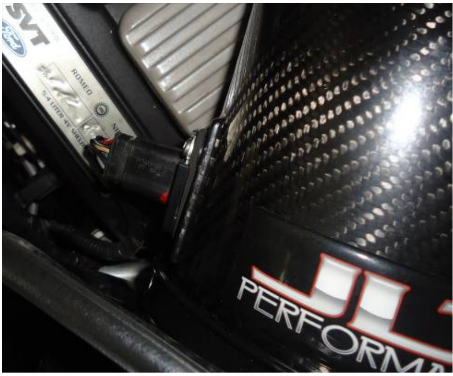
4. If you have an aftermarket CAI, remove it from your fender. If you have the stock airbox, use the 13/32” socket to remove the bolt holding it to your fender. On the MAF Sensor connector, pull out the red tab and remove the connector.
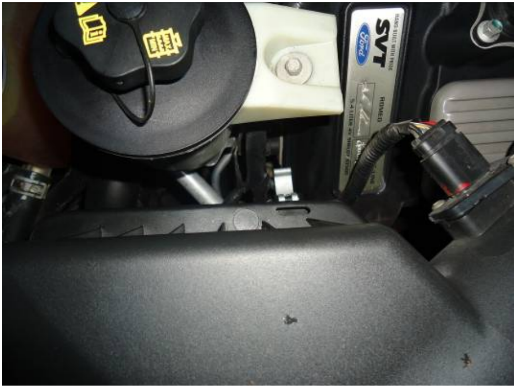
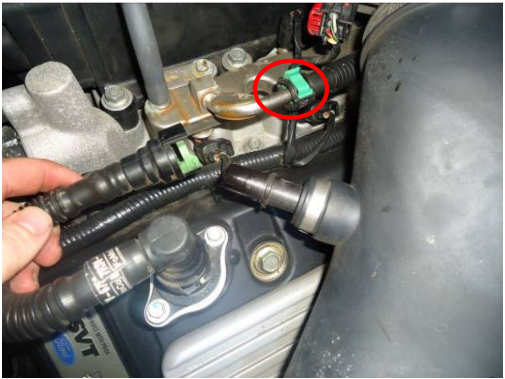
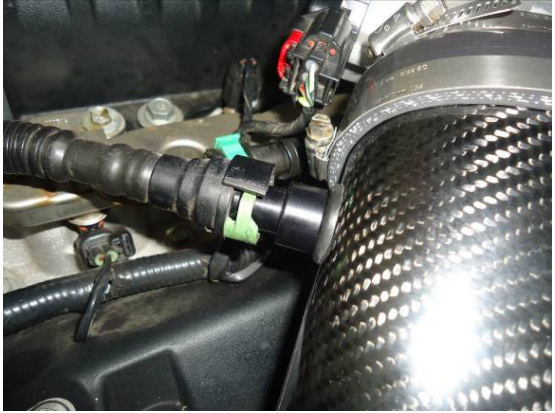
5. Gently twist the green locking tab on the PCV tube going to your inlet tube and remove it. Gently pull the vacuum hose from the inlet tube.
6. Use the large flathead screwdriver to loosen the hose clamp at the throttle body. Remove the airbox (or CAI) and inlet tube from the car using a flat blade screw driver.

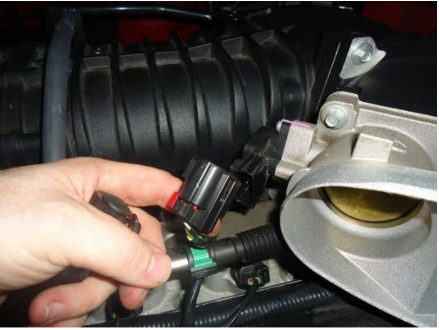
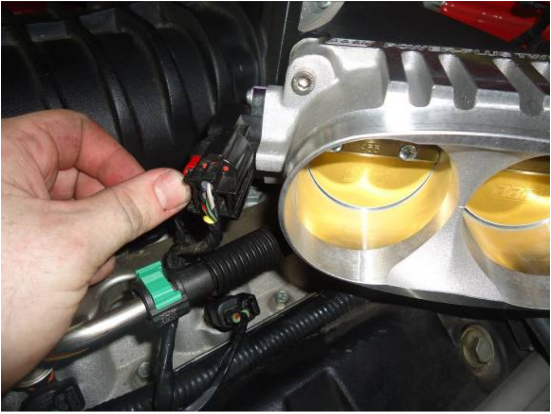
7. On the left connector of the throttle body (TPS), pull the red tab out on. Disconnect from the throttle body. On the right connector (Motor Housing), do the same.
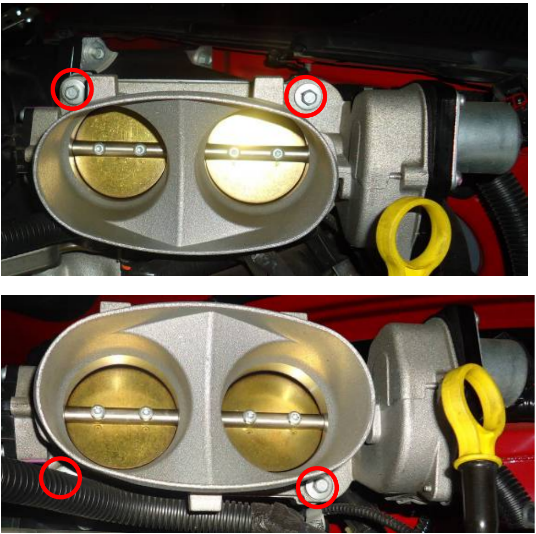
8. Use your 5/16” socket to remove the 4 bolts holding the throttle body to the intake elbow. You’ll need to use the extension on the lower bolts. Be sure to hold the throttle body with one hand before you remove the last bolt so it doesn’t fall.
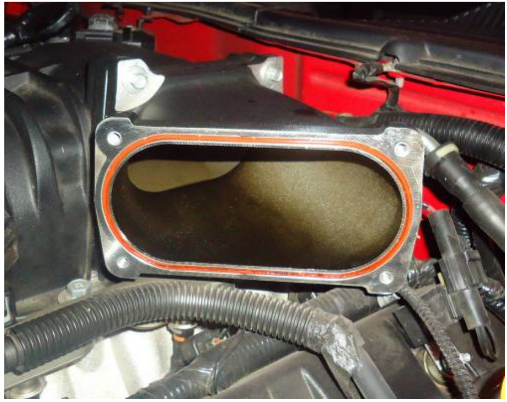
9. Take care not to damage the gasket on the inlet elbow. Gently close your hood to prevent contaminants from getting inside, but be sure not to let it latch completely! The battery is disconnected and you won’t be able to pop the hood open!
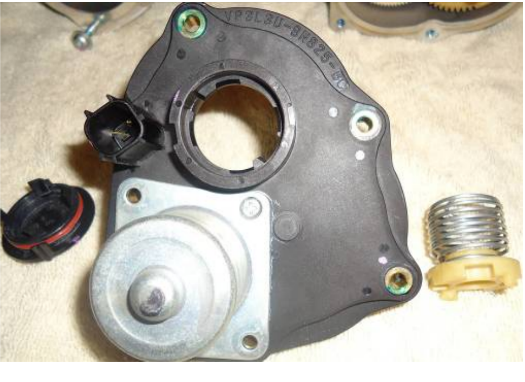
10. Now we need to transfer the TPS and Motor Housing from the old TB to the new one.
11. Use the T-20 Torx bit to remove the TPS from the stock TB. Put some blue thread locker on the bolts and use them to install the TPS on the new TB. Don’t rotate the TPS; install it in exactly the same orientation.
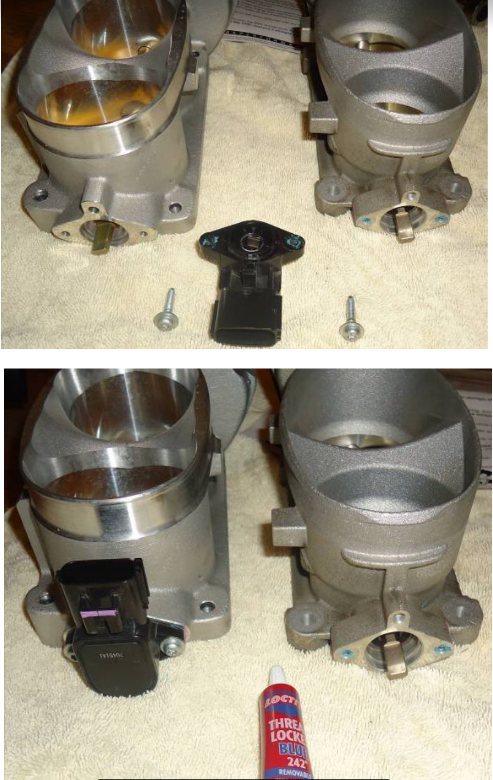
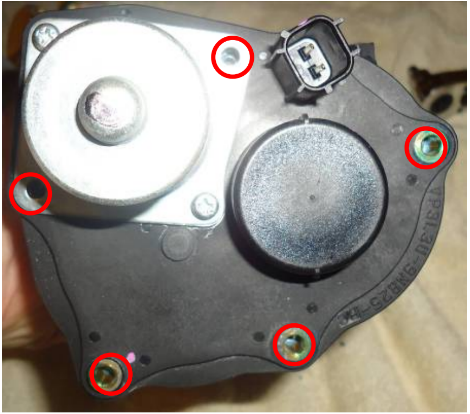
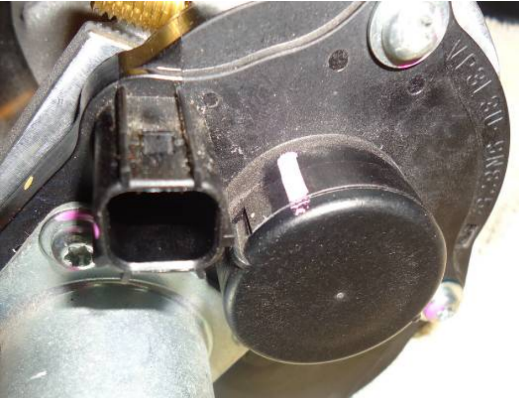
12. Use your T20 Torx bit to remove the bolts holding the motor housing to the old TB. It is not necessary to remove the 2 bolts securing the motor housing; see the picture below.
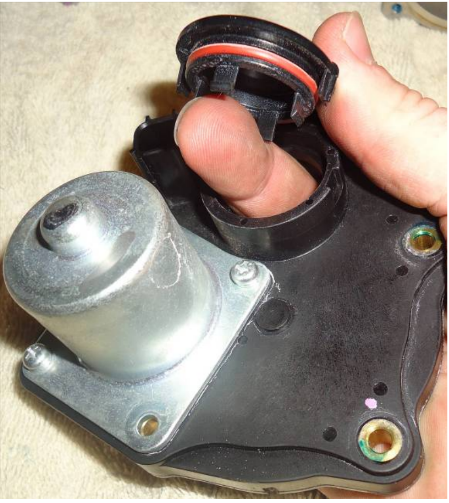
13. Flip the motor housing over. Remove the spring and set it aside. Flip it back over and use your finger to pop off the black cap from the backside.
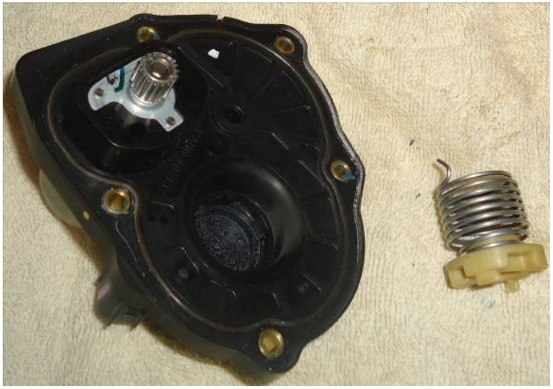
14. Place the spring into the new TB. Insert the tip of the spring into the hole in the top gear.

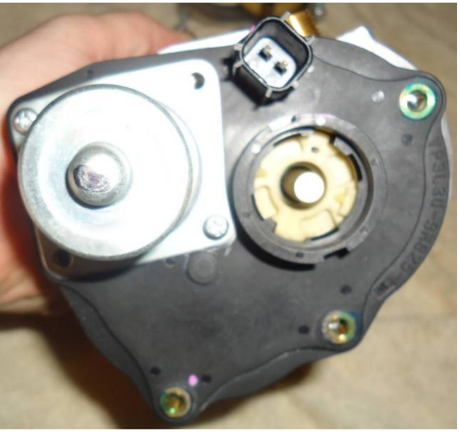
15. Place the motor housing (without the black cap!) onto the TB. Use some blue thread locker and tighten all the screws.
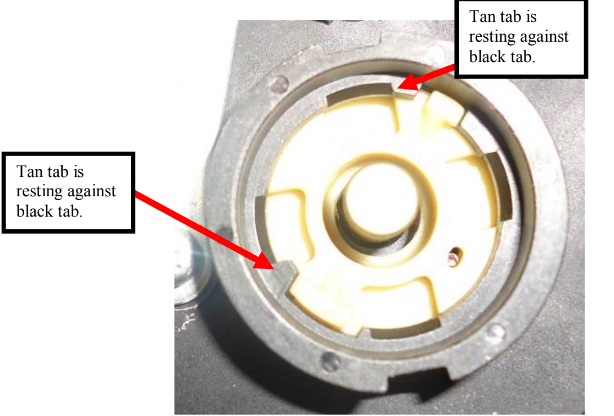
16. Firmly grasp the tan spring cap with your needle-nosed pliers. Rotate it 180⁰ counterclockwise. This will make the indentions line up with the black tabs on the motor housing. Once they line up, pull the tan spring cap up. It should lock into place.
17. Snap the black cap over the spring. It only goes on one way, but there should be a pen mark from the factory showing you how to line it up.
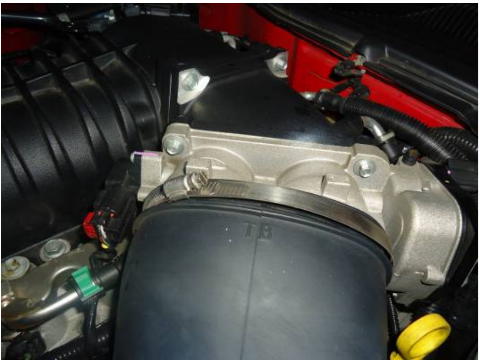
18. Install the new TB onto your intake elbow. Use the 2 shorter bolts that were supplied with the TB on top; use your original bolts on the bottom. The top bolts require a 5mm Allen wrench.
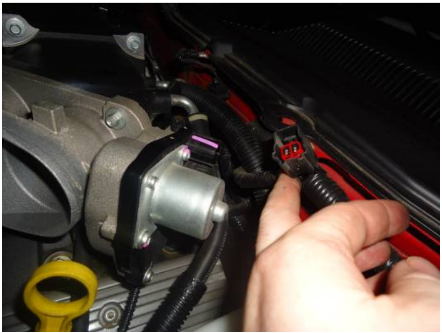
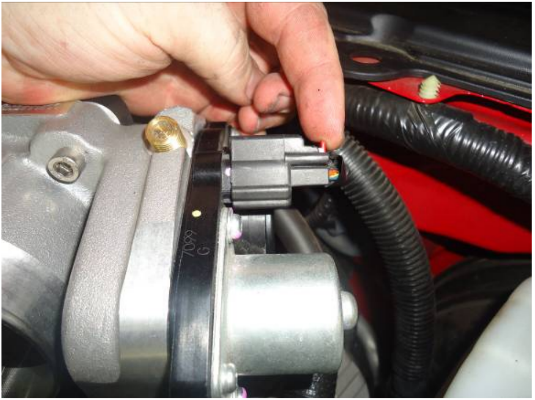
19. Reinstall the two connectors to the TB. Press in the red tabs to lock them in place.
20. Now is a great time to install a new CAI. Whether you’re installing a new CAI or the OEM assembly, reattach the inlet tube to the TB with your hose clamp.
21. Attach the MAF connector to the inlet tube and press in the red tab to lock it in place. If you installed an aftermarket CAI, you will need to transfer the MAF Sensor from your OEM tube to your new tube.
22. Slide the PCV tube onto your inlet tube. The green locking connector will snap into place. Slide the vacuum hose on and make sure it is secure.
23. Reinstall your strut tower brace. Reconnect the negative battery terminal. Congratulations!
Installation instructions provided by AmericanMuscle customer Brian Becker 8.9.12

