 FREE 1 to 3-Day Delivery on Orders $149+ Details
BBK Ceramic Long Tube Headers ('05-'10 GT) - Installation Instructions
Installation Time
1 days
Tools Required
- Floor Jack or Ramps
- Jack Stands (unless you used a ramp)
- 5mm, 8mm, 10mm, 12mm, 22mm sockets/open end wrenches/ratchet wrenches
- 13mm & 15mm deep sockets
- Flat head screwdriver
- Socket wrench extender
- O2 Sensor extenders (included with headers and shorty mid pipes)
- Dremel™ with grinder bit (see Step 12)

Shop Parts in this Guide
Installation
Removal of stock manifold & Install of BBK LTHs:
1. With your mustang on a flat surface, ideally a garage floor, slowly jack up the front your mustang and brace with jack stands. If you chose a ramp, align the ramp to your tires and slowly drive up.
2. Disconnect your negative battery terminal. Safety is always a concern.
3. Now that your mustang is lifted, find the best angle of approach and disconnect all (4) O2 sensors and remove the single bolt that holds the dipstick tube in place; remove dipstick.
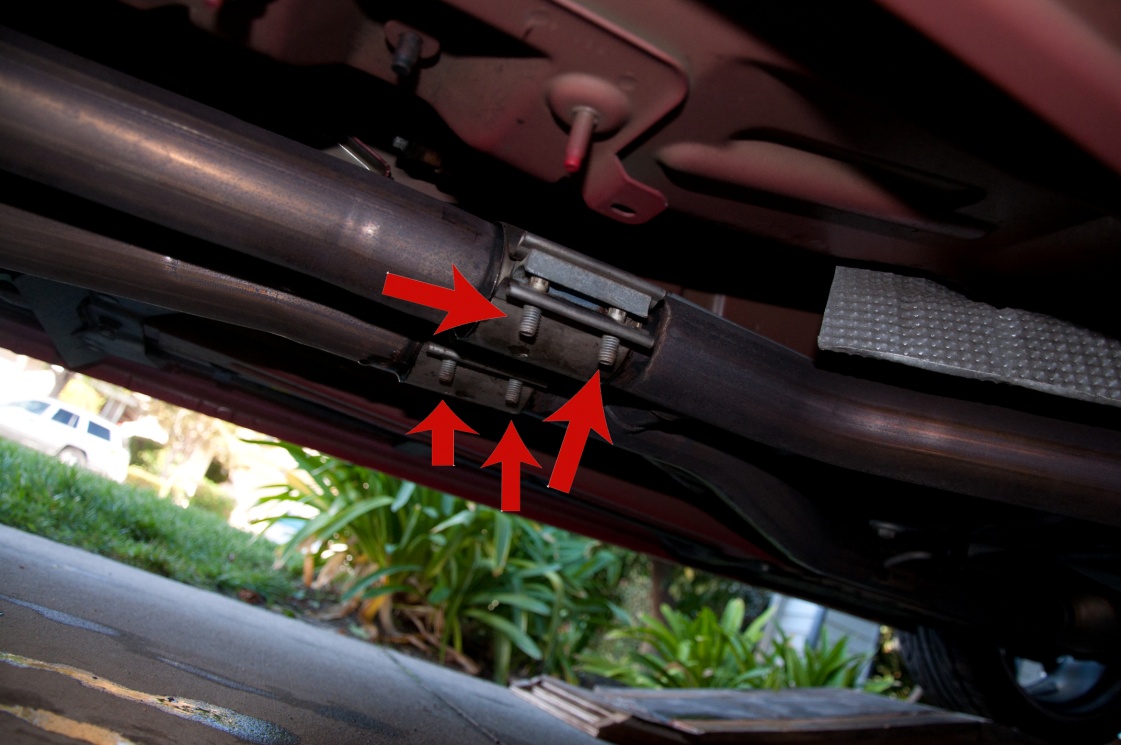
4. Now loosen and remove the (4) nuts on the (2) band clamps that attach the stock mid pipe to the cat-back portion of your exhaust. Pry the locking tabs up with a flat head screwdriver and slide the clamps back towards the rear of the car. See image below for reference.
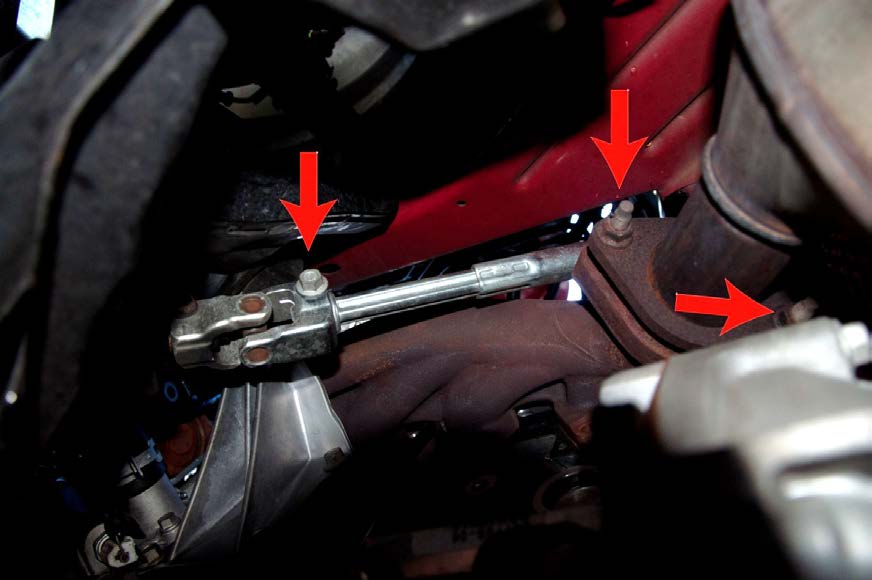
5. Removing the H-pipe. The H-pipe is connected to the (2) headers just above the factory catalytic converters. These (4) bolts can be tricky to reach. Using the tools provided, proceed to unscrew and remove the bolts. WD-40 may be needed to help aid in this process. NOTE: The top bolt on the passenger side may be very difficult to reach, to get around this, you may need to remove the battery and battery holder and try through the engine bay. A ratchet wrench will save you big here.
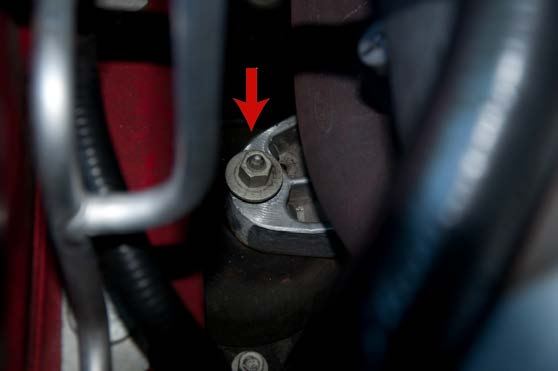
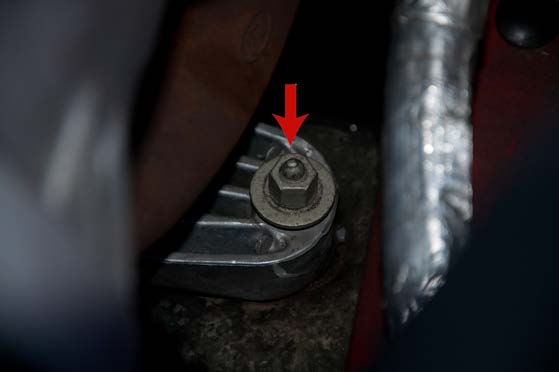
6. Remove the steering shaft by removing the bolts at the top and bottom of the shaft. Images below show the bolts for removing the H-pipe and steering shaft.

7. Now that you have removed the H-pipe and steering shaft, it is now time to lift your engine to gain better access to the bolts on the starter and stock headers. Lifting the engine also makes the long tube header install easier as space is limited. Unbolt the (2) motor mounts (shown below) and use your jack to SLOWLY raise the engine. If you have a strut tower brace, remove it. Also, you may want to separate your intake from the throttle body as a precaution.
8. Raising the engine. I found that the ideal location to lift the engine is by placing a block of wood towards the front of the engine block near the flywheel and slowly lifting the engine to the point at which the mount just clears the bolt it was bolted to.
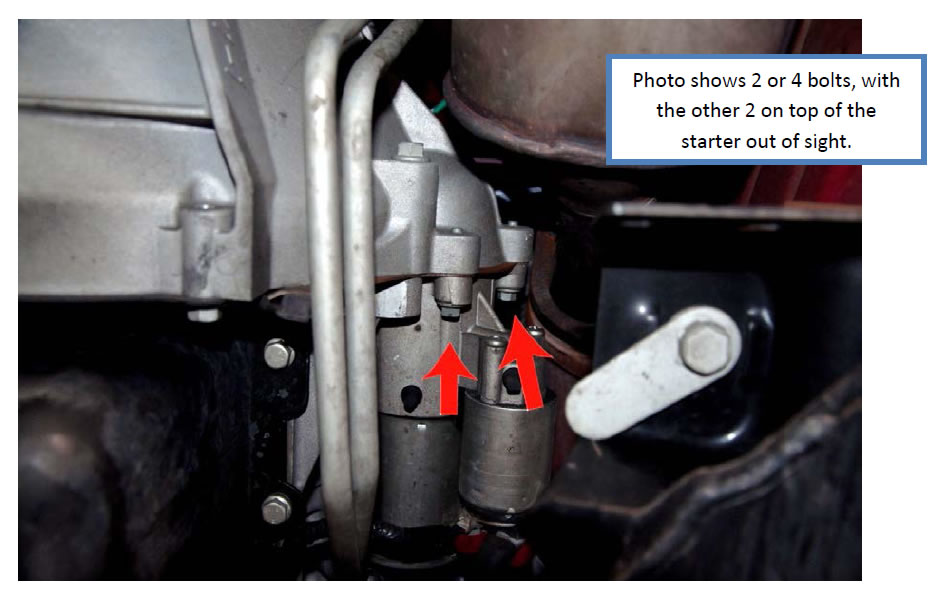
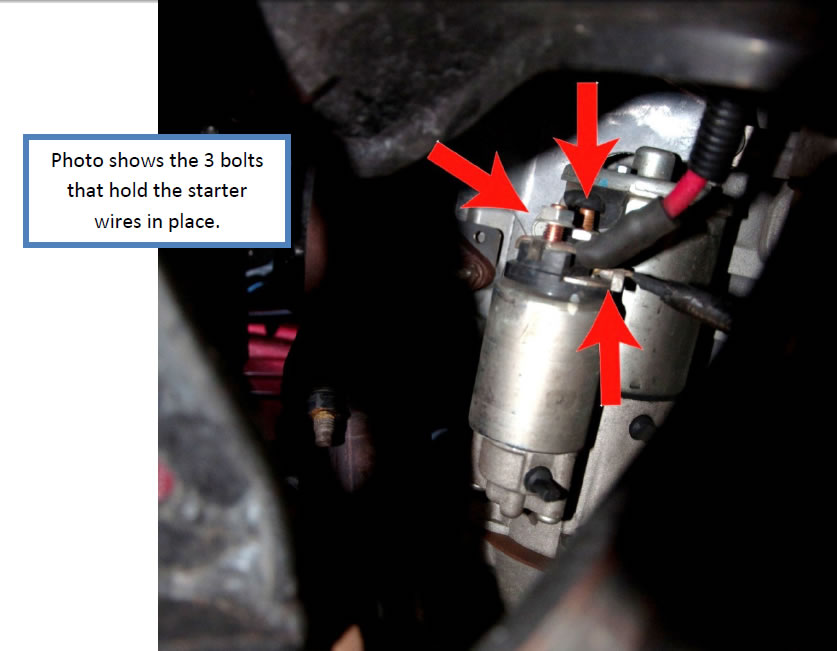
9. Now that the engine is raised, proceed to remove the starter. There are (4) bolts that hold the starter in. The bolts are shown in the below pictures.

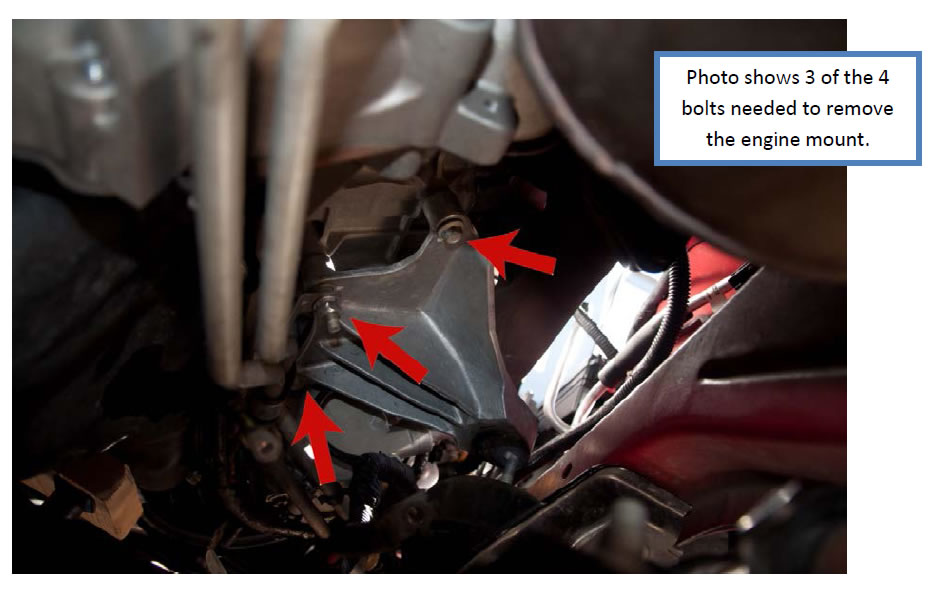
10. Next, remove the passenger side engine mount. There are (4) bolts that secure the mount to the engine. NOTE: The driver side mount may need to be removed. I did not need to remove the driver side mount as I found enough clearance to unbolt the driver side header.
11. Now that the engine mount(s) have been removed, you can remove the old factory header with much ease. Using a 5mm socket will help facilitate this process. There are (8) bolts per header: (4) on top, (4) on bottom.
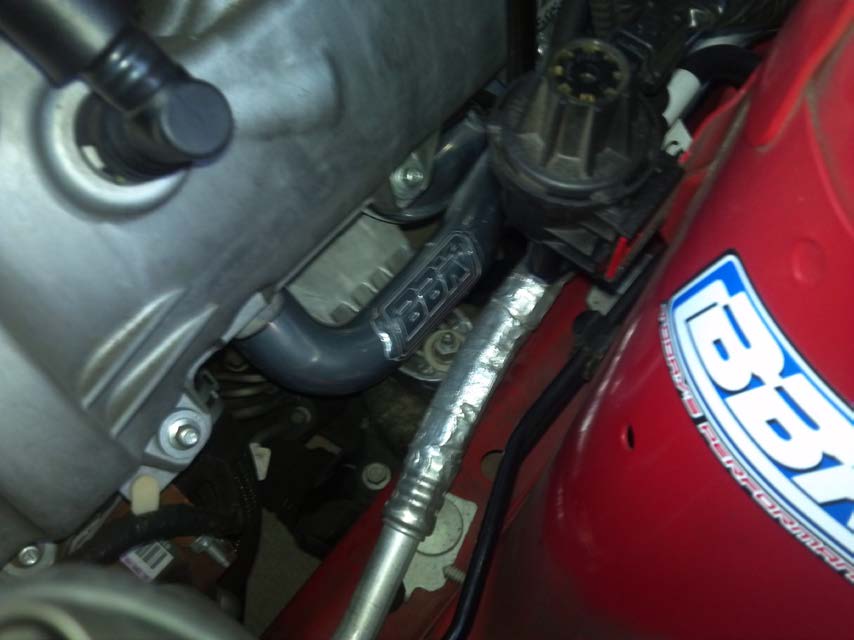
12. After you have removed the stock headers, it’s time to put in those gorgeous new BBK’s. Install is simple; start by installing the supplied gasket. Then, have a friend hold the header in place as you finger tighten some of the bolts.
*NOTE:As you screw in and tighten the bolts, you may find that on the PASSENGER side header, one of the top bolts will not screw in as the headers tubing is in the way. I ran into this issue, I don’t know if others have as well, but I’m being sure to include a simple fix:
- Use one of the factory 5mm bolts in place of the BBK bolts.
- Screw in the factory bolt into the engine block and grab your Dremel™
- While wearing safety glasses, grind down ½ to ¾ of an inch of the threaded end of the bolt.
- Leave enough room to securely fasten the stock nut to the header.
- Be sure not to cross thread the nut.
- Be sure not to grind too much – but if you do, you have 15 more bolts to try again.
13. After you have tightened down all of the bolts, simply reinstall in the order that you uninstalled:
- Reinstall motor mounts
- Reinstall starter
- Lower engine and tighten nuts
- Reinstall air intake to throttle body (and strut brace if applicable)
- Reinstall steering shaft
14. Now that you have your mustang almost back together, use a wrench to remove all (4) O2 sensors and install them on your BBK headers and your matching BBK shorty mid-pipe (I purchased the BBK catted shorty x-pipe). After you have installed the sensors, use a grinder or wire cutters to remove the plastic tabs that prevent the stock O2 sensors from locking into the O2 sensor extenders. Install the (2) O2 sensors and their extenders and connect them and re-install your dipstick tube. Now you are done with the header portion of this install.
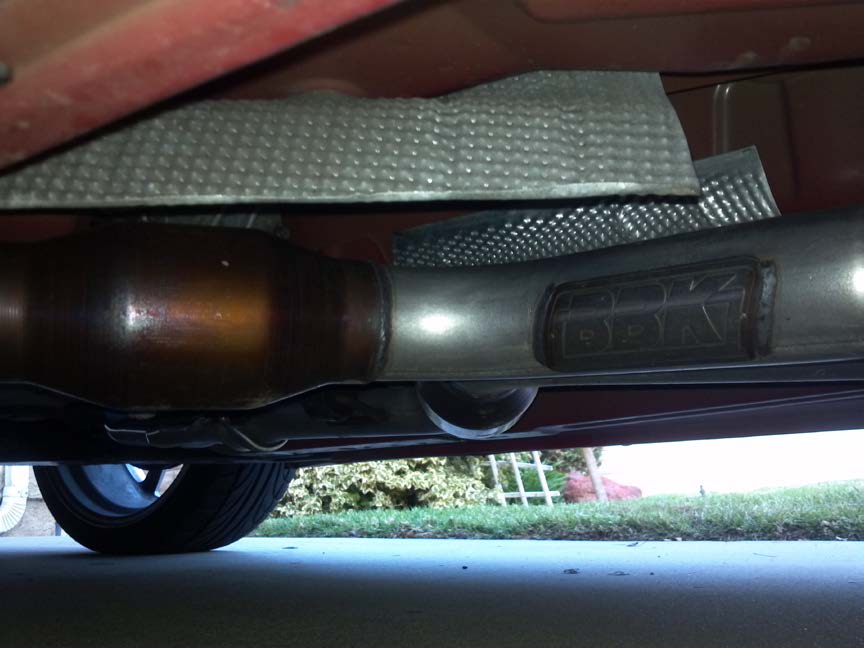
15. Installing the shorty mid pipes are as simple as uninstalling the stock ones.
- Mate the cat-back with the mid pipe and tighten the band clamps you uninstalled earlier.
- Using the supplied washers, nuts and bolts, finger-tighten the x-pipe to the header and tighten with a wrench.
- Connect the stock O2 sensors and the extenders and plug into your vehicle.
16. Reconnect your battery and anything else you may have disconnected in the process and fire up that Mustang and hear her purr. It is highly recommended you tune your vehicle to get the maximum performance out of your new headers and x-pipe. Drive the car for a day or two and check for lose bolts. If you get a check engine light, it may go off on its own since you have to break in the high flow cats. If you purchased an off-road X-pipe, you can clear the check engine light with a tune.
Installation Instructions written by AmericanMuscle customer Dalton Spiekermann 11.23.11
