FREE 1 to 3-Day Delivery on Orders $149+ Details
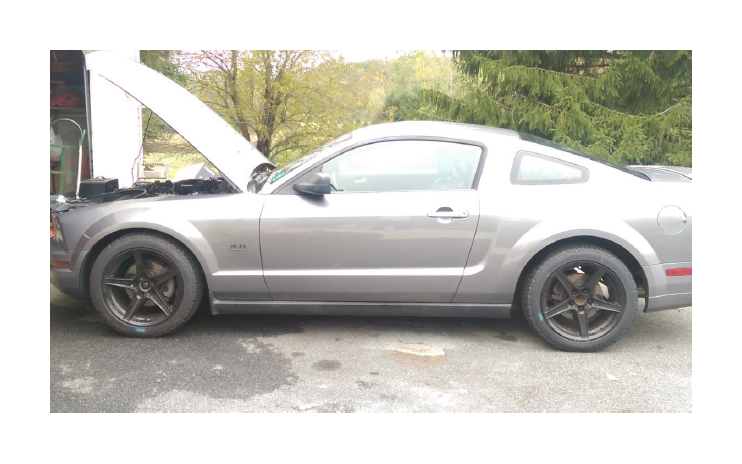
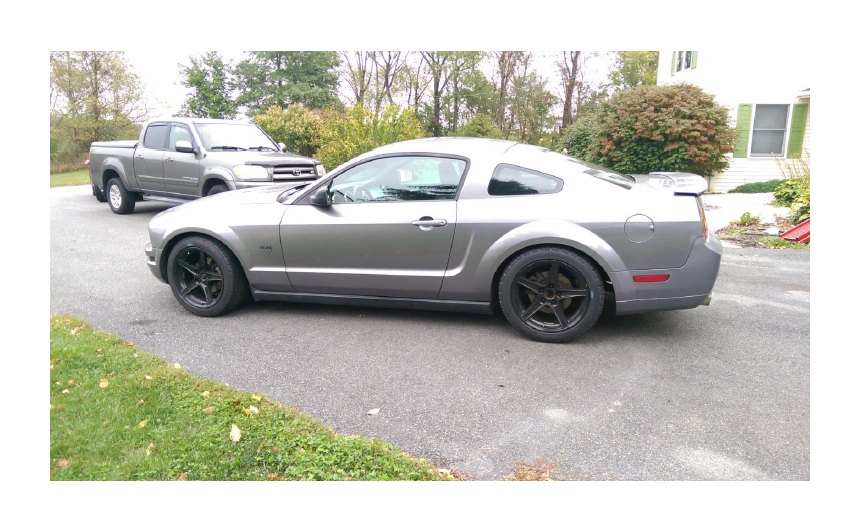
How to Install PA Performance Alternator - 130 Amp on your Mustang
Installation Time
2 hours
Tools Required
- Floor Jack and Jack Stands
- 3/8 Socket Driver (I personally used an 20 volt impact gun as it makes life a lot easier)
- Breaker bar (some bolts/nuts may require this to loosen)
- Torque wrench that goes up to 100 ft/lbs
- Sockets
- 8 mm
- 10 mm
- 13mm
- 15 mm
- 18 mm
- 21 mm
- 22 mm
- 5 mm Allen Key
- 15mm Wrench
- 17 mm Wrench
- 18 mm Wrench
- Spring Compressors
Steps for replacing struts and front lowering springs
Step 1 Loosen lug nuts on wheels.
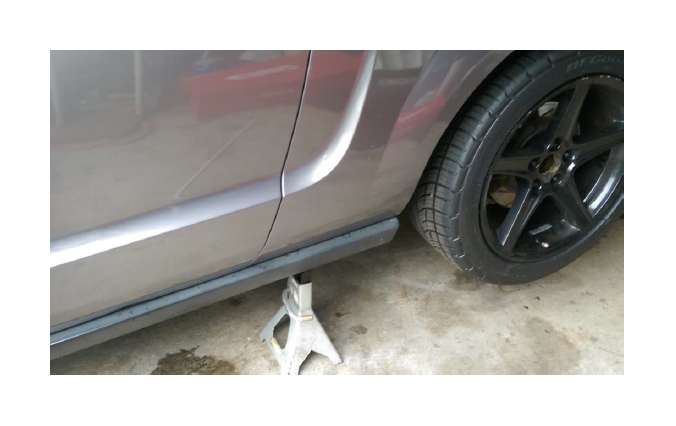
Step 2 Jack up front end of vehicle from center cross brace and place jack stands for safety.
Step 3 Remove wheels from vehicle.
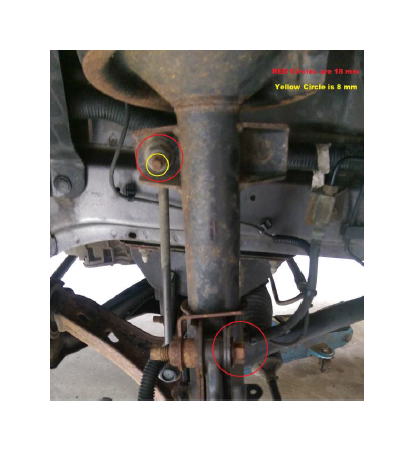
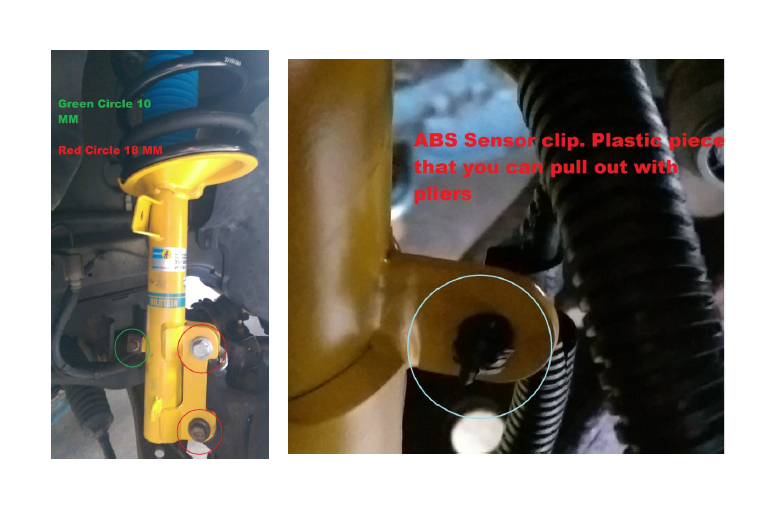
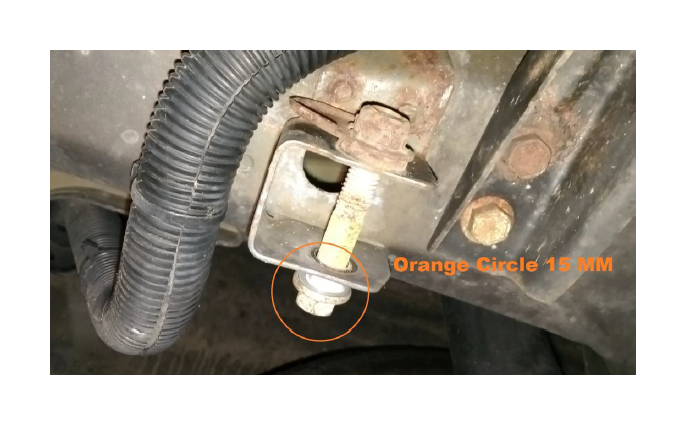
Step 4 Remove sway bar support by using 18mm wrench and 8mm socket. (See Below)
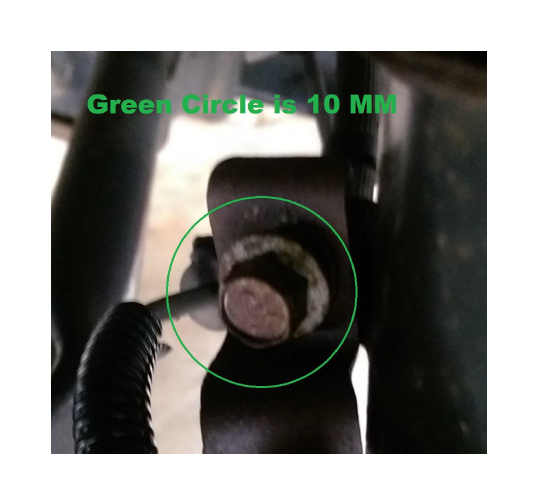
Step 5 Remove brake line from strut using 10mm socket. (See Below)
Step 6 Remove ABS sensor clip.
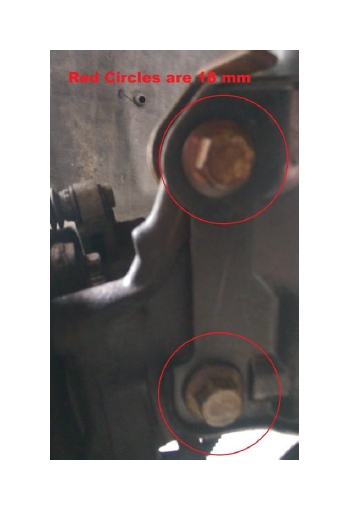
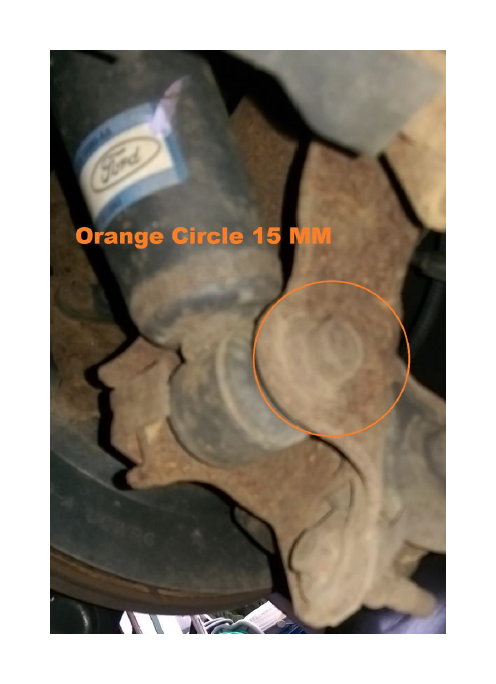
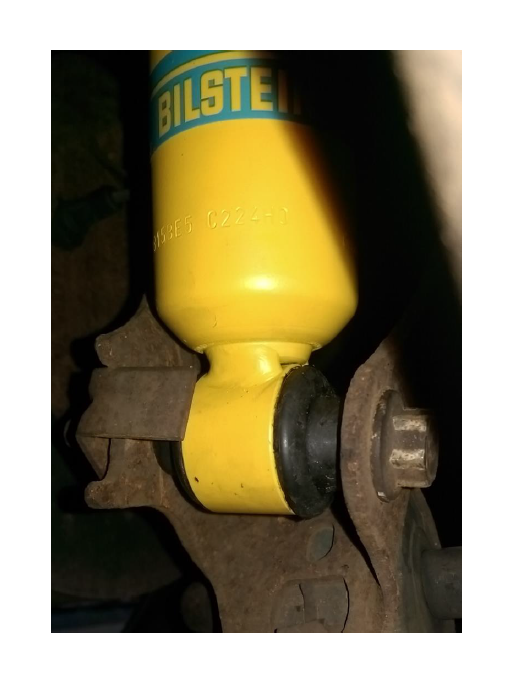
Step 7 Using 18mm socket remove knuckle from the strut making sure that there is no downward pressure against knuckle remove both bolts and let knuckle hang freely. (See Below)
Step 8 Open hood.
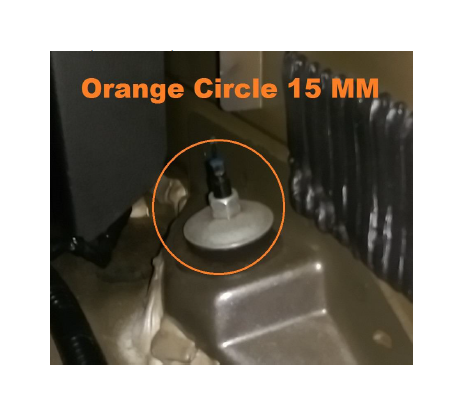
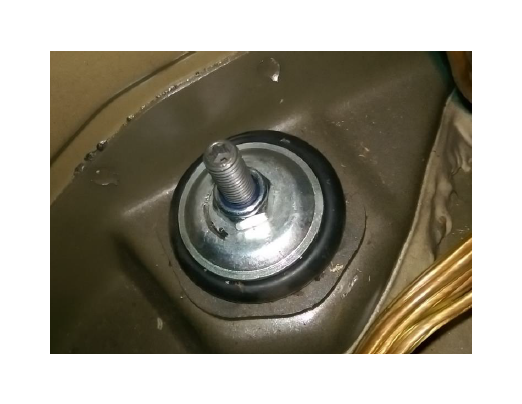
Step 9 Using 13 mm deep sockets remove nuts supporting strut from strut tower and pull strut down to remove. (See Below)

Step 10 Using spring compressor collapse spring. (Size of bolt varies depending on manufacturer of compressor)
Step 11 With spring moving freely use 21 mm socket to loosen and remove top plate from old strut.
Step 12 Slide spring off strut and gently remove compressor from spring.
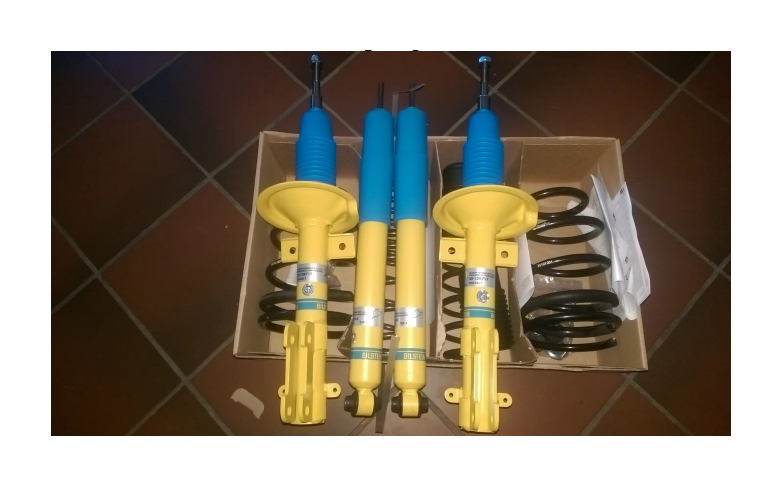
Step 13 Align new Eibach spring and Bilstein strut so that the spring is seated in strut groove.
Step 14 Take top plate and slide over shaft and line top up with spring.
Step 15 Using 22 mm socket torque bolt down to 59 ft lbs.
Step 16 Install new strut/spring assembly making sure that the arrow and indent in top plate are pointing towards the outside of the vehicle.
Step 17 Reconnect knuckle to the strut using 18 mm socket. (See Below)
Step 18 Reconnect sway bar support to strut using 18 mm socket. (See Below)
Step 19 Reconnect ABS clip to strut. (See Below)
Step 20 Reconnect brake line to strut using 10 mm socket. (See above)
Step 21 Put wheel back on and tighten bolts.
Redo steps 4-21 to other side
Lower vehicle and make sure that strut tower nuts are still tightened
Steps for replacing shocks and rear lowering springs
Step 1 Open Trunk.
Step 2 Remove carpeting from floor and pull back carpeting from the sides to reveal the shock tops located at the back of the trunk. (See Below)
Step 3 Go inside car and pull down seats for better access to bolts.
Step 4 Using a 15 mm wrench and a set of vice grips to hold the spindle. Loosen and remove bolts from shocks.
Step 5 Jack car up from axle and put jack stands in designated area in front of rear tires. (Please note make sure that jack has at least 3 inches of extra lift as when raising jack after job is done the axle will require more movement to raise the body off of stands) (See Below)
Step 6 Using 15mm socket remove upper bolts to sway bar and let sway bar hang to gain access to shock lower bolts. (See Below)
Step 7 Use 15 mm socket to remove shock bolts. Shocks will expand after bolt is removed. (See Below)
Step 8 Remove shocks on both sides.
Step 9 Carefully lower the axle slowly to release tension in the springs. Springs will loosen and you can remove both. (You may need to pull down on the corresponding wheel to gain a bit of extra room)
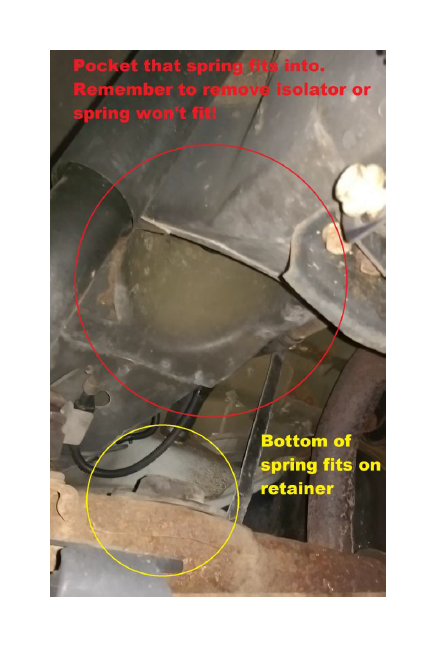
Step 10 Reach into pockets that the springs were removed from and remove factory isolator.
Step 11 Taking new Eibach springs locate labeling and make sure that it is facing right side up and legible to read.
Step 12 Place isolator on top of spring and raise spring into pocket making sure that the bottom of the spring is placed securely on the axle retainer.
Step 13 Raise axle with jack so that there is a slight amount of compression on the spring holding it in place.
Step 14 Grab shock and place on spindle in this order: washer (with concave section facing up) and a rubber bushing (with the nub facing up).
Step 15 Put shock spindle in hole that old shock came out of. (Please note that you may need someone’s help to hold shocks as the remaining bushings (nub facing down) and the remaining washers (concave facing down) are slid onto spindles from the trunk and the 17 mm nuts are started.
Step 16 Under the car reinstall 15 mm bolts through lower mounts of shocks. (See Below)
Step 17 Reinstall and tighten sway bar 15 mm bolts.
Step 18 Raise axle so that body is lifted off of jack stands then slowly lower the car until full weight is on tires.
Step 19 From inside car access shock spindles and while using a 5 mm Allen key and a 17 mm wrench tighten bolts. Please note that bushings will compress but you do not want the washer to cut through bushings. (See Below)
Step 20 Return carpet to position that it was in before, raise seats, and close trunk.
Job Done!
Please note that after job is complete it is HIGHLY recommended that a PROFESSIONAL do a proper wheel alignment.