 FREE 1 to 3-Day Delivery on Orders $149+ Details
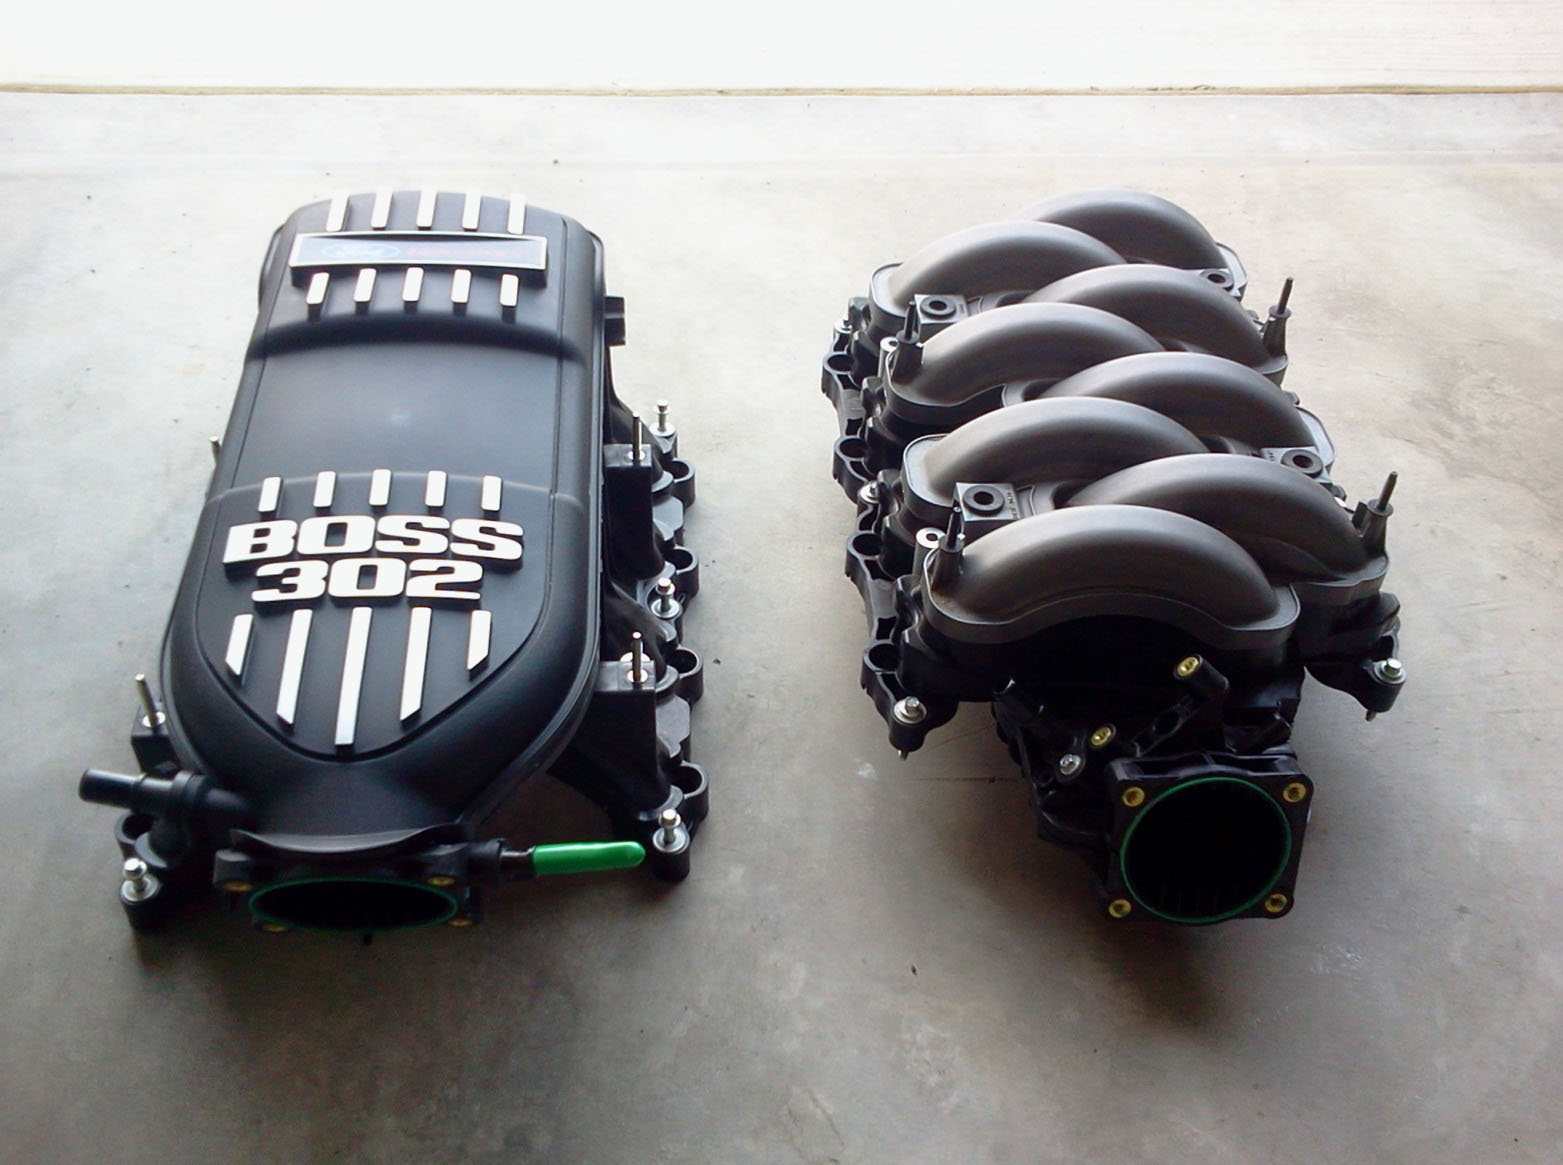
How To Install a Boss 302 Intake Manifold on your 2011-2013 Mustang GT
Installation Time
2 hours
Tools Required
- 8mm/9mm/10mm/13mm socket
- 3/8” and/or ¼” drive extension (depending on tools you use)
- Ratchet
- Torque wrench Capable of 89 inch-pounds
- 2 sets of Pliers
- 3/8” Fuel and Disconnect Tool
- SCT Tuner w/ Custom Tune
- Approximately 2 feet of 3/8” Fuel/Emissions Hose
- Hose Clamps to fit

Shop Parts in this Guide
Please Note:
This installation guide only covers install of the Boss 302 Intake Manifold with an aftermarket Cold Air Intake. If you are planning on installing this Intake Manifold with a stock air box, you require the Ford Racing BOSS 302 Intake Manifold Install Kit (11-13 GT) Part# M-9444-M50B
Removal Procedure:
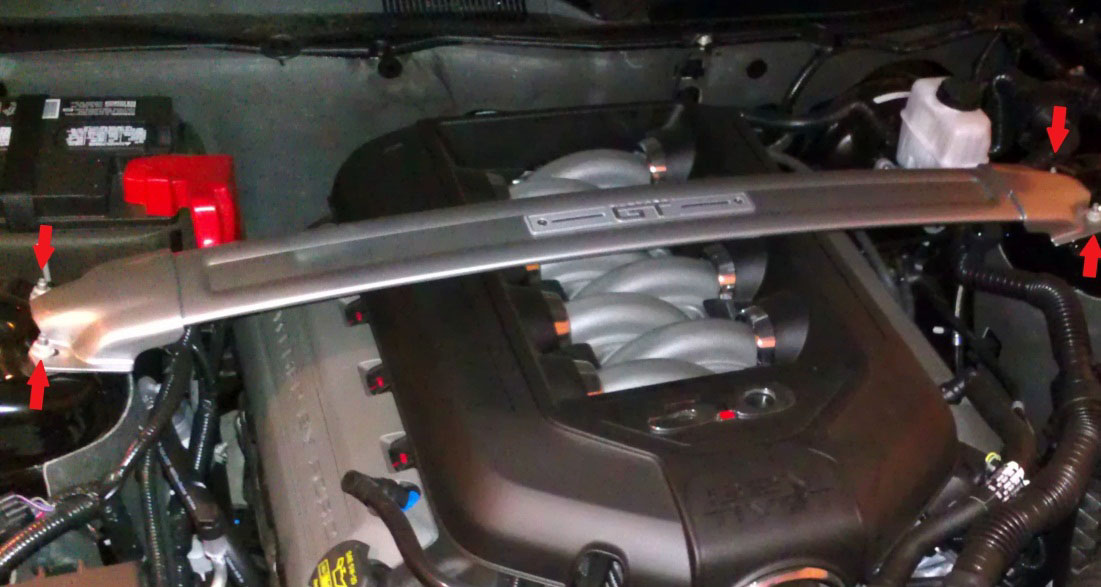
1. Remove the 4 nuts from the Strut Tower Brace with 13mm socket and remove. Note: The stock Strut Tower Brace will not fit over the Boss 302 Intake Manifold.
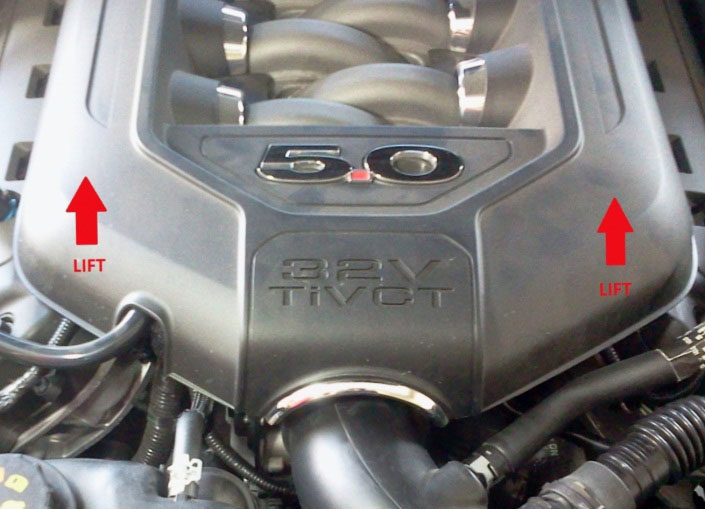
2. Remove your Intake Cover simply by pulling up on the cover and unsnapping it.
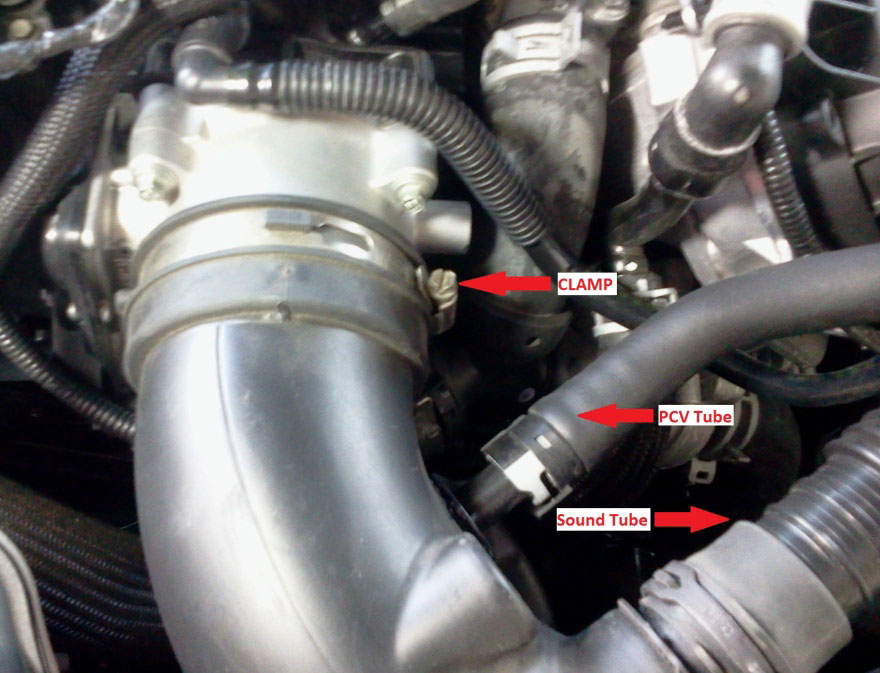
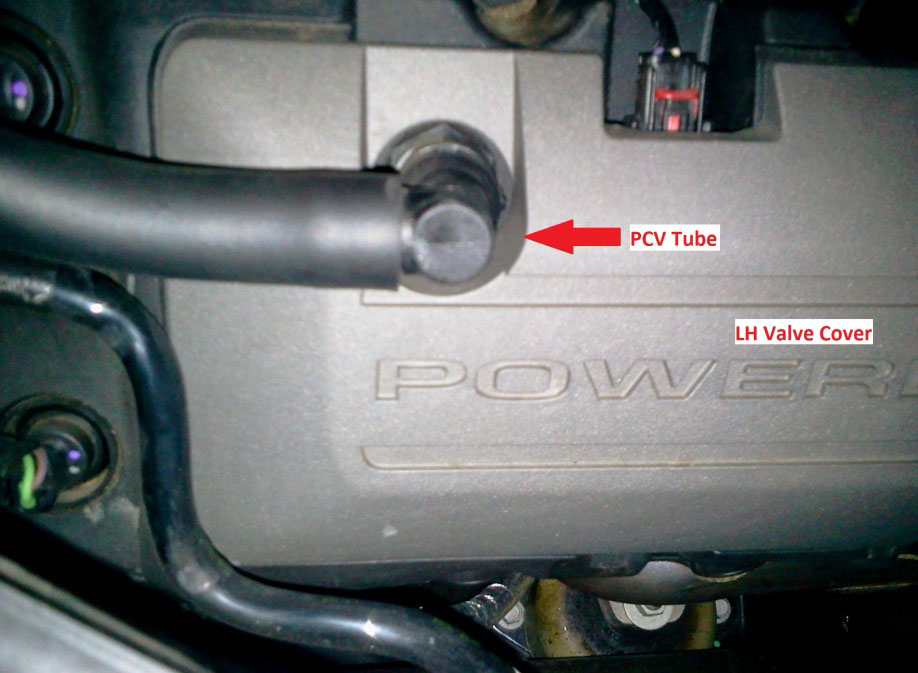
3. Remove your Inlet Tube by simply loosening the clamp disconnecting the PCV Tube and the Sound Tube. For convenience, I would recommend disconnecting the PCV Tube from the LH Valve Cover for the remainder of the removal. The Sound Tube is not required for operation; it merely brings the intake sound into the cabin area. I removed mine because it was in the way of my LH Hood Strut. An aftermarket Cold Air Intake should come with a plug if you choose to remove it.
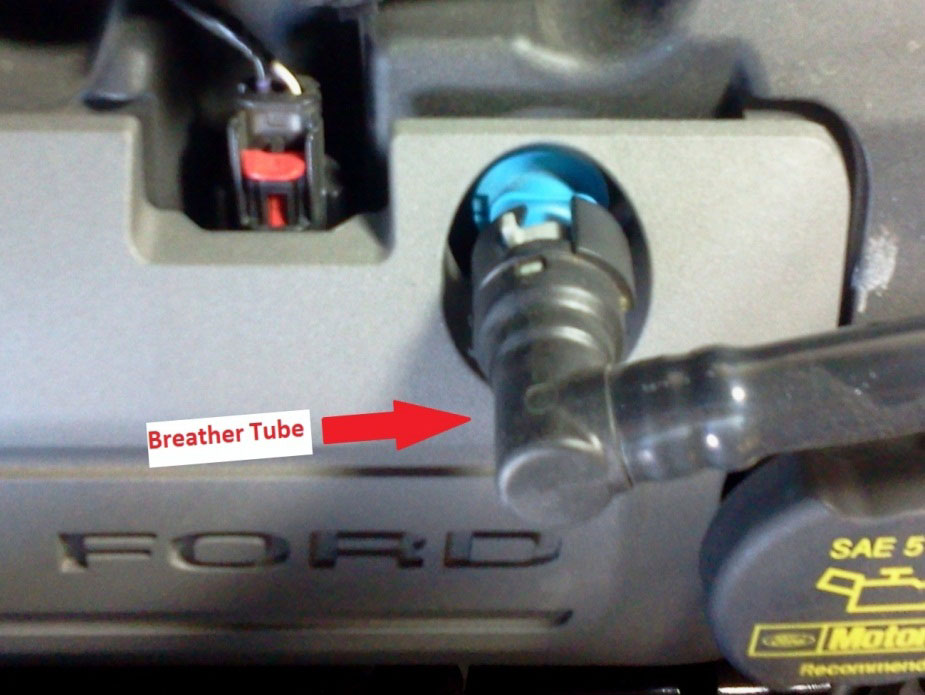
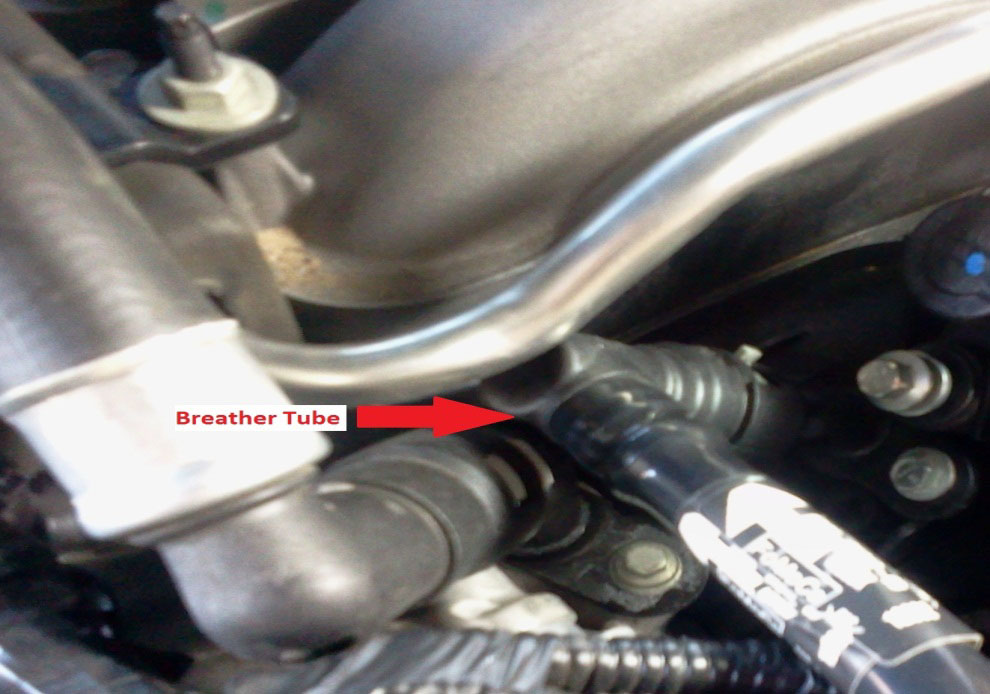
4. Completely remove the Breather Tube that runs from the RH Valve Cover to the Intake Manifold.
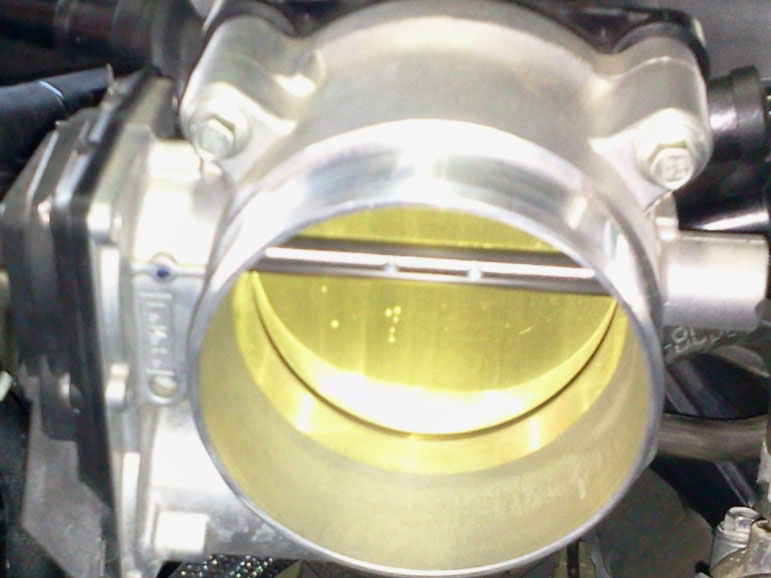
5. Remove the 4 bolts that attach the Throttle Body to the Intake Manifold using an 8mm socket and its electrical connector.
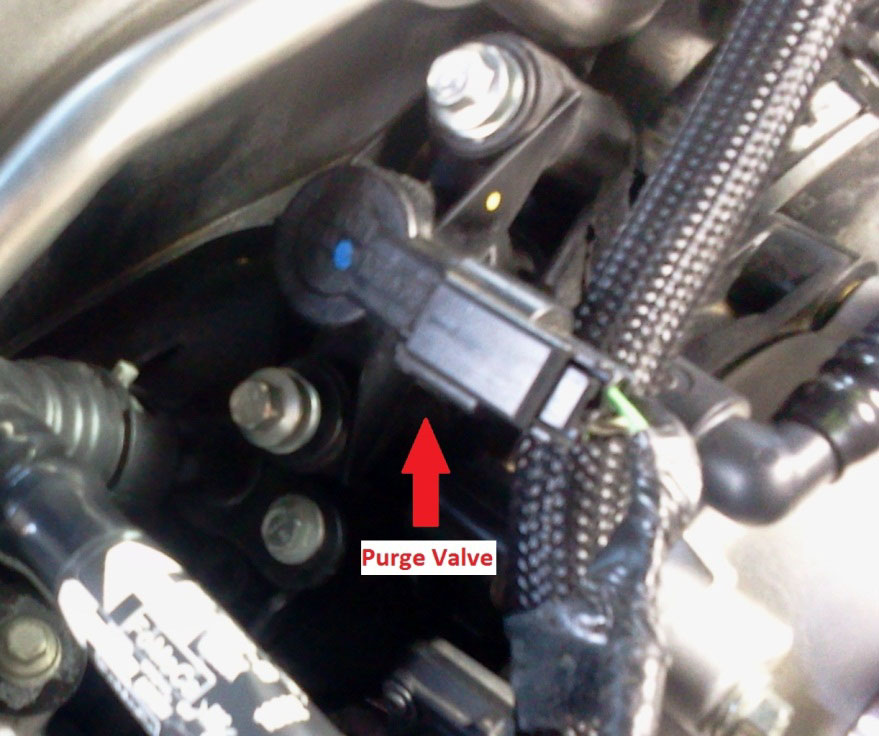
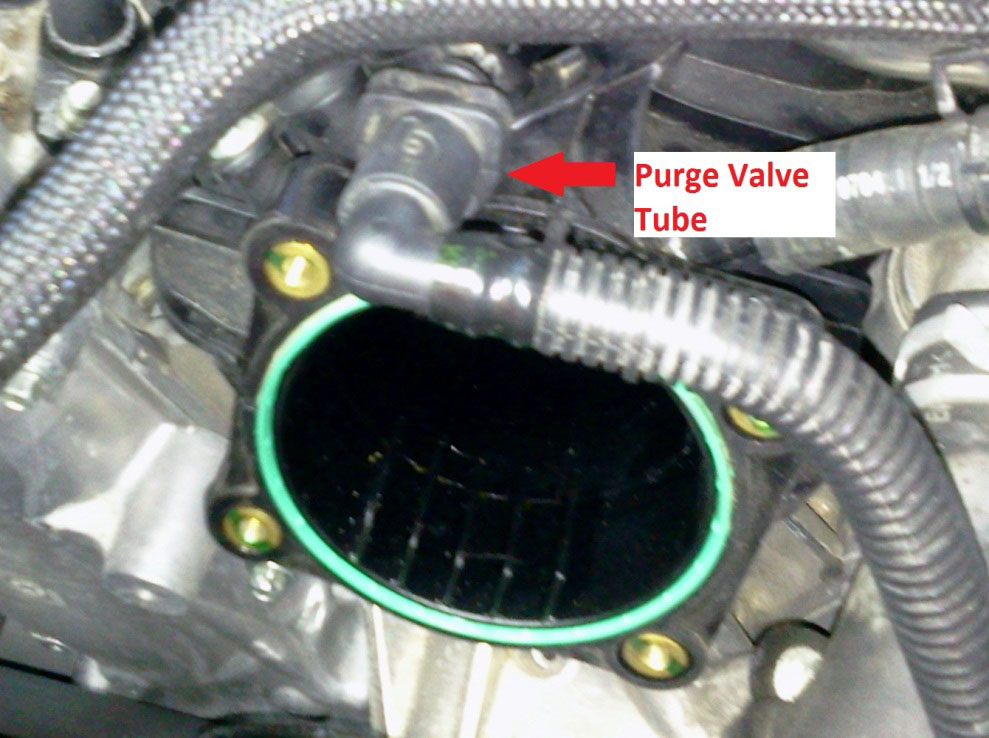
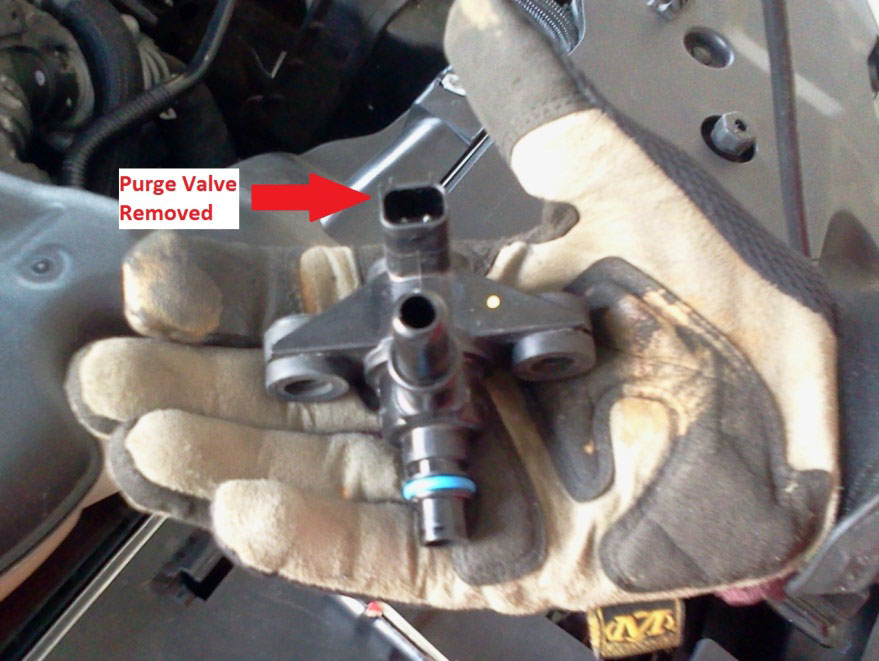
6. Remove the two bolts from the Purge Valve using an 8mm socket and its electrical connector. Then you will remove the Purge Valve Tube using a Fuel and Disconnect Tool.
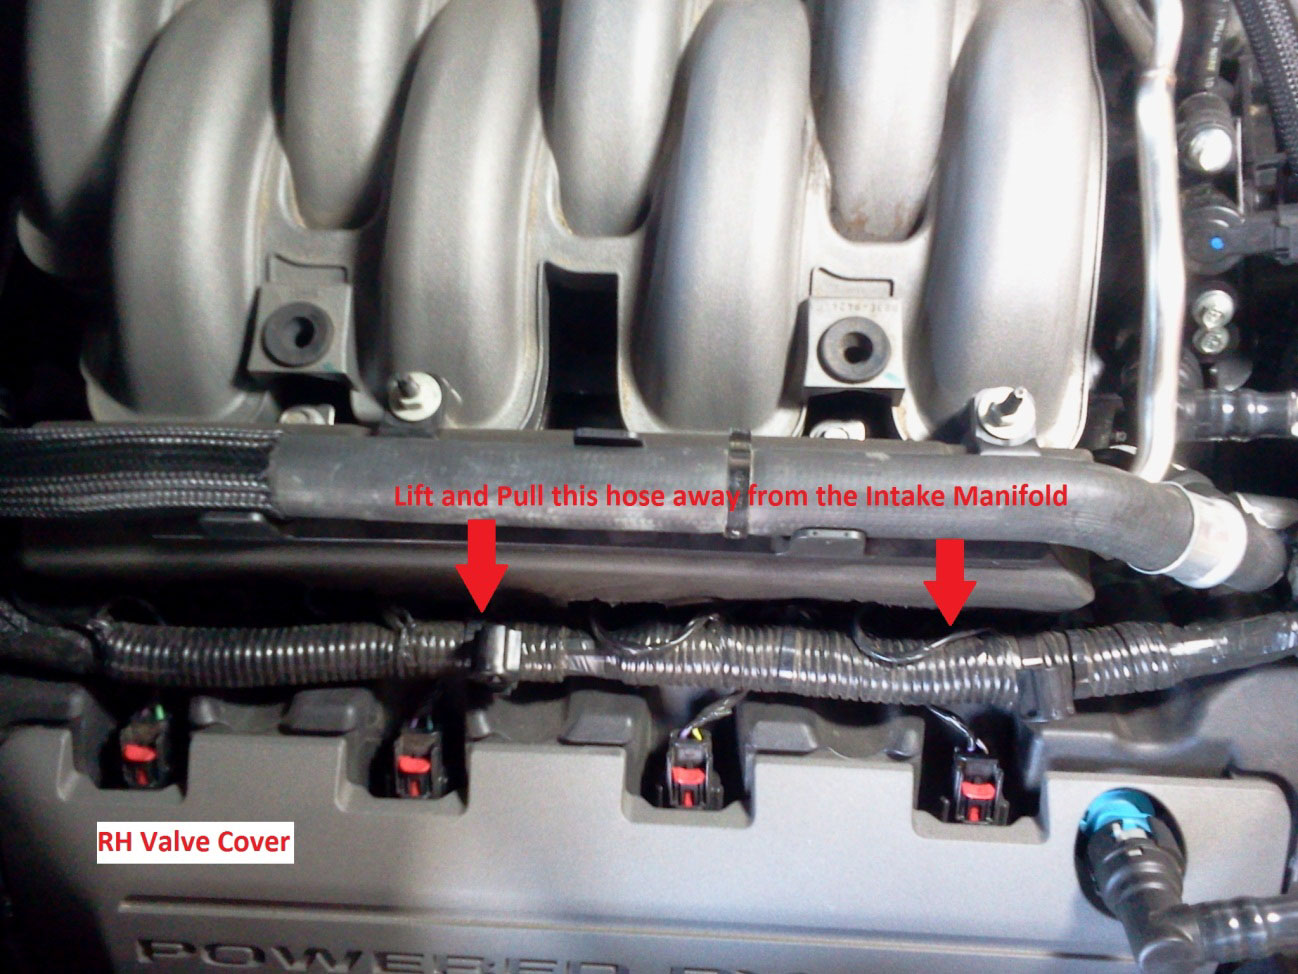
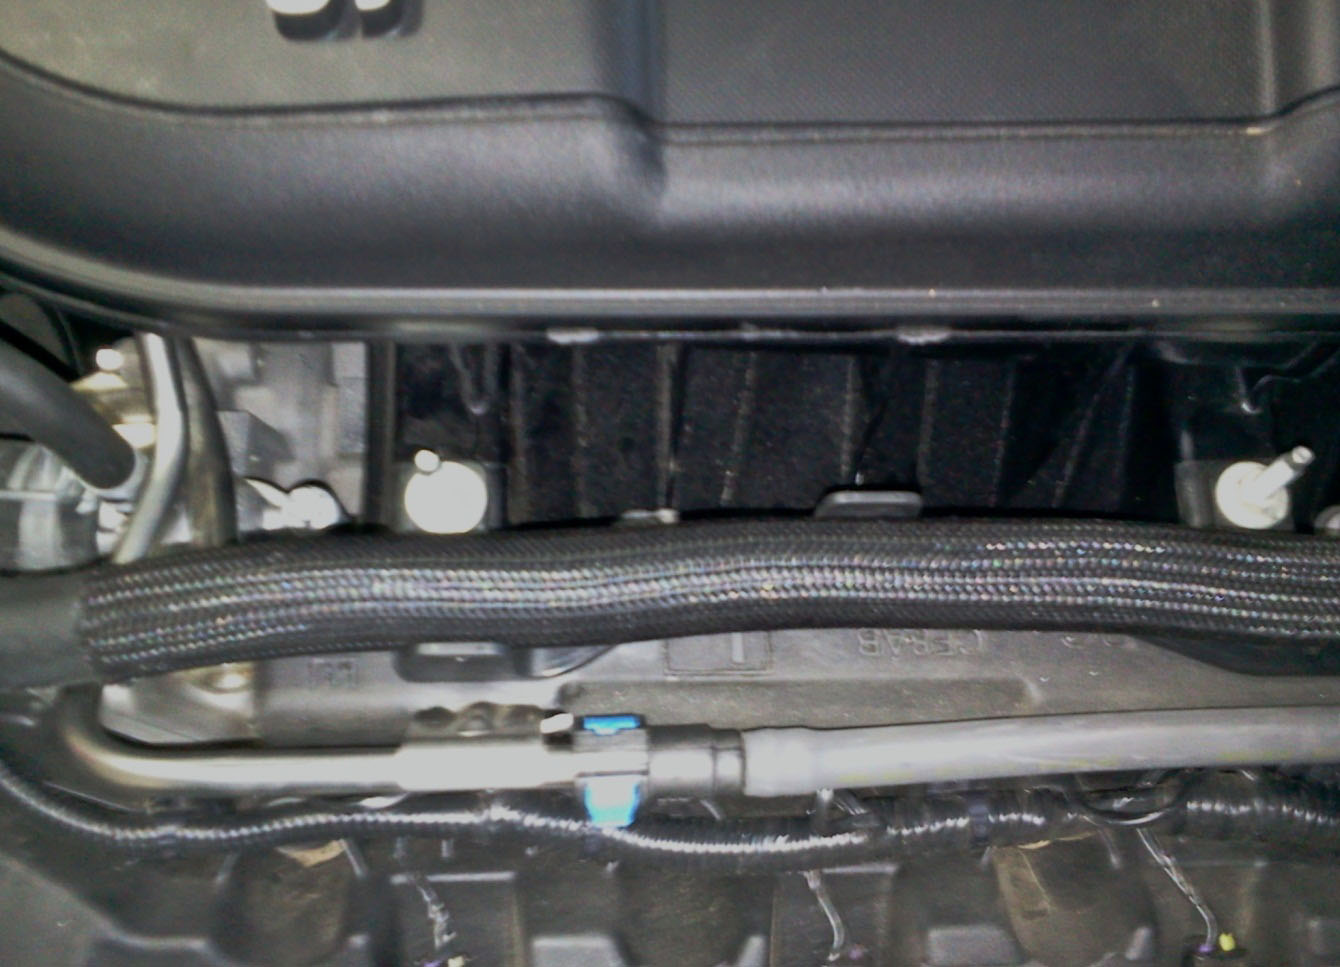
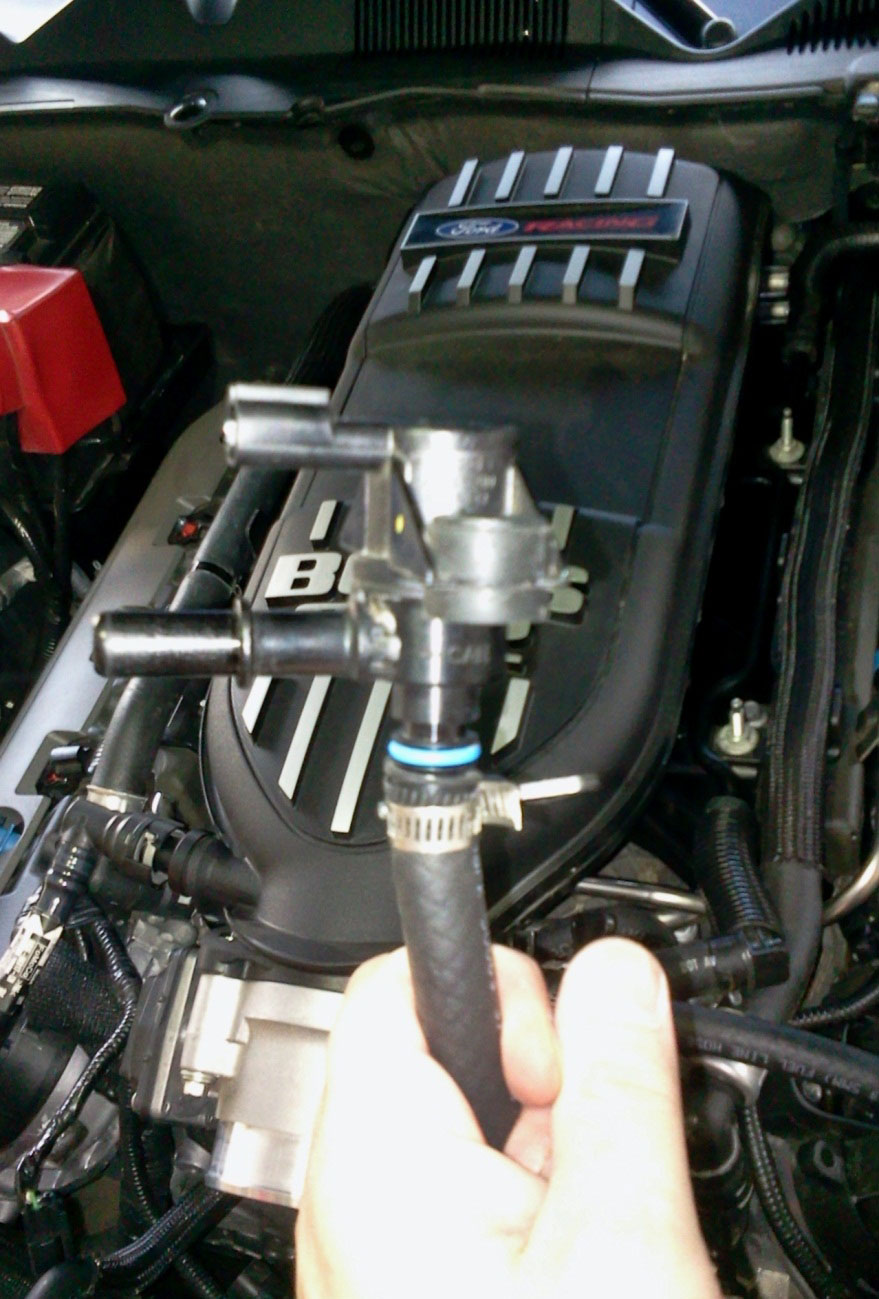
7. On each side of the Intake Manifold you will see two large hoses DO NOT DISCONNECT THESE, simply lift and pull them away from the Intake Manifold as shown below. Underneath you will see (2) nuts holding (2) plastic hose brackets, use a 10mm socket to remove them. Remove and set aside the brackets. The LH Bracket retains the Brake Booster Vacuum Tube.
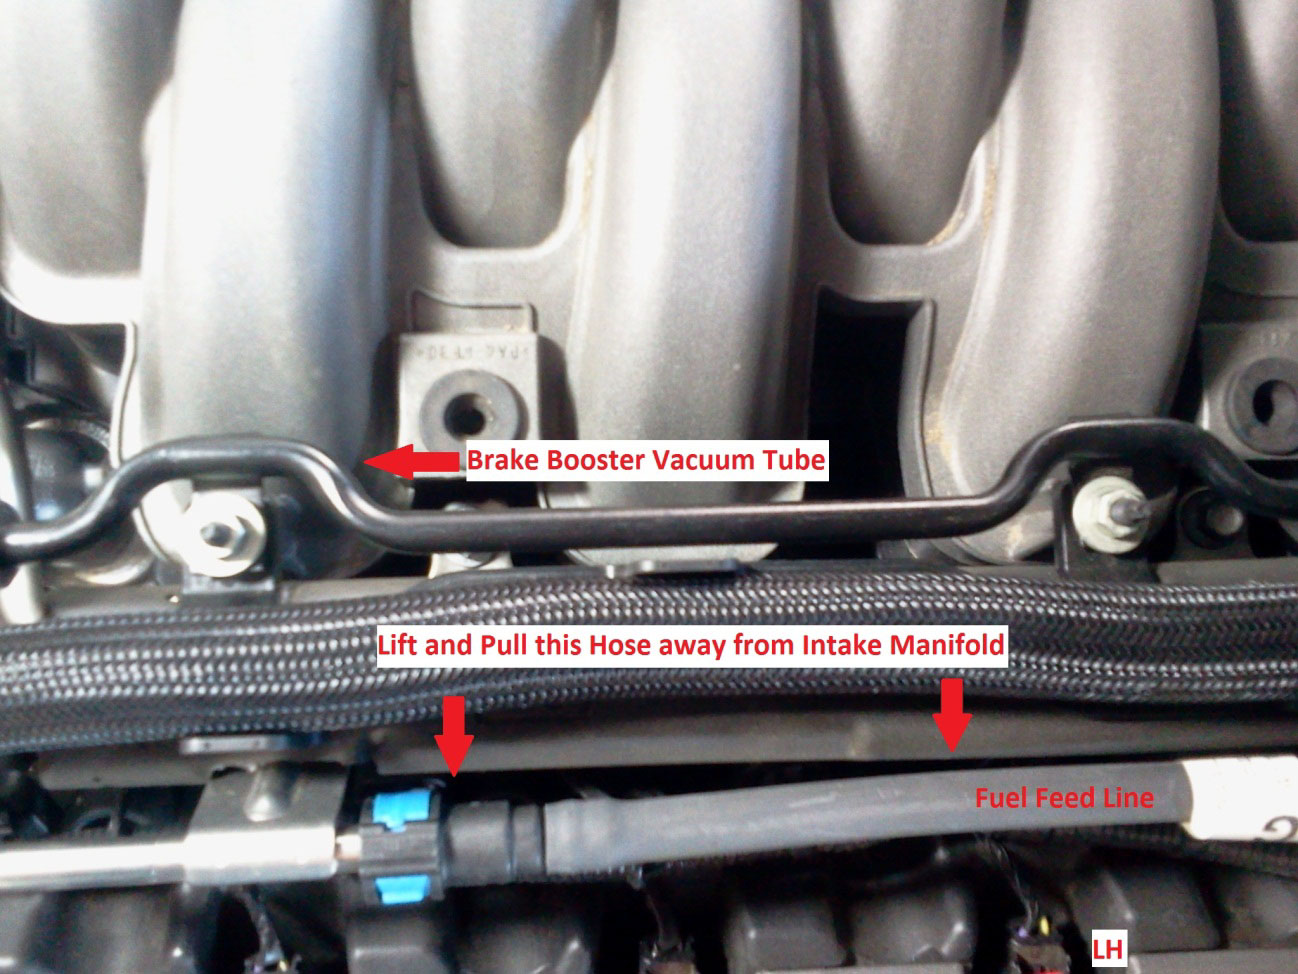
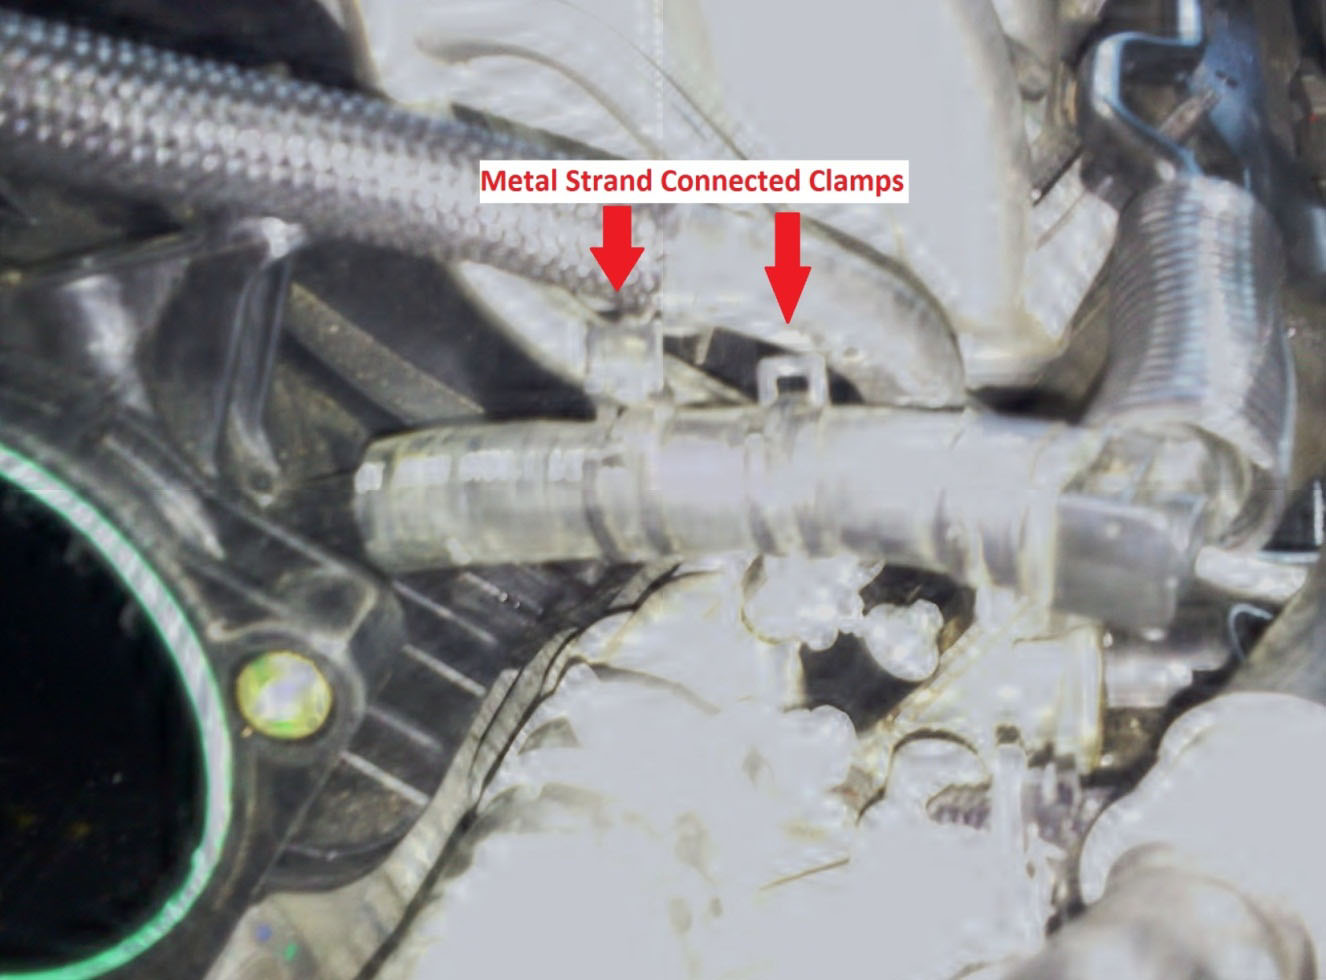
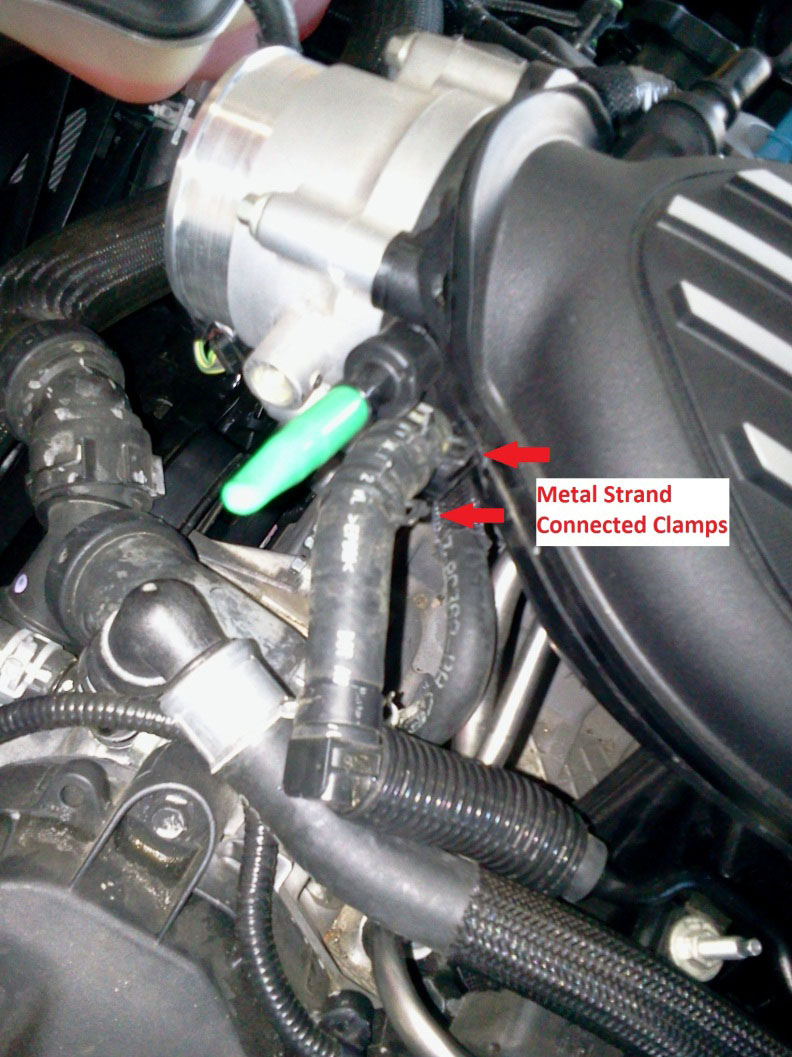
8. Disconnect the Brake Booster Vacuum Tube from the LH Intake Manifold utilizing the (2) Pliers and a Friend. There are (2) clamps connected with a Metal Strap so they do not move independently. This hose can be quite stuck on the Intake Manifold, once separated just pull it out of your way.
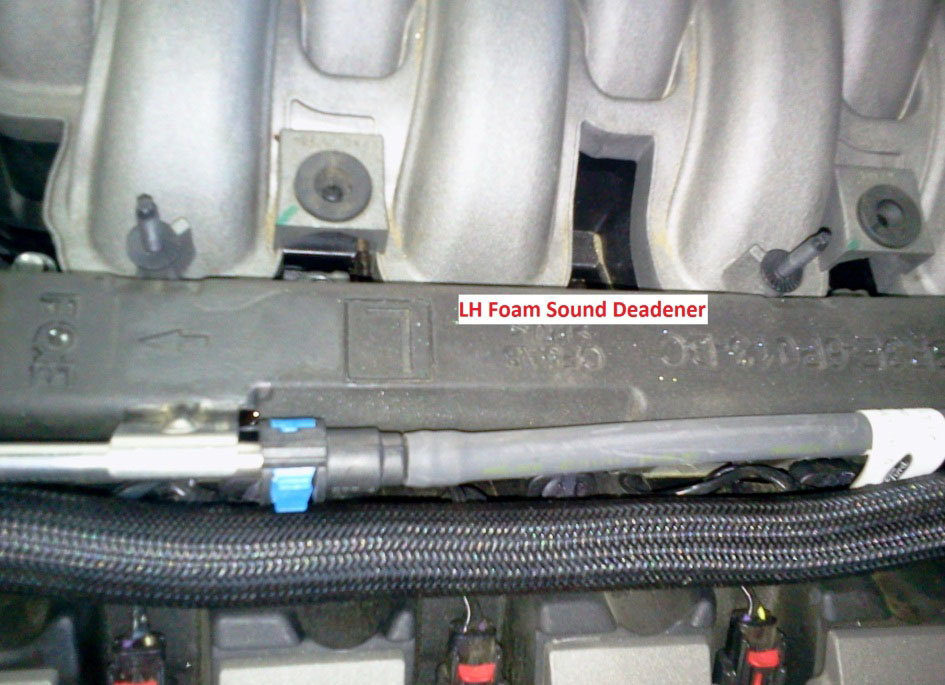
9. Remove the Foam Sound Deadener from both sides of the Intake Manifold and atop the Fuel Rails.
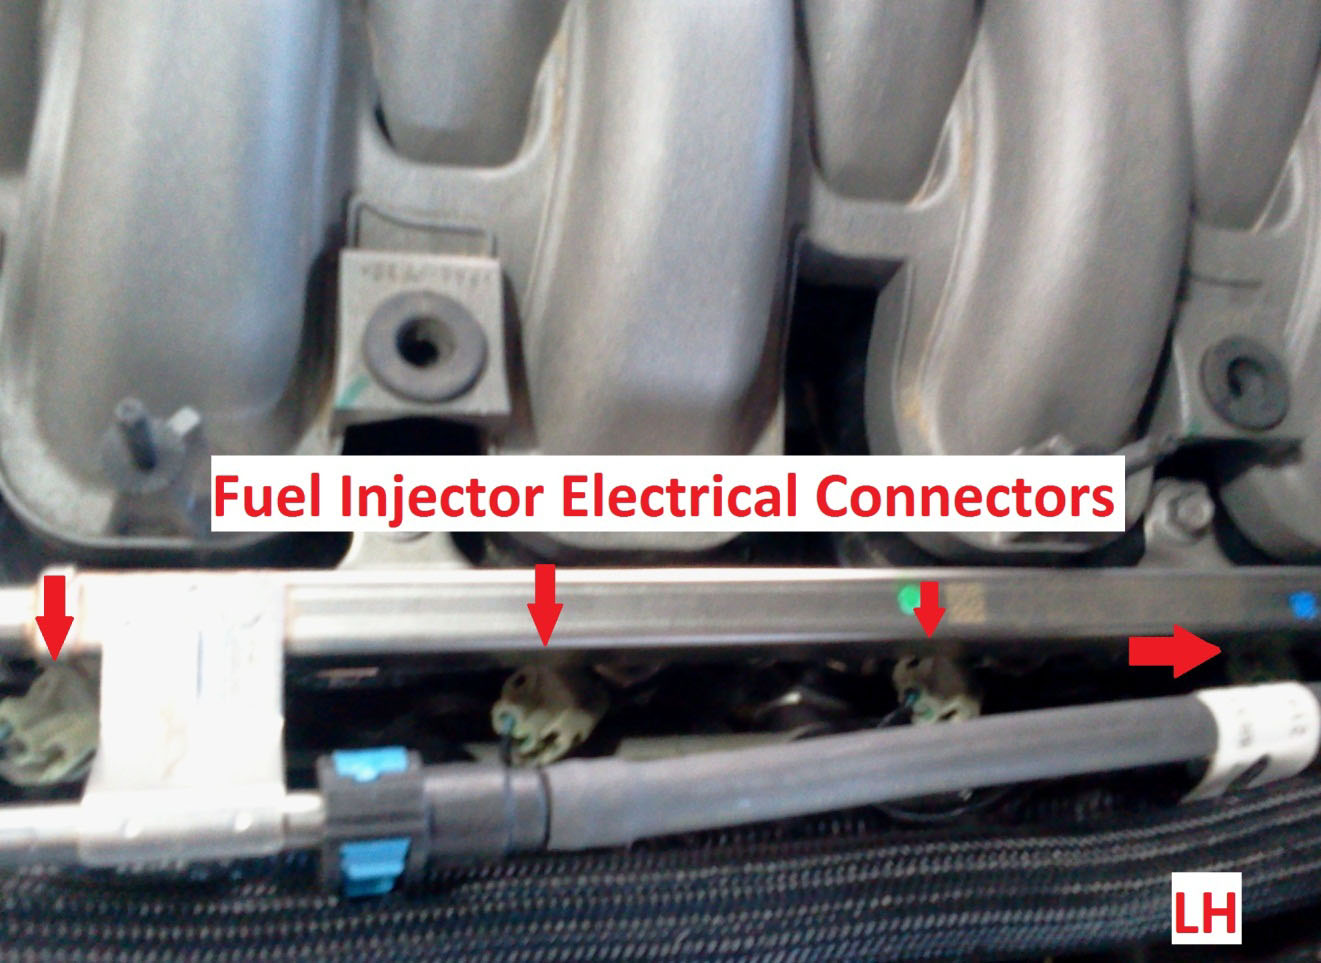
10. Remove the (4) Fuel Rail Retaining Bolts using a 10mm socket and an extension. Unplug all (8) of the Fuel Injector electrical connectors.
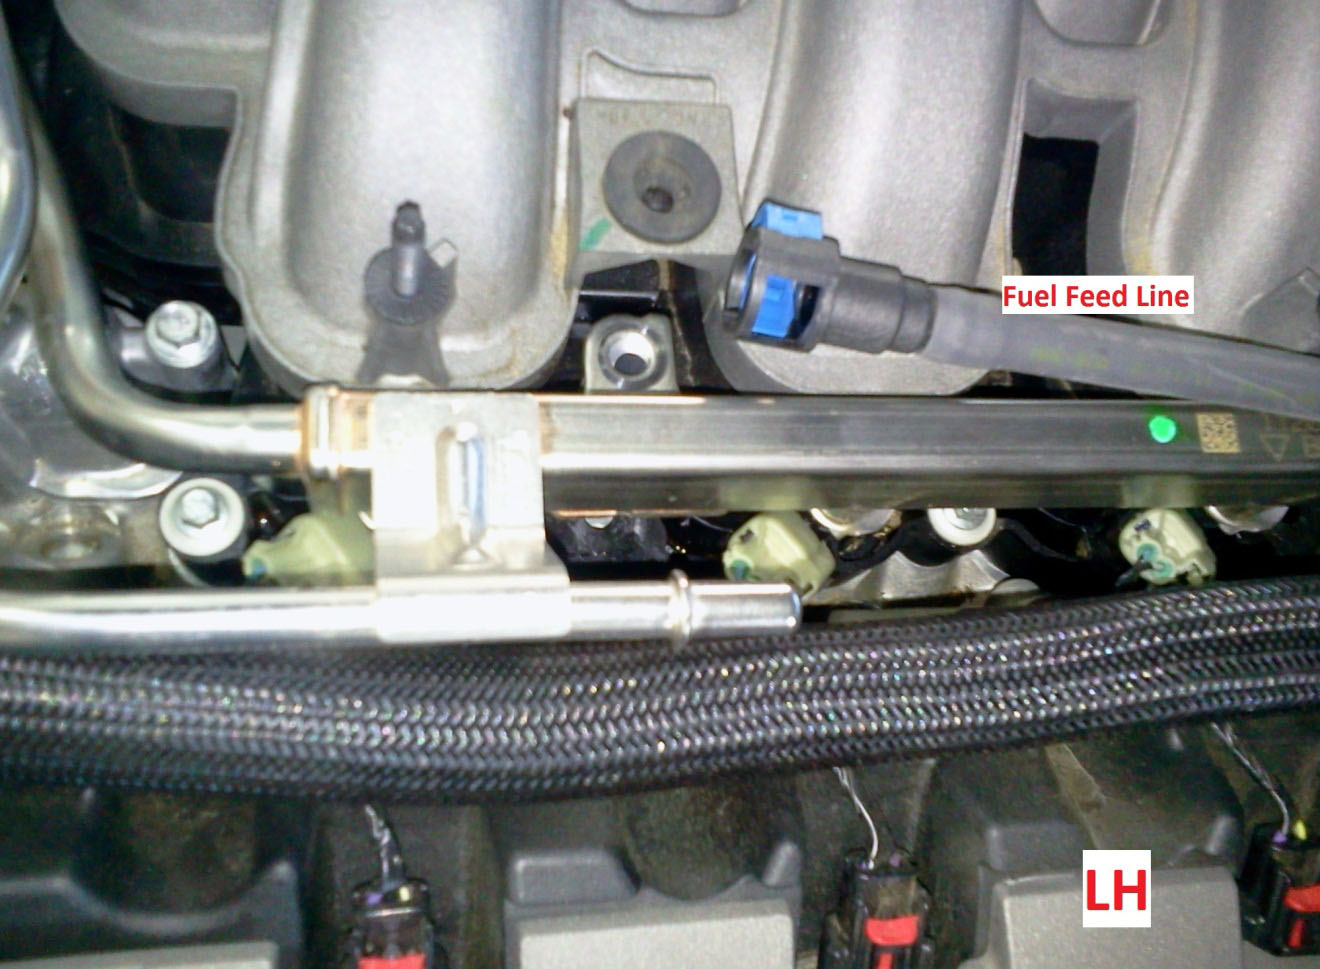
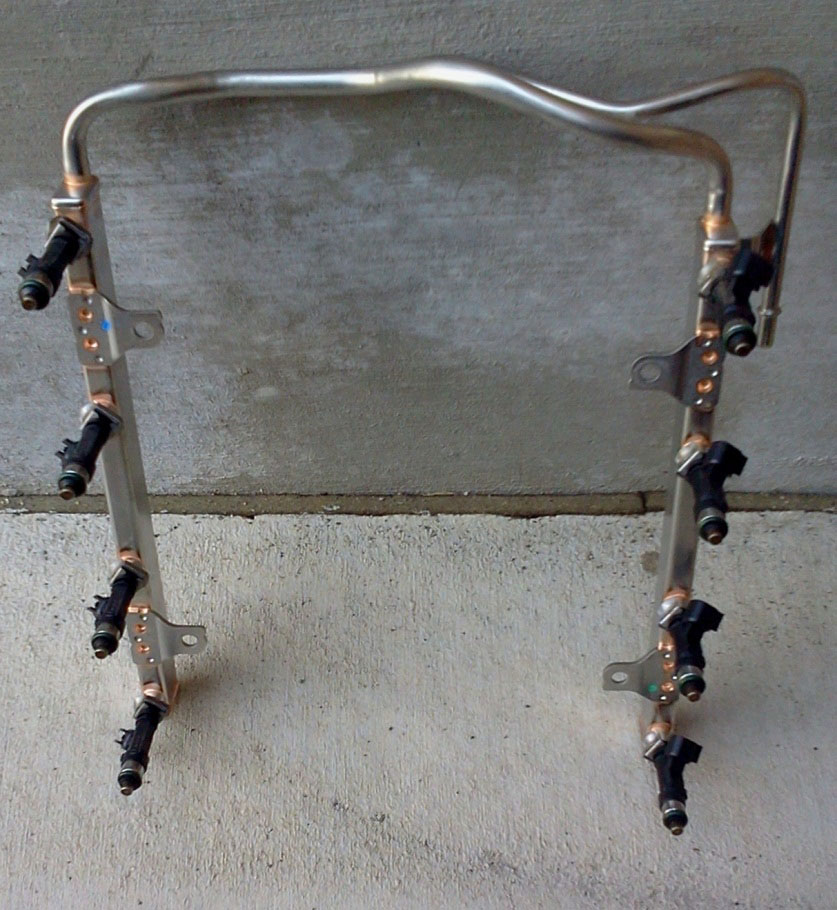
11. At this point you should depressurize your Fuel System. NOTE: SAFETY GOGGLES ARE RECOMMENDED. When ready to continue, use the 3/8” Fuel and Disconnect Tool to disconnect the Fuel Feed Line. Gently lift on the Fuel Rails thus releasing the Fuel Injectors from the Intake Manifold. There will still be fuel in the Fuel Rails. Set aside the Fuel Rails and be sure not to set the Fuel Injectors on the ground.
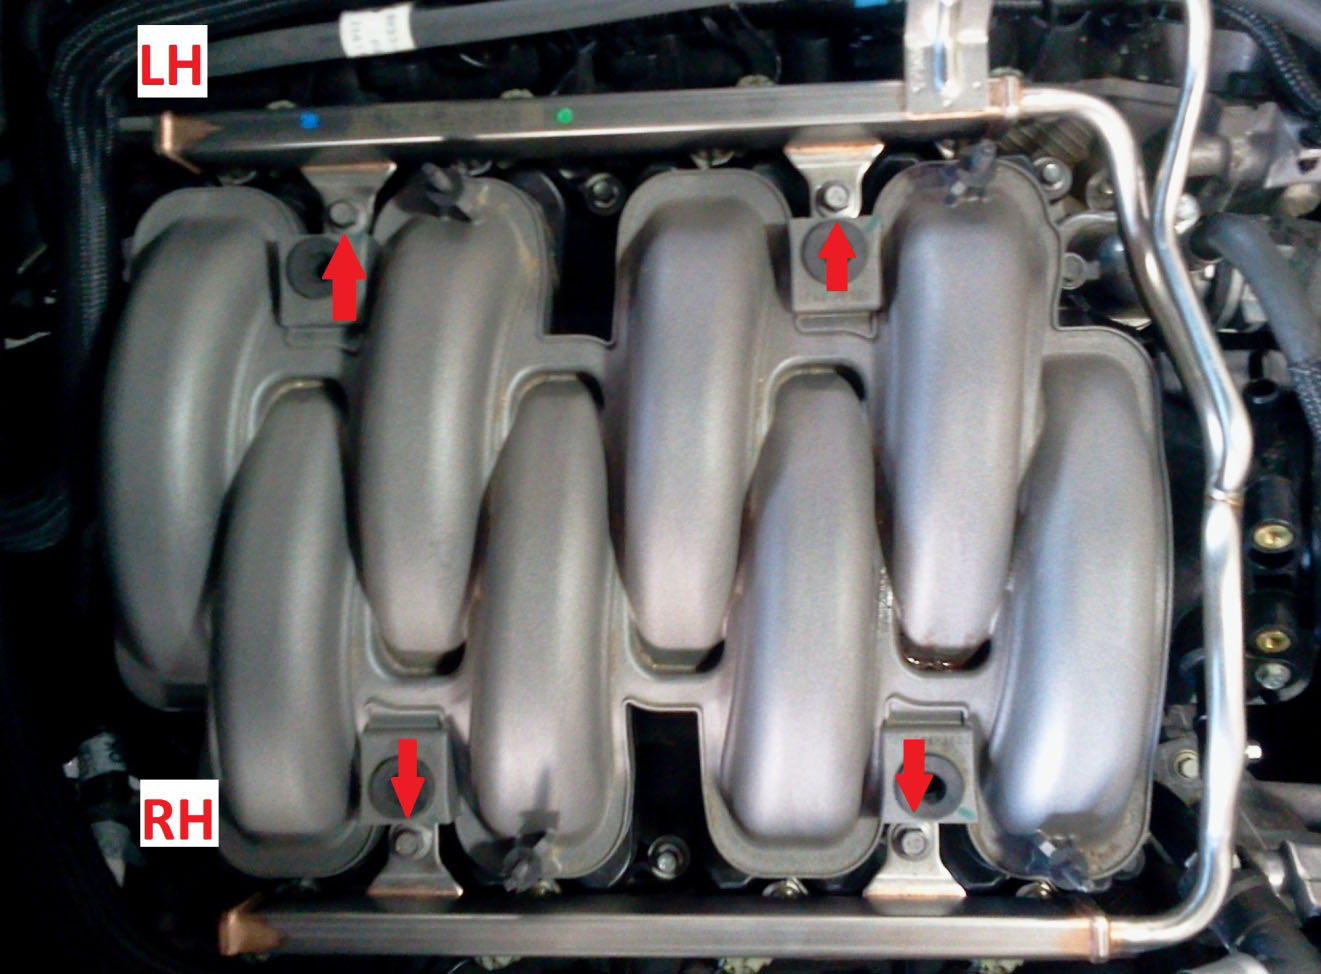
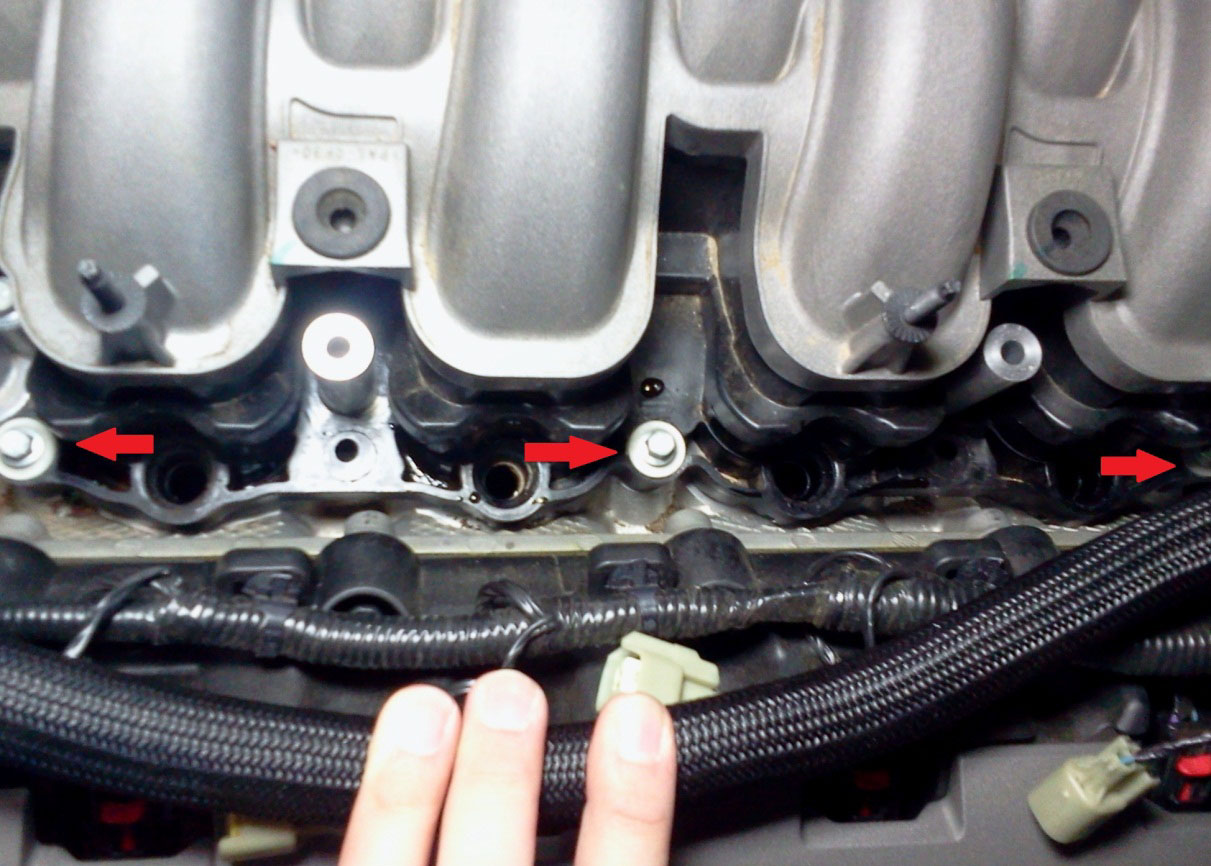
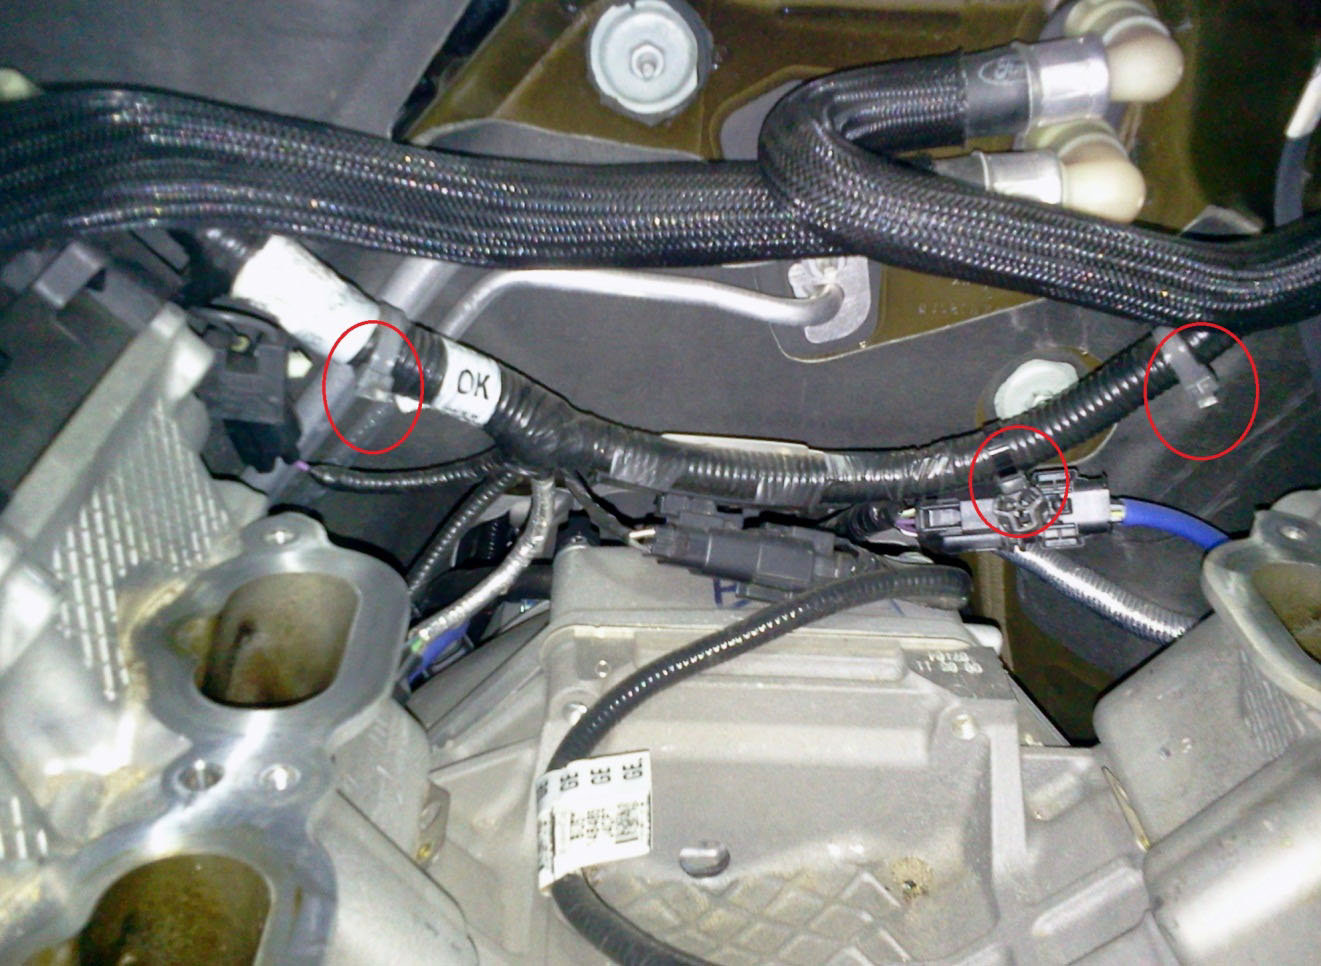
12. Now you will remove (6) retaining bolts (9mm) that hold the Intake Manifold to the Heads. There are (3) on each side located the front/ rear corners and dead center. Loosen and Lift all (6) of these, but they are built into the Intake Manifold and will not come out. After that, lift up on the Intake Manifold and slide it forward slightly. On the very back, there are (4) Wiring Harness retainers that need to be pulled free or clipped off of the Intake Manifold. Two are located near the Rear Corner retaining bolts. Only (3) are pictured because I broke one of mine off. Pull the stock Intake Manifold up and out.

It’s also a good idea to a good clean up of the Head area, before proceeding with the installation. My car had plenty of oil/fuel/dirt/debris.
Installation Procedure:
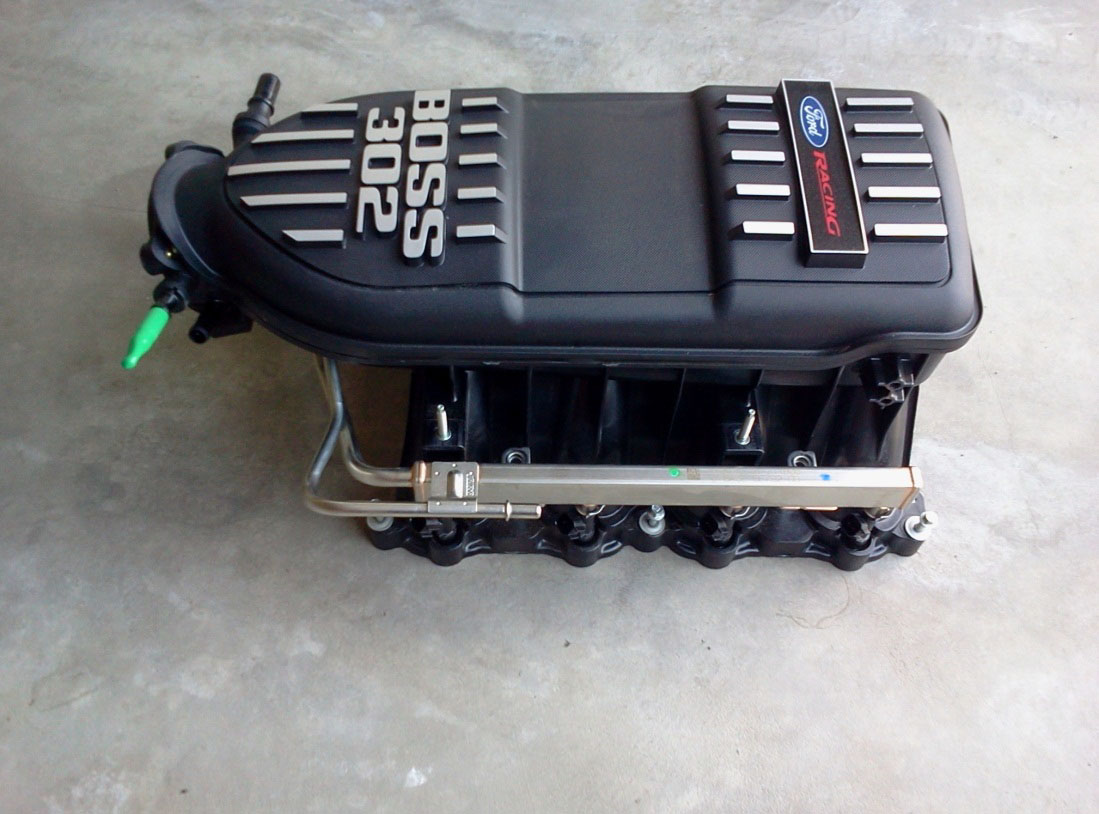
13. Set the stock Fuel Rails into place on the Boss Intake Manifold and set the Fuel Injectors in their respective ports. It has been said that it is easier to torque the Intake Manifold retaining bolts before installing the Fuel Rails. I did not have a problem installing them together. NOTE: This Intake Manifold comes with pre-installed Gaskets so just set the Boss Intake Manifold atop the heads. Only the outer 2 out 4 Wiring Harness retainers can attach to the back of the Intake Manifold.
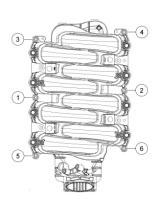
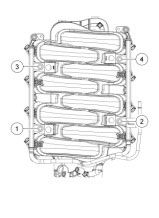
Finger tighten the 6 Intake Manifold retaining bolts and the 4 Fuel Rail retaining bolts, then torque them to 89 inch-pound in the following respective sequences:
14. Plug in all Fuel Injector electrical connectors then connect the Fuel Feed Line to the Fuel Rails. Reinstall the Foam Sound Deadeners around the Fuel Rails.

15. Reinstall the (2) plastic hose brackets with the (4) nuts (10mm) and set their respective hoses back atop them.
16. Reinstall the Throttle Body with the (4) bolts (8mm) along with its electrical connector.
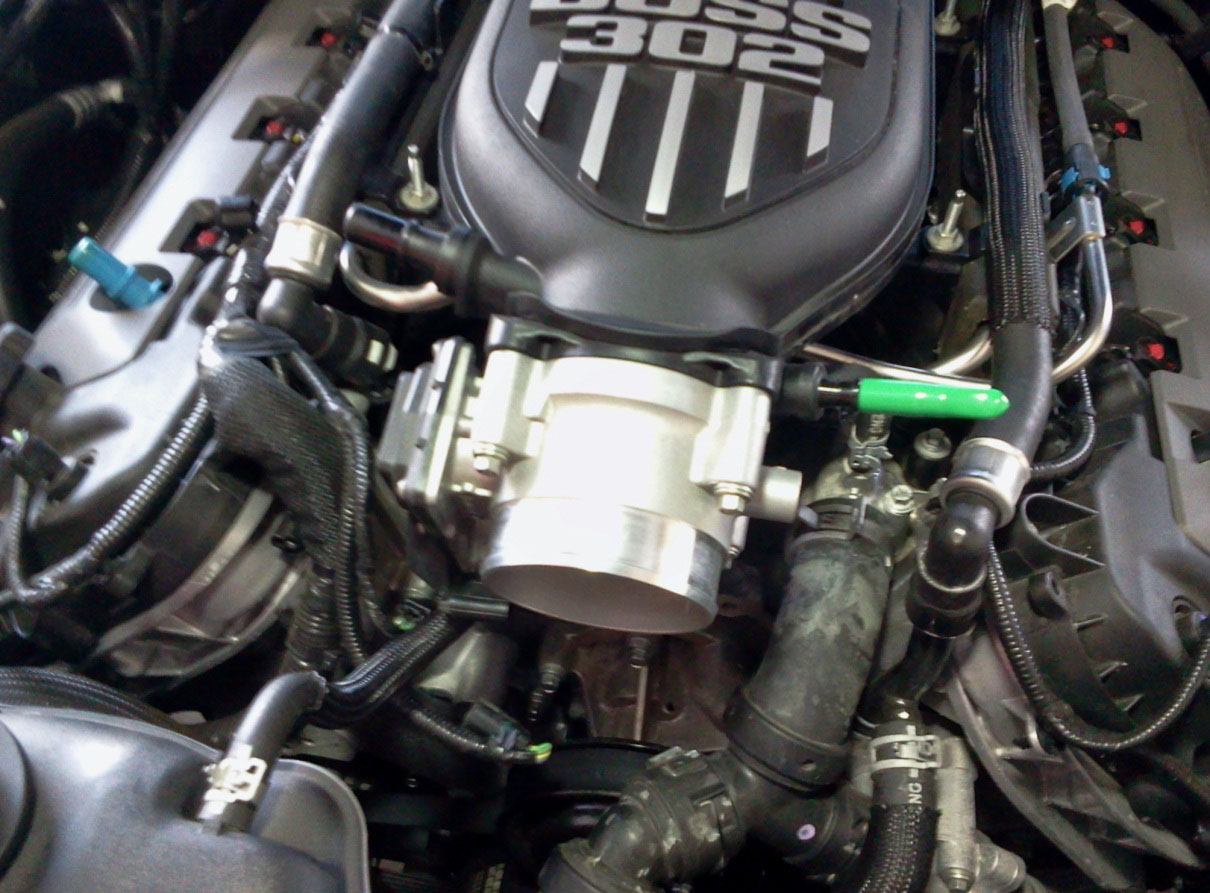
17. Get your (2) Pliers and Friend back and reinstall the Brake Booster Vacuum Tube to the Port on the LH front of the Intake Manifold just below the Green Cap pictured and ensure it isn’t kinked.
18. Reinstall the Breather Tube.
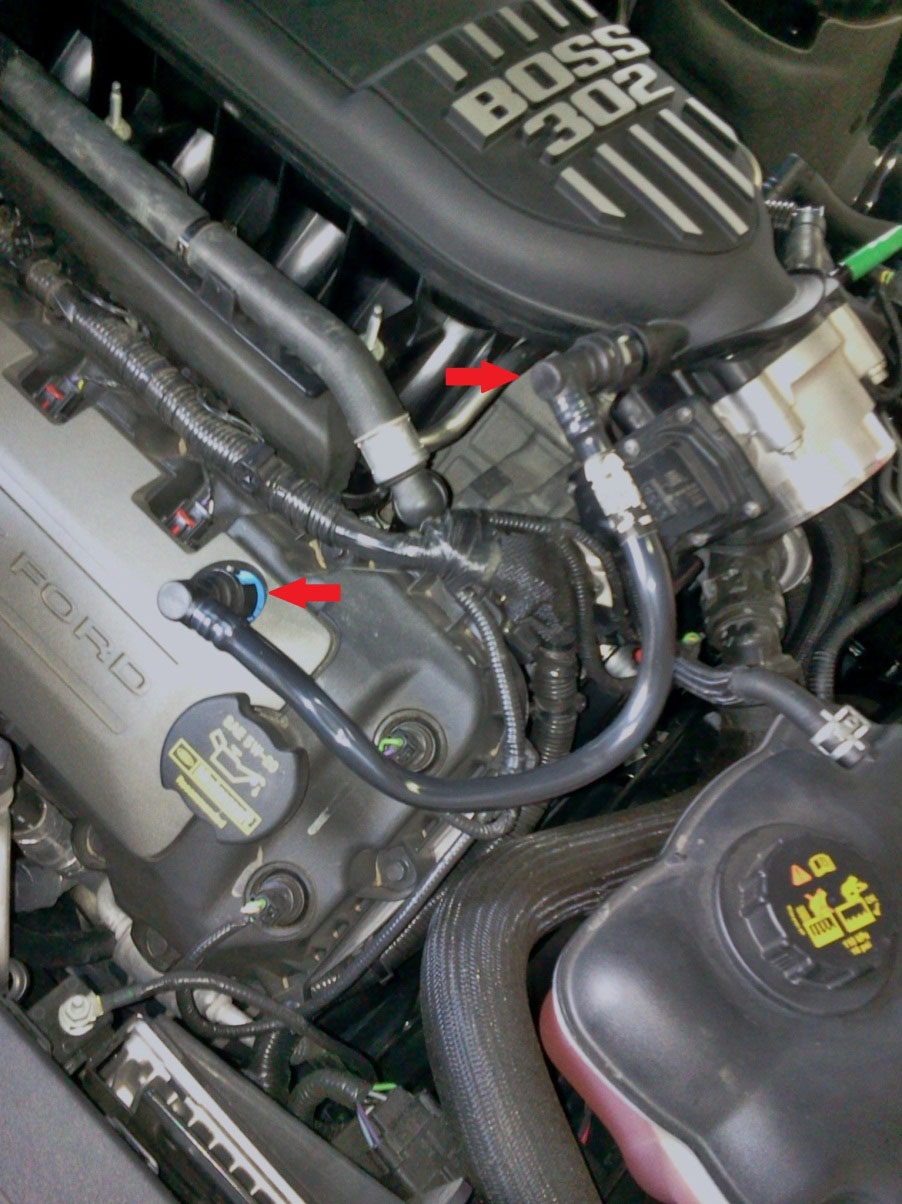
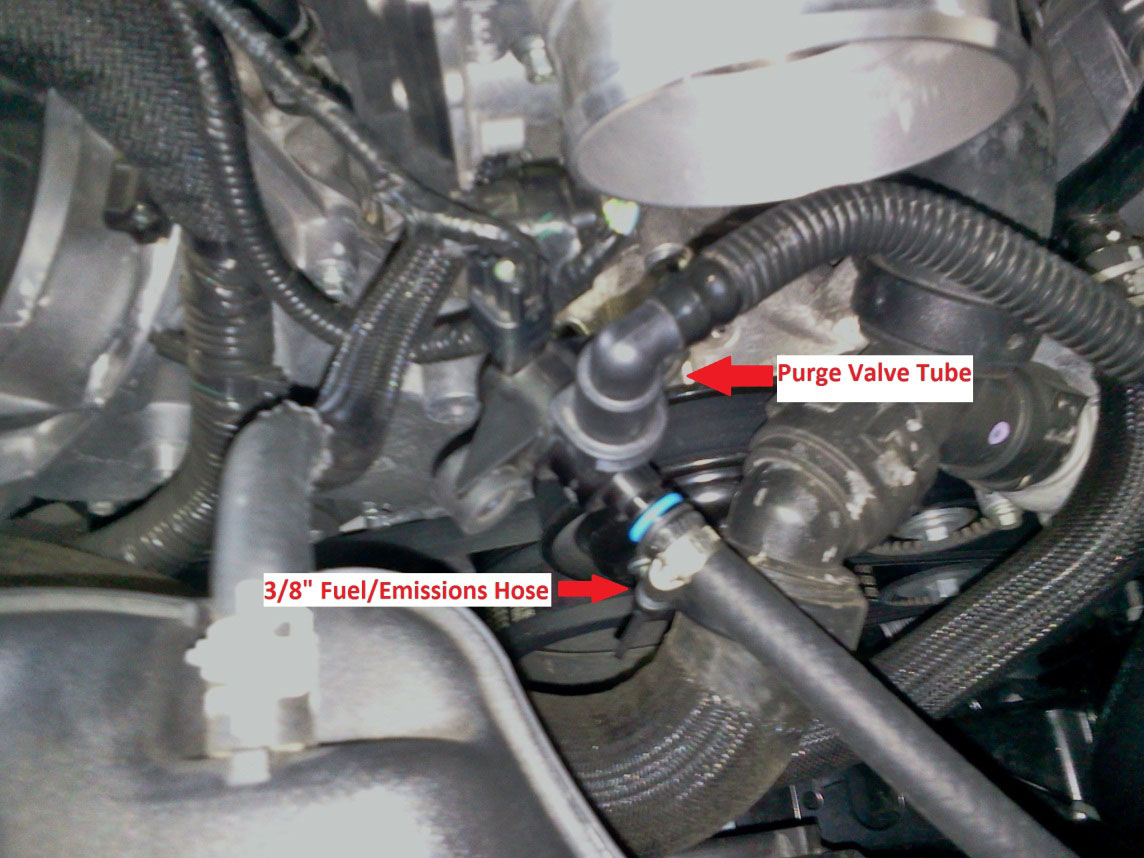
19. This is the step where you reinstall the Purge Valve and the Extra Parts listed at the beginning of the guide come into play. The purpose of the Purge Valve is to vent fuel tank vapor in to the Intake Manifold during certain operating conditions. On the stock Intake Manifold the Purge Valve is mounted directly behind the Throttle Body. On the 2012-2013 Boss 302s, the Purge Valve is located at the LH rear of the Intake Manifold. You can get the correct Boss 302 Purge Valve and its corresponding bracket from Ford for roughly $200 when it becomes available. For a temporary solution use a 3/8” Fuel/Emissions Hose and (2) Hose clamps to install from your Purge Valve to the Green Capped Port on the LH front of the Intake Manifold. Then reconnect Purge Valve Tube and the electrical connector to the Purge Valve and route the best way you find underneath the Throttle Body.
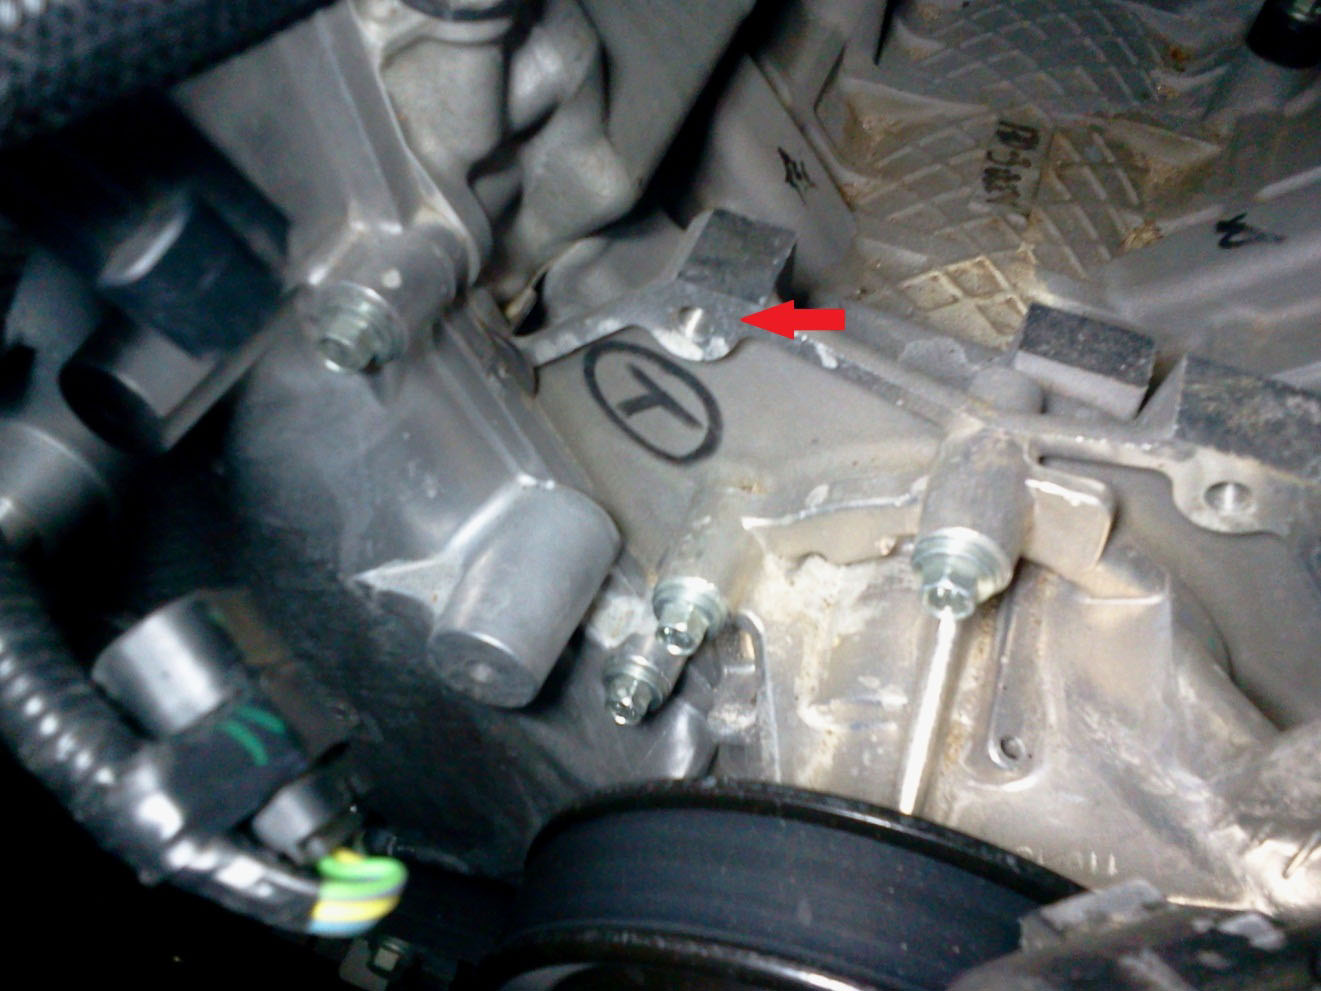
You can also install the Purge Valve to the Engine Block with a little finagling, a Bolt, Washer, and Lock Washer. Here is the best image I could take of the best place to mount it on the Engine Block.
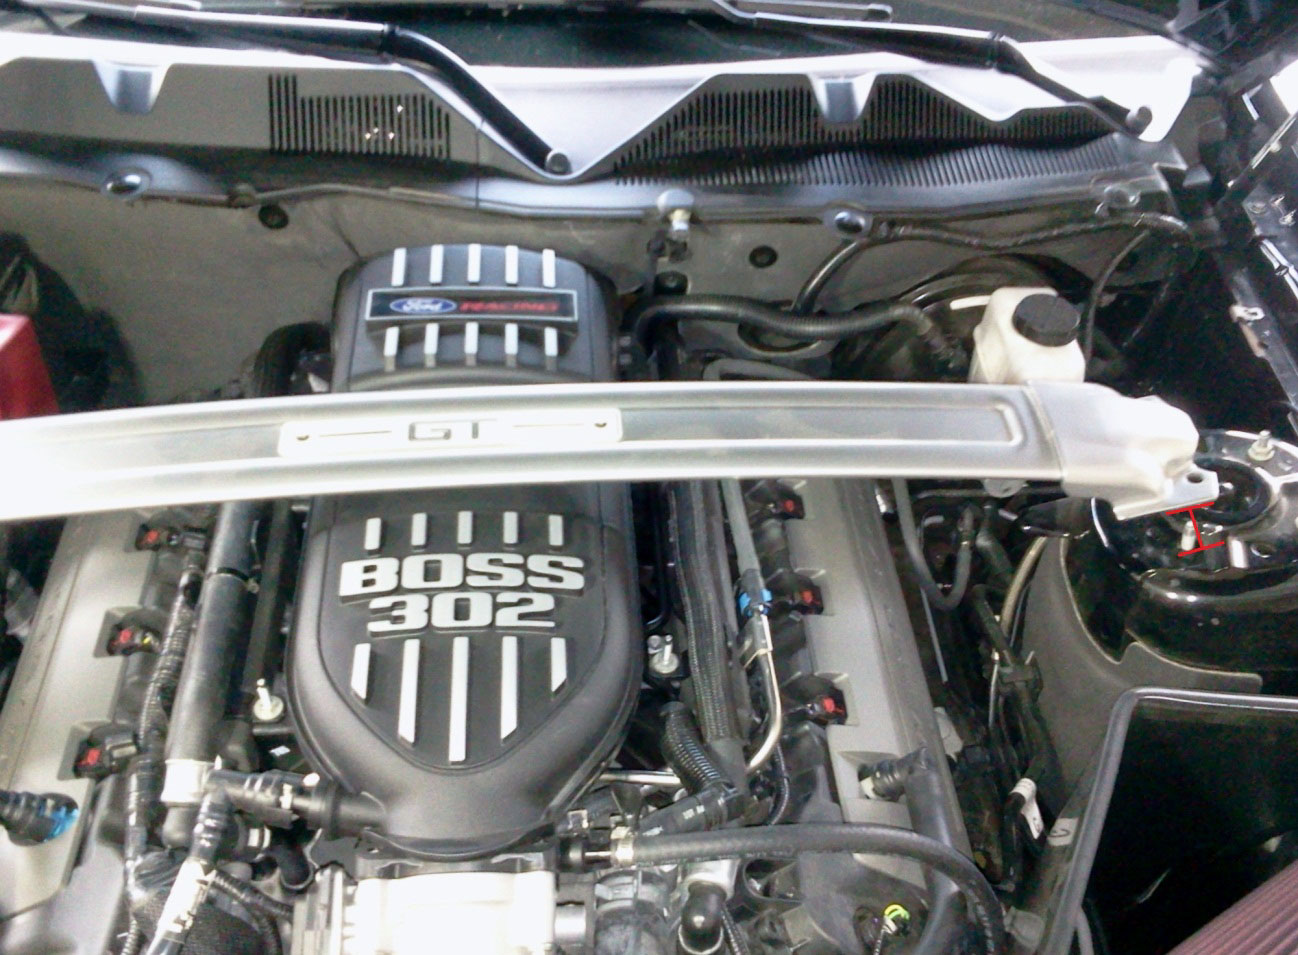
20. Install the Boss 302 Strut Tower Brace, if purchased. Your stock Strut Tower Brace will not clear.
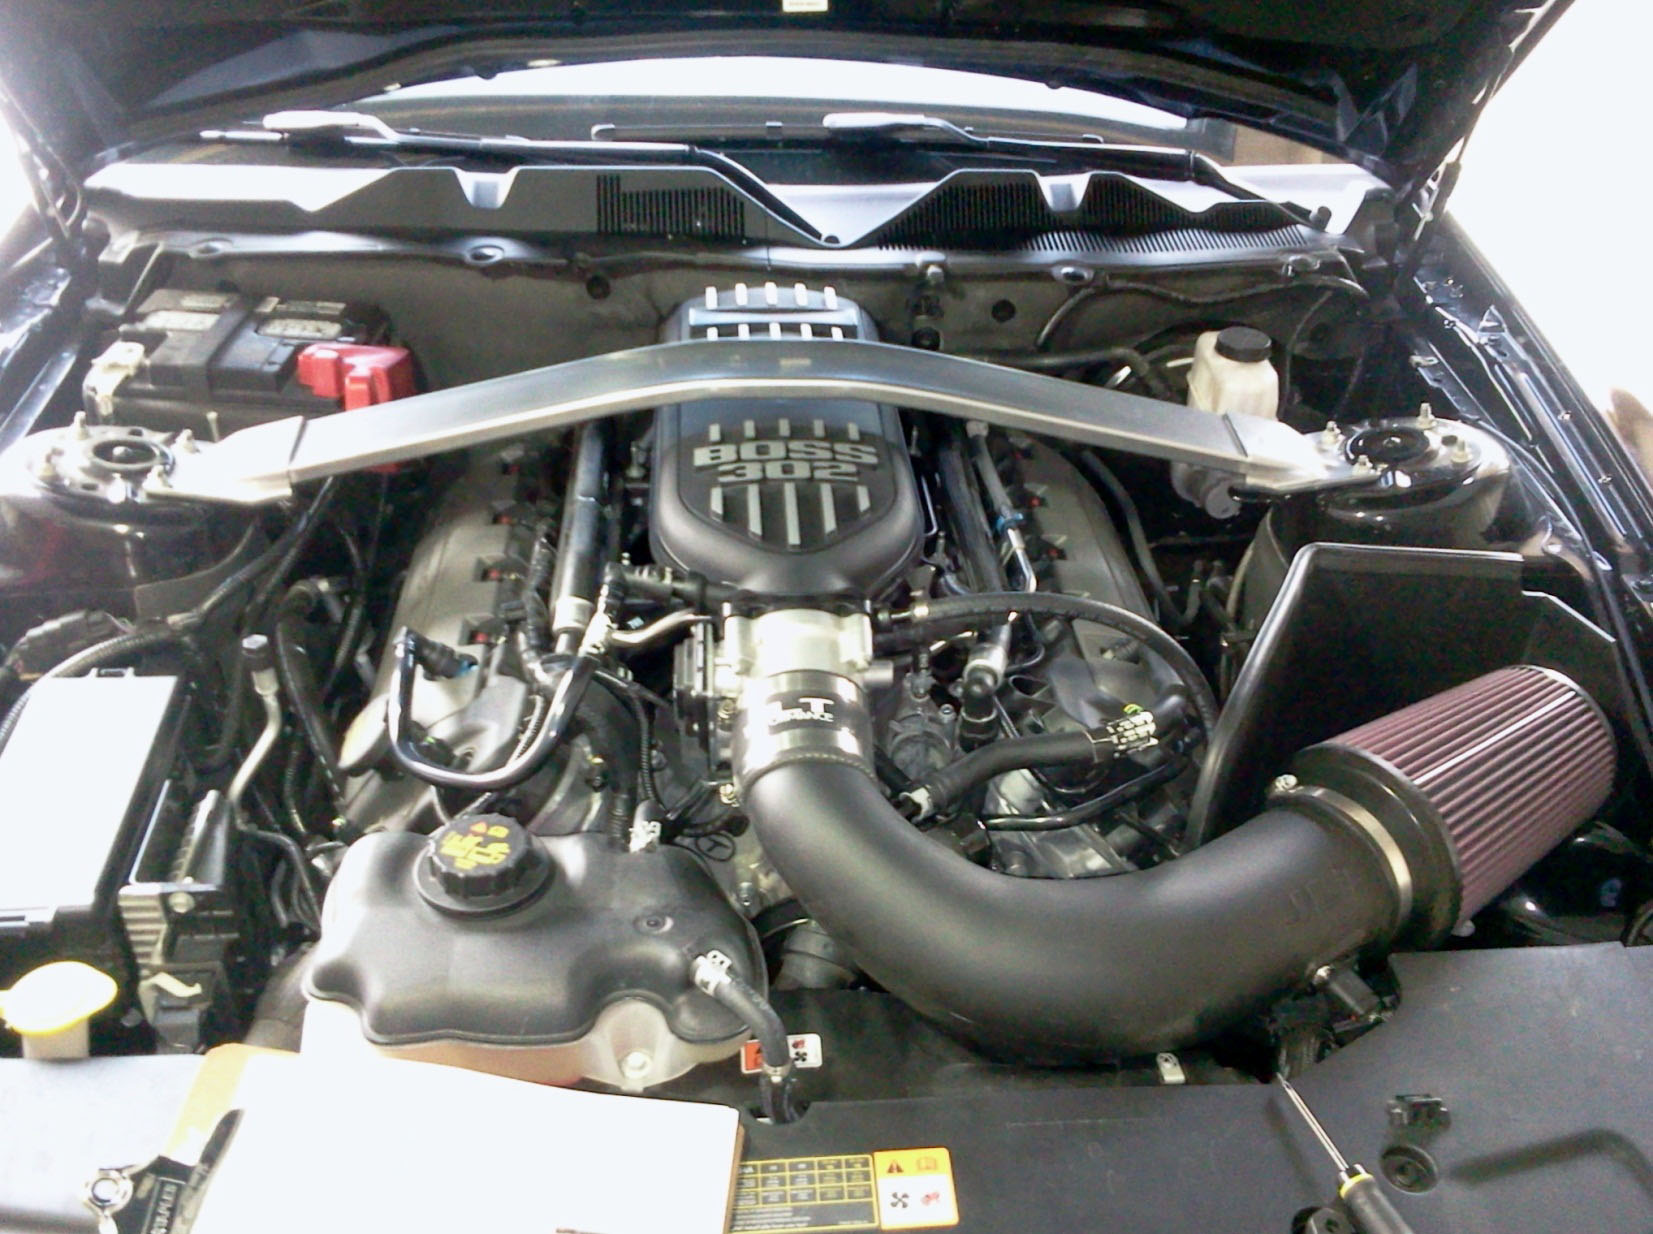
21. Now install the Cold Air Intake of your choosing with that Intake’s supplied instructions. And remember you can install this Boss 302 Intake Manifold with the above mentioned Boss 302 Intake Manifold Install Kit. Either way you go, don’t forget to reattach the PCV Tube. I personally upgraded to the JLT Cold Air Intake for 2012-2013 Boss 302s and the fitment was really great.
22. DO NOT START YOUR CAR UNTIL YOU HAVE FINISHED INSTALLING THE TUNE.
Installation Instructions written by AmericanMuscle customer Benjamin Connery 7/17/2012

