 FREE 1 to 3-Day Delivery on Orders $149+ Details
How to install a CDC Rear Deck Lid Panel on your 2010-2012 Mustang
Installation Time
15 minutes
Tools Required
- Masking Tape
- Plastic or Wood Wedge
- Heat Gun or Hair Drier
- Isopropyl Alcohol
- Clean Cloth

Shop Parts in this Guide
Installation

About the Product:
This product is designed and manufactured by Classic Design Concepts. The panel is Injection Molded Urethane that is ready to be installed. If you choose to paint this product, we recommend the part be painted by a professional automotive paint facility to maintain the quality of the part. Recommended bake cycle temperature of 150° F or less. Please read instructions before installation and test fit part before painting.
Kit Component:
- Pre-Taped Trim Panel
- Instruction Guide
Attention:
CDC Deck Lid Trim Panel material is pliable and will conform to the shape of Deck Lid upon installation. Failure to follow instructions may result in loss of this product. Classic Design Concepts is not responsible for improperly installed Deck Lid Trim Panel. Deck Lid Trim Panel must be installed at a temperature of 70ºF or above. If necessary, warm the vehicle and Trim Panel areas with a heat gun or hair dryer.
Removing Rear Emblem:
1. Tape area around emblem (Figure 1).
2. Warm emblem with a heat gun or hair drier (Figure 2).
CAUTION: Do not over heat!
3. Insert a plastic or wooden wedge between the emblem and Deck Lid to remove (Figure 3).
Note: Emblem is not intended to be reused.
4. Clean Deck Lid and wipe with isopropyl alcohol to remove wax. It is imperative that any wax be removed from the vehicle at the tape contact areas for proper adhesion.
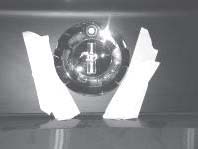
Fig.1
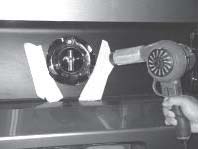
Fig. 2
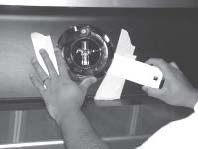
Fig. 3
Installing Rear Deck Lid Trim Panel:
5. Create pull-tabs by peeling approximately 2” of red backing from the 2 individual tape runs on the backside of the Deck Lid Trim Panel (Figure 4).
Fig. 4
6. Center the Trim Panel on Deck Lid side to side (Trim Panel should be approximately 1/16” from the both side edges as well as the bottom edge of the deck lid). Once proper location has been achieved, pull the red backing from the tape and press Trim Panel to deck lid. Once again go over the Trim Panel and firmly press over the tape areas to seat the Acrylic Tape. (Figures 5 & 6).
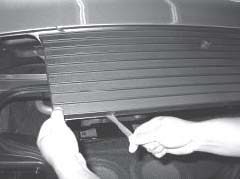
Fig. 5
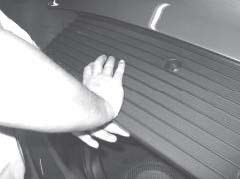
Fig. 6
Thank you for choosing Classic Design Concepts for your restyling needs. If you have any questions or concerns regarding installation please contact [email protected] or call 866-624-7997

