FREE 1 to 3-Day Delivery on Orders $149+ Details
How to Install Cervini's C-Series Upper Grille on your Mustang

Shop Parts in this Guide
Step 1:
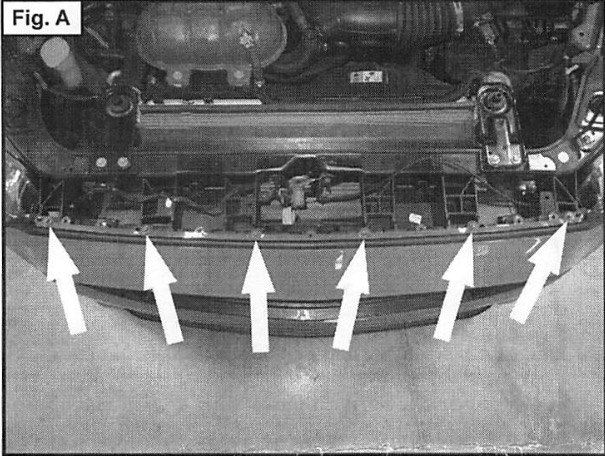
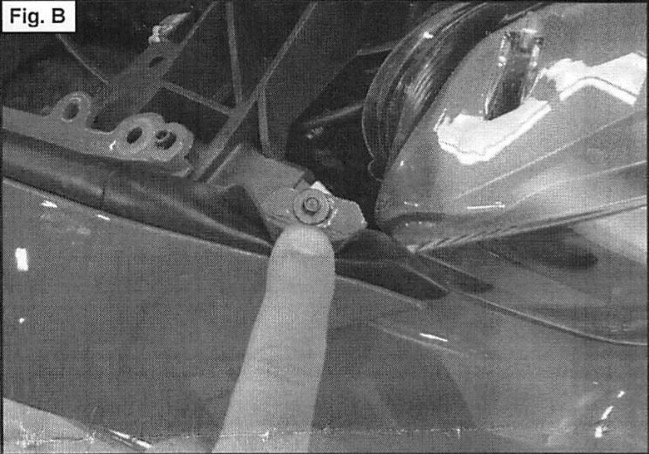
Using a flat head screw driver, remove the push pins that hold the radiator cover in place and then remove the radiator cover. Remove six, 8mm screws attaching the front bumper to the car as shown in Fig. A. Remove two, 7/32" screws each headlight under the rubber seal as shown in Fig.B. |
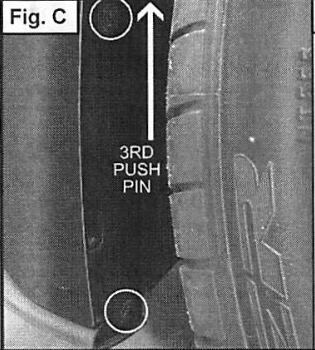
Step 2: Using a flat head screw driver, remove three plastic push pins in each wheel well as shown in Fig. C. To access a screw behind the left side wheel well plastic shield, you will need to turn the wheel all the way to the right side, pull the plastic wheel well back to gain access to the 7mm screw that holds the bumper to the fender, as shown in Fig. D (a ratchet wrench will work best to remove this screw). Repeat on right side. Turning the wheel in the opposite direction to gain access.
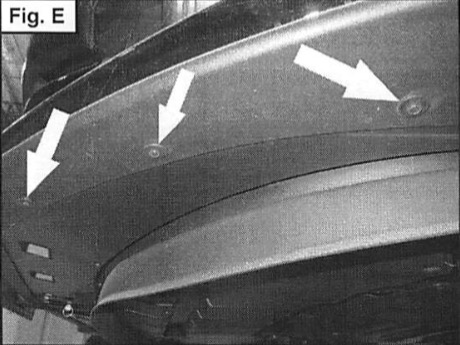
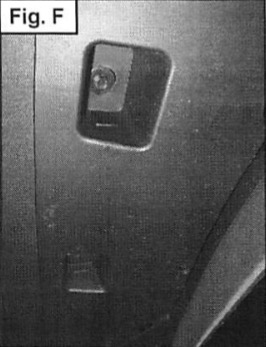
Step 3: Remove twelve, 8mm screws that attach the lower splashpan to the bumper and chin spoiler as shown in Fig. E & F.
Step 4:
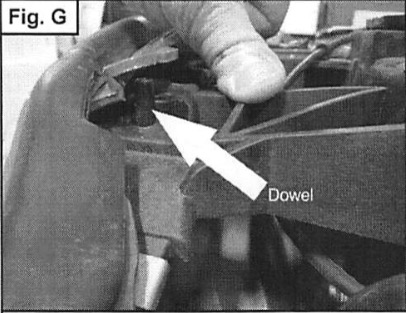
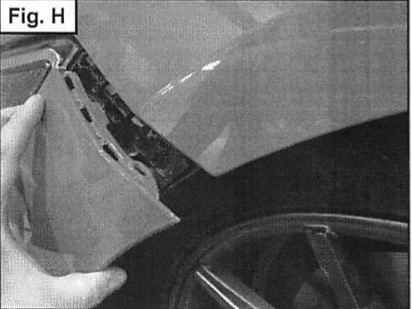
Two people will be required to remove the from the car.front bumper covered painted ledge of plastic the car as clear of where it bumper. A cloth stand is needed to place the bumper on. Pull up on the front the bumper to clear the line up dowels on the reinforcement of shown in Fig. G. While staying clear of the dowels, pull out on the bumper meets the fender to unsnap the from the fender as shown in Fig.H. With the bumper pulled away slightly, unplug the blinker and fog light harnesses. Now place the bumper on a stand with the painted surface on the towels.
|

Step 5:
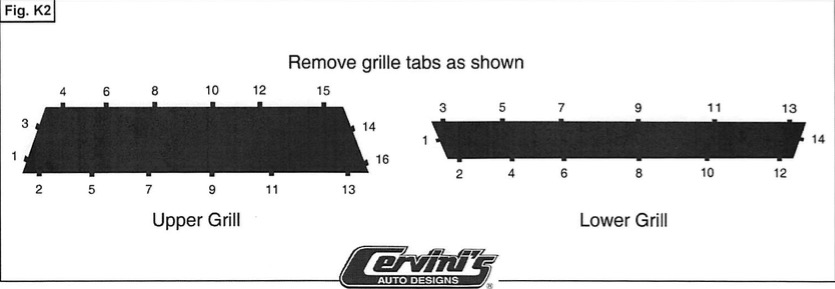
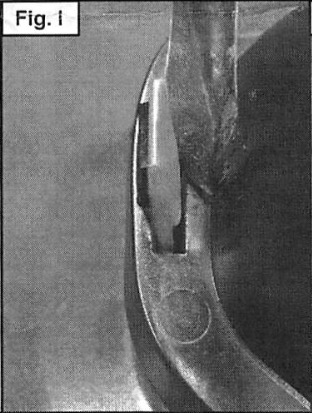
Remove the center plastic 8mph impact bar. This will be reinstalled in Step 10. To remove the grilles you will need 2 people working on this and 2 large flat head drivers. In order to unlock the tabs holding the grilles it is best to work on 2 tabs close together at the time. Starting on one side of the grille apply pressure as shown in Fig.l. Then place your finger tips grille and pull upward as shown in Fig.J. You will unlock the tabs on one side and work your way to side. The order in which you should remove the illustrated in Fig. K2. |
Step 6:
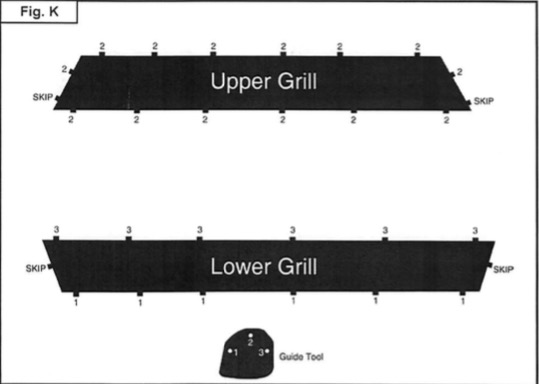
Preparing to install the new Cervini grilles: using the guide tool supplied in the hardware packet all the locking tabs right must be marked with a pointed marker. This diagram will indicate a number on referencing of the number guide tool to use for each tab in Fig.K. |
Step 7:
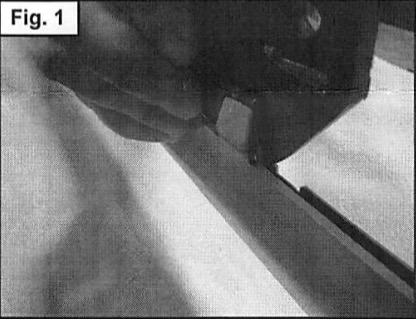
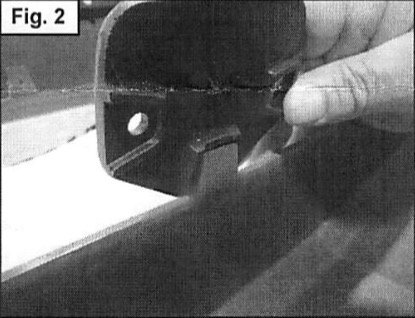
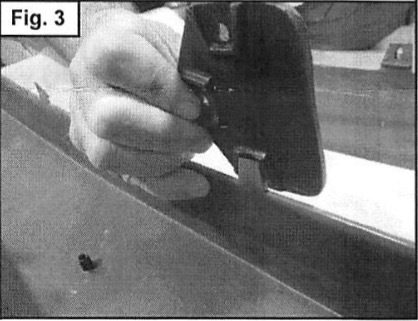
Follow the examples in Fig's. 1, 2 & 3. On the guide tool #1 is to be placed on the flat side of the locking tab, #2 and #3 is to be placed on the lock side of the tab. Fig's 1, 2 & 3 show examples of the guide tool being used. |
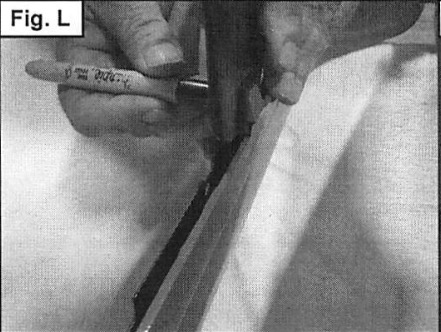
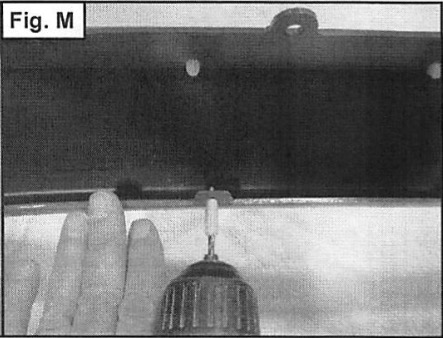
Step 8: While holding the guide tool in place use a pointed marker to dot each location that needs to be drilled as shown in Fig. L. Once all the holes have been marked drill a 3/16" hole through the tabs, we recommend using some masking tape about 1/2" away from the tip, this will keep the drill bit from hitting the top of the bumper when drilling as shown in Fig.M
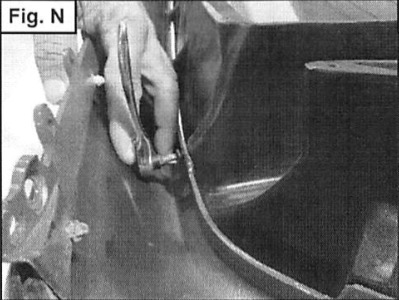
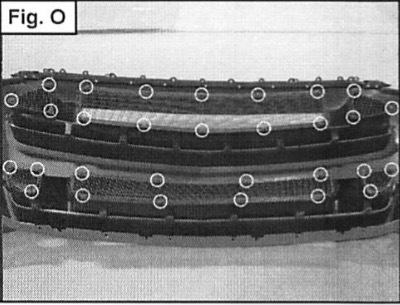
Step 9: Insert the painted grilled from the front of the bumper and install the Phillips screws provided in the hardware packet, do not tighten the screws until all of them ahve been started as show in Fig. N. Install the screen to predrilled locations with the provided Phillips style screws as shows in Fig. O.
Step 10:
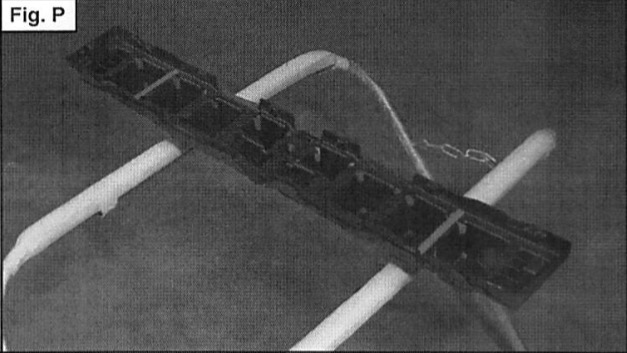
Using isopropyl alcohol, clean the 2 flat surfaces on the 8mph impact bar where the 2 sided tape is installed in Fig. P. Then install the 2 sided tape. Hold the impact bar car and position it centered from left to right. Take note where the 2 sided tape will come in contact area of reinforcement. Clean the area of with isopropyl alcohol and install the bar. |

Step 11:
Once this is complete you can reinstall your bumper onto the car. |