FREE 1 to 3-Day Delivery on Orders $149+ Details
How to Install cp-e TopHat In-Tank Triple Fuel Pump Hat on your Mustang
Installation Time
2 hours
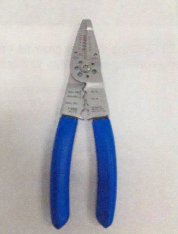
Tools Required
- Wire Strippers
- Flat HeadScrewdriver
- 3/16" Allen Key
- Tape Measurer
***DISCONNECT THE NEGATIVE BATTERY CABLE BEFORE BEGINNING INSTALLATION***
The car battery stores a tremendous amount of energy and must be treated with respect. Disconnect the NEGATIVE, BLACK, wire from the car's battery. Be extremely careful NOT to short the battery with your tools while removing the negative cable. Shorting the battery by touching the terminal will almost certainly cause severe burns, a fire, or even an explosion. FYI, the reason to remove the negative terminal of the battery is so that if the wrench were to slip while on the nut of the battery terminal, and accidentally contact the frame of the car (ground) the result would not be a short from positive to ground, but a much less harmful short from negativeto-negative. Be careful to not slip and hit anything .
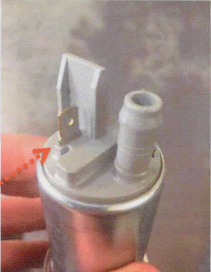
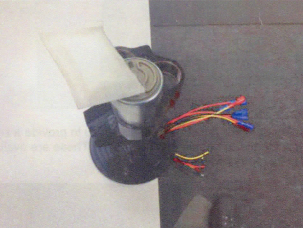
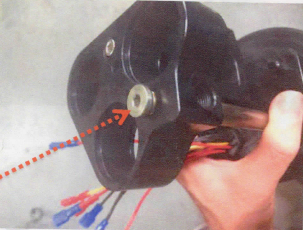
1. If your pump has the male terminals like the one above you can skip steps 4-9. Known pumps that have this are the Tl F90000262, Walbro GSS342, and AEM 320.
2. In this case just figure out the polarity of the pump and slide the correct connector onto it. Red is " " and Black is "-". Most of the time the polarity is marked on the fuel pump.
3. The following steps, 4-9 are for fuel pumps like the Tl Auto F90000274, Tl Auto F90000267, Tl Auto 10000302, and AEM 320E.
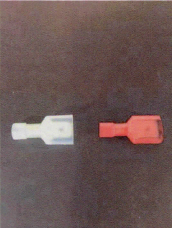
4. The Red Male Connectors are for the 18 AWG wires and the Blue Male Connectors are for 14 AWGwires.
5. The fuel level sender will use the Red Male Connectors. The good news here is that there is no polarity for the Fuel Level Sender, simply make sure you hook up the fuel level sender to the yellow wires on the fuel hat.
6. The 14 AWG wires are for your fuel pump. You will need to cut the connector off as close as possible to the connector.

7 .Strip all wire's back 0.1875" or 3/16" of an inch in preparation for crimping.
8. Using a set of wire strippers like the above will allow you to provide a secure crimp for the connectors and enjoy long term trouble free operation. These are available at hardware stores for $15-25 if you don't already have a set.

9. Be sure to crimp on the metal tube part of the connector for a good secure hold. Insert wire in until insulation bottoms out on metal tube and squeeze. After the crimp be sure to tug on the wire and verify that the crimp will hold. Most of the time 15-20 pounds of pull force will verify a solid crimp.
10. If you mess one of these up don't stress, this type of connector is available at your local hardware store.
11. Be sure to install the 5/16" hoses with the supplied clamps and tighten the clamps down firmly .
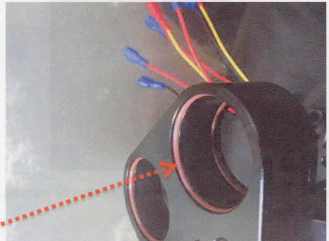
12. Be sure to install the -129 0-Rings into the grooves on the bottom of the fuel hat. There are 6 0- Rings, or if you are only running two pumps you can install 4 of them.
13. Install the fuel pump filter socks and insert fuel pump into the fuel hat. Verify the socks are½" to ¾" above the bottom of the tank and trim the hose as necessary. This can be done with a tape measure.
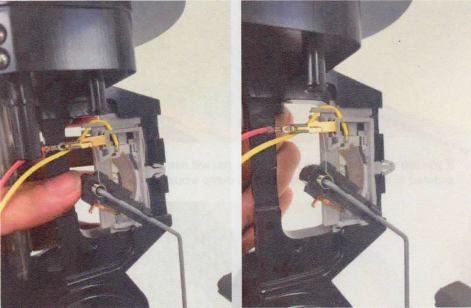
14. It is now time to plug things in electrically, ie. the fuel pumps and fuel level sender.
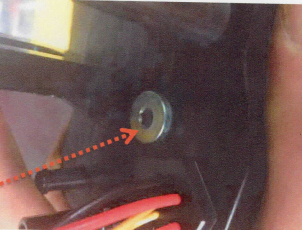
15. If you are only running two fuel pumps you will need to install the provided 4 ORB plug as pictured in the location where the third pump would reside.
16. You also need to determine if you are planning a bottom exit or side exit fuel return location. We recommend the side exit as it seems to help with fuel aeration and tuning. In the picture the plug is installed on bottom so that the fuel will exit out the side. This is also a 4 ORB plug.
17. With the hat partially inside the tank, be sure to install the siphon line from the other side of the tank, this will click into place on the fuel hat.
18. Make sure you click the fuel level sender into place before installing the hat into fuel tank for final time. This is where patience comes into play. Make sure you take your time and install this gently without bending the fuel level sender float bar.
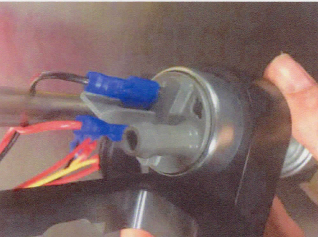
Fuel Level Sender Notes:
Below is a picture of a typical 2008-201 O Fuel Level sender and the correct installation in the fuel hat.