 FREE 1 to 3-Day Delivery on Orders $149+ Details
How to Install The Driveshaft Shop Halfshaft Axle Assembly - 800 HP - Right Side on your Mustang
Installation Time
4 hours
Tools Required
- Jack
- Jack stands
- 8mm socket
- 10mm socket
- 14mm socket
- 15mm socket
- 18mm socket
- 18mm wrench
- 32mm socket
- 36mm socket
- Torque wrench
- Ratchet
- 1/2” breaker bar
- Pry bar
- Hammer

Shop Parts in this Guide
Removal:
1. Begin by jacking the car up on a flat, level surface. Place jack stands under the car before beginning any work on the vehicle.
-Remove the rear wheels, which will require a 21mm socket for OEM lugs.
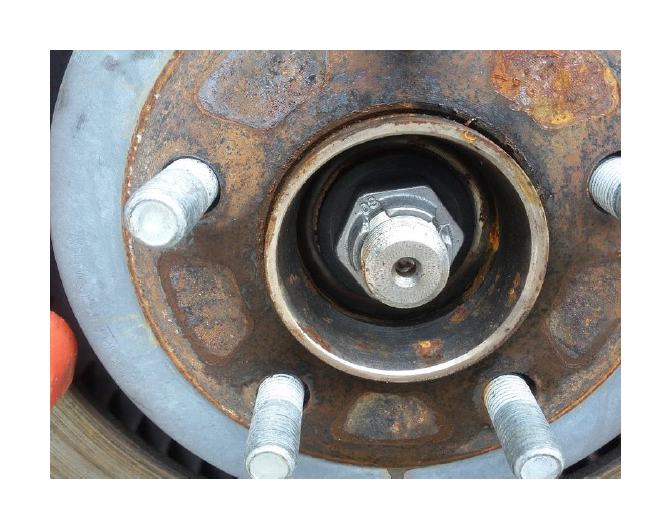
2. Remove the spindle nut with your 32mm socket and breaker bar. Leaving your parking brake on will make this much easier.
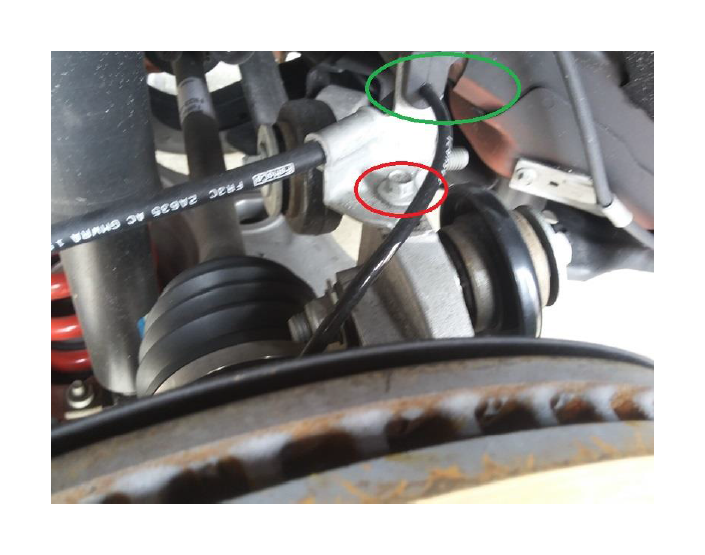
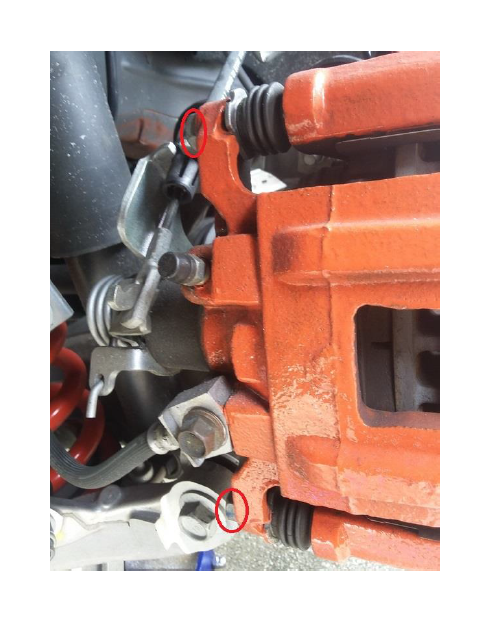
3. Remove the bolt that holds the parking brake cable to the spindle (circled in red) with a 10mm socket. Also remove the wheel speed sensor wire grommet (circled in green) from the bracket.
4. Remove the bolt that holds in the wheel speed sensor (circled in red) with an 8mm socket.
5. Remove the ABS sensor and tuck it out of the way. I put it around the top of the shock mount. Be sure to keep the sensor clean, debris that gets on the sensor can throw an ABS light.
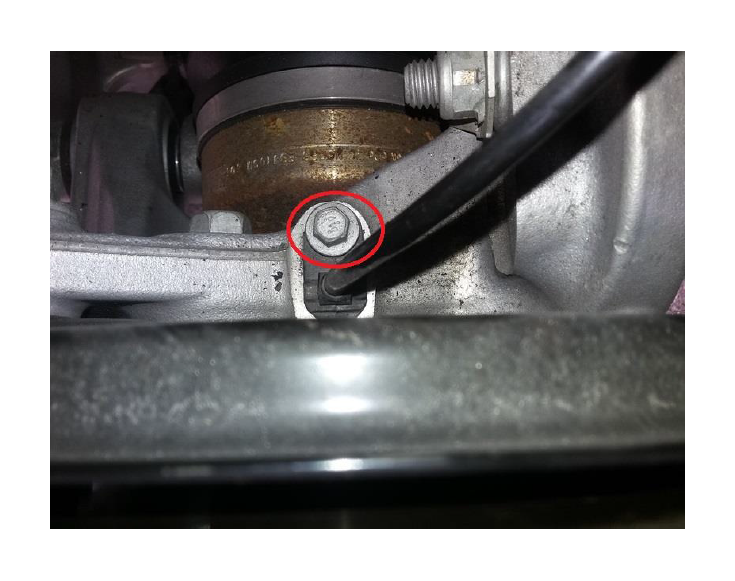
6. Remove brake hose bracket bolt (circled in red) with a 10mm socket. It’s located on the sway bar end link.
7. Next you will want to remove the caliper by removing the 2 14mm bolts (circled in red). Be sure to turn your parking brake off before removing the caliper.
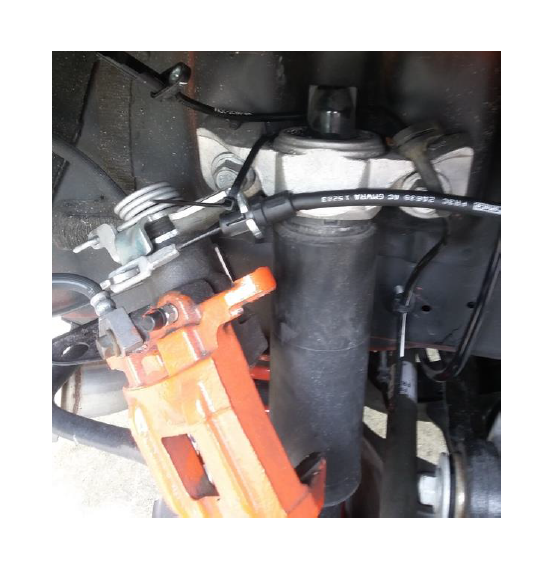
8. Attach a zip tie to the body to support the brake caliper, this will prevent damage to the brake hose.
9. Separate the upper arm from the spindle using a 15mm socket and 18mm wrench.
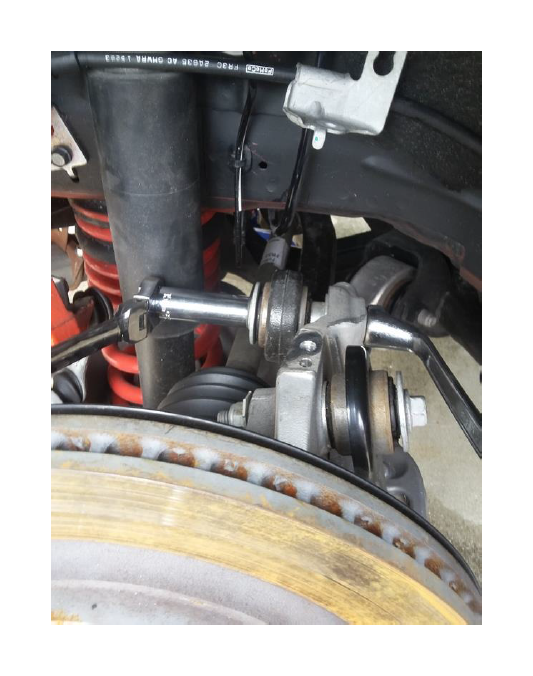
Leave the nut on the end of the bolt, as you will need to drive the bolt out to completely remove it. Drive the bolt out by hitting the nut with your hammer, this will prevent the threads from getting damaged.
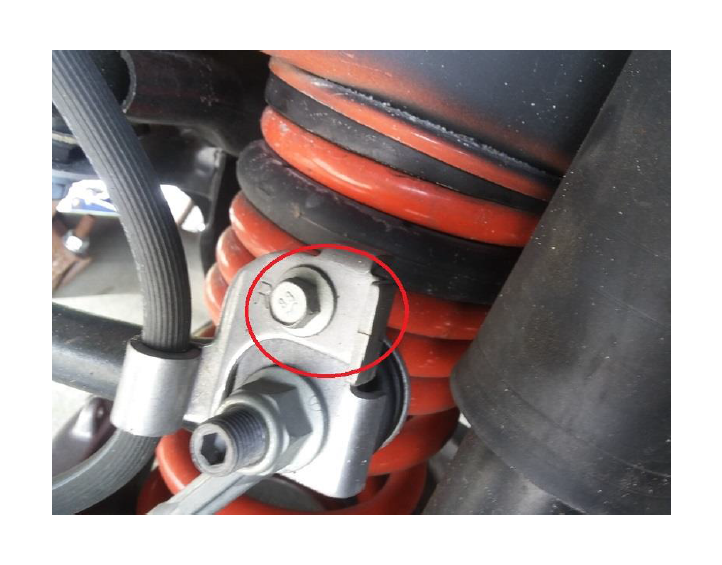
10. Remove the bolt that attaches the vertical link to the spindle with a 15mm socket.
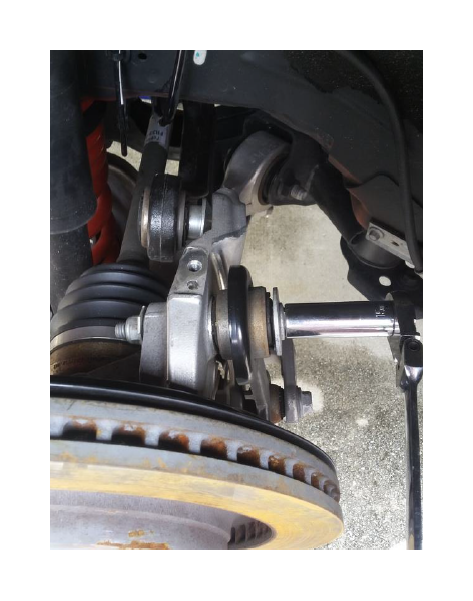
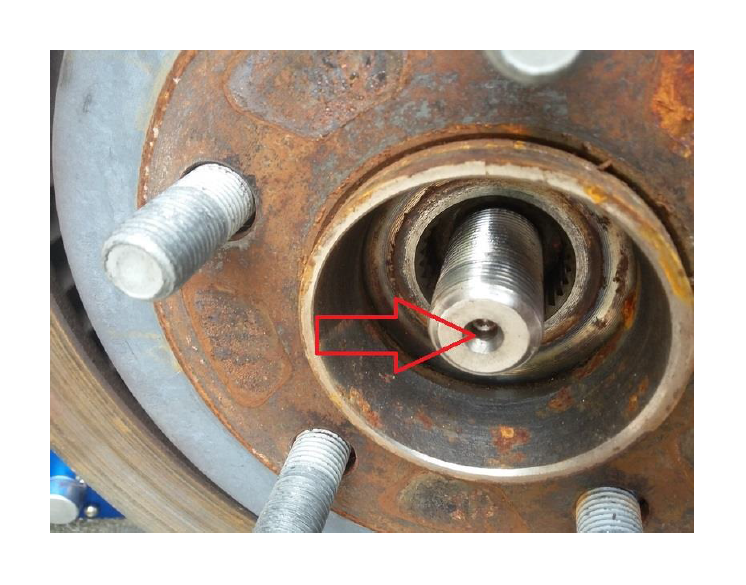
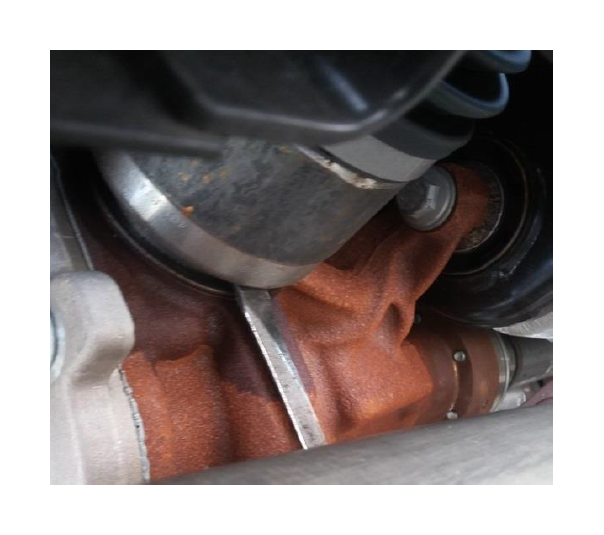
11. Lightly tap the face of the axle (red arrow) with a hammer to separate it from the spindle. I put a deep socket up against the axle to drive it all the way out of the splines on the spindle.
12. Remove the bolt that holds the lower control arm to the spindle with an 18mm socket.
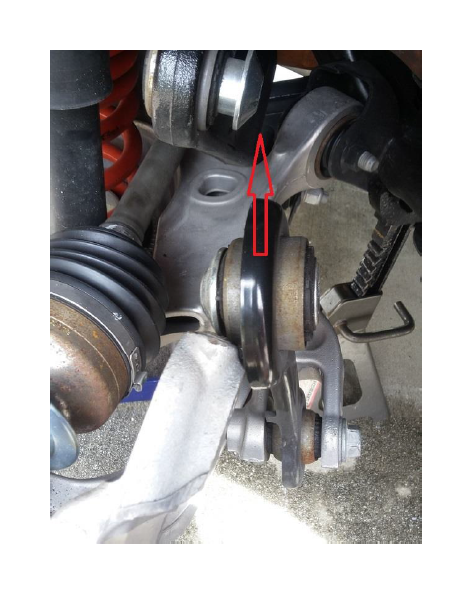
13. Pry the vertical link towards the center of the car (red arrow)to separate it from the spindle.
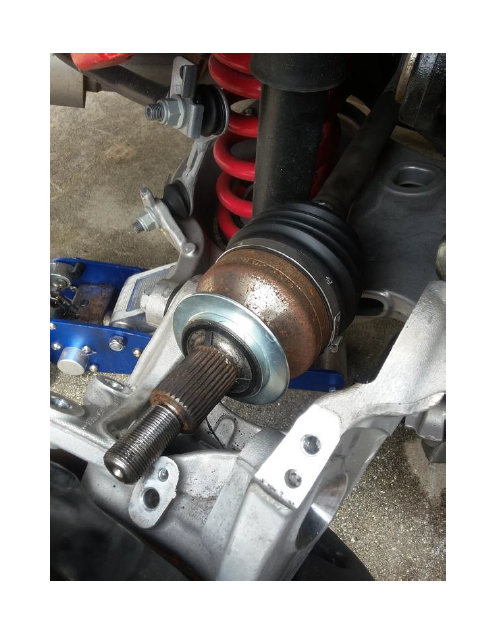
14. The spindle can now be pulled towards you and the axle splines can be slid out of the spindle the rest of the way. Bend the axle at the joint to free it from the spindle completely.
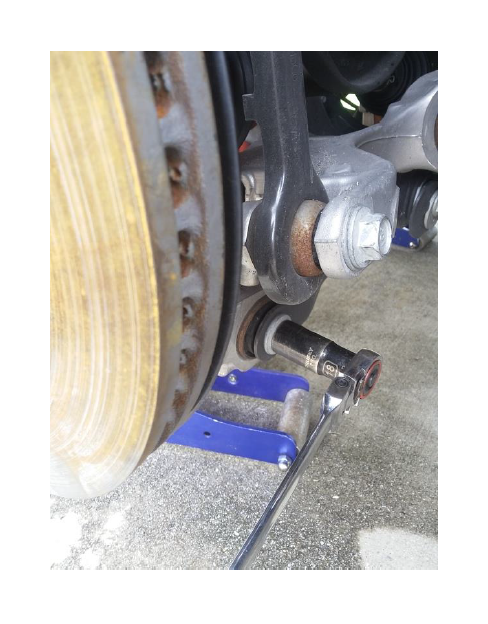
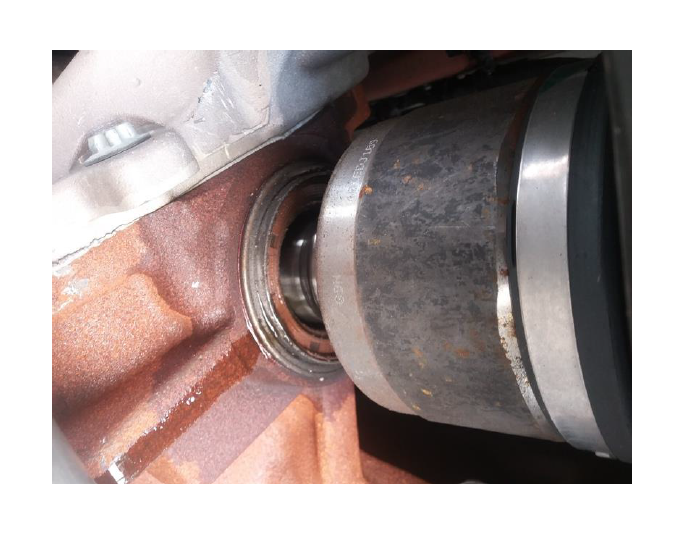
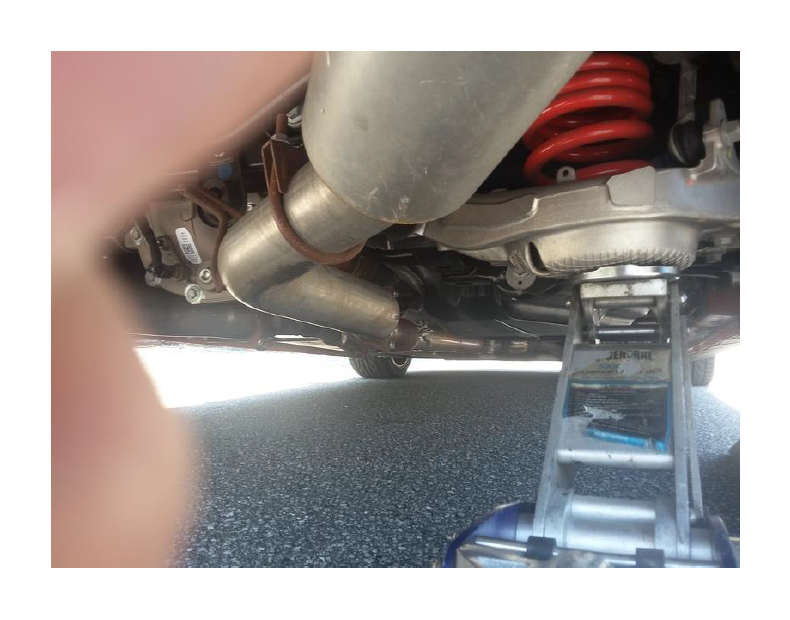
15. Now go underneath the car to remove the axle from the differential. You will do this by prying the axle out like the image below.
You may see a couple drops of fluid leak out when removing the axle, this is normal.
16. The axle should now be free and you will be able to remove it from the car by pulling it out.
Installation Procedure:
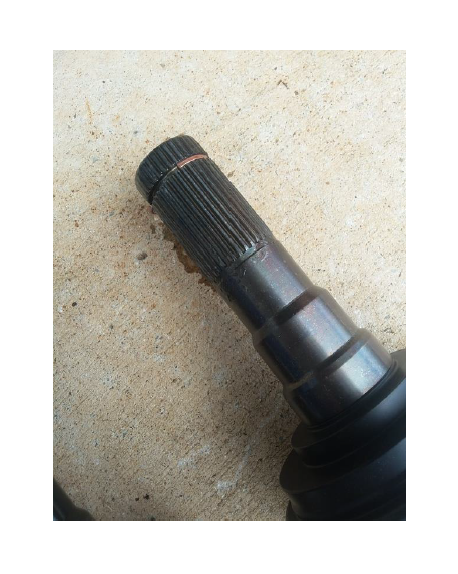
1. Put a light coat of grease on the splines of the inboard axle joint before installing.
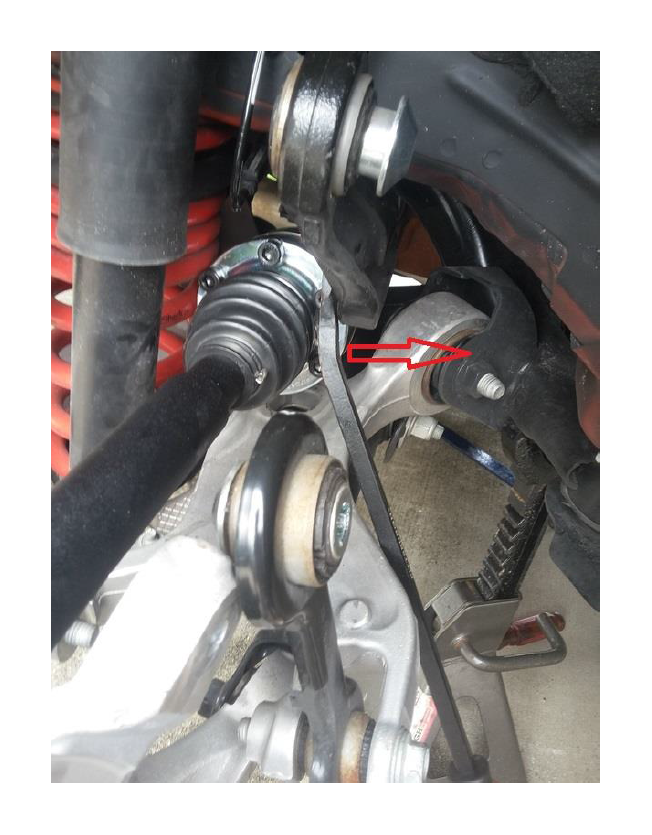
2. Install the axle the same way it was removed. This is where a helper will come in handy if you have one. The new axles are a bit larger than the stock units, and due to this the upper control arm will be slightly in the way when sliding the axle in. Have your helper use a pry bar to move the control arm slightly towards the front of the vehicle (red arrow), and slide the axle in.
3. Get the axle splines lined up with the differential and push the axle in place until you hear a click. The click indicates that the shaft is fully seated, so do not move on from this step until you hear it.
4. Slide the splines on the outside of the axle into the spindle. Again note that these axles are a bit beefier than stock, so it will take a bit more effort to slide them in than it took to remove the stock units.
5. Install the bolts on the upper and lower control arm, as well as the vertical link LOOSELY.
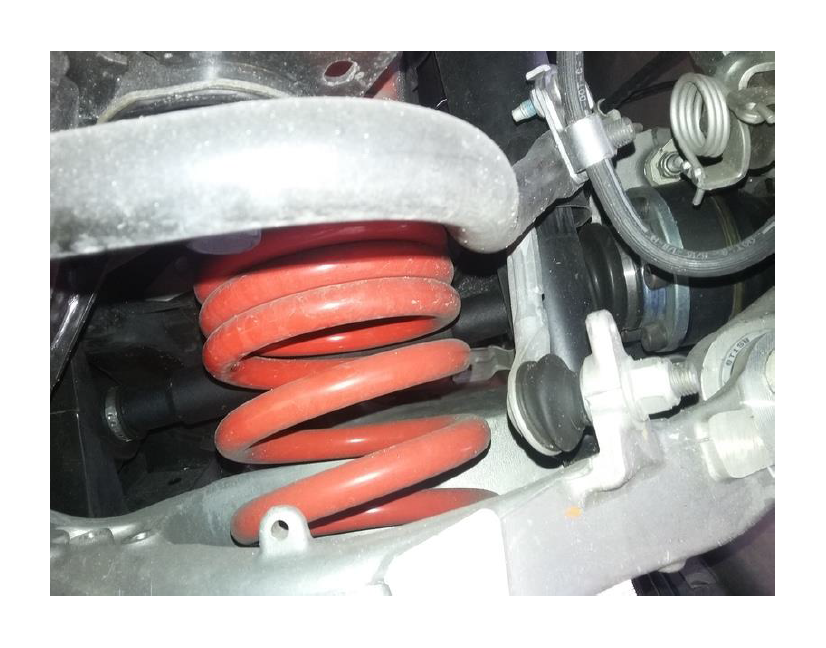
6. Before torqueing down everything it is important to make sure the suspension is under full load for proper alignment. Do this by placing a jack under the spring cup to compress the spring to ride height.
7. Now go back and torque down the bolts to the upper and lower control arms and vertical link. The torque specs are as follows:
*Lower control arm-129 ft/lbs using an 18mm socket
*Upper control arm-76 ft/lbs using a 15mm socket and 18mm wrench
*Vertical link-76 ft/lbs using a 15mm socket
8. Reinstall the brake caliper and torque the 2 14mm caliper bolts to 24ft/lbs.
9. Install the brake hose bracket bolt with a 10mm socket.
10. Secure the parking brake cable to the spindle by tightening the 10mm bolt to 21ft/lbs.
11. Install the wheel speed sensor and torque the 8mm bolt to 80 in/lbs
12. Install the supplied spindle nut onto the axle using a 32mm socket. Torque to 125ft/lbs. Be sure to have your parking brake on before torqueing to spec.
13. Reinstall wheels using a 21mm socket for OEM lugs. Torque to 145ft/lbs.
14. Remove vehicle from the jack stands and set on the ground. Recheck torque specs on wheel lugs before driving. Enjoy your new axles.
Installation Instructions Created and Submitted by AMericanMuscle Customer, Jonathan Brown on 9/23/2016

