FREE 1 to 3-Day Delivery on Orders $149+ Details
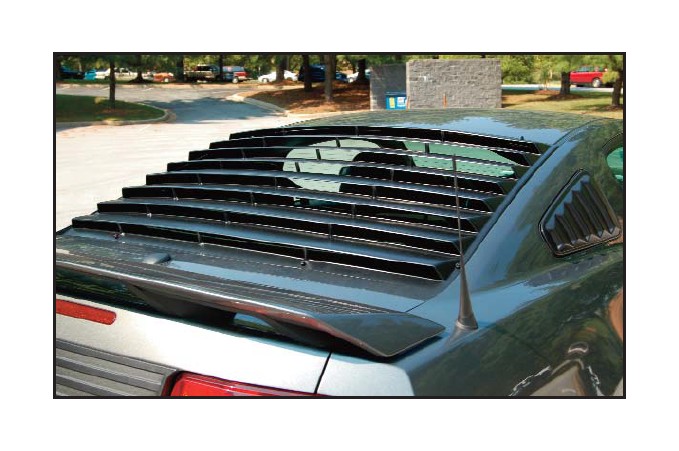
How to Install E & G EGX Rear Window Louvers - Textured Black (05-14 Coupe) on your Ford Mustang

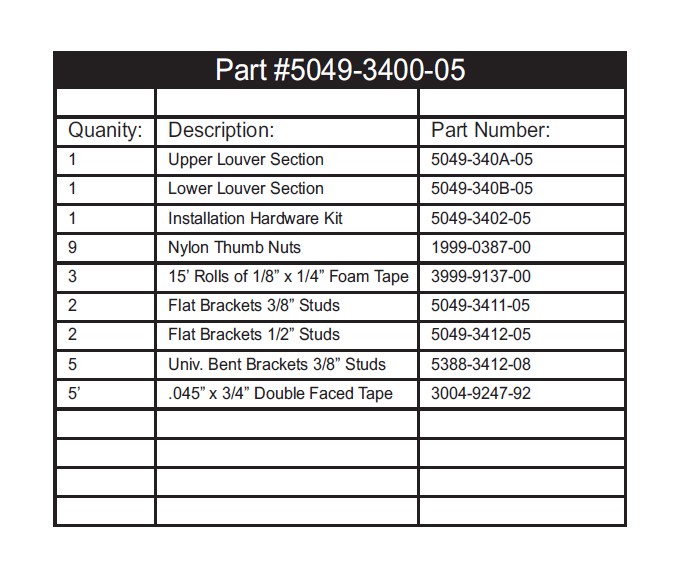
Shop Parts in this Guide
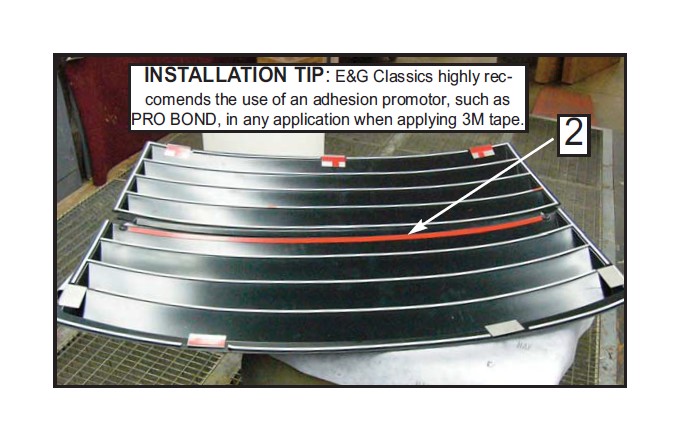
1. Place the louvers onto a clean, flat work area. Temporarily install the mounting brackets (two (2) flat ones at the bottom). Then install the remaining five (5) bent brackets around the perimeter. Then install the supplied 1/8” x 1/4” foam tape to the inside sur face (where shown with white lines) breaking at the mounting brackets.
2. Apply the .045” x 3/4” 3M double-sided tape on the upper edge of lower half of the louver set as shown.
3. Thoroughly clean the rear window on the vehicle.
4. Once the mounting brackets have been removed, align the louvers over the rear glass. Please pay close attention to the alignment since this set consists of two individual louver sections. The louvers should be pushed as forward as possi ble on the upper glass area.
5. Lift up the sides of the louvers and insert the five (5) bent mount ing brackets (1 per side & 3 along the top) making sure that the bent edges are facing outwards and the mounting studs are protruding through the existing holes in the louvers.
6. Once the five (5) bent brackets are in place, mark their locations with a grease pencil.
7. Remove the two sections of louvers and mounting brackets.
8. Take the five (5) bent brackets and remove the red 3M tape backing. Align the brackets to the markings made in Step #6 and press firmly into place.
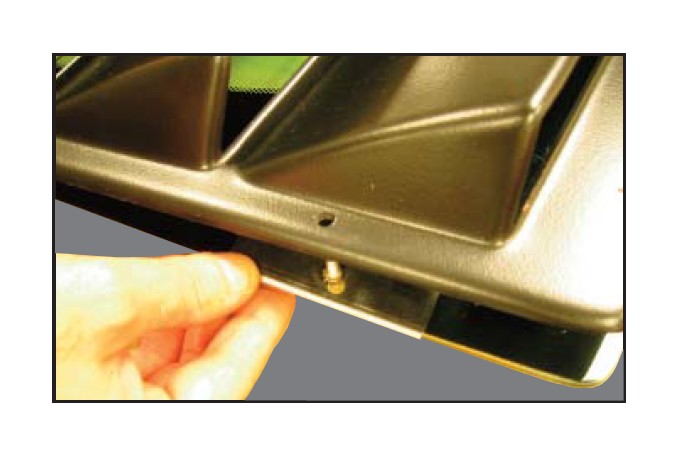
9. Place only the lower section of the louver on the rear glass over the previously installed lower brackets.
10. Remove the backing from the red 3M tape on the two flat brackets with the 1/2” studs. Important: These are the only flat brackets that have 1/2” studs.
11. Place the stud through the upper hole & press the bracket down firmly to the glass.
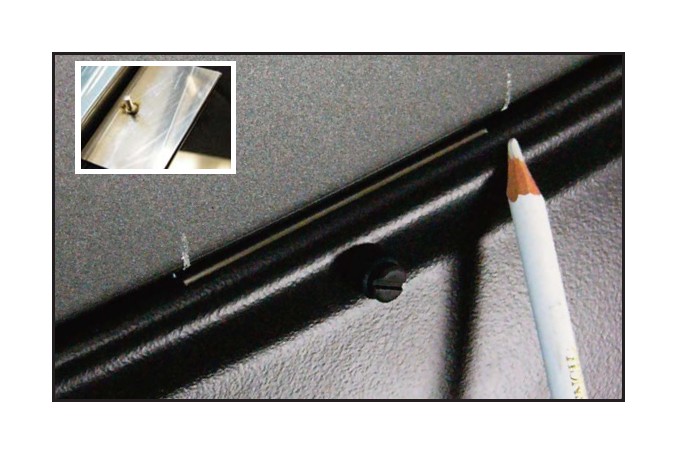
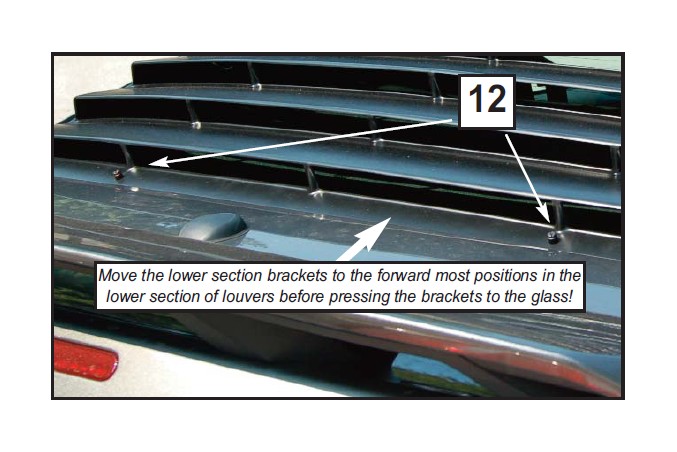
12. Repeat Step #10 with the two lower section flat brackets (3/8” studs) that are located just above the trunk (ensure that the bracket/stud location is in the most foward location away from the deck lid before pressing the brackets to the glass).
13. Remove the lower section of the louver.
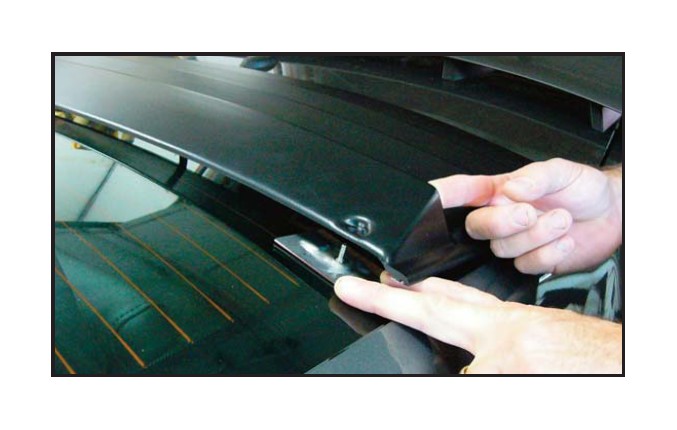
14. Place the top section of the louver in place ensuring that all studs protrude through the mounting holes.
15. Remove the backing from the 3M tape on the lower section of the louvers that was attached in Step #2. Align the lower section to the mounted brackets and press the upper and the lower together.

16. Secure the louvers using the supplied nylon thumb nuts.
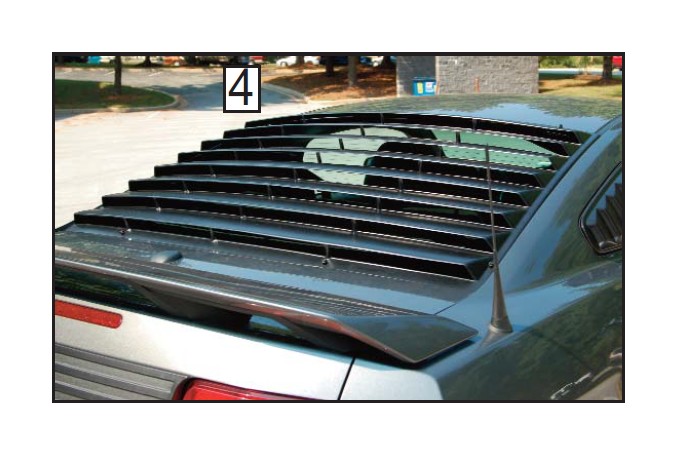
17. Finished installation.