FREE 1 to 3-Day Delivery on Orders $149+ Details
How to Install E & G Polished Q Grilles (10-12 V6) on your Ford Mustang
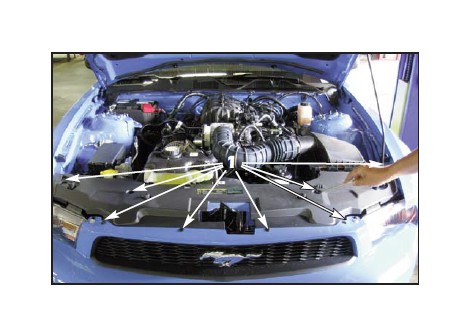
1. Remove the eight (8) plastic push fasteners using a small flat blade screw driver and remove the radiator support panel cover from the vehicle (to be reused).
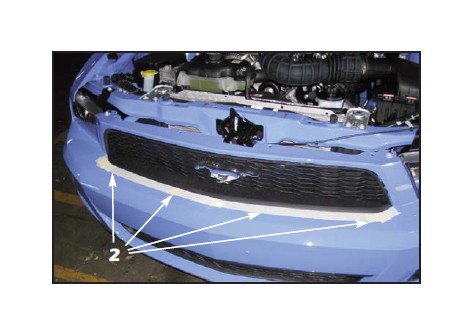
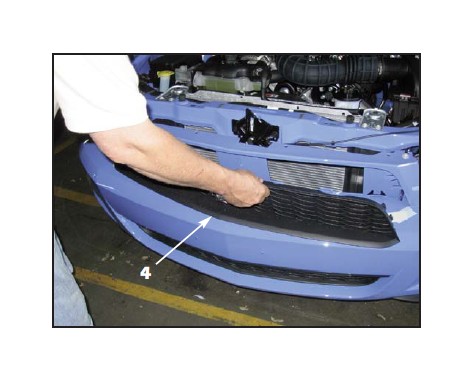
2. Use masking tape to protect the bumper cover grille opening while removing the factory grille insert.
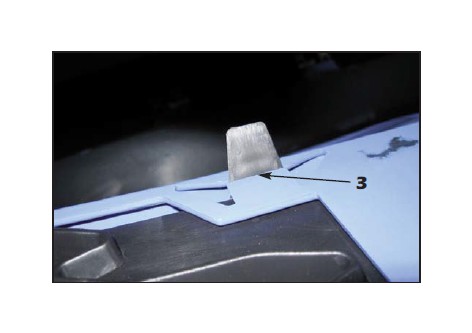
3. Lift up on the bumber cover tab locking the factory grille insert mounting tab in place, then push the mounting tab forward to begin grille insert removal (10 mounting tabs total).
4. Carefully pull the factory grille insert out of the bumper cover, making sure you do not drag it across the top of the bumper cover.
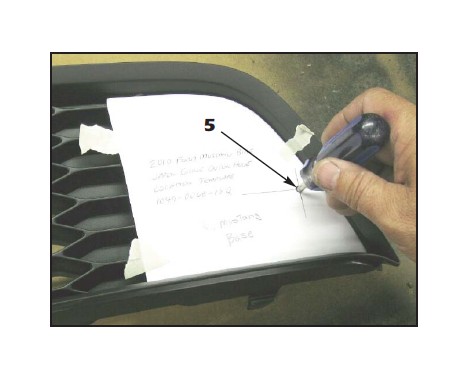
5. Carefully cut out and align the upper grille outer hole location template and tape it into place and use an awl or similar pointed tool to mark the grille at the hole locations. Keep the awl perpendicular to the surface of the grille for an acurate hole location.
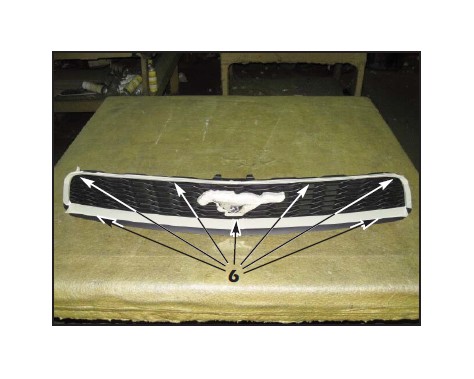
6. Carefully tape the grille insert as shown to prevent scratching the plastic during the “Q” grille installation. You must also carefully tape the raised mounting boss surrounding the pony emblem.
7. Use a 1/8” drill bit to drill a pilot hole where the marks were made in the factory grille. Enlarge the holes to 5/16”.
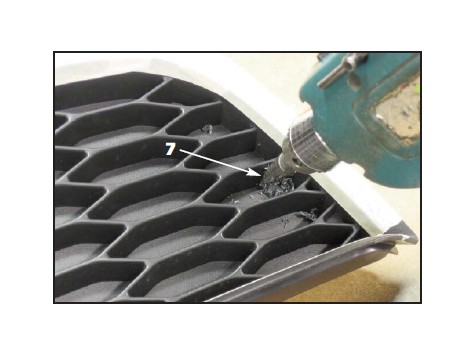
8. Turn the factory grille over and clean off any plastic shavings.

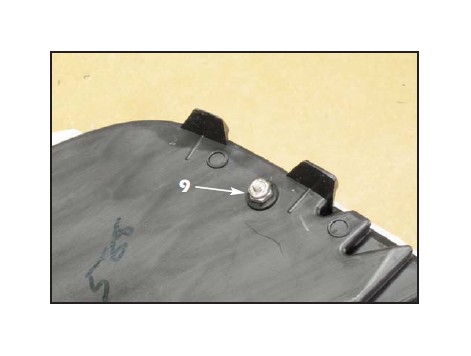
9. Carefull align the cleaned “Q” grille into the factory grille insert, making sure you do not scratch the factory grille insert. Install a black plastic washer and a 8-32 ESNA half nut onto each stud and tighten.
10. Position the grille back into the bumper cover opening and align the mounting tabs. Press firmly to engage the mounting tabs into the slots in the bumper cover.
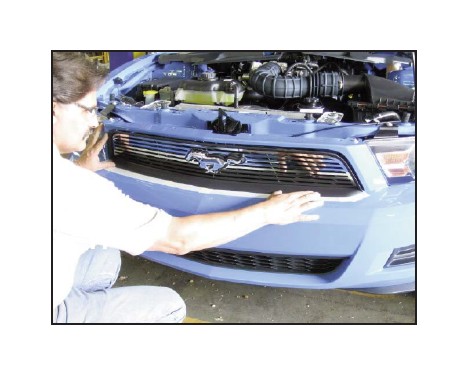
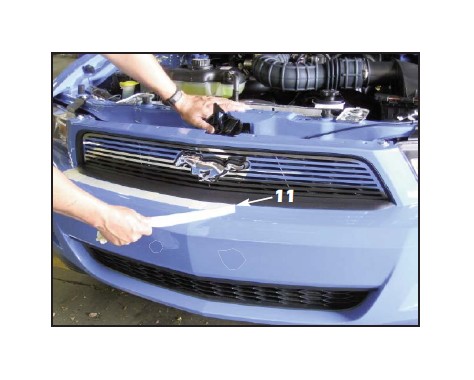
11. Carefully peel off the masking tape from the bumper cover to finish the upper grille installation.
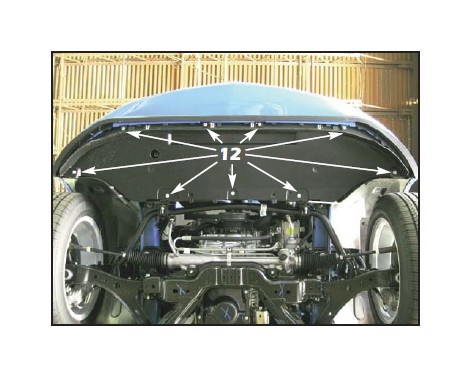
12. Raise the vehicle and remove the lower front aero pan 5.5mm hex screws.
IMPORTANT: It is not necessary to remove front license plate brackets to install the lower “Q” grille.
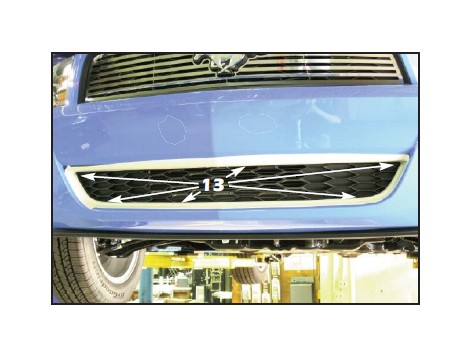
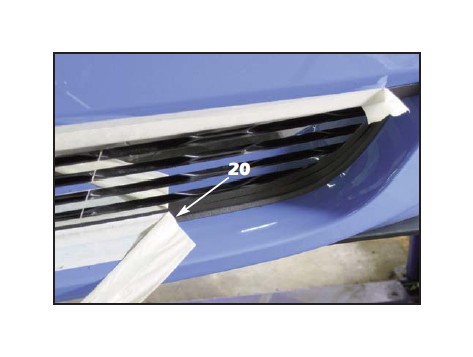
13. Apply protective masking tape around the lower grille opening (as shown).
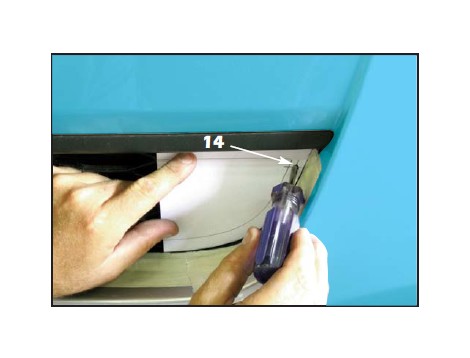
14. Using the supplied template, mark the outer stud hole locations using an awl or similar pointed tool.
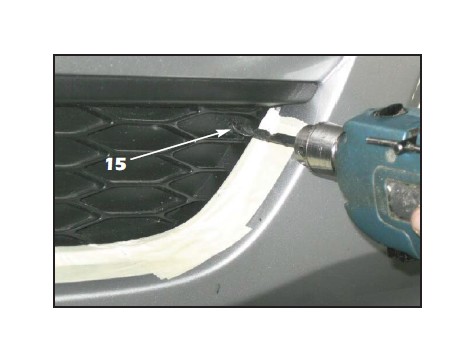
15. Use a 5/16” drill bit to drill through the marks made in the previous step.
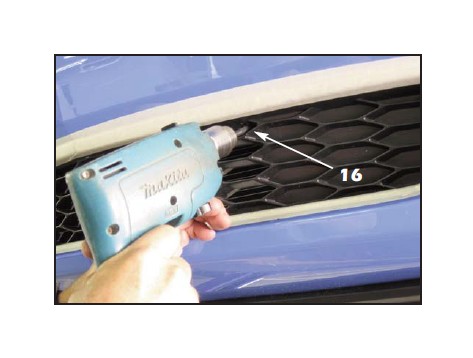
16. Test fit the lower grille. If the upper studs hit the factory grille, remove the “Q” grille and use a 5/16” drill bit to remove some of the factory plastic interfereing with the upper mounting studs. If you do not do this, the grille will not be centered in the factory opening.
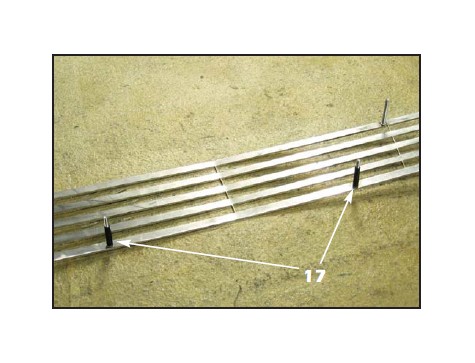
17. Trim the closed ends from the black cap plugs and install them onto the lower center mounting studs on the lower grille.
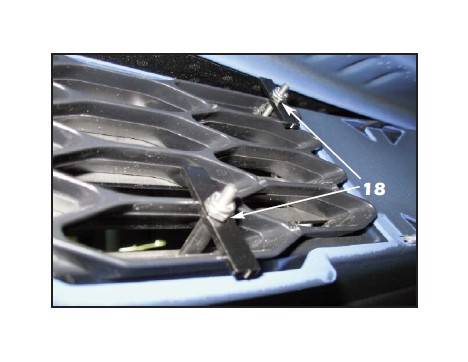
18. Align the lower grille into place, making sure that the studs protrude through the outer holes drilled in Step 15. Install the supplied rectangular mesh retainers to secure the grille to the factory lower grille.
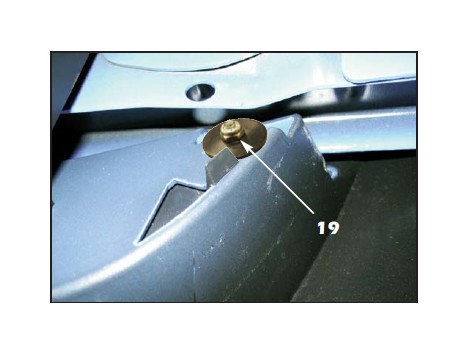
19. Install a large black plastic washer and a #8-32 ESNA half nut onto each outer stud and tighten.
20. Remove the protective masking tape by pulling it back over itself to minimize tape breakage. Lift up on the “Q” grille if the tape appears to be caught underneath.
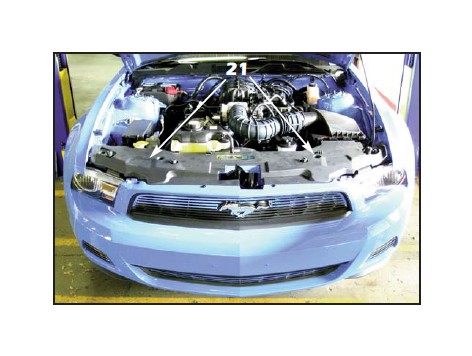
21. Reinstall the radiator support panel cover and the lower aero pan to finish.