FREE 1 to 3-Day Delivery on Orders $149+ Details
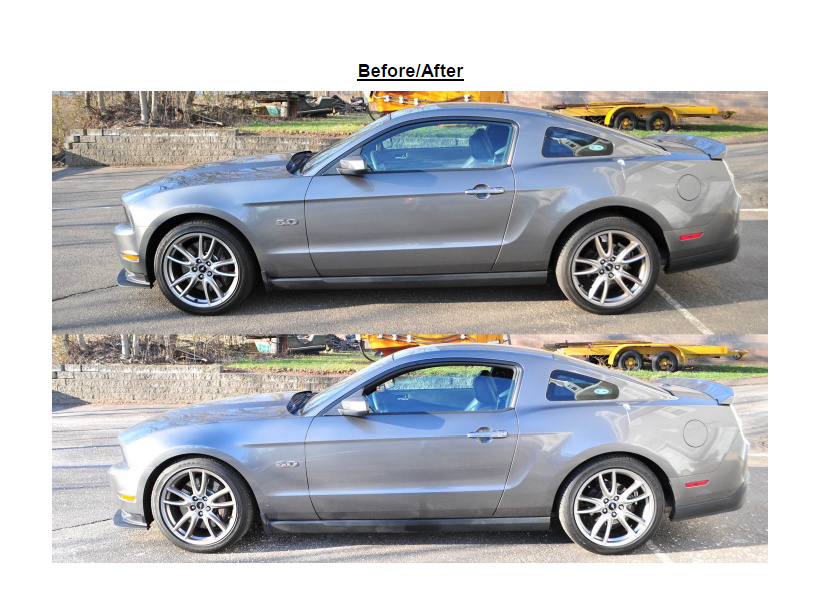
How to Install Eibach Sport-System-Plus on your Mustang
Installation Time
6 hours
Tools Required
- 1/2” Drive Torque Wrench
- 7, 8, 10, 13, 15, 18, 19, and 22mm sockets and wrenches
- T40 Torx driver
- Rubber Mallet
- Small and Large Pry Bars
- Lithium Grease
- Low profile Floor Jack and Jack stands
- Drive on Ramps
- Wheel chocks
- Hack Saw
- 5/32nd Allen key

Shop Parts in this Guide
NOTE: If for whatever reason you can’t jack the car up on 4 jack stands, then you MUST do 1 axle (front or rear) at a time. Meaning do not lift the driver side of the car and attempt to install everything. You will have an extremely difficult time installing the sway bars due to the very heavy load they will be under if the tire is resting on the ground.
TIPS: When working with suspension components the torque specs tend to be higher. If possible, I’d highly recommend using air tools. It will make the install much faster, and less rigorous on yourself.
Lifting Vehicle
1. Place the low profile floor jack under the engine cross member jacking point right in front the oil pan.
2. Once the vehicle is high enough, locate the openings in the rocker covers exposing a jacking point on the pinch weld, and place the jack stands here as shown below. Slowly lower the vehicle onto the stands.
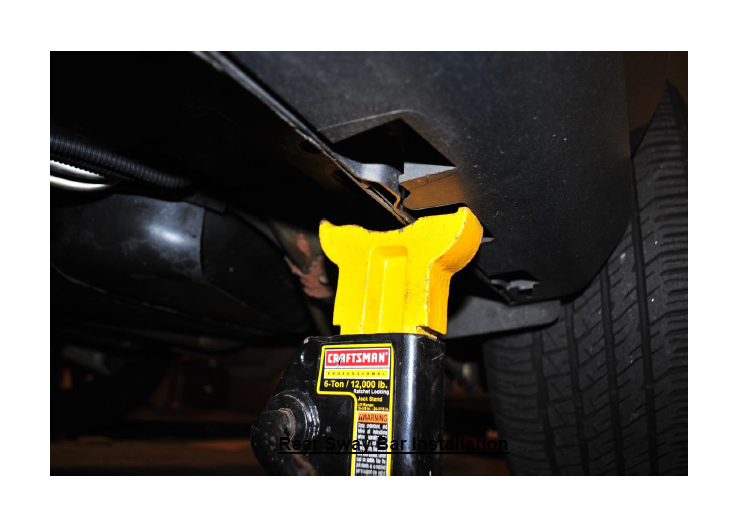
3. Carefully place your floor jack underneath the rear differential. Be cautious to not damage the face of the diff cover with the jack cup.
4. Once the rear of the vehicle is off the ground, repeat the same process as before to locate the correct locations to place the jack stands on the pinch welds. Photo shown below.
5. Once vehicle is off the ground, give it a good push side to side to make sure the car is seated on the jack stands.
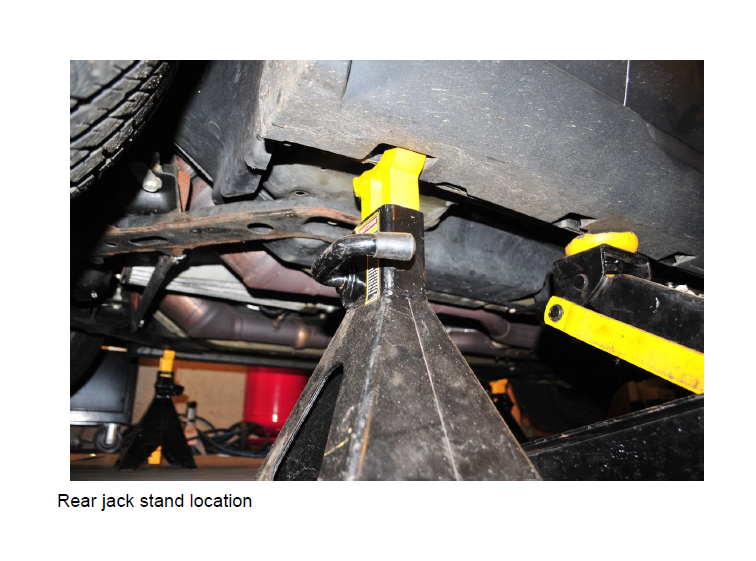
Rear jack stand location
1. Begin by removing all 4 wheels off the vehicle and placing in a safe area.
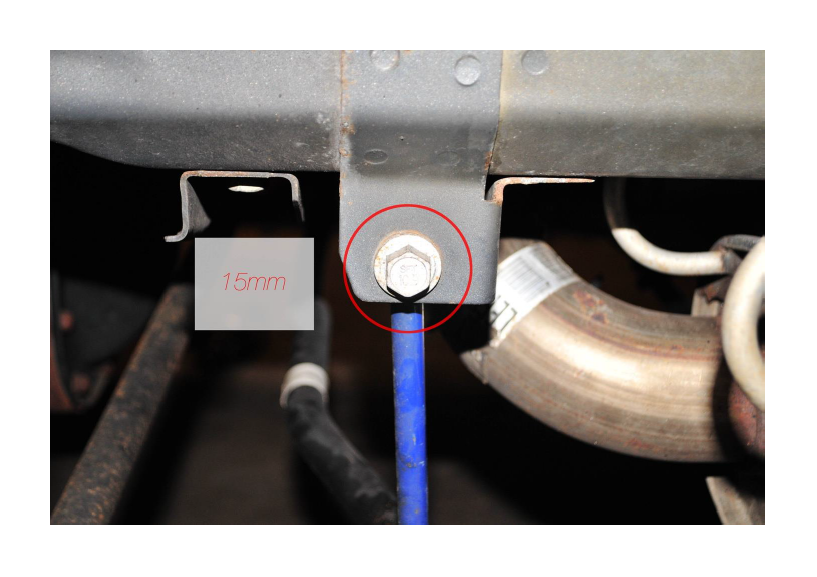
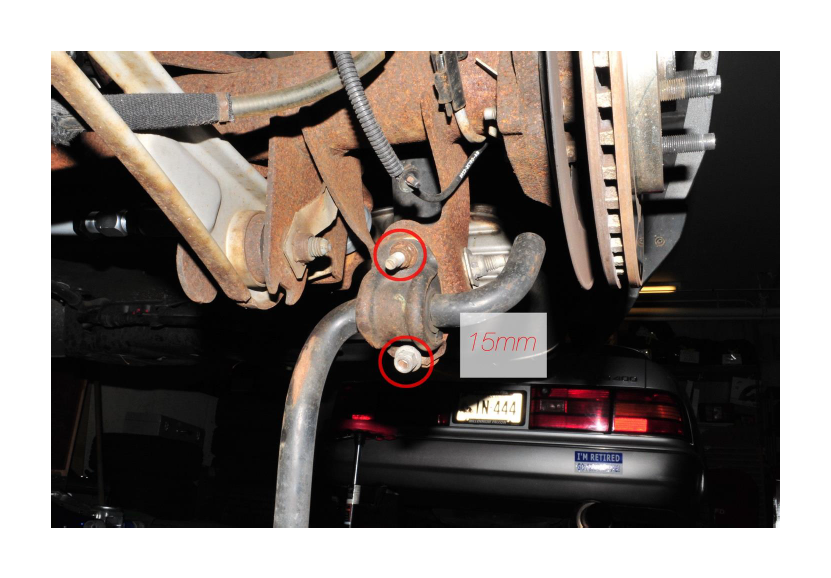
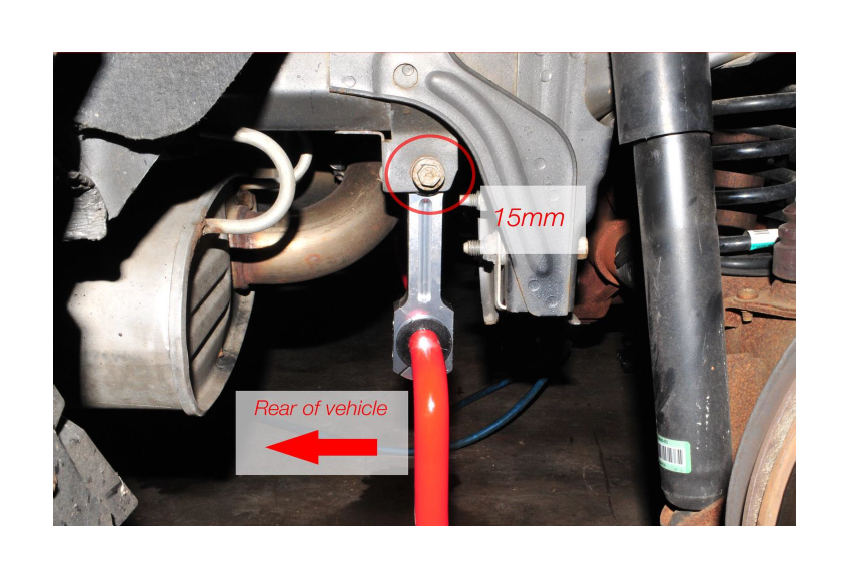
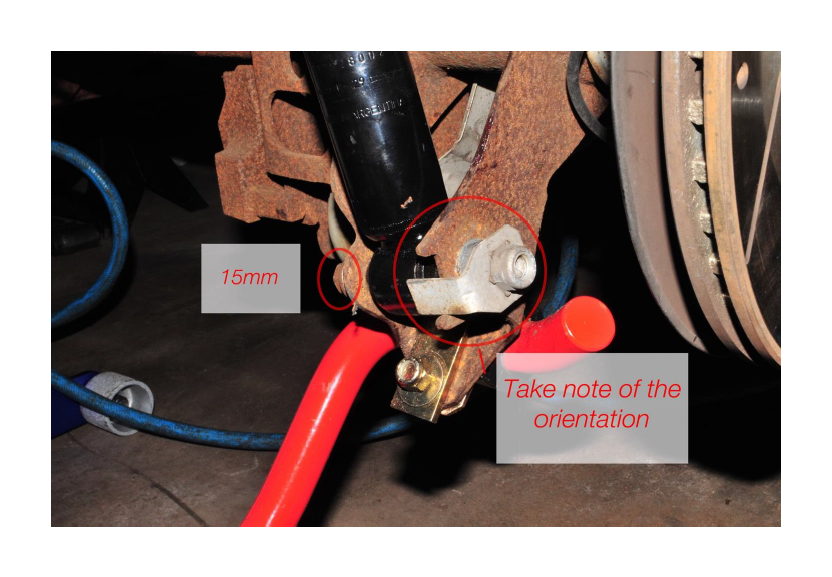
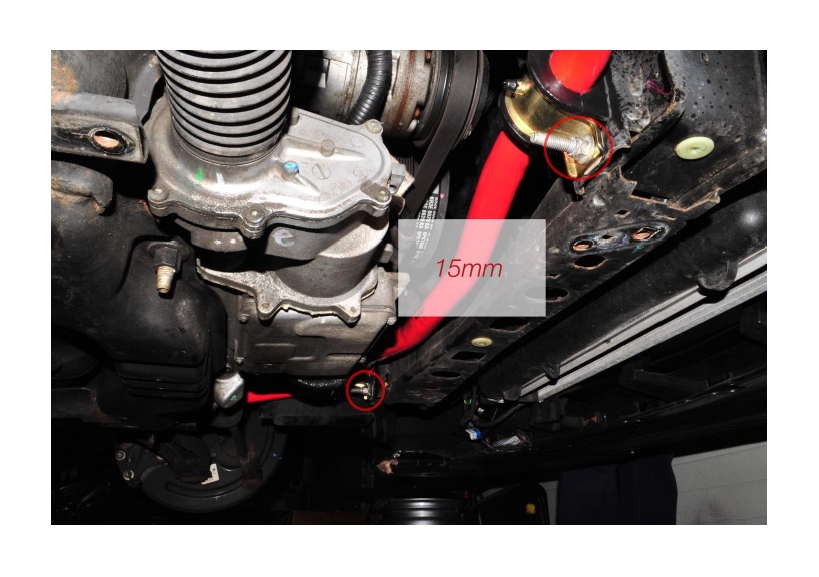
2. Locate the 15mm bolts attaching the sway bar end links to the chassis. Remove both bolts and slowly lower sway bar and rest it on the ground.
3. Now locate the sway bar mounts on the rear axle, and remove the 2 x 15mm bolts on each side. Once the bolts are taken off you can remove the sway bar from the vehicle.
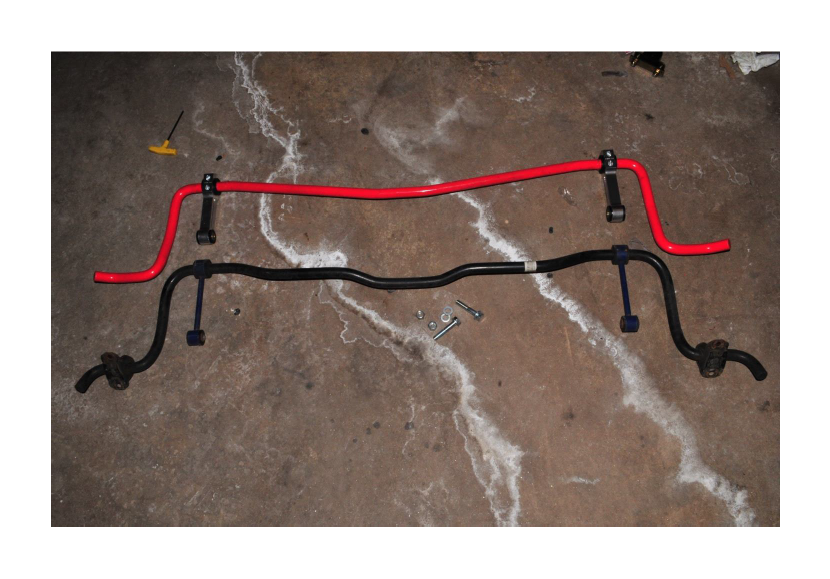
4. Place the old sway bar on the ground alongside the new one with the ends curving up on both. This will help you get a general idea of where the end link’s
will go, as well as the correct orientation for installation.
5. You will find 3 different types of bushings included for the rear sway bar. The ROUND solid one with the slit cut into it is what we will be using for this step. Take the bushing, and use the supplied grease to coat the outside & inside with a nice uniform coating. Now spread the bushing open and install it on the bar with the slit facing up as shown below.
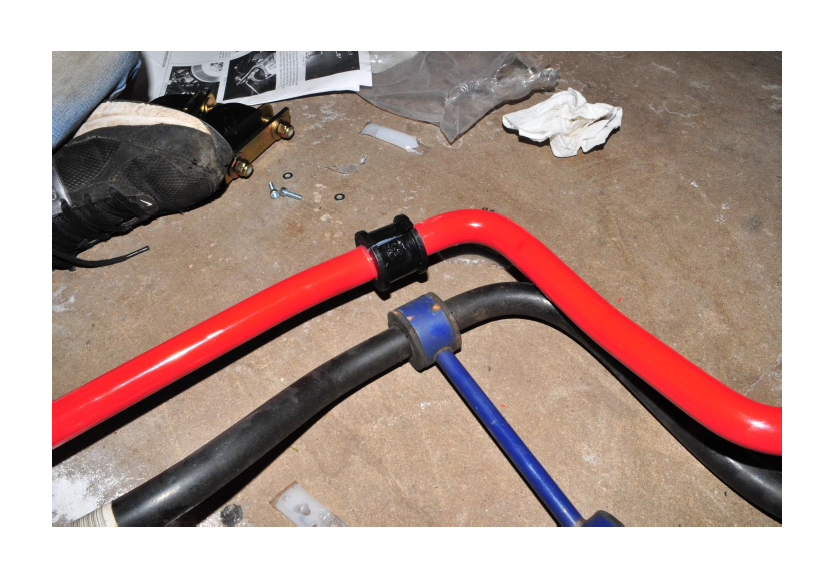
6. Now locate the round 2 piece bushings with the metal sleeve in the middle. Using the same grease, lube the outside of the bushings, as well as the outside of the metal sleeve. Insert the bushings into the end link making sure they are in all the way, and then insert the sleeve.
(NOTE: We had a clunk which turned out to be this metal sleeve being too long and not allowing the bushing to compress when it was installed and torqued down on the car. The fix was to have Eibach ship us a pair of new sleeves which had been ground down. If you have this issue, you can choose to do the same, or save yourself the time having to wait for them to ship you a new pair and just grind about a millimeter of material off one of the ends of the sleeve.)

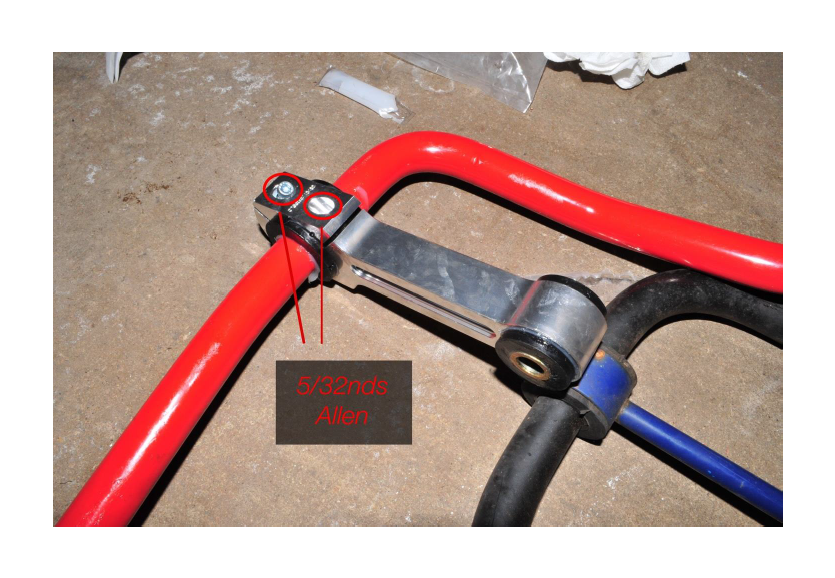
7. Install the end links onto the bushings you’ve already attached to the sway bar. Make sure the openings of the end link are facing up, and the body is pointing down as shown below. Place the caps on, and HAND TIGHTEN the 5/32nd allen bolts.
8. Install the sway bar onto the car by re-attaching the end links on both sides and reusing the factory 15mm hardware. If you assembled them as I mentioned above, the caps on the end links should be facing the rear of the car. Again, hand tighten the hardware. (NOTE: Once you complete the installation of the rear sway bar, you will need to remove these bolts and lower the sway bar in order to lower the rear axle for the shocks and spring installation.)
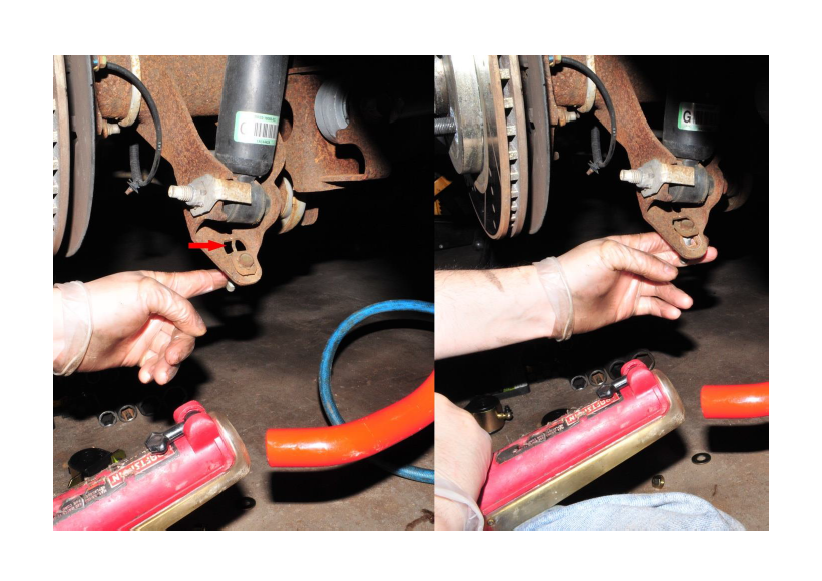
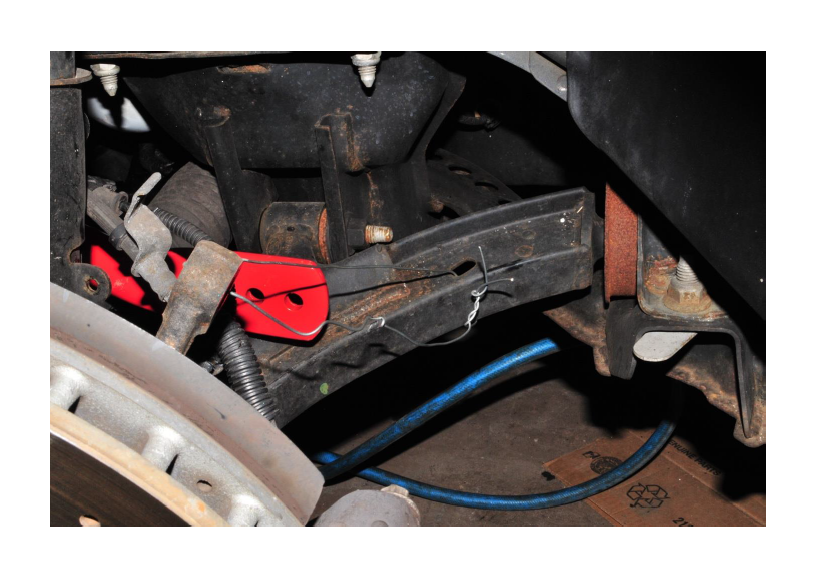
9. Next you will need to remove the studs located on the hub which held the factory sway bar mounts in place. You can use a screw driver to push the tab towards the ground, and then slide the bolts forward and tilt them downwards as shown in the image below to remove them. You will not reuse these.
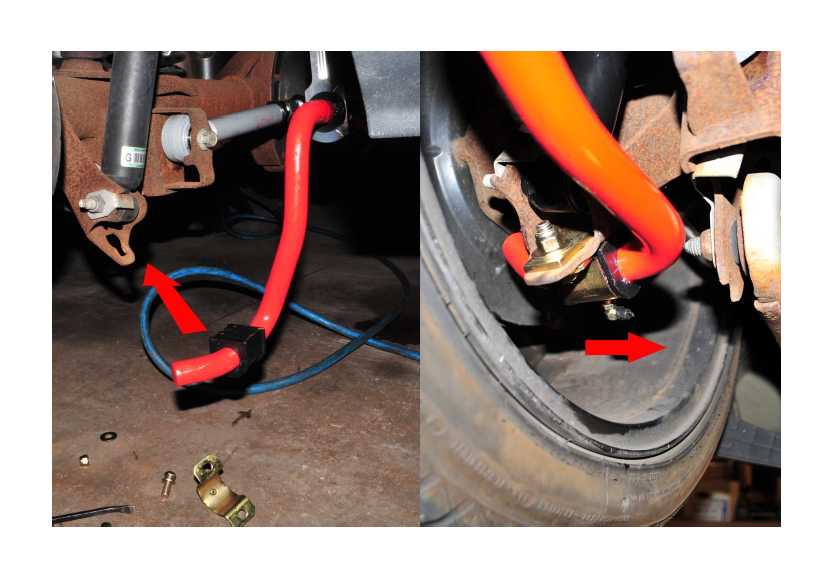
10. Take the D shaped bushings, apply grease to the inside, and outside of them. Install them onto the end of the sway bar just before the bar curves forward towards the front of the car, with the slit part facing the back of the vehicle. At this point swing up the sway bar, and with the flat part of the bushing resting on the hub put the bracket on and bolt them down. Don’t forget to place the reinforcement plate on the top side of the mounting location as shown in the photo below. This will be a bit tricky so you will want to prop the bar up in place, or have a helper hold it for you as you will need both hands to hold the plate and start the bolts by hand. Torque the supplied 14mm hardware to 52lb/ft.
(NOTE: Make sure the zerk fitting is pointing towards the differential to make future greasing easier!)
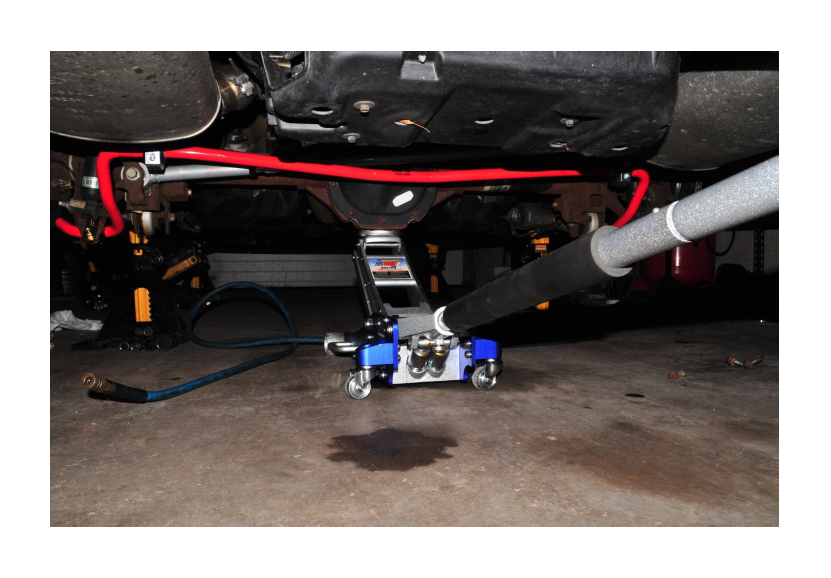
At this point you have finished the rear sway bar installation, however due to the design of the vehicle you will need to remove the bolts holding the sway bar end links to the chassis, and carefully lower the newly installed sway bar down to be able to lower the rear drive axle. We will reinstall and torque this last.
Rear Shocks & Springs Installation
1. With the sway bar resting on the ground, place your floor jack on the rear differential taking care not to catch the diff cover. Pump the jack up just enough to have the weight of the diff resting on the jack cup.
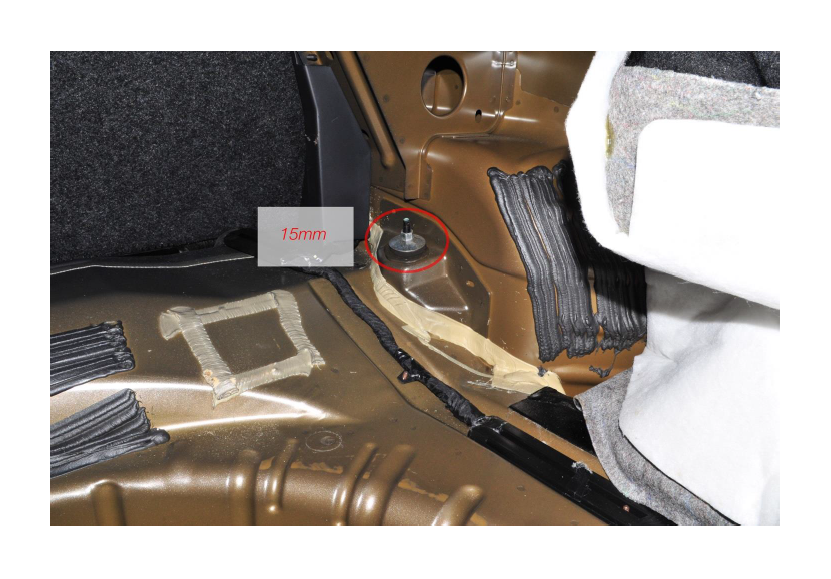
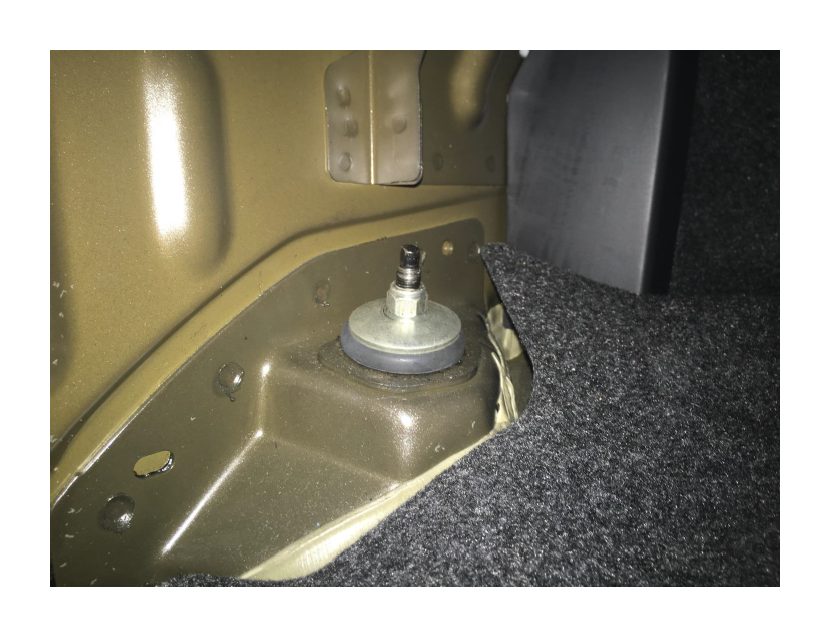
2. Open the trunk, and remove the spare tire well cover. Now grab the side panels on either side from closest to the rear seat, and pull back towards yourself. There are no clips holding them in, so they should easily pull away to reveal the strut mount. Remove the 15mm nut on both struts.
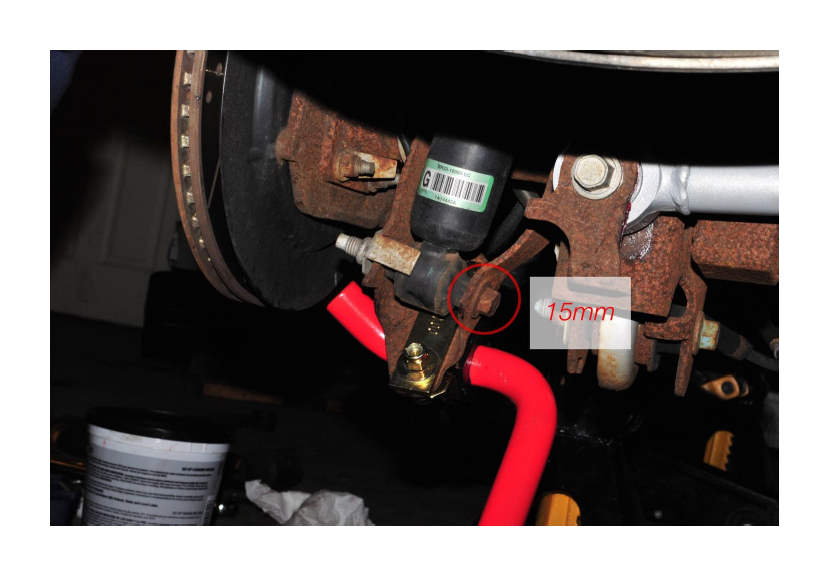
3. Locate, and remove the 15mm bolts holding the base of the shock on the rear axle.
4. Once the bolts are out, remove the shocks from the lower perch where they are bolted to. If they seem difficult to remove, use a rubber mallet to lightly tap them out, or a small pry bar to pry the bottoms out towards the back of the car.
The shocks should now be hanging from the top of the wheel well, give them a firm tug and they will come out.
5. Now lower the jack slowly until the tension on the springs is gone, and then a little bit more so you can remove them.
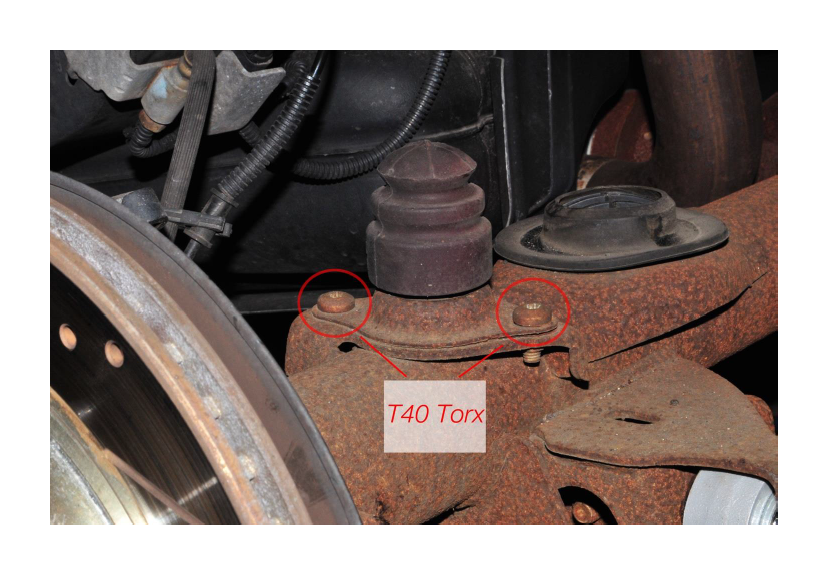
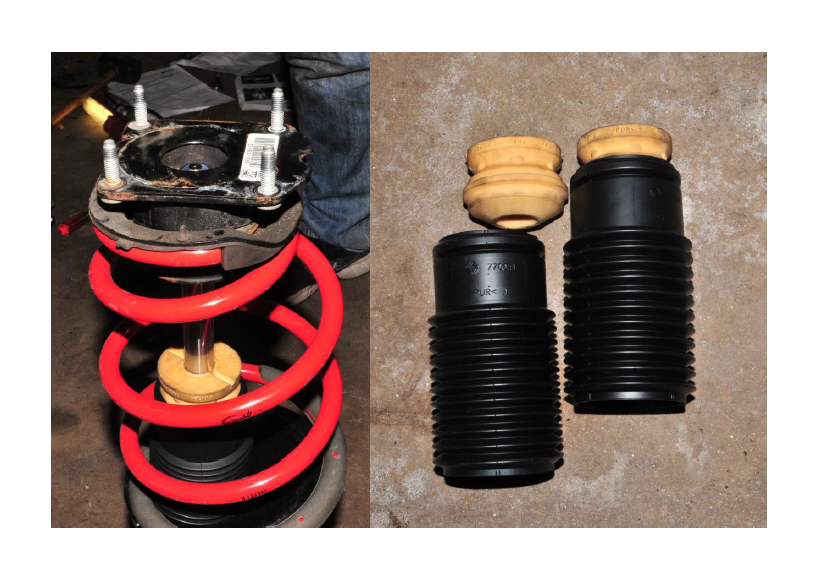
6. Next use a T40 torx bit to remove the bump stop bracket.
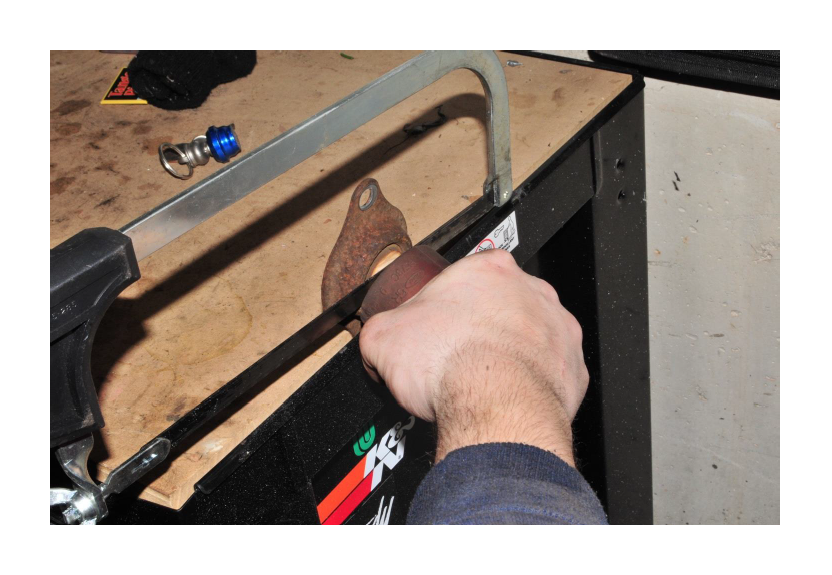
7. Now you will need to remove the old bump stops from the brackets. Using a hacksaw, cut them in half between the metal bracket, and the thickest part of the bump stop as shown below.
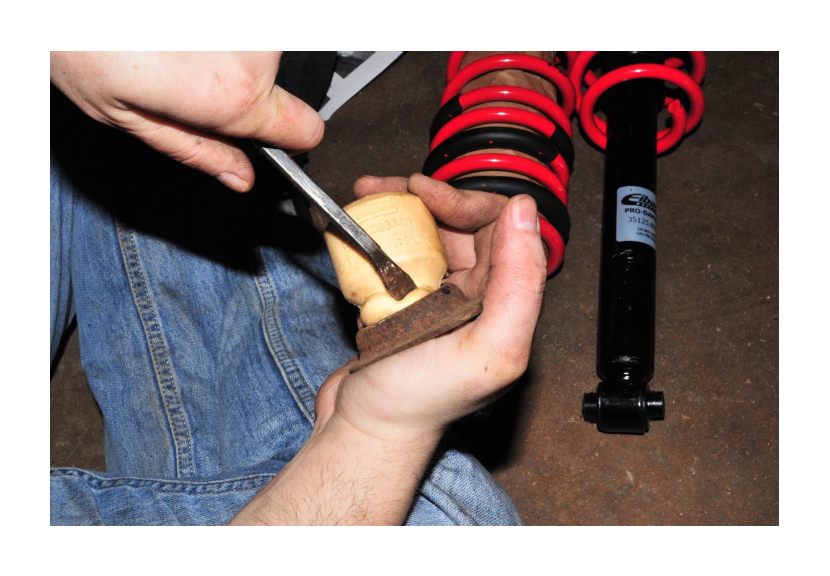
8. Install the new bump stops into the brackets. Use a small pry bar, or a flat head screwdriver to “tuck” the thick lip of the new stop through the hole.
9. Reinstall the bump stops, tighten the bolts “snug”.
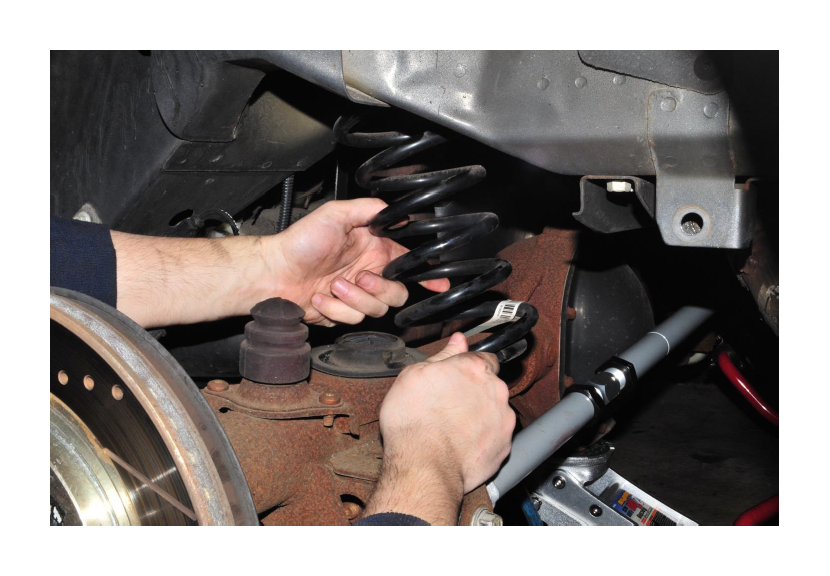
10. Install the new springs onto the axle with the text upright, and facing you.
11. When installing the shocks, you will need to install new bushings. Using the supplied hardware place the washer with the larger opening on the shock with the cup facing upwards followed by the conical bushing with the nipple on top.
12. Now install the shocks into the bottom mounting point on the axle with the factory hardware finger tight.
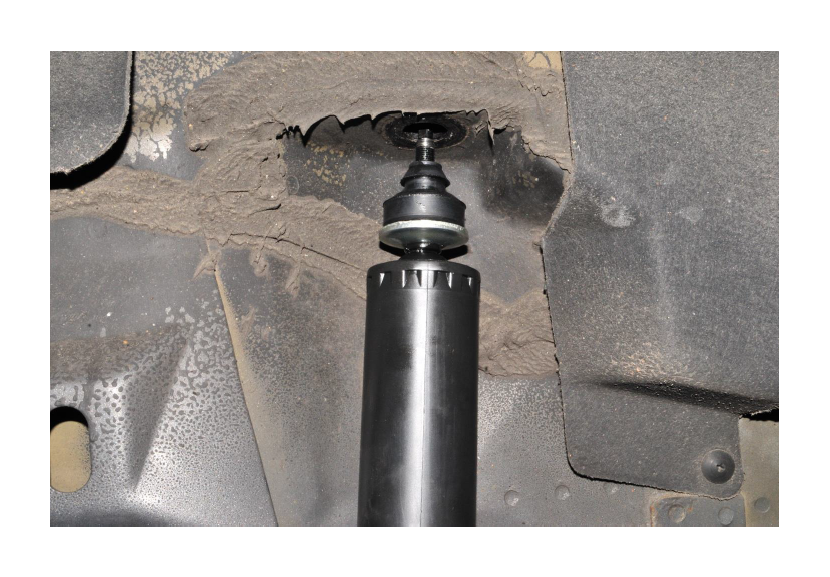
13. Once both shocks are in, jack the drive axle back up slowly and guide the shock shafts into the holes as shown below.
14. Install the upper bushing and washer with the cup facing down, followed by the supplied 14mm nut. Torque to 30 lb/ft.
15. Go back under the car and torque the 15mm lower shock bolts to 85 lb/ft.
16. Reinstall the sway bar end links, and torque the 15mm bolts to 85 lb/ft.
17. Tighten end link cap 5/32nd allen bolts. No torque spec was provided, but tighten firmly.
Front Sway Bar, Shocks, & Springs Installation
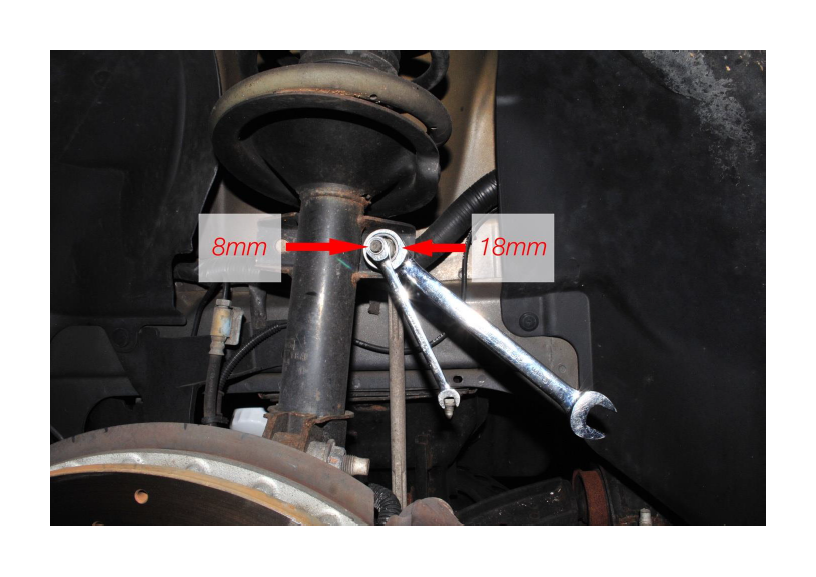
1. Located and disconnect the sway bar end links from the shocks on both sides using an 8mm, and 18mm.
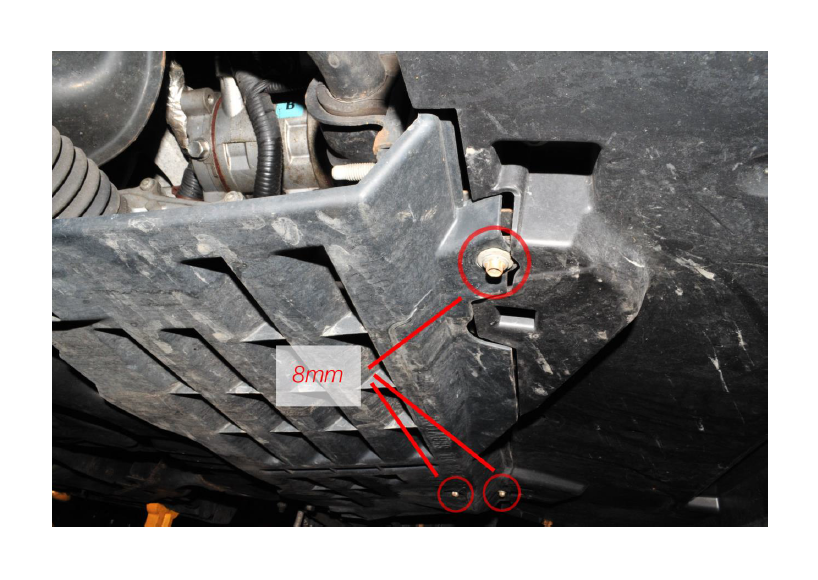
2. Remove the belly pan. It is held in by 3x 8mm bolts
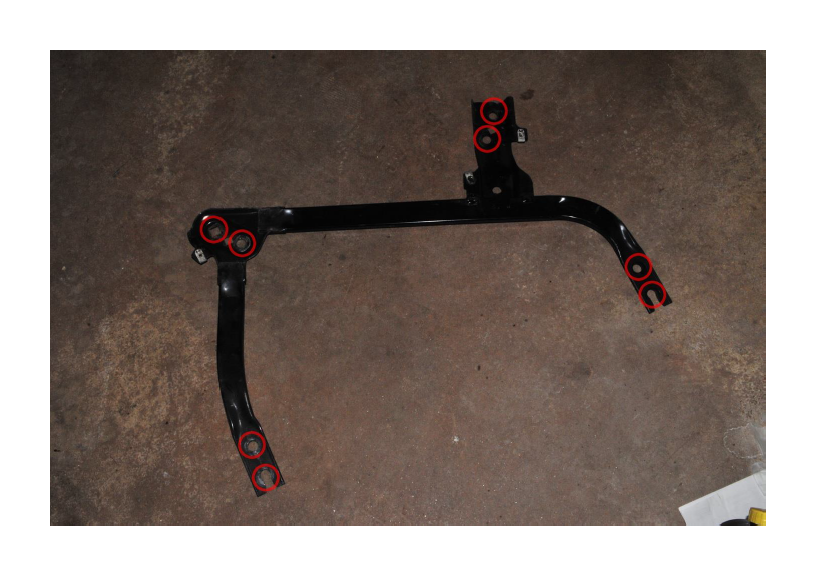
3. Remove the cross member brace held in by 6x 15mm bolts, and 2x 15mm nuts.
4. Now remove the 4x 15mm nuts on the sway bar mounts. The 2 lower ones are shown in the photo below, the other 2 are directly above the sway bar. Remove the sway bar.
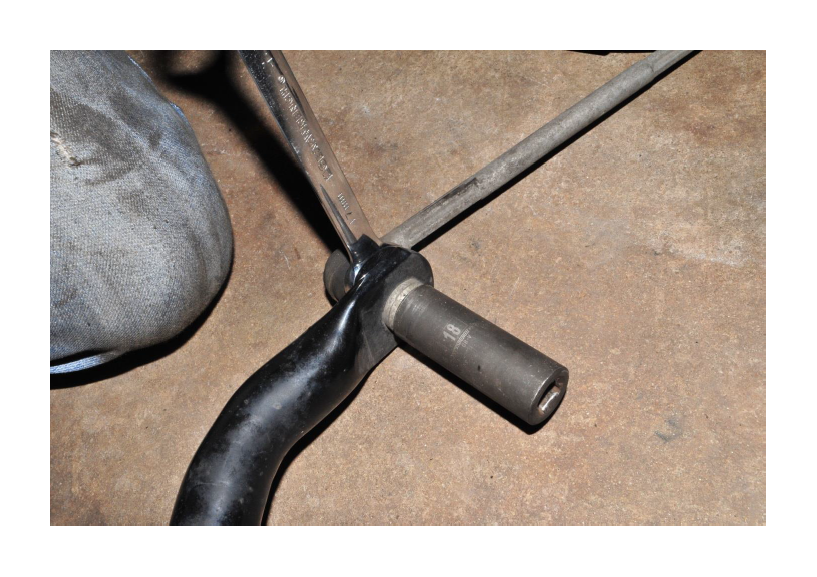
5. With the sway bar out of the car, remove the endlinks from it. You will reuse these on the new sway bar. (TIP: If you happen to strip the 8mm head on the sway bar, there is a hex head on the other side which takes a 17mm box wrench.)
6. Take the new Eibach sway bar, and place it on the ground with the text right side up so its readable. Now take the new bushings, lube them with the supplied grease, and install them onto the sway bar with the slit facing the ground.
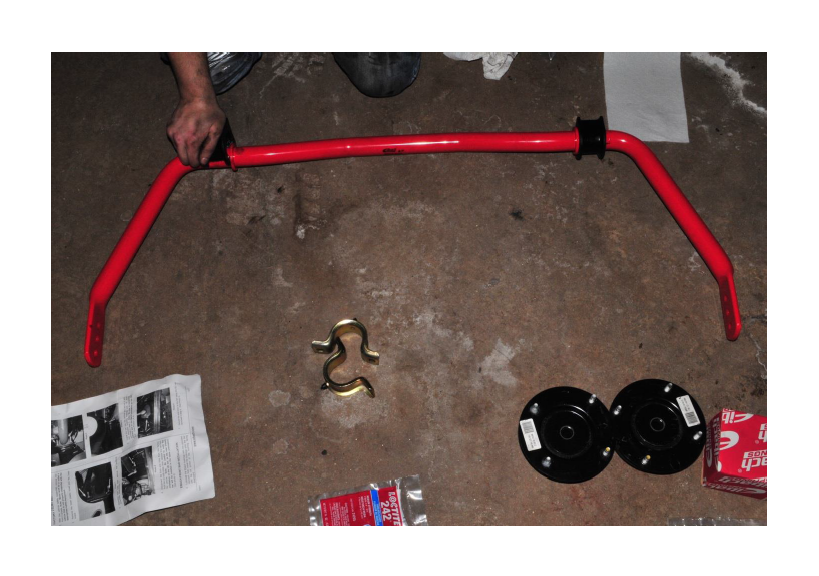
7. Install the sway bar making sure the Eibach logo is oriented facing the rear of the vehicle, and upright so its legible. Use the supplied brackets with the zerk fittings, and torque the 4x 15mm nuts to 52 lb/ft.
8. Reinstall the subframe brace not forgetting to slip the belly pan onto it first.
9. Reinstall 3x 8mm belly pan bolts.
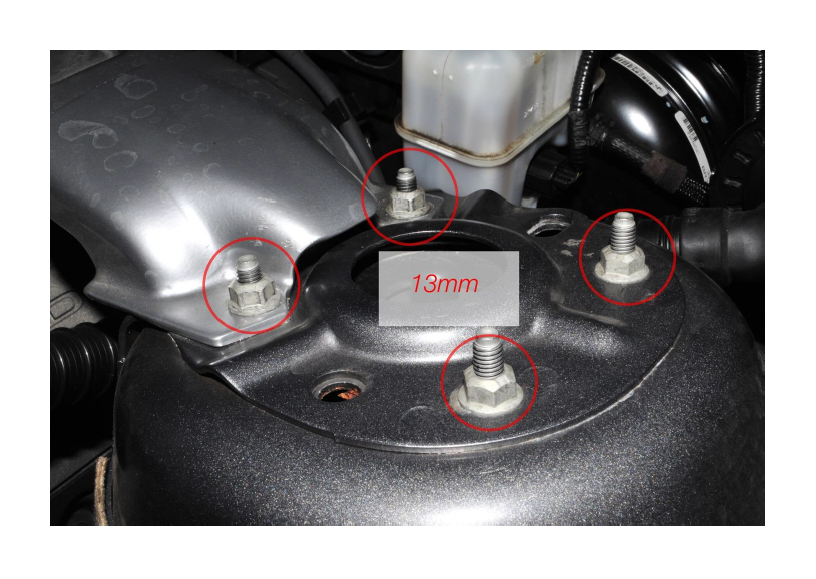
10. Remove the 10mm bolt holding in the brake line/ABS sensor bracket on the strut.
11. Remove the 2nd clip for the ABS sensor from the strut.
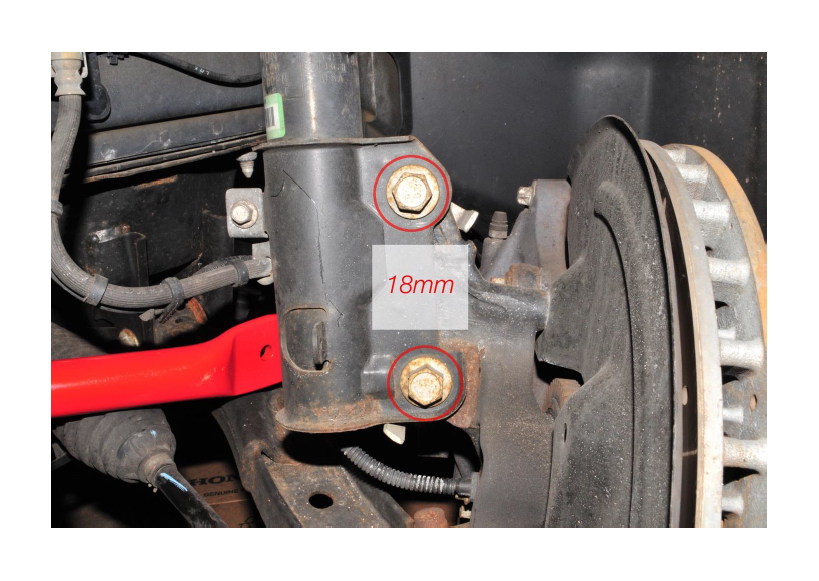
12. Remove the 18mm bolts on the lower shock body.
13. Using a bungie cord, or mechanics wire tie the knuckle back so it doesn’t hang and pull on the brake hose.
14. Remove the 4x 13mm nuts on the strut tower, while having someone hold the shock in place so it does not fall.
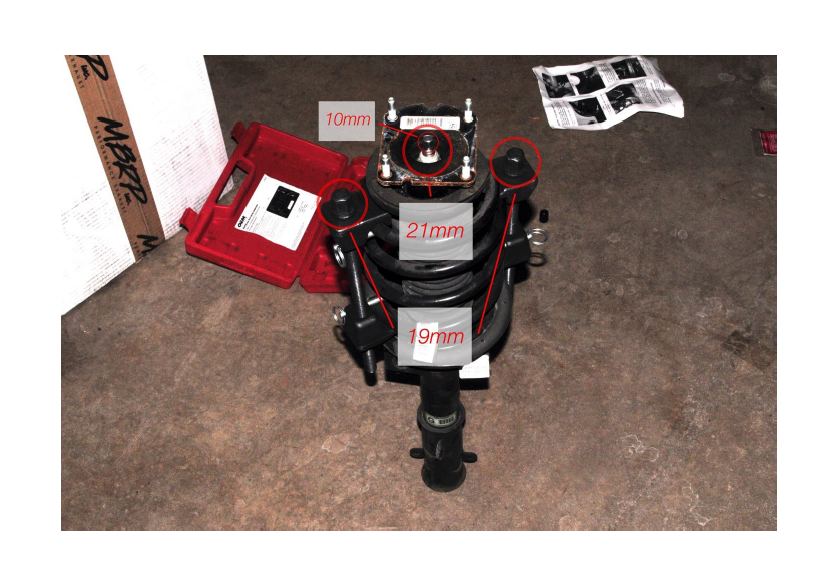
15. Now take the spring compressors, and place them on opposite sides of the springs. Slowly compress them alternating side to side so the spring does not kink using as 19mm socket. Once you feel that the spring can move freely, remove the 21mm nut holding the top hat down. Remove the top hat, and the spring
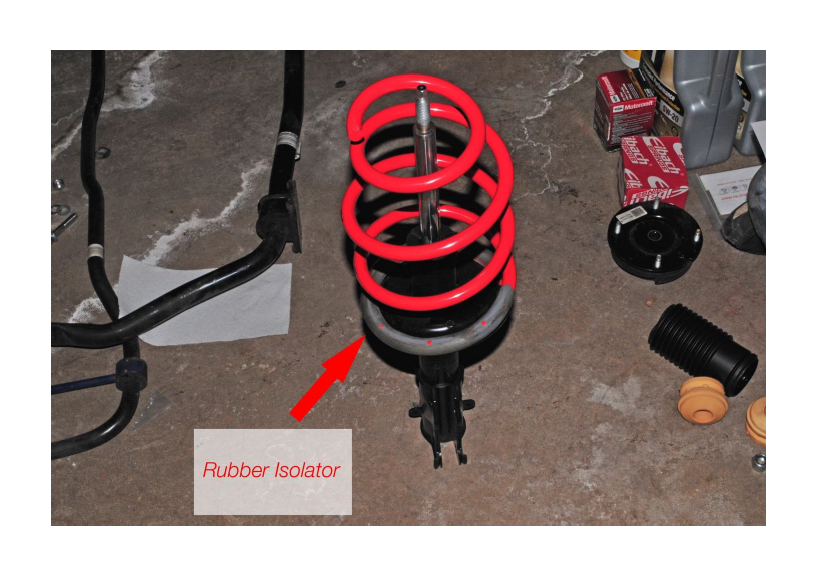
16. Slowly un-compress the spring, again alternating side to side. Once you have removed the spring compressors, remove the rubber isolator, and install it on the new spring as shown.
17. Take the new bump stops and insert them into the dust boot as shown. Slide them onto the shaft, and install new springs on the new shock making sure that the spring seats correctly in the lower perch. It should sit on the bottom just like the top shown below in the photo.
18. Compress the springs again using the spring compressor, and once the top hat can be installed tighten it down with the newly supplied 22mm nut until the piston spins..
19. Reinstall the shocks onto the car with the small half circle notch in the top hat facing the wheel. Torque 4x 13mm nuts to 26 lb/ft.
20. Reattach the ABS clip, as well as the Brake line bracket with the 10mm bolt.
21. Reinstall the knuckle to the new shock using the factory 18mm hardware and torque to 166 lb/ft
22. Reinstall the the sway bar endlinks using all the original hardware. Torque to 85 lb/ft.
(NOTE: There are 3 holes on the new sway bar, when installed the one furthest away from the body of the sway bar is equivalent to stock. The middle one would be a good setting for daily/spirited driving, and the last one closest to the sway bar is recommended for track days.)
23. Put the wheels back on the car and torque the lug nuts to 100 lb/ft. Lower the car, and take it down a quiet road to check for squeaks or rattles. If you don’t hear anything go have some fun! (Note: Be mindful now that you’ve lowered the front of your car by over an inch. If you have a front lip or splitter be careful as to now scrape it on bumps, driveways, or curbs.)