 FREE 1 to 3-Day Delivery on Orders $149+ Details
How to Install Ford Racing Traction - LOK Limited Slip Differential w/ Carbon Discs - 31 Spline 8.8i
Installation Time
4 hours
Tools Required
- Wrenches: 8mm, 13mm, 15mm, 5.5 mm allen, 6mm Allen
- Sockets: 5/8", 3/4"
- Ratchet
- Floor Jack
- Jack Stands
- Wheel Chocks
- Torque Wrench
- Impact Gun

Shop Parts in this Guide

Please note: This install was completed on the Alloy USA 31 spline axles, but the installation instructions can be referenced for any brand or spline count axles.
1. Engage emergency brake and put transmission in gear; automatics use Park.
2. Place wheel chocks or blocks in front of and behind each of the front wheels.
3. Loosen the lug nuts (but do not remove) using a breaker bar and 3/4 socket (this size may vary depending on your particular lug nuts).
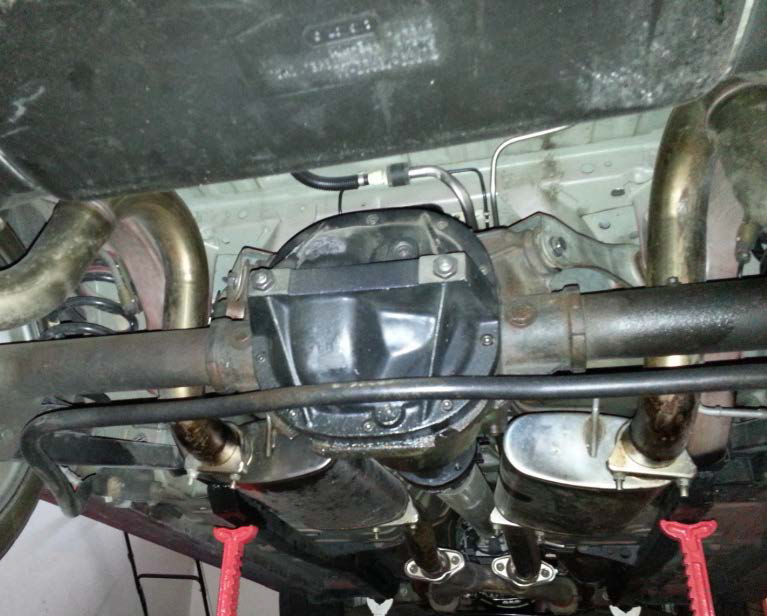
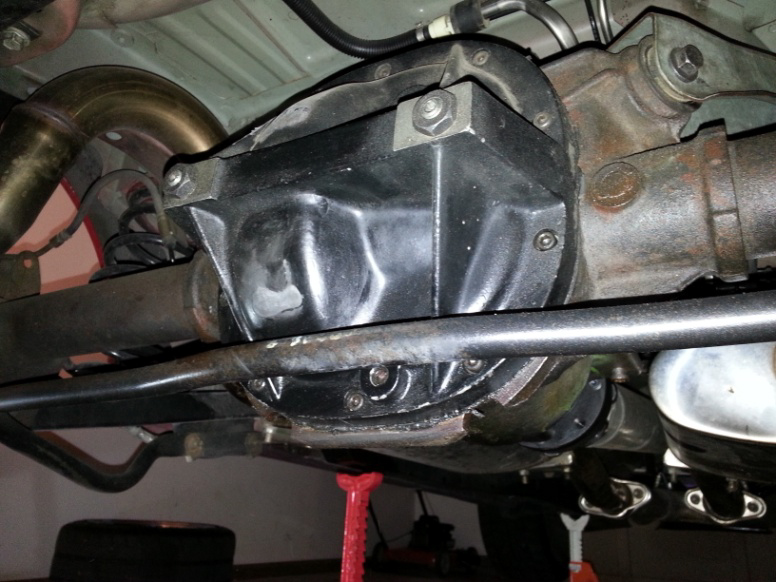
4. Carefully raise the rear of the car by placing the jack at the front of the rear differential housing. Place jack stands on both sides of the vehicle under the frame.

5. Slowly lower the jack, allowing the rear axle to come down, and move the jack out of the way.
6. Remove the lug nuts and pull the wheels off.
7. Place the car in neutral and release the emergency brake.
8. Remove the two 13mm brake caliper bolts and pull the caliper out of the way. Repeat for other side of vehicle.
9. Remove the two 15mm caliper bracket bolts and set the bracket aside. Repeat for other side of vehicle.
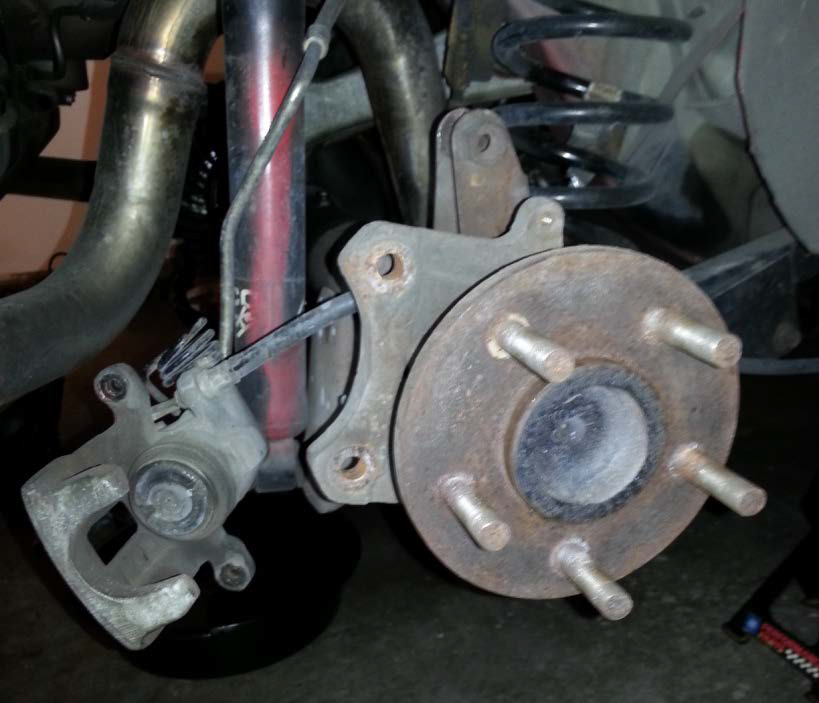
10. Remove both rotors.
11. Place a drain pan under the rear axle housing.
12. Remove the differential cover drain plug using a 6mm allen wrench (this may vary depending on which type of cover you have).
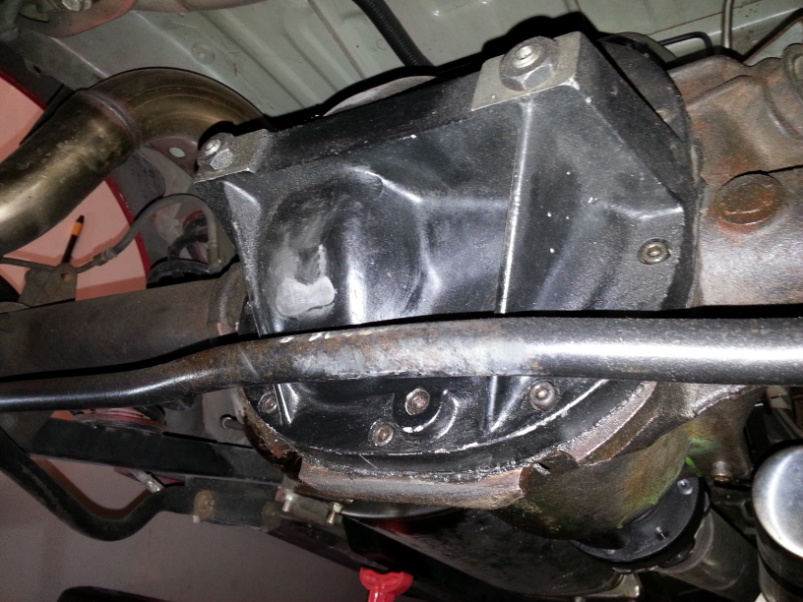
13. Remove the ten differential cover bolts using a 5.5mm allen wrench (may also vary).
14. Pull the cover off and set aside.
15. Rotate the axles until the differential pin retaining bolt is accessible.
16. Use an 8mm wrench to remove the bolt.
17. Slide the differential pin out of the carrier.
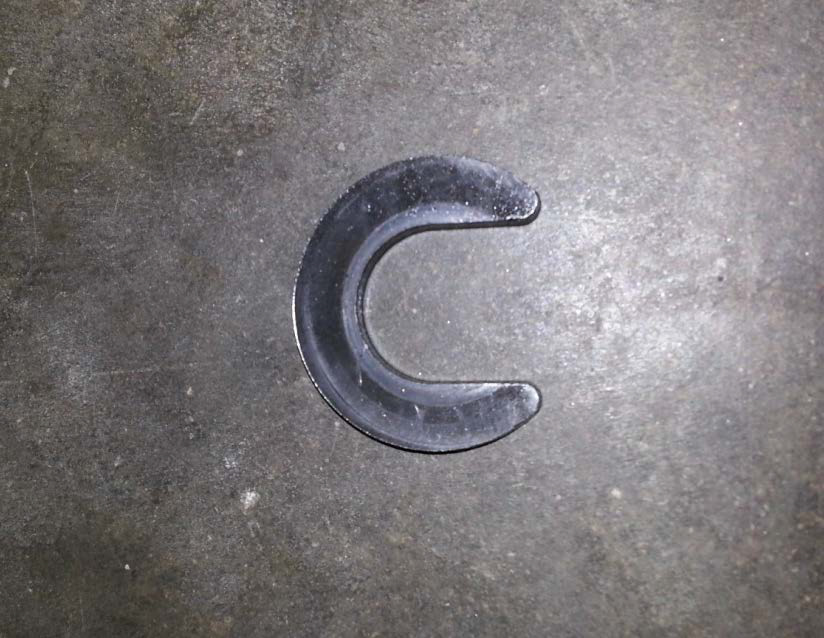
18. Push the axles slightly towards the center of the car and remove the C-clips using a magnet or needle-nose pliers.
19. Slide the axles out of the car about 6”, enough to clear the differential.
20. Use a punch or paint pen to mark the orientation of the two differential bearing caps (left, right, top, bottom). It is critical that these caps are reinstalled in the position that they were removed.
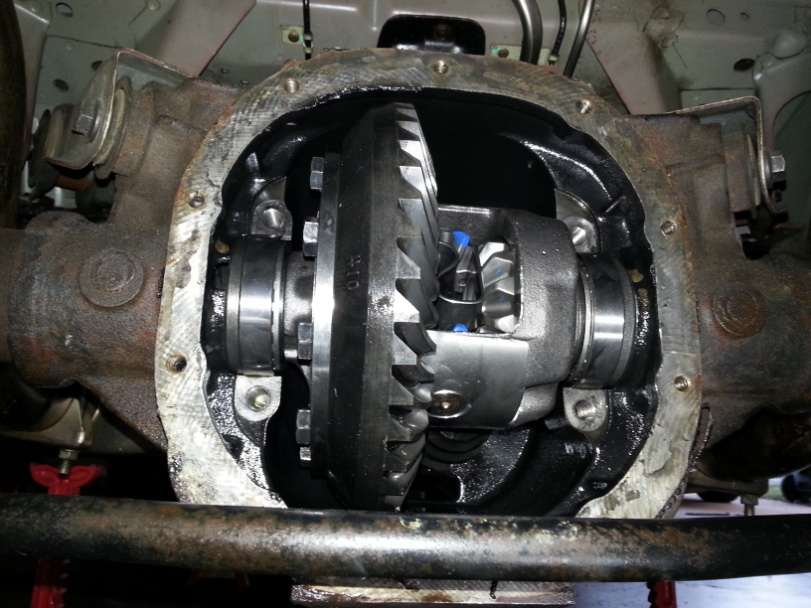
21. Using a 3/4 socket and breaker bar, remove the four differential bearing cap bolts, and remove the caps.
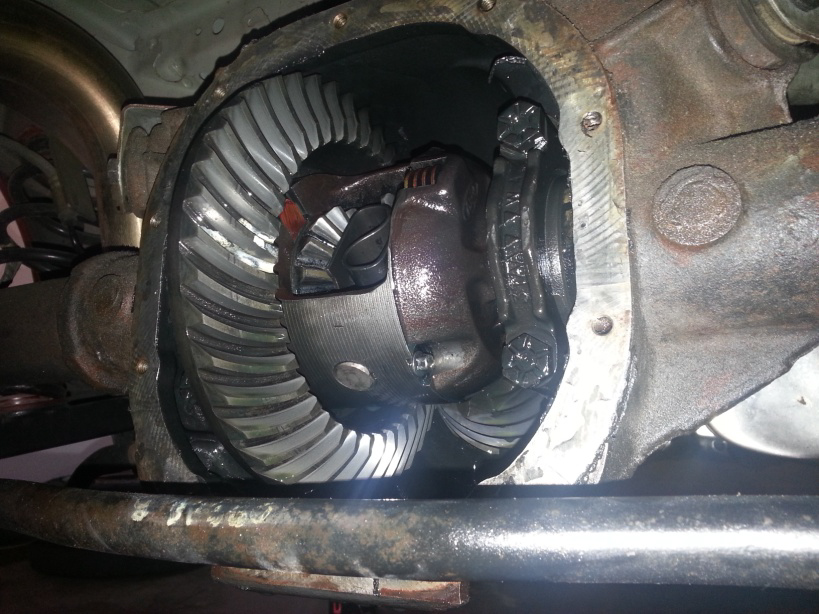
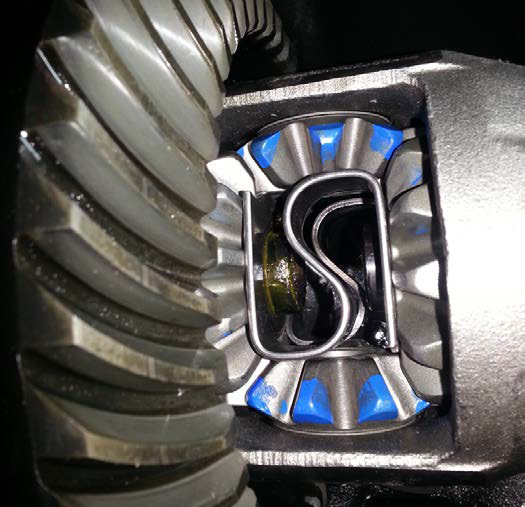
22. Slide the differential straight out. There are shims on each side of the differential bearings. Make sure these are reinstalled on the same side they were removed, facing the same direction.
23. Using a 5/8 socket and impact gun, remove the ten ring gear bolts.
24. Use a press to push new differential bearings onto each side of the new differential.
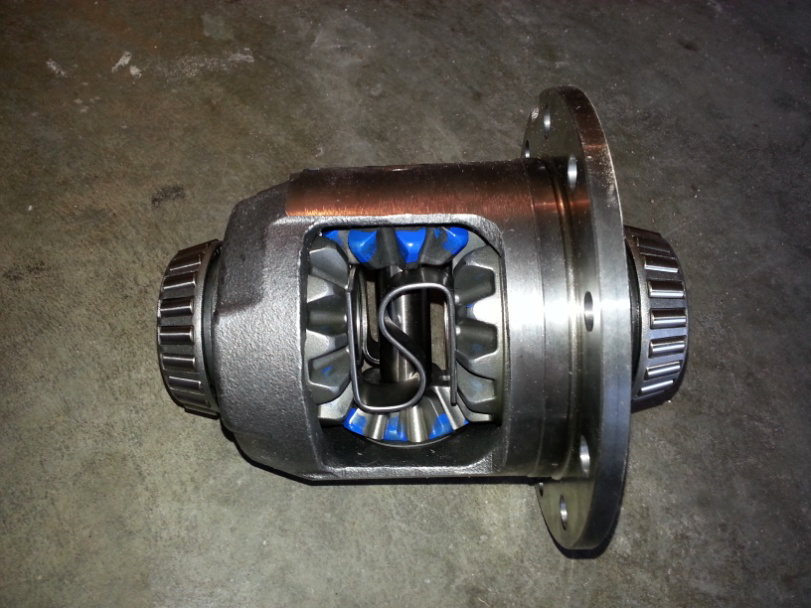
25. Tap the ring gear off the old differential, and slide it onto the new differential.
26. Apply a medium-strength thread locker to the ring gear bolts. Use an impact gun to reinstall the bolts. Draw the bolts down in an opposing sequence to ensure the ring gear is pulled on straight.
27. Place the differential bearing shims in the housing in the same orientation that they were removed.
28. Place the new bearing races on the differential bearings.
29. Put the differential back into the housing.
30. Reinstall the differential bearing cap bolts and tighten to 75 lb-ft. using a 3/4 socket and torque wrench.
31. Rotate the differential until the differential pin retaining bolt is accessible.
32. Use an 8mm wrench to remove the bolt and slide the pin out.
33. Push the axles back in as far as they will go.
34. Reinstall the C-clips on the axles, and push/pull the axles away from the differential to make sure the C-clips are secure.
35. Slide the differential pin back into the carrier and tighten the differential pin retaining bolt.
36. Clean the differential cover gasket surface on the housing and the cover.
37. Using a new cover gasket, reinstall the cover and tighten cover bolts.
38. Locate the fill plug on the front of the differential housing and remove. (Or remove the fill plug on top of the differential cover, if applicable).
39. Fill with 3 quarts of gear lube oil and one 4 oz. bottle of friction modifier. (I recommend 75w-90)
40. Reinstall the fill plug.
41. Reinstall both rotors.
42. Put the car back in gear and apply the emergency brake.
43. Apply a small amount of thread locker to the caliper bracket bolts and reinstall the bracket.
44. Reinstall the calipers. PREVENTATIVE MAINTENANCE – apply anti-seize to the caliper bolts. Check the brake pads and replace if needed.
45. Reinstall the wheels and lug nuts. Make sure the lug nuts are fairly tight.
46. Place a floor jack under the front of the axle housing and raise until the jack stands can be removed.
47. Slowly lower the jacks until it is free and slide it out from under the car.
48. Tighten the lug nuts to the recommended torque specification for your application/wheels. If you are unsure of your torque specification, tighten to at least 100 lb-ft.
49. Remove wheel chocks.
Installation Instructions Written By AmericanMuscle Customer Tyler Vanlant 4/18/2013
