 FREE 1 to 3-Day Delivery on Orders $149+ Details
How to Install a Ford Racing Traction LOK Rebuild Kit w/ Carbon Discs - 8.8in on your 1986-2013 Must
Installation Time
4 hours
Tools Required
- Jack Stands (2)
- Floor Jacks (2)
- Oil Pans (1)
- Wheel Blocks (2)
- Differential Oil - 3 Quarts
- Friction Modifier - 3 Bottles
- Tube of Black RTV
- Torque Wrench (ft-lbs)
- Break Bar
- Rubber Mallet
- Needle Nose Pliers
- Gloves
- C-Clamp
- Assortment of Ratchet Sockets and Wrenches
- Rebuild Kit

Shop Parts in this Guide
Tools Required:
Jack Stands – 2
Floor Jack – 2
Oil Pans – 1
Wheel Blocks – 2
Differential Oil – 3 qts
Friction Modifier – 3 bottles
Tube of Black RTV
Torque Wrench (ft-lbs)
Break Bar
Rubber Mallet
Needle Nose Pliers
Gloves
C-Clamp
Assortment of ratchet sockets and wrenches
Rebuild Kit
In this How-To, you will be replacing the clutch packs your mustang. The bolts in the rear-end spin a high speeds. It is recommended that you tighten things to the given torque specs. These are only recommended so for accurate torque ratings please search online or through a manual.
IMMIDIATELY SOAK THE CLUTCH PACKS IN 2 BOTTLES OF FRICTION MODIFIER BEFORE BEGINNING.
Installation Instructions:
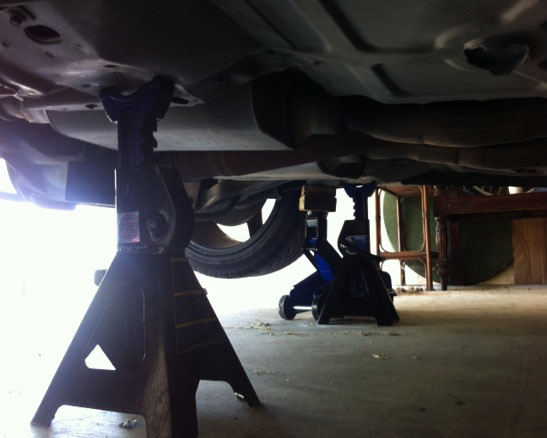
1) Place the wheel blocks on the front wheels. Put the car in neutral and release the emergency brake. Then raise the car near the differential. Jack the car up as high as safely possible. Place 2 jack stands underneath the subframes:
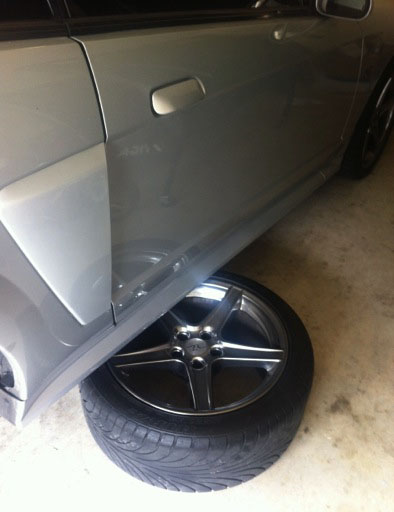
2) Remove wheels, calipers, and rotors: Remove your rear wheels, unbolt the caliper and caliper bracket, and remove your rotor. For safety precautions, place the rear wheels underneath the car.
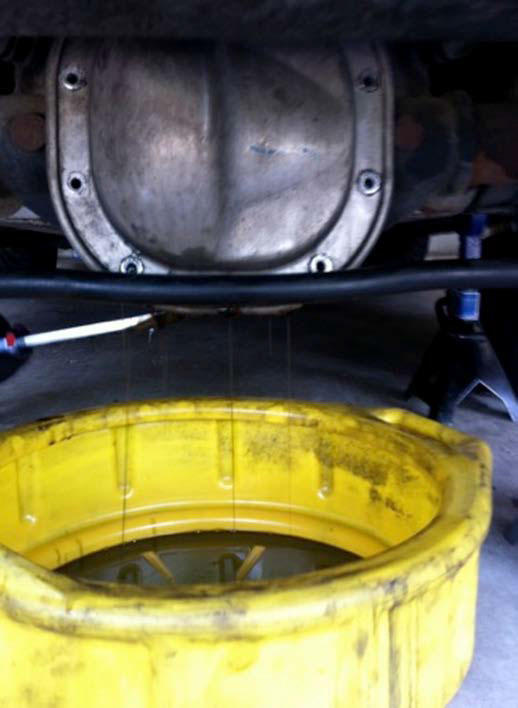
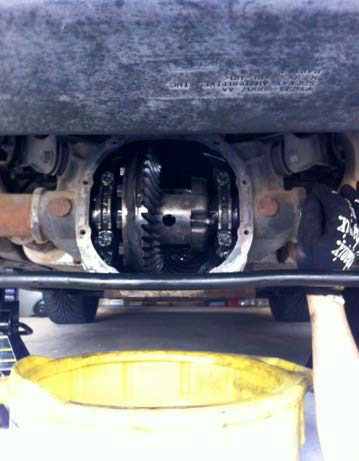
3) Drain the rear-end:
1. Place a pan underneath. Start by removing the bottom 3 bolts first and work your way to the top. Pry out the bottom of the cover with a flathead screwdriver to loosen the cover. The oil will start to drain.
4) Remove the pinion bolt:
1. Using a 5/16” socket (it's fairly tight) loosen the small bolt.
2. Once out, rotate carrier to get your hand behind the pin and remove the pin.
3. If you feel slight resistance when taking the pin out this is OK, but you shouldn't have to more than lightly tap it with a thick punch. If you do encounter resistance check to make sure it isn't hitting something or binding somewhere. Usually it just slides right out.
5) Remove the axles:
1. With the cover of the differential off, you can see the c-clip. We want to remove that by first pushing in the axles.
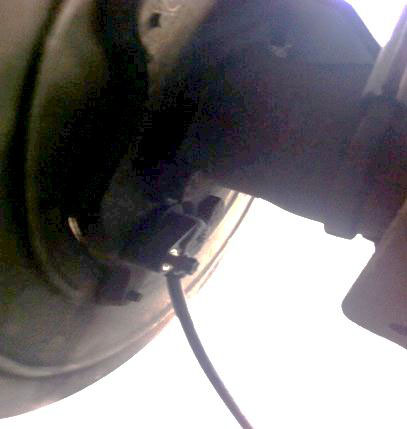
2. Before pushing in the axle, remove the ABS sensor as shown in the picture. It won't hurt anything to remove it. Just be gentle with it. If you bend this sensor, they cost roughly $55 new.
4. Once it is pushed in as far as it can go, remove the C-clip holding the axle in place with a flat head screw driver. Do this for the other side.
5. Slide the axles out carefully. Set them aside.
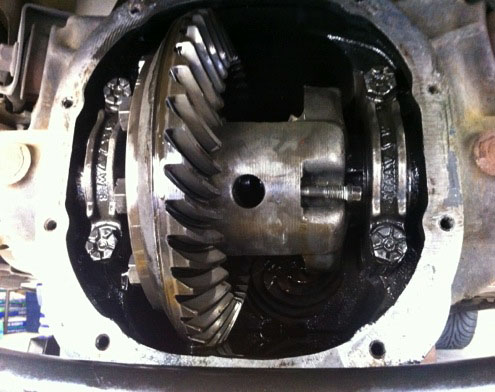
6) Remove the carrier:
1. Unbolt the 4 bolts on the 2 caps that hold the carrier into place. The carrier will be heavy so be careful when setting it down on some cloths. You don't want to damage the ring gear.
2. Place the LEFT and RIGHT components on separate towels or cloths.
3. Carefully remove the carrier. Shims will fall out so keep these to their relative sides as well.
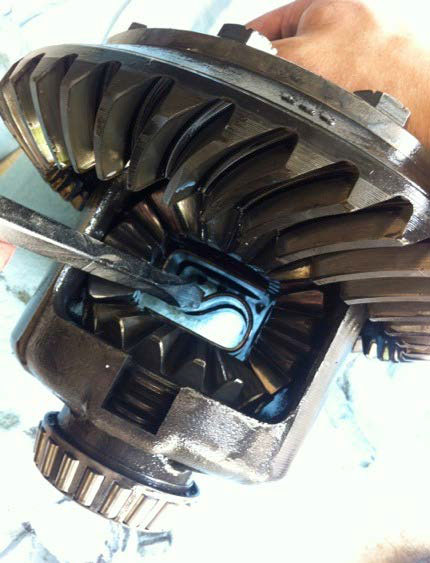
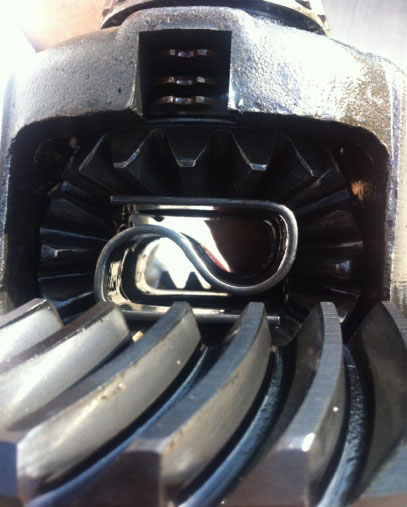
7) Removing the Ring Gear:
1. You must remove the ring gear because you have to take the s-spring out. The s-spring will not slide out because it will hit the ring gear. Before removing the ring gear, check to see if you have clearance.
8) Removing S-Clip:
1. Place a flat-head screwdriver on the s-clip and take your rubber mallet to knock it. Take your time and be careful to not chip the gears.
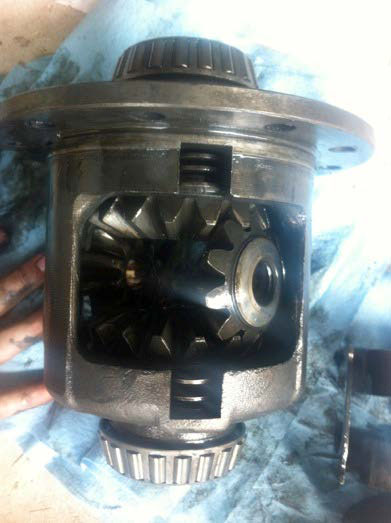
9) Removing the Trak-Lock gears:
1. Rotate the gears so that the 2 little gears rotate toward the openings.
2. Pull out the 2 small gears and then the 2 large gears with the clutch packs.
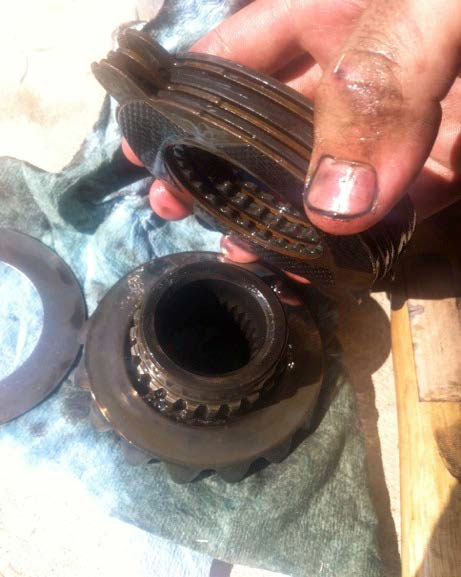
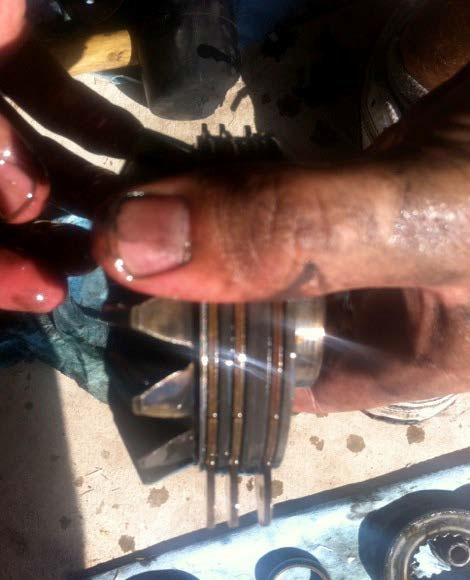
10) Replacing the clutch packs
1. The clutch packs with be in the box exactly how they should be packed.
2. The order will be S-C-S-C-S-S-C-S. The first shim is the shim that came off with the original clutch packs. This is the thin shim located on the left of the gear in the picture.
11) Fitting the gears back together:
1. To fit the gears back together, do EXACTLY the reverse of what you did to remove them. Place the small gears in the correct teeth so that when you rotate it back into place they will line up with the holes that the axles slide through. It might take a couple tries to get it lined up correctly.
12) Fitting the S-Spring:
1. The S-spring will be very hard to slide back in. The clutch packs should be very tight so to slide the S-spring in, simply grab a small c-clamp and slide the s-spring into the carrier. Then take a rubber mallet with the screwdriver and tap it in.
13) Replace the carrier with the shims and races. Tighten the bearing caps with 70-90 ft-lbs.
14) Slide in your axles, put in the c-clips, place the pin into the carrier, and tighten the small bolt.
15) On the differential cover, scrape off the residue of the old RTV until the surface is completely clean. Use some RTV and make a large contact surface with the new tube of RTV so that no oil will be able to leak out. Let it sit for at least 1 hour and then go back and tighten again.
16) Filling your differential with oil:
1. Unbolt the refill hole on the top of the differential housing. It takes 2.5qts and one bottle of friction modifier.
2. Place the end of bottles of friction modifier and lubricants into this hole and fill it up.
17) Now that everything is put back onto the rear-end, make sure everything is tight.
18) Replace you brakes and wheels, and put your wheels back on.
19) Raise your car, remove the jack stands, and then lower your car down slowly.
You're done!
Installation Instructions written by AmericanMuscle customer Martin Salomon 8/1/2012

