Installation Time
(approx) 30 Minutes
Difficulty Level:
Simple installation for anyone.
Installation Guides
FREE 2 or 3-Day Delivery on Orders $119+ Details
$88.99 (kit)
FREE Shipping on orders over $119 Market Price $100.99 You Save 12% ($12.00)Saved - View your saved items
We're sorry. We couldn't save this product at this time.
or use
Hey, guys. Adam here with americanmuscle.com. And today we're taking a quick look at and installing the Ford Performance Hood Struts with the Ford Performance logo available for the 2015 and newer GT, EcoBoost, and V6 Mustang. You should be checking these out if you're looking to get rid of that ugly, inconvenient, and in the way hood prop from the factory and replacing it with these hood struts that are clean, out of the way, subtle, and very, very helpful. This is perfect for the guys out there going to a lot of car shows with their S550, looking to show off that engine bay, and really who just don't want that ugly hood prop in the way. It takes away from the line of sight of that cool build that you might have under the hood or a lot of those underhood dress-up pieces that you might want to show off. Also, if you're doing a lot of routine maintenance or if you're working on your build, leaning over the front end of your Mustang, first off, the hood line doesn't reach a proper grade that gives you a lot of access to the hood. It comes down and causes you to hunch your back and duck. Using these hood props actually push the hood up a lot farther than the factory hood prop would, which is very convenient for the guys looking to maximize the amount of space while they're working under that hood. Also, it uses leverage to get your hood up and down a lot easier. You can use two fingers to shut this thing, so if you're looking to make it easier on yourself, this can also come in handy. You don't have to hold the weight of the hood up. You can literally just push it down when it's time to close and opening it is just a matter of pushing your hand upward. It is so simple to use and finally, it's a great option for the guys out there who are really just looking for a clean aesthetic. This has the Ford Performance logo laser engraved on the side of a matte black housing, so it's subtle and blends in really well with the factory engine bay. I personally think it should have come on the S550s from the factory. The hood prop is a little outdated and these hood struts are what you're seeing on a lot of new vehicles nowadays and I think the Mustang is just one of them that should have hopped on that train to begin with from the 2015 lineup. Now if you wanted to pick this up for your own S550, you can do so for just around 70 bucks, making it a very, very affordable mod. It's not too bad after all and it does really big wonders for your underhood dress-up. These are made from steel and aluminum housings. The gas struts hold up to 90 pounds of weight, perfect for factory and aftermarket hoods. A lot of these aftermarket hoods are carbon fiber or fiberglass, so you don't have to worry about that. It'll be a lot lighter and actually easier to use with an aftermarket hood than it would be from the factory but this one is super, super simple. As far as the install, it is going to get one out of three wrenches on our difficulty meter and that is gonna include very, very minor drilling. And I say minor because it's not even drilling to the body of your vehicle or underhood, it's really just the battery cover. Now, that thing is easily replaceable if for whatever reason you mess up the drill, but it's super simple. It comes with a template. Alternative, if you don't want to do any drilling, pop the battery cover off. It's totally fine. A lot of vehicles nowadays don't come with battery covers so you can survive without it if you didn't want to do any drilling whatsoever. It is completely optional. You can get this whole job done in I'd say 30, maybe 45 minutes at the absolute most. Very simple stuff though. I'll take you guys through every step of the process, so why don't we get to it. Tools used in this install include a drill, impact gun, center punch, 3/8 ratchet, 10-millimeter deep socket, 7/32 hex socket, and a drill bit set up to a 1-inch drill bit. Guys, the first step of the process here is to grab a 10-millimeter deep socket. We're gonna remove the top bracket on our passenger's side. Now, in order to do that, we're just gonna pop this right off, and then we're gonna install our passenger's side bracket. You want to make sure you're using your factory hood prop throughout the entire process just until the very end. Now that we have that nut out of place, we're going to take our passenger's side bracket and set that into place. That's gonna drop right on over top of that factory stud with the side bracket, the L bracket, facing to the outside of the vehicle. Replace that factory nut and we'll tighten that back down. That'll sit flush up against the inside of the factory bracket. Now, working on that bottom bracket, very similar to this one. We're actually gonna have to do a little bit of that drilling to the factory battery cover, so we're just gonna pop ours off. And this factory hole you see here, we're essentially going to drill a 1-inch hole to the left of that and I'll show you guys exactly where that goes with our template so let's get this on the table. Guys, now that we're on the table here, we're gonna grab our battery cover and we are gonna have to drill that 1-inch hole and they do actually give you a template from Ford Performance in your kit. You're just gonna poke out the bigger, larger hole. That's essentially this. You're gonna line your template up with that hole. It's also a good idea to tape this down when you're doing the drilling. That smaller hole is exactly where you're going to be doing it. So if you have a center punch, that works as well. If not, you can use one of those smaller drills, but it's always a good idea to use a center punch. So now that we have this in place, I've got my drill here and my drill set, we're gonna start smaller since 1-inch is a pretty large drill bit. We're gonna start say with about a 7/32. That's a good size. Going from 7/32, I'll bump up to about a 1/4 inch, from a 1/4 inch to a 3/8, 3/8 to 1/2 inch, 1/2 inch to a full inch. You want to keep going size by size. If you just immediately jump up to a 1 inch, it's gonna be really messy. It's not gonna go all the way through. It's just gonna be a really crappy design and you don't want to be shredding up the battery cover. You still want to make it look nice and neat under the hood. After all, that's exactly what the hoods struts are made for, so you don't want to mangle your battery cover. Take it step by step and have a little bit of patience. So you want to make sure you're taping your template exactly where you need it to be. We've got a couple pieces of tape here just to keep it in place. That's always a good idea. The second thing you want on hand is a center punch. This side here is where we're going to be punching our center. All right. From there, we can see exactly where we need to drill our hole. We can pop this off and out of the way and start with our first drill bit. All right, we're gonna start off with our 7/32 drill bit, line that up to our center punched hole, go straight through. It's a pretty easy material to drill through, so once you get your first hole started, it just gets even easier from there. We're gonna swap that out for a 1/4 inch just because it was so easy to get through. All right, now we're jumping up to a 3/8. You can always come back and clean it up later. We just want to make sure we're getting the proper size. From 3/8, we'll jump up to a 1/2 inch. One more size jumping up to a full inch. Perfect. Now we have a clean 1-inch hole, it's time to put this right back in our '18 EcoBoost. You want to pop your battery cover back into place after you drill that hole out, just to make sure it lines up good. That looks good to me. We're gonna set this just off to the side for now. You want to grab your passenger's side bracket and install that into the oval hole on your frame here under the hood. Now, the passenger side one is going to be indicated because there's two different brackets. One of them has two retaining pins on the bottom, that's for the driver's side. This one does not, so it's passenger. As you can see, there's a serrated washer on the bottom as well as this nut. The serrated washer and the nut are both going to go on the inside of this hole. That serrated washer is what's gonna grip the inside when we tighten it up by hand. All right, now we can slide this right into that oval hole. You want the nipple on the end where the strut is going to attach to face the outside of the vehicle toward the fender. Once you have that in place, you want to pull it toward the front of the car and downward and just tighten it up by hand. Now you can grab the Allen key or socket and tighten this down all the way. Now, you want to make sure this is nice and tight because you don't want this to loosen up when you're actually using the hood struts because it can cause some damage if it pops off. About 20 foot-pounds and you're good to go. Now that we have that set up, we can throw our battery cover back on and put the nipple through the open hole now.All right. At this point, we can start working on the opposite end and then we'll finish things up by popping on our hood struts. But for now, what we're gonna do is install the brackets on our driver's side. We're doing the same thing on the driver's side, except we don't have to do any drilling. The open hole is already exposed and there's no cover in the way, so we're gonna drop this into place. Do the same thing. You just want to make sure the serrated washer gets underneath. Grab your socket and tighten that down. Perfect. So now we can grab our 10-millimeter socket and remove the top nut on the bracket. Perfect. Now we can grab those hood struts and pop them into place. You want the larger portion at the top, so you can read it, Top Up. You want to snap these right on top. You can lift that hood up past your factory hood strut, get this to pop into place. Lay that factory hood strut down and the use of a helping hand definitely goes a long way. Bring it down. All right, now we can do the same thing on the passenger's side.All right, guys. The next step is optional, but if you wanted to remove your factory hood prop, grab a 10-millimeter socket. You're just gonna pull off this bolt here and the whole bracket will come off in one piece. Well, guys, that's gonna wrap up my review and install of the Ford Performance Hood Struts with the Ford Performance logo. You can get this particular set right here at americanmuscle.com.
Subscribe to our YouTube Channel
Features, Description, Reviews, Q&A, Specs & Installation
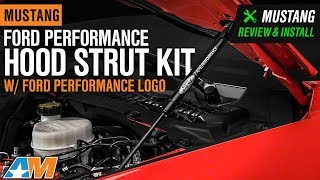
Keep Your Hood Open Wide. Keep your S550 Mustang’s hood open wide to show your engine bay at car shows with this Hood Strut Kit featuring the Ford Performance logo. The prop rod that came from the factory won’t make the grade when you need to lift your hood to do some work on the engine. Replace that old prop with two gas struts that lift your hood and let you see what you are doing.
Work Safely. There’s no need to worry about the hood crashing down because you bumped a manual prop. These lightweight steel and aluminum struts use leverage to open and close hoods up to 90 pounds with the touch of a finger.
Easy Installation. Installing the Ford Performance Hood Strut Kit is simple with the included installation hardware. Installation should take about 30 minutes and involves a simple bolt-on process.
Application. Ford Performance Hood Strut Kit with Ford Performance Logo fits 2015-2023 V6, GT and EcoBoost Mustangs.
Please Note. If you replace your OEM hood with a lighter aftermarket hood, be watchful. These powerful struts may open your hood faster than you expect.
Fitment:
Ford Performance M-16826-MA
CA Residents: WARNING: Cancer and Reproductive Harm - www.P65Warnings.ca.gov
Installation Info
Installation Time
(approx) 30 Minutes
Difficulty Level:
Simple installation for anyone.
Installation Guides
What's in the Box
10 More Questions