 FREE 1 to 3-Day Delivery on Orders $149+ Details
How to Install Ford Performance Rear Tow Hook Assembly (15-17 GT350) on your Ford Mustang
The use of a floor hoist is recommended for this installation. If you do not have access to one, use a hydraulic floor jack and jack stands to raise the vehicle.
!!!CAUTION: JACK STANDS MUST BE USED ON A LEVEL SURFACE AND BE SECURELY SEATED. FAILURE TO DO SO MAY RESULT IN PERSONAL INJURY OR VEHICLE DAMAGE!!!
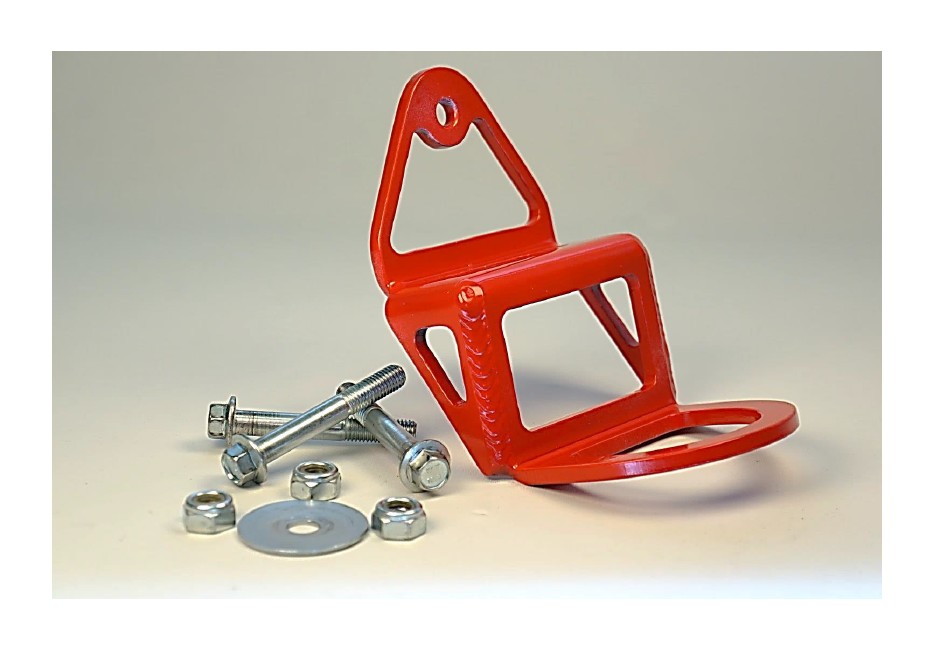
Included in this Kit
1 –Tow Ring
3 –Shouldered Bolts
3 –Nyloc Nuts
1 –Flat Washer
1. Rear Tow Ring Applications
1. Raise the vehicle on a hoist.
2. Remove the rear wheels and tires.
Torque: 148 ft/lb (200.66 Nm)
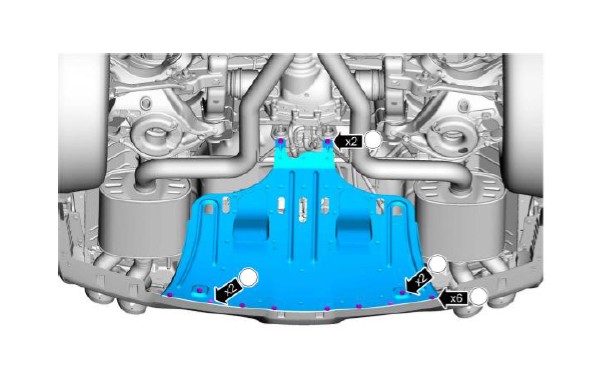
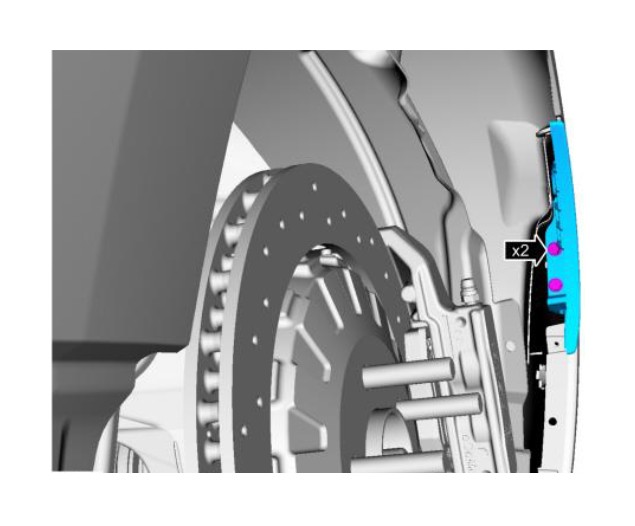
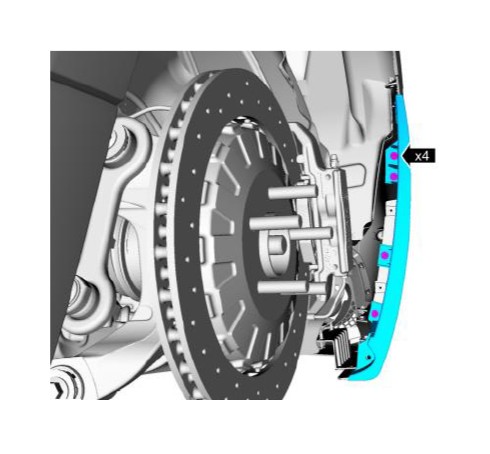
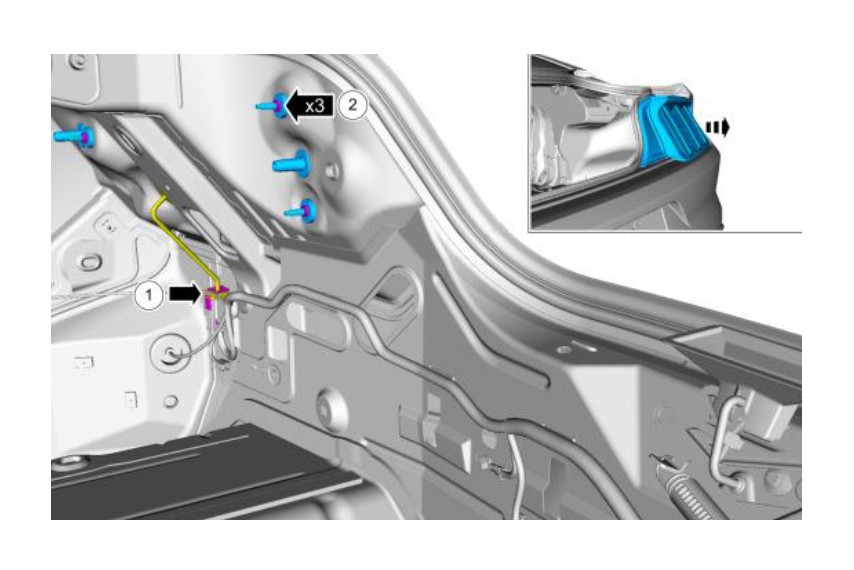
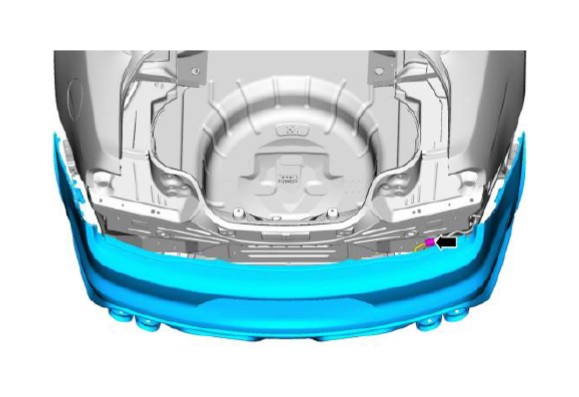
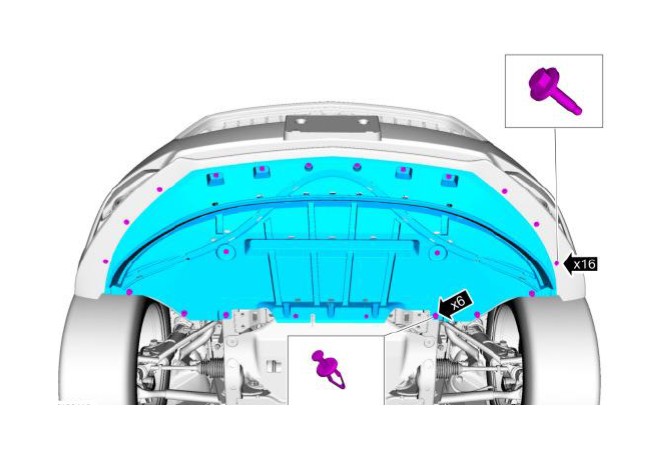
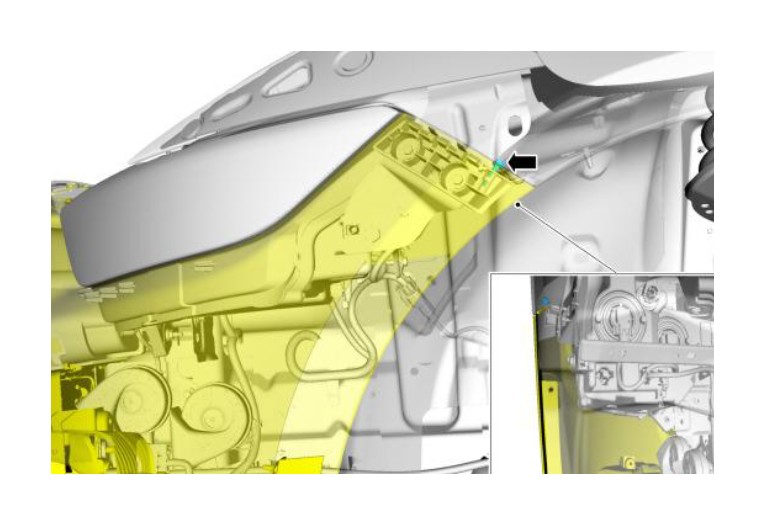
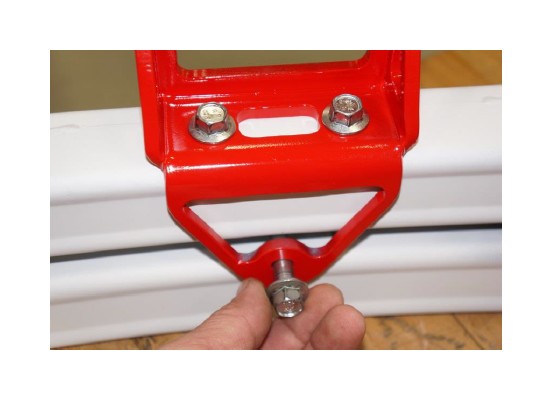
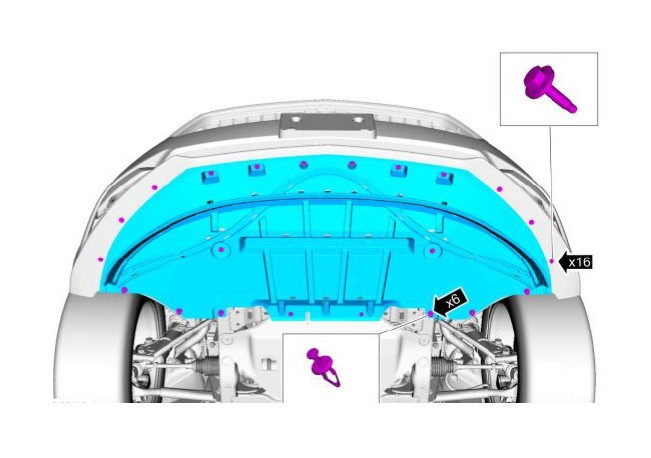
3. Remove the rear under body
Remove the rear underbody shield rear bolts.
Torque: 80 lb.in (9 Nm)
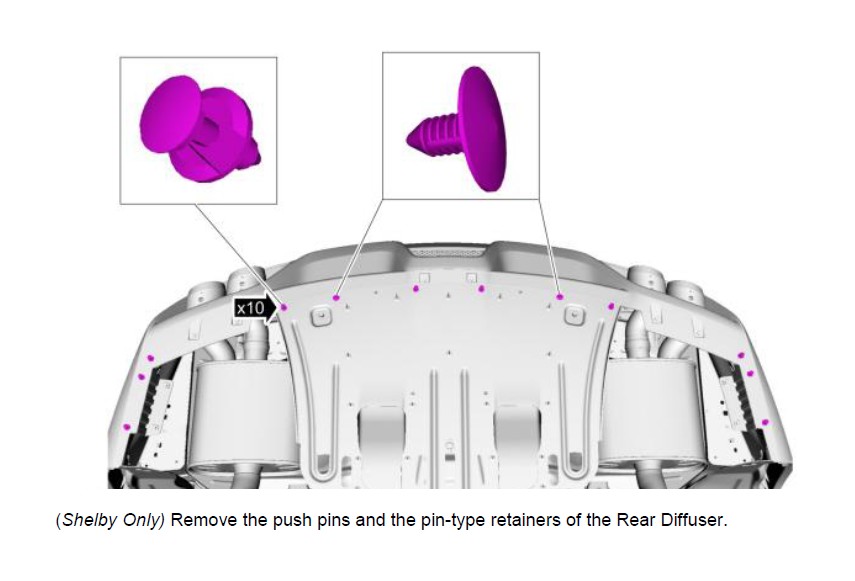
Remove the rear under body shield pushpin retainers.
Remove the rear underbody shield, front bolts.
Torque: 22 lb.ft (30 Nm)
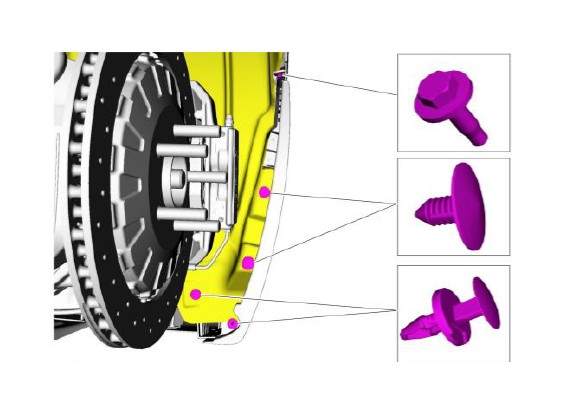
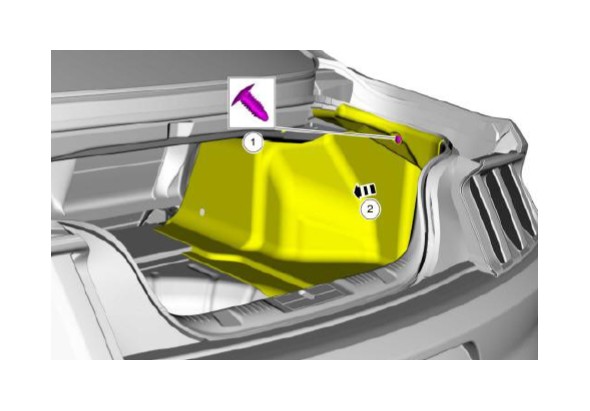
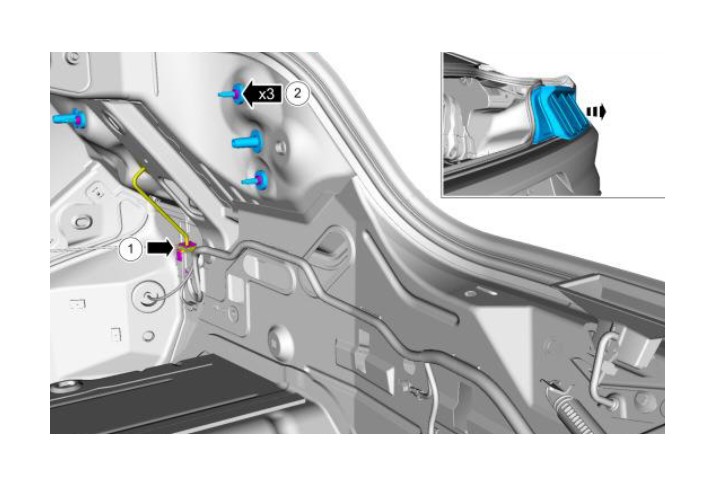
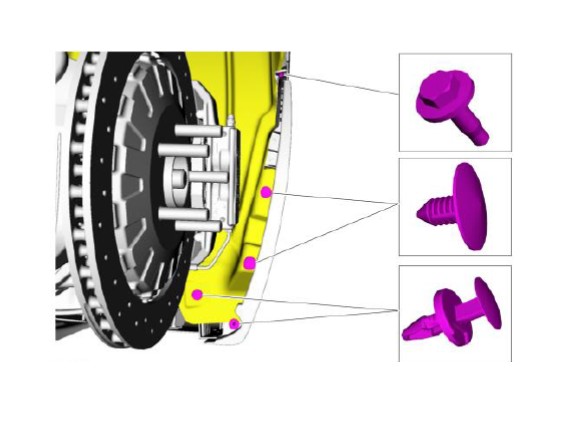
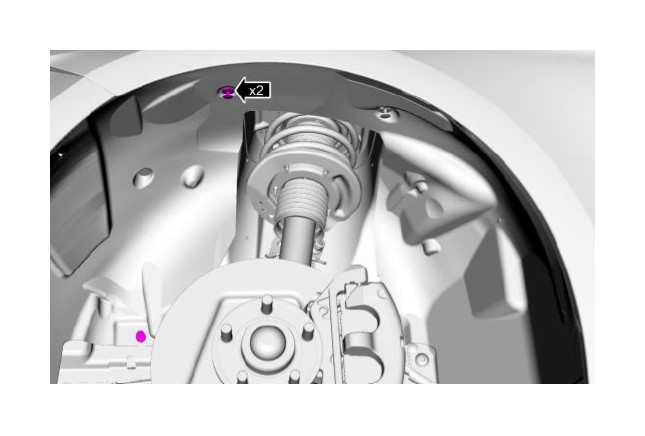
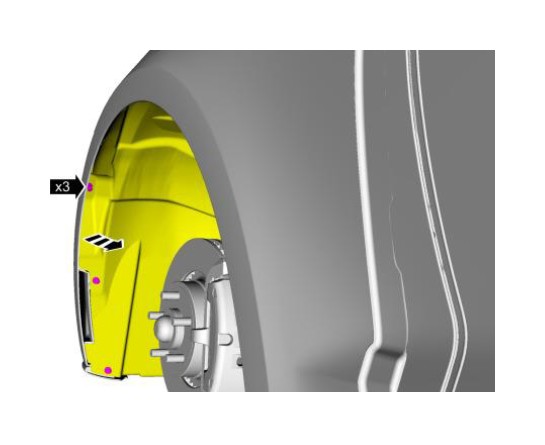
4. On both sides.
Remove the pin-type retainers, the push pins and the screw pictured above, then position the fender liner aside.
Shelby Only
Vehicles equipped with small fender lip mouldings
5. On both sides.
Remove the screws and the fender lip moulding.
Torque: 13 lb.in (1.5 Nm)
Vehicles equipped with large fender lip mouldings
6. On both sides.
Remove the screws and the fender lip moulding.
Torque: 13 lb.in (1.5 Nm)
All vehicles
7. Remove the rear lamp assemblies.
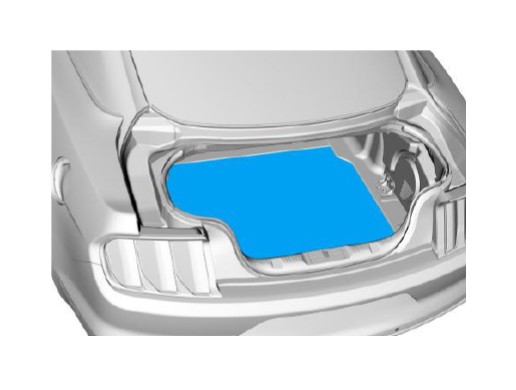
Remove the Spare Tire Well Cover
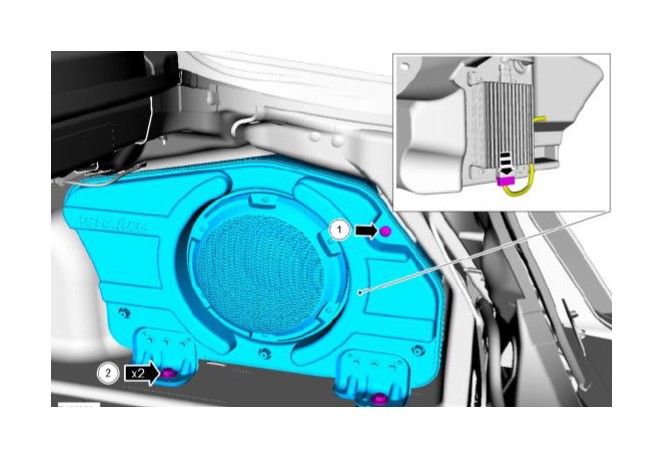
If Equipped, Remove the Sub-Woofer

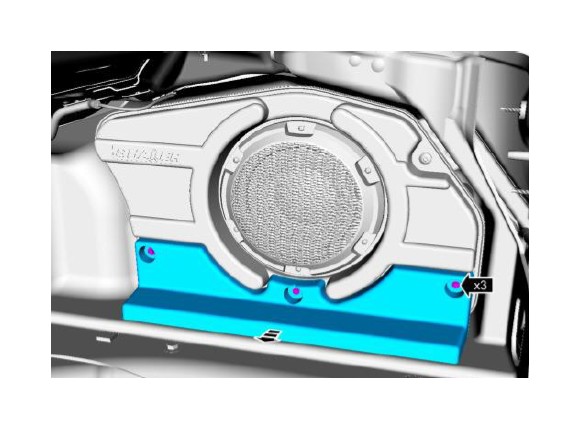
Remove the bolts and the subwoofer speaker cover.
Torque: 21 lb.in (2.4 Nm)
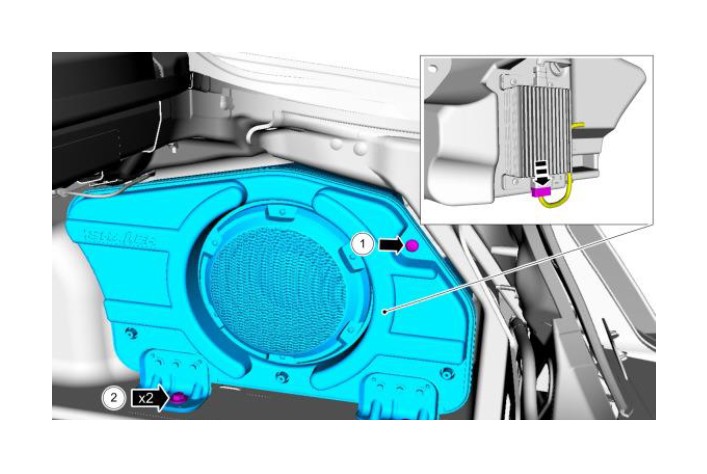
Remove the bolts, disconnect the electrical connector and remove the subwoofer speaker.
Torque: 93 lb.in (10.5 Nm)

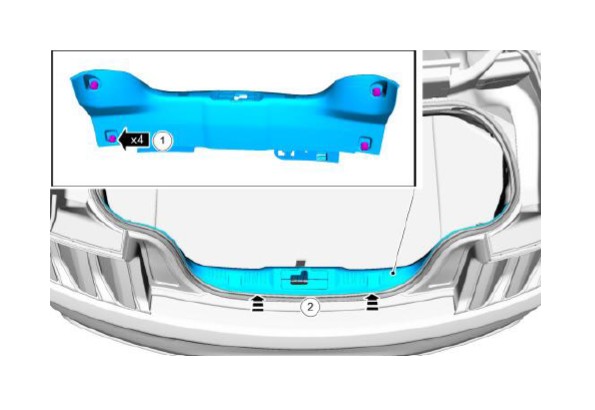
Remove the luggage compartment scuff plate.
1. Remove the thumb nut type retainers.
2. Remove the luggage compartment scuff plate.
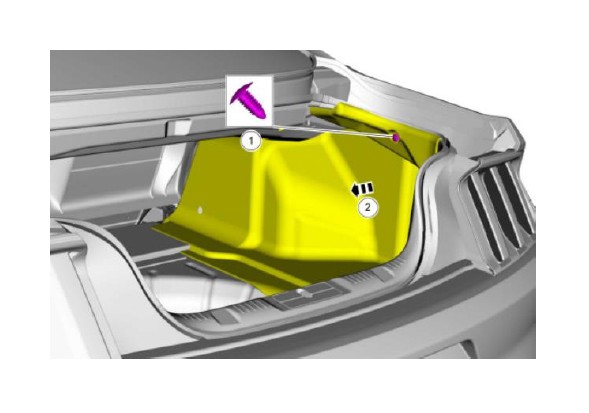
Position the luggage compartment side trim panel aside.
1. Remove the pin-type retainer.
2. Position aside the RH or LH luggage compartment side trim panel.
Remove the rear lamp assembly.
1. Disconnect the rear lamp assembly electrical connector.
2. Remove the nuts.
Torque: 55 lb.in (6.2 Nm)
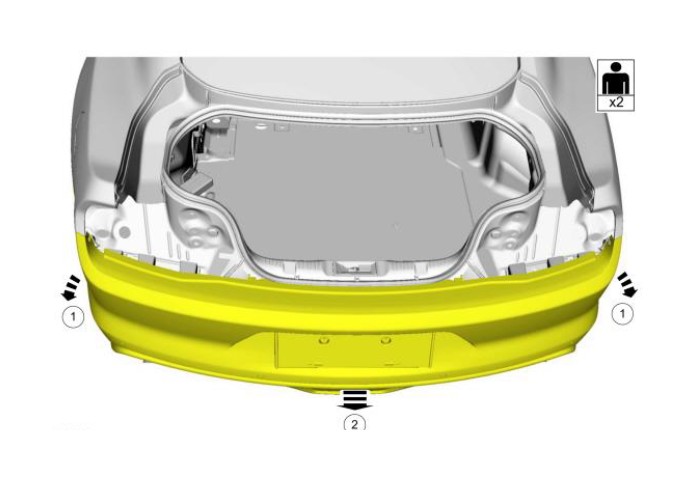
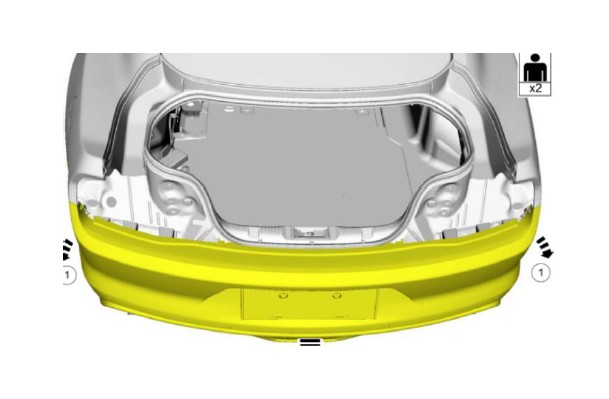
8a Position the rear bumper cover aside for access to electrical connector.
1. Release the sides of the rear bumper cover from the brackets by pulling the Cover from the sides.
2. Release the center of the rear bumper cover from the rear brackets by pulling straight back and position aside.
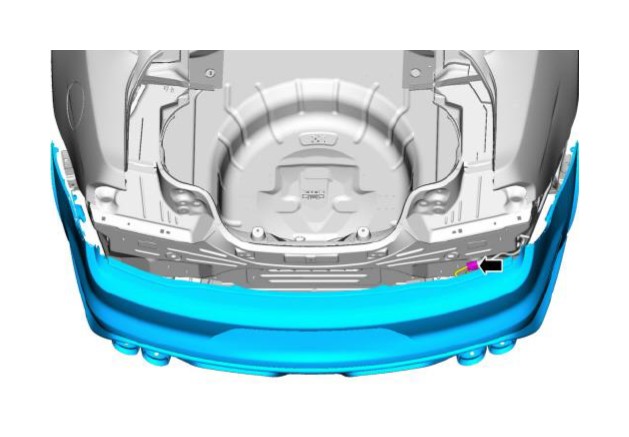
8. Disconnect the electrical connector and remove the rear bumper cover.
Inspect both sides for damaged clips.

Inspect the Rear Brackets for damage.
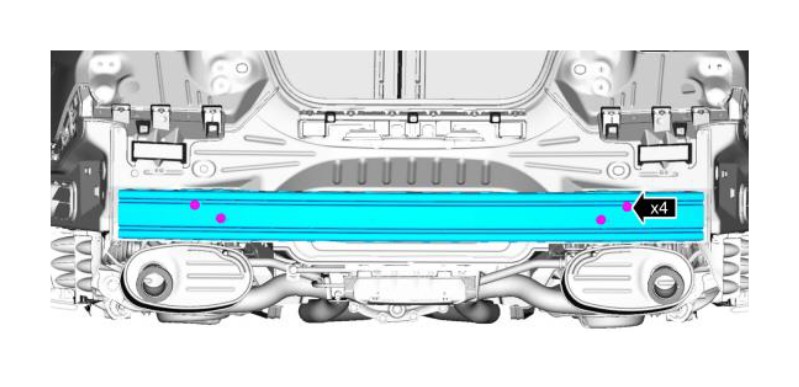
9. Remove the bolts and the rear bumper.
Torque: 18 lb.ft (25 Nm)
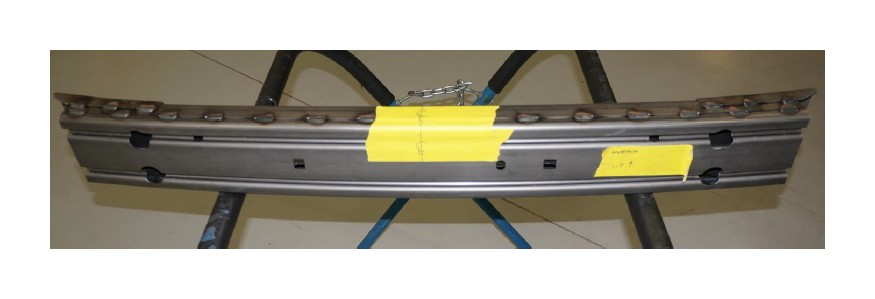
TIP!!! Mark on a piece of tape which is the top and which the bottom is and attach to the Rear Bumper Beam.
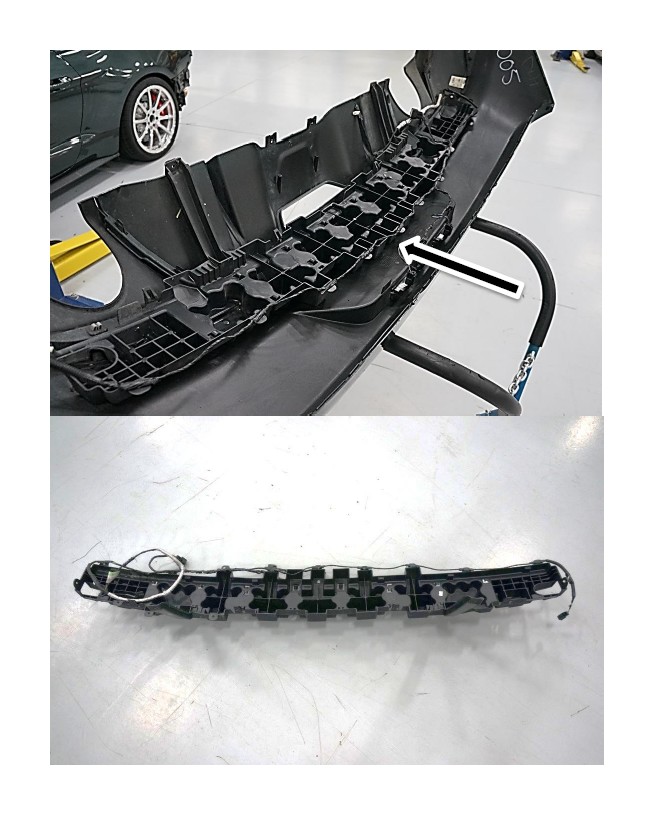
10. Unplug the Reverse Lamp and remove the Four (4) Screws retaining the Reverse Lamp housing to the Rear Fascia.
NOTE: The Rear Tow Ring will mount to the bottom and behind the Rear Bumper Beam. Once the Beam is off of the Vehicle, it is very easy to confuse the top for the bottom. ALWAYS double check the orientation before drilling
Drill the Rear Bumper Beam for the Rear Tow Ring
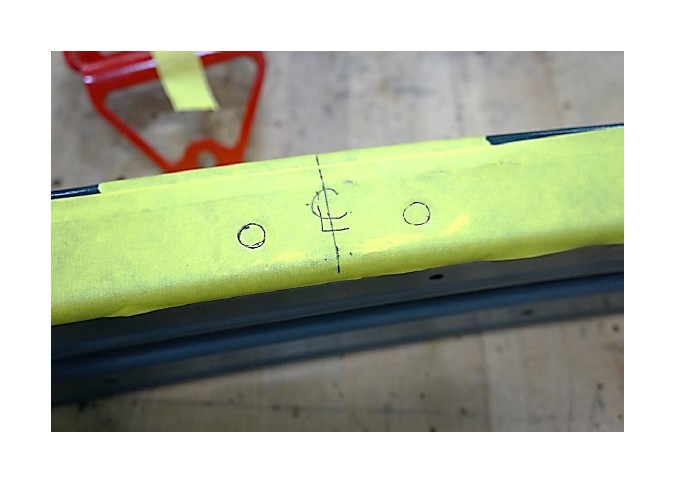
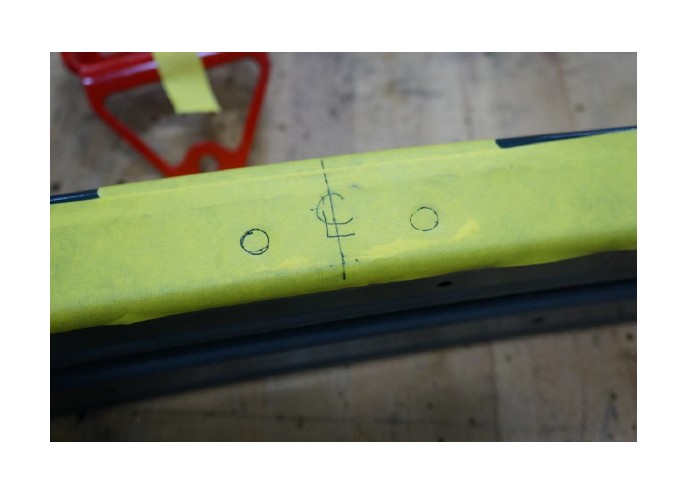
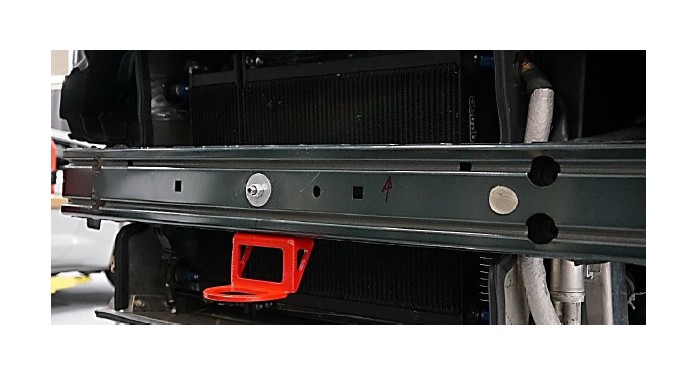
11. Find the Center of the Bottom of the Rear Bumper Beam as well as the Rearward facing side. Draw a line across both Planes.
12. Set the Tow Ring on the Bumper Beam with the Back Side of the Bumper Beam facing up. Center the Hole on the center line you have drawn and mark the two (2) Bottom Bolt Holes. (picture below)
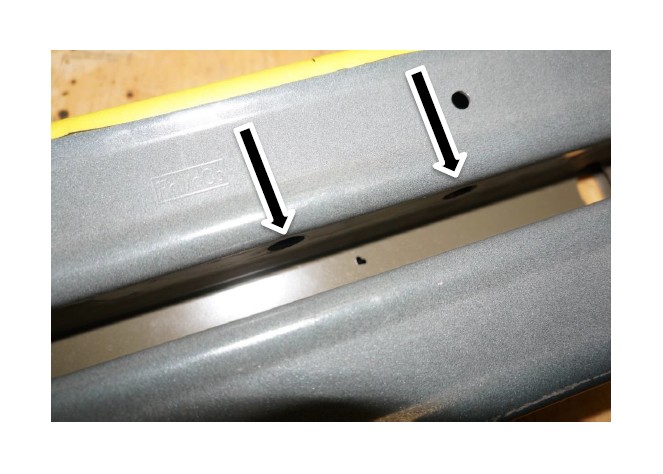
13. Drill the two (2) Holes you have marked with a 7/16 Bit through two (2) layers of the Bumper Beam, into the Center Channel.
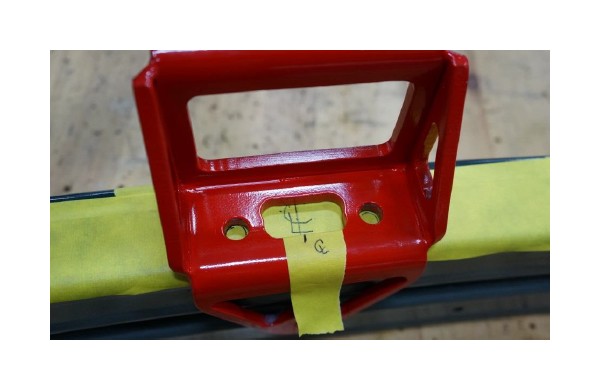
14. Fit the Tow Ring to the Rear Bumper Beam temporarily to Transfer the Rear Bolt Hole Location into the Channel on the back side of the Rear Bumper Beam. Use the Two (2) shorter Bolts through the holes previously drilled.
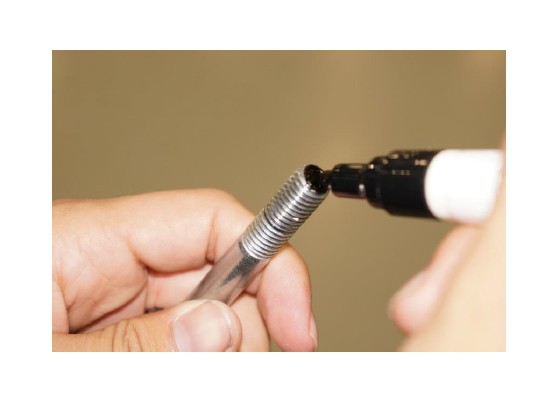
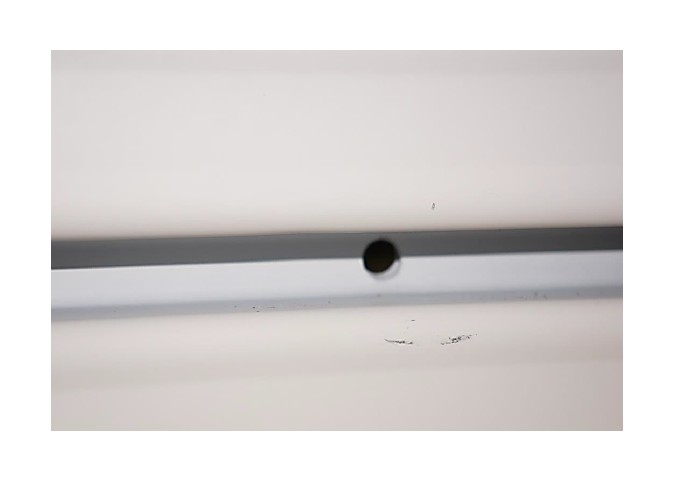
15. To Transfer the Hole to the inside of the channel on the back of the Bumper Beam, apply some paint to the end of the Bolt and, while its wet, slide the Bolt through the Hole on the Tow Ring and touch the Bumper Beam inside the channel. This is the location that you will drill a 7/16 through hole in the Bumper Beam.

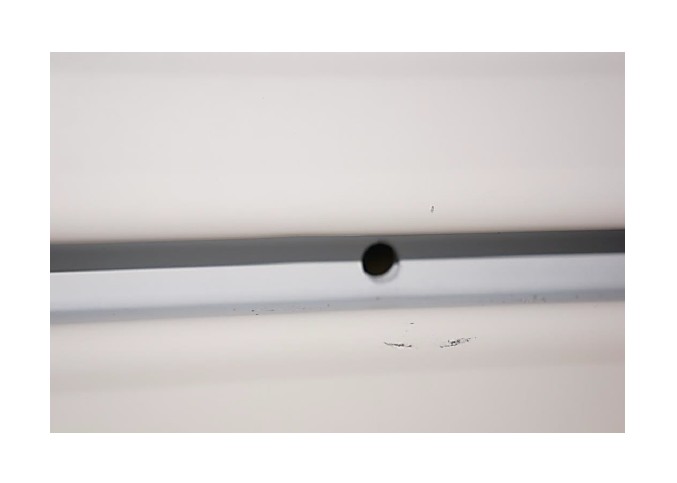
Hold Drilled through the Channel of the Rear Bumper Beam
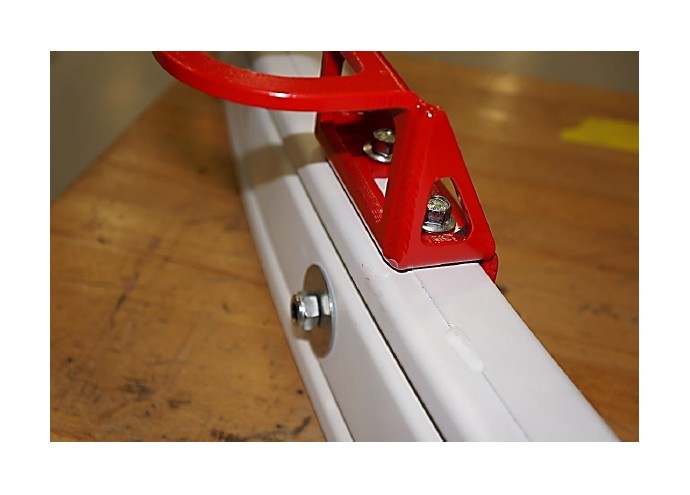
16. Bolt the Tow Ring to the Rear Bumper Beam Torque: 35 ft/lb (47.5 N.m)
17. Install the rear bumper.
Torque: 18 lb.ft (25 Nm)
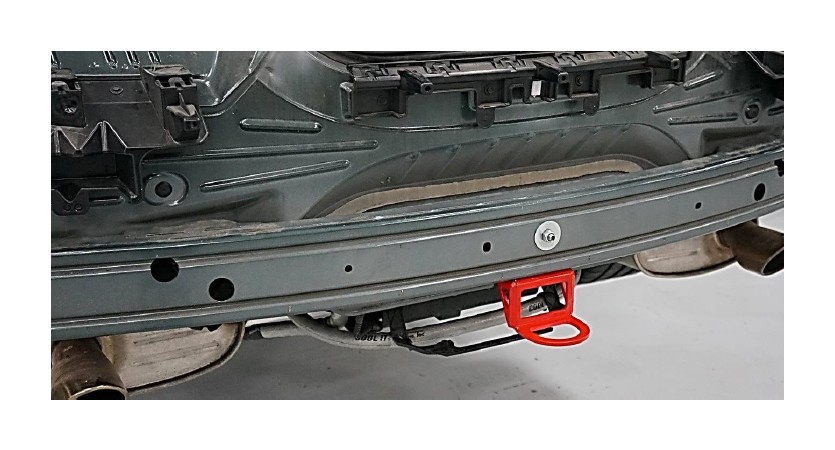
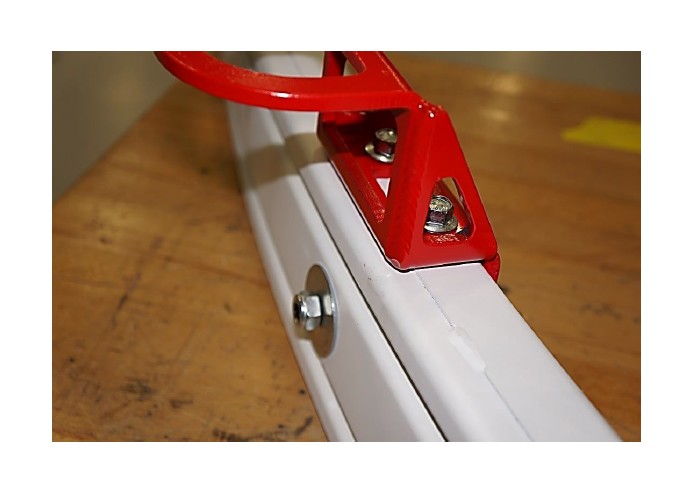
Rear Bumper Beam Re-Installed with the Ford Performance Rear Tow Ring
REAR BUMPER COVER MODIFICATION
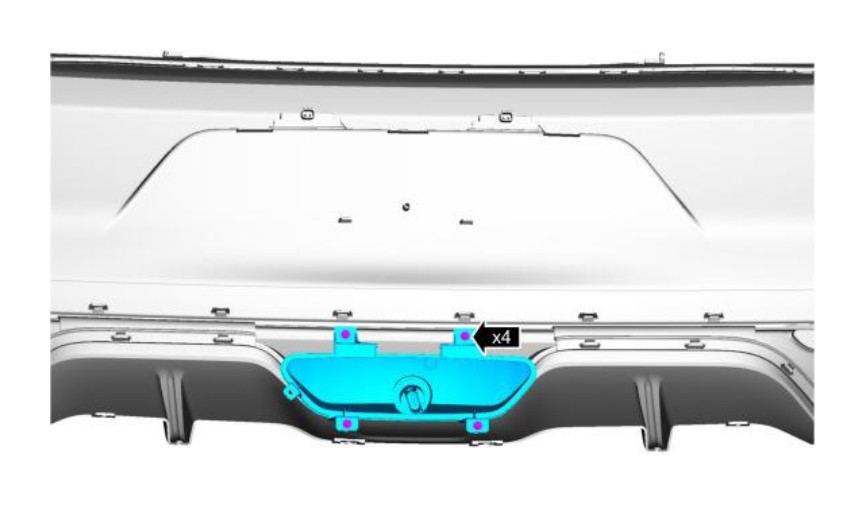
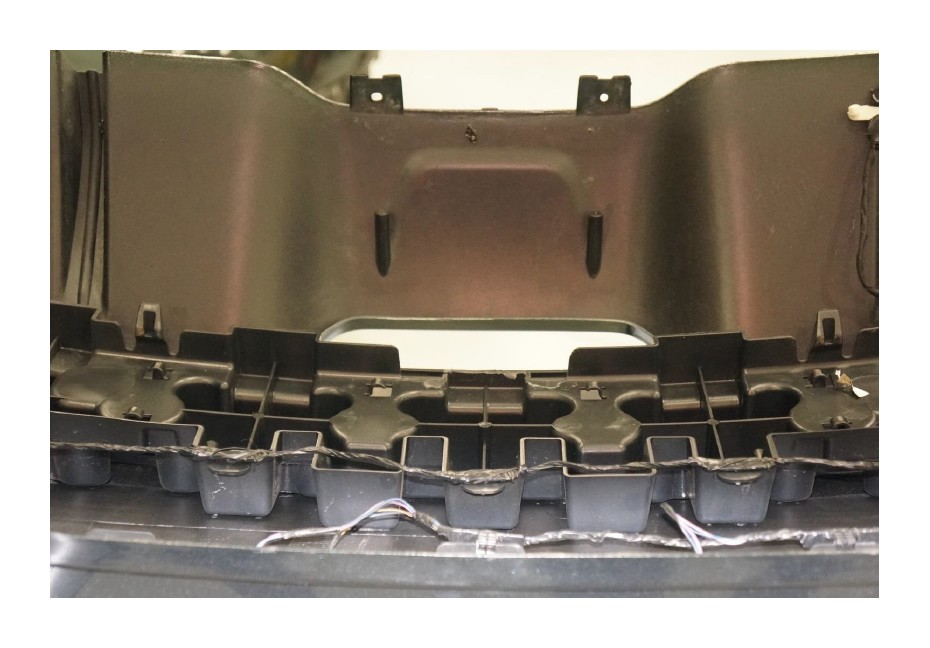
18 Remove the 4 Screws that attach the Reverse Lamp Housing to the Rear Bumper Cover then, remove the Reverse Lamp Housing. The Reverse Lamp will not be re-installed.
Attached to the inside of the Rear Bumper Cover, there is a Plastic Insulating Absorber Strip that must Be modified.
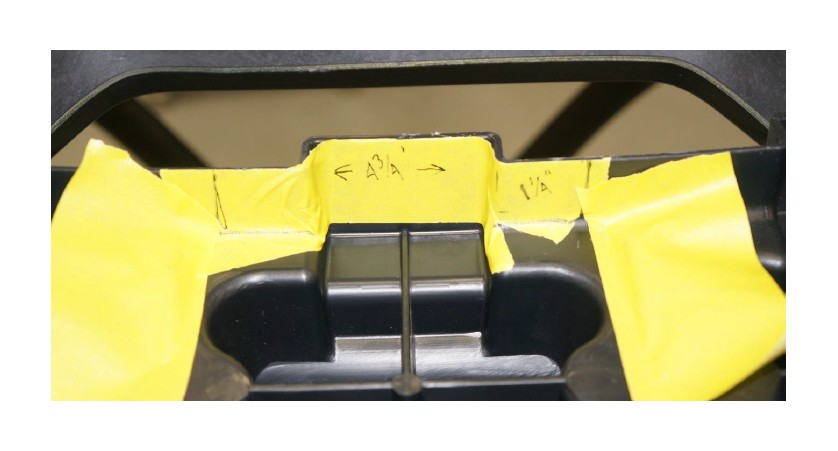
19 Just above the Reverse Lamp Opening in the Rear Bumper Cover on the Plastic Insulating Absorber Strip, Find center and mark off an area 4 ¾ inches wide or, 2 3/8 inches to the Left and Right of the Center Line.
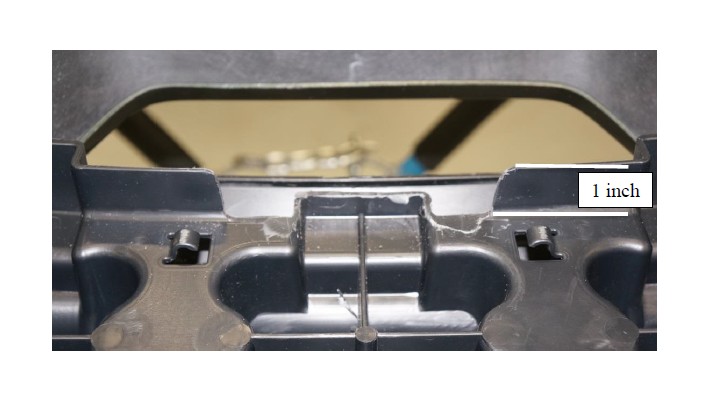
20 Measure down 1 inch and trim the area out to clear the Rear Tow Ring.
After trimming, your Rear Bumper Cover should look like the above picture
Re-Assembly
21 Re-connect the Electrical Harness and Install the Rear Bumper Cover.
22 Position the rear bumper cover for attachment
1. Attach the center of the rear bumper cover to the rear brackets by pushing straight in.
2. Attach the sides of the rear bumper cover to the brackets by pushing the Cover from the sides.
23 Install the rear lamp assembly.
1. Re-connect the rear lamp assembly electrical connector.
2. Install the nuts.
Torque: 55 lb.in (6.2 Nm)
24. Position the luggage compartment side trim panel.
1. Position the RH or LH luggage compartment side trim panel.
2. Install the pin-type retainer.
25. Install the luggage compartment scuff plate.
1. Install the luggage compartment scuff plate.
2. Install the thumb nut type retainers.
If Equipped
Connect the electrical connector and install the subwoofer speaker. Install the Bolts.
Torque: 93 lb.in (10.5 Nm)
Install the bolts and the subwoofer speaker cover.
Torque: 21 lb.in (2.4 Nm)
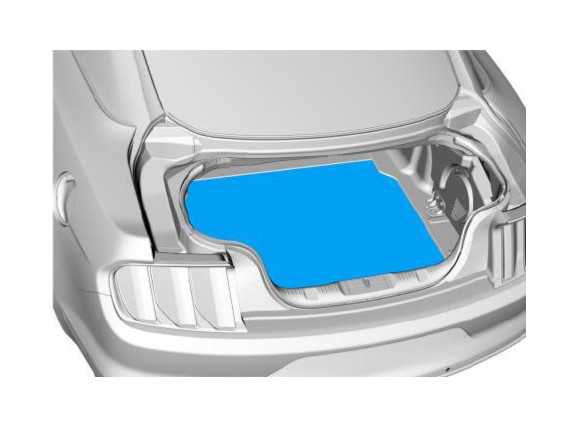
26. Install the Spare Tire Well Cover.

Vehicles equipped with large fender lip mouldings
27. On both sides.
Install the screws and the fender lip moulding.
Torque: 13 lb.in (1.5 Nm)

Vehicles equipped with small fender lip mouldings
28. On both sides.
Install the screws and the fender lip moulding.
Torque: 13 lb.in (1.5 Nm)
29. On both sides.
Install the pin-type retainers, the push pins and the screw.
Shelby Only

30. Install the rear under body
Install the rear underbody shield rear bolts.
Torque: 80 lb.in (9 Nm)
Install the rear underbody shield, front bolts.
Torque: 22 lb.ft (30 Nm)
31. Install the rear wheels and tires.
Torque: 140 Ft/Lb (190 Nm)
32. Lower the Vehicle from the Hoist.
2. S550 MUSTANG FRONT TOW RING APPLICATIONSExcluding SHELBY GT350 / GT350R
Note: The following Instructions are for the S550 Mustangs ONLY. For the Shelby GT350 / GT350R, You will need Ford Performance Shelby Front Tow Ring Kit. p/n M-17954-FA
The use of a floor hoist is recommended for this installation. If you do not have access to one, use a hydraulic floor jack and jack stands to raise the vehicle.
!!!CAUTION: JACK STANDS MUST BE USED ON A LEVEL SURFACE AND BE SECURELY SEATED. FAILURE TO DO SO MAY RESULT IN PERSONAL INJURY OR VEHICLE DAMAGE!!!
1. Raise the Vehicle on a hoist.
2. Remove the Front Wheels
Torque: 140 ft/lb (190 Nm.)
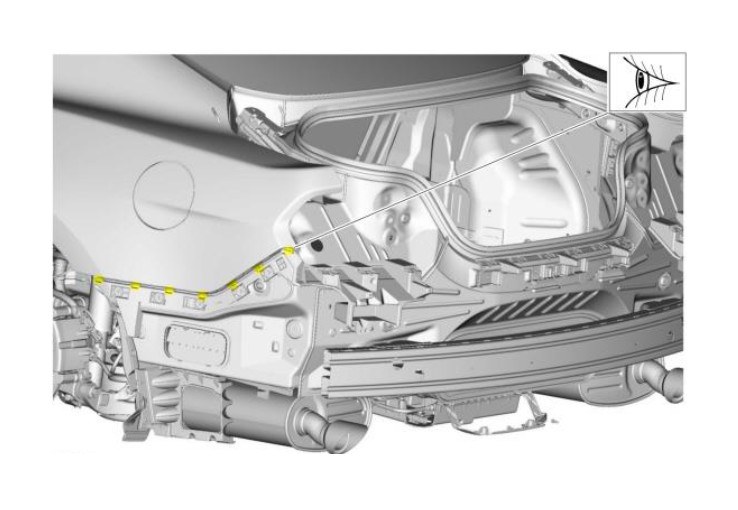
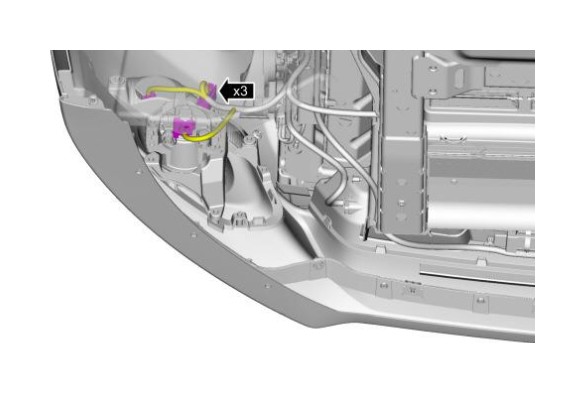
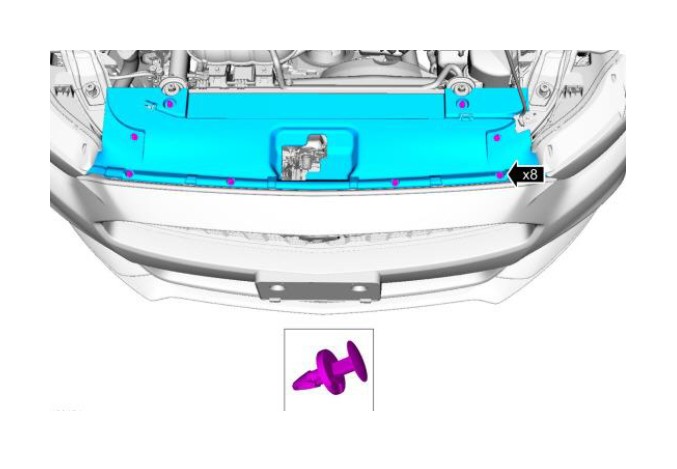
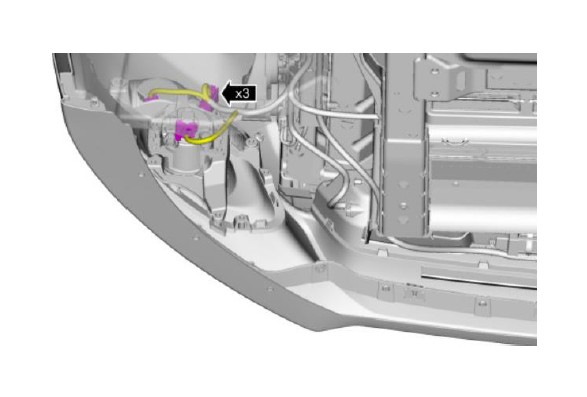
3. Remove the push pins, screws and the lower air deflector.
4. NOTE: On both sides.
Remove the push pins.
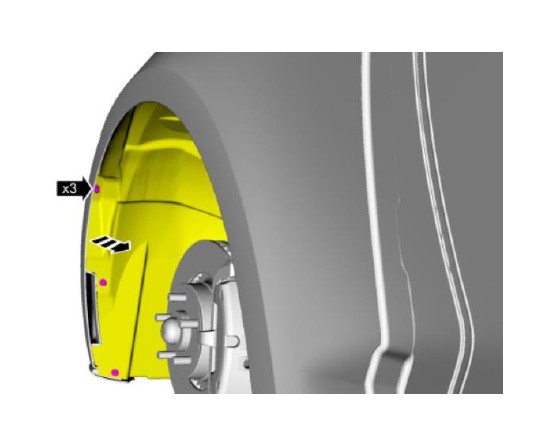
5. NOTE: On both sides.
Remove the push pins and position the inner fender liner aside.
6. NOTE: Halogen foglamp shown, LED fog lamp is similar.
NOTE: On both sides.
Disconnect the electrical connectors.
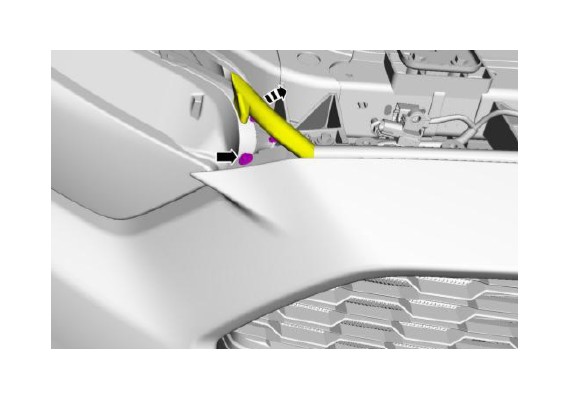
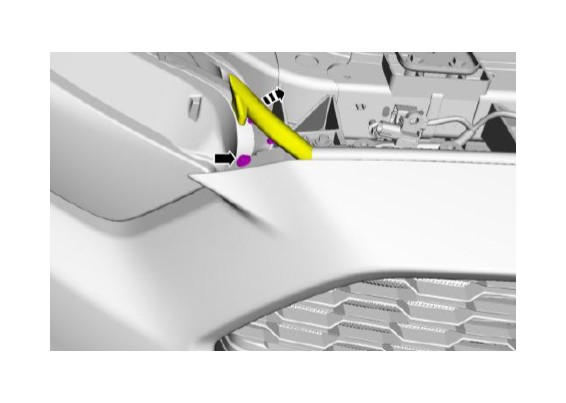
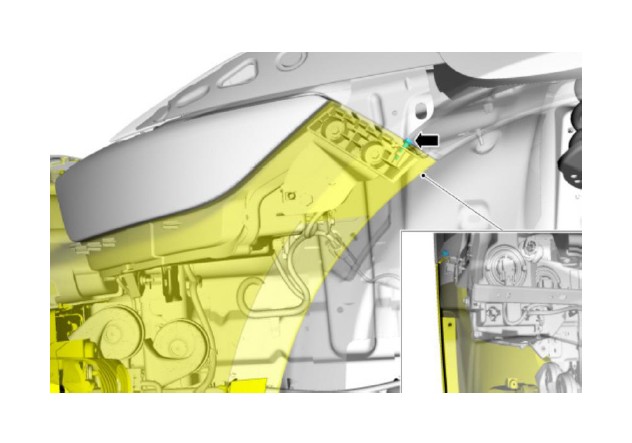
7. NOTE: On both sides.
Remove the bolt and separate the front bumper cover from the fender bracket.
Torque: 15 lb.in (1.7 Nm)
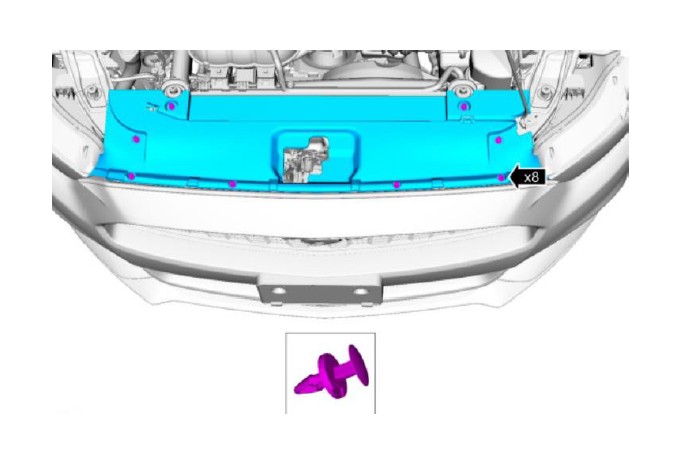
8. Remove the push pins and the radiator sight shield.

9. If equipped, remove the screws and the license plate bracket.
***Reminder*** This product is intended for Off Road Use Only. You will need to remove your Front Mounted License Plate (if you are required to have one) for access to the Ring at the Track.
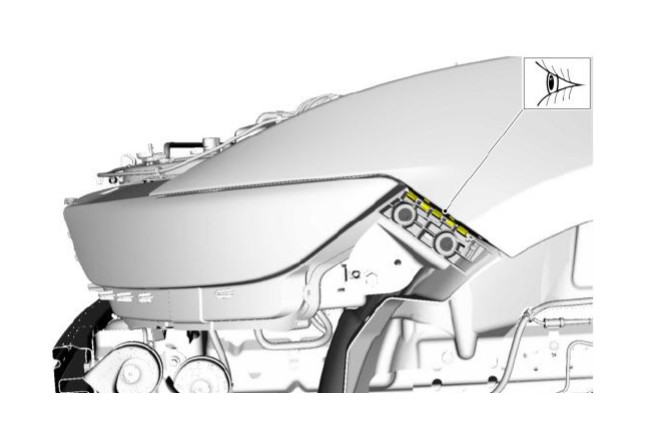
10. NOTE: On both sides.
Position aside the outer edge of the hood seal and remove the bolt.
Torque: 15 lb.in (1.7 Nm)
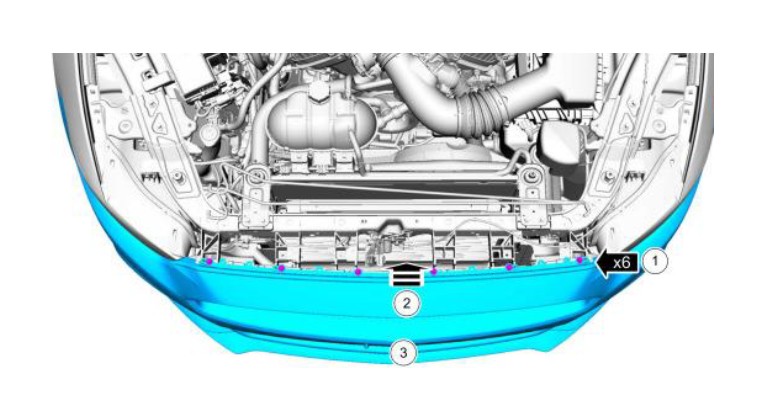
11. Remove the front bumper cover.
1. Remove the screws.
Torque: 48 lb.in (5.4 Nm)
2. Lift the front bumper cover up and off the alignment pins.
3. Pull the front bumper cover forward and off the vehicle.
12. Inspect the fender bracket teeth for damage.
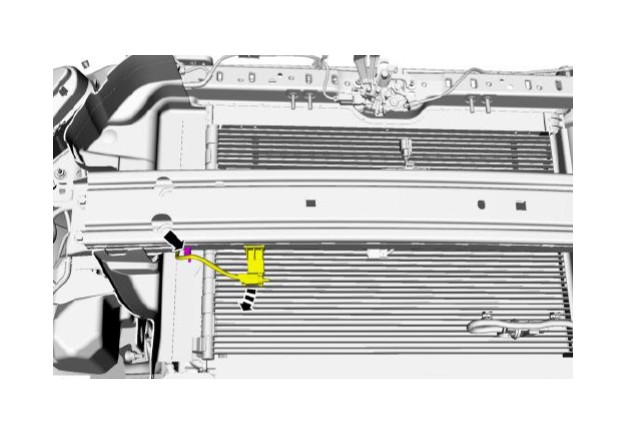
13. Position aside the ambient air temperature sensor bracket and wiring harness guide.
14. Separate the wiring harness guides.
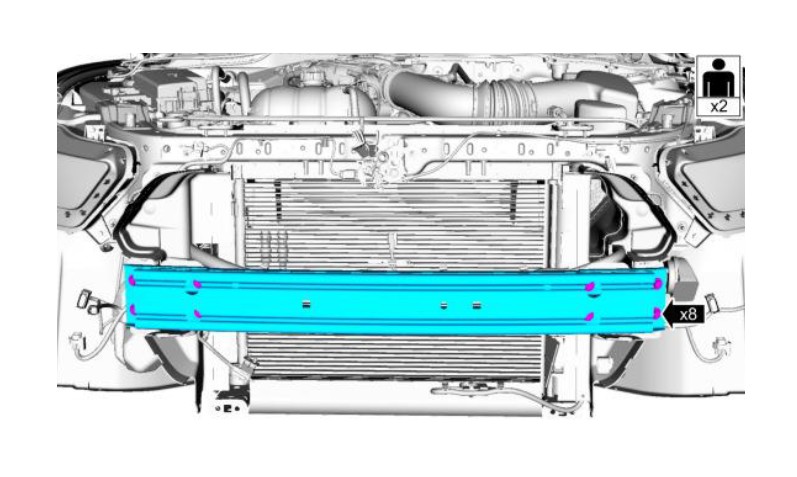
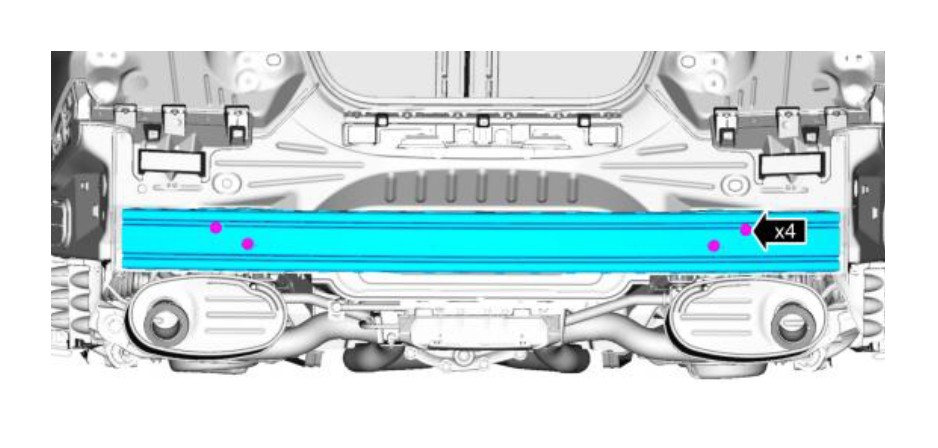
15. Remove the bolts and the front bumper.
Torque: 18 lb.ft (25 Nm)
Mounting the S550 Mustang Front Tow Loop
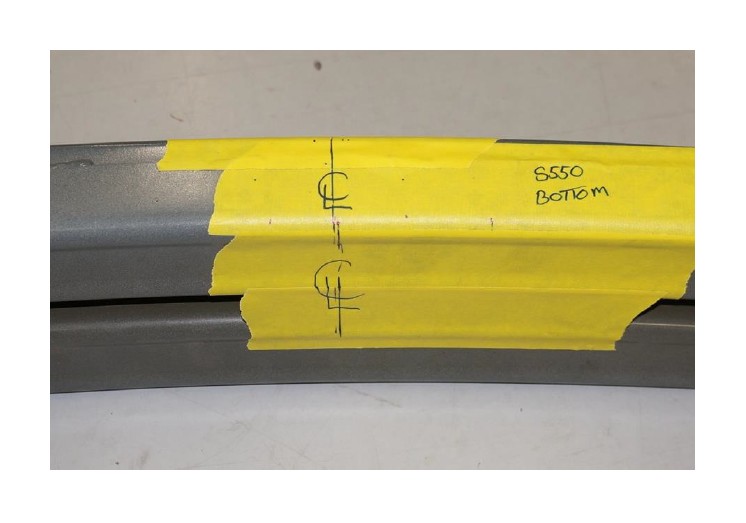
16. On the bottom of the Front Bumper Beam, find center and draw a line across the bottom then, transfer that Center Line across the Back of the Bumper Beam.
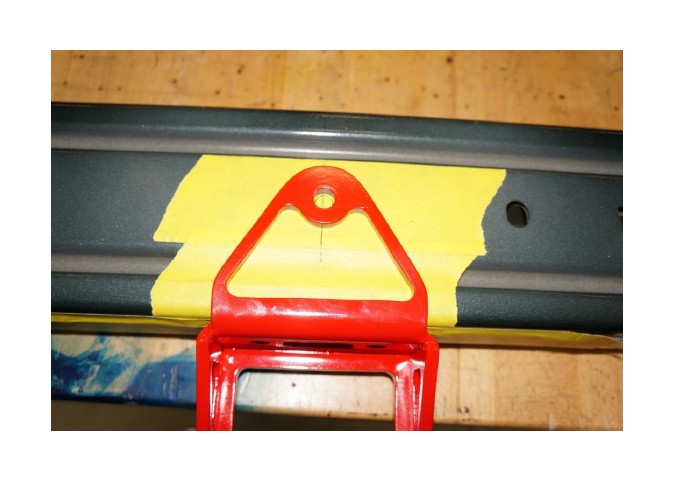
17. Find and mark the Center of the Tow Ring. Lay the Tow Ring over the Bumper Beam and align the Center Line Marks. Transfer the Bolt Holes to the Bumper Beam.
18. Your marks should look like the above Picture. Again, make sure these marks are on the BOTTOM of the Bumper Beam and drill the two (2) holes using a 7/16 bit. You will drill through two (2) layers. You will see the bit in the Center Channel on the back of the Beam when you drill through properly. (see below Picture)
19. Fit the Tow Ring to the Front Bumper Beam temporarily to Transfer the Rear Bolt Hole Location into the channel on the back side of the Front Bumper Beam. Use the Two (2) shorter Bolts through the holes previously drilled.

20. To Transfer the Hole to the inside of the Channel on the back of the Bumper Beam, apply some paint to the end of the Bolt and, while its wet, slide the Bolt through the Hole on the Tow Loop and touch the Bumper Beam inside the channel. This is the location that you will drill a 7/16 through hole in the Bumper Beam.
Hold Drilled through the Channel of the Front Bumper Beam
21. Bolt the Tow Ring to the Front Bumper Beam.
Torque: 35 ft/lb (47.5 N.m)
Re-Assembly of the Front Bumper Beam and Cover
22. Install the front bumper and the Bolts.
Torque: 18 lb.ft (25 Nm)
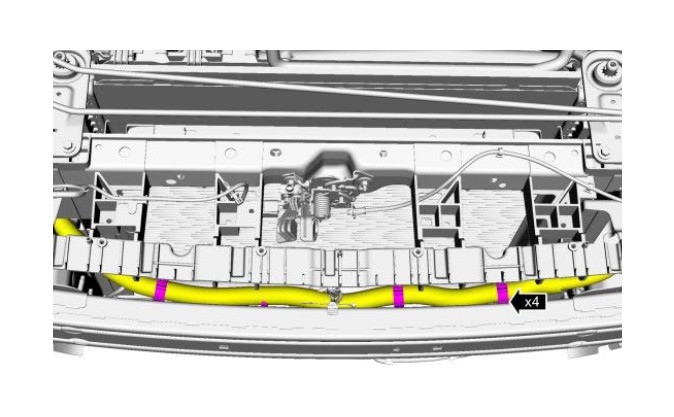
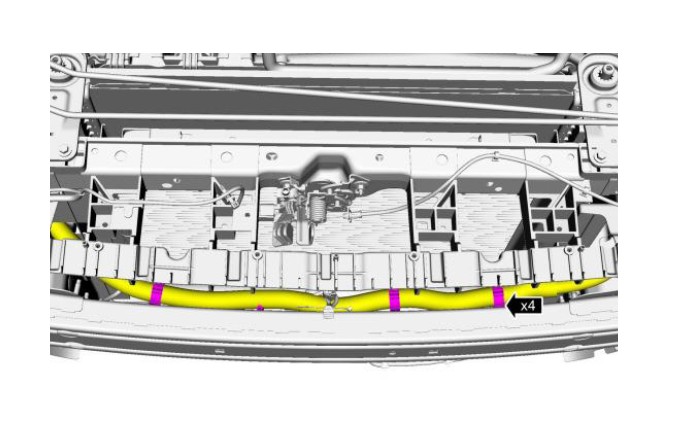
23. Re- Attach the Forward Lamp Harness to the Front Bumper Beam.
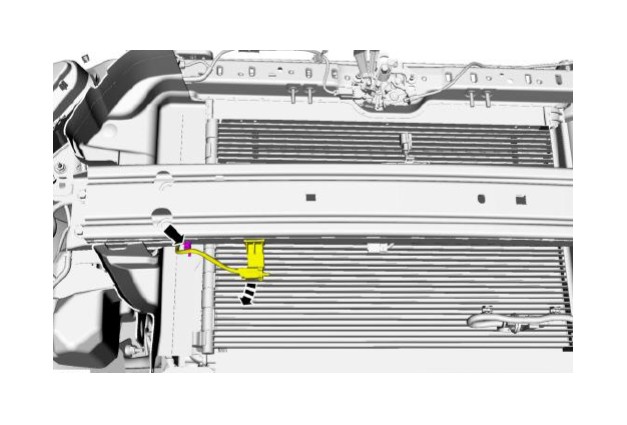
24. Install and Connect the Ambient Temperature Sensor.
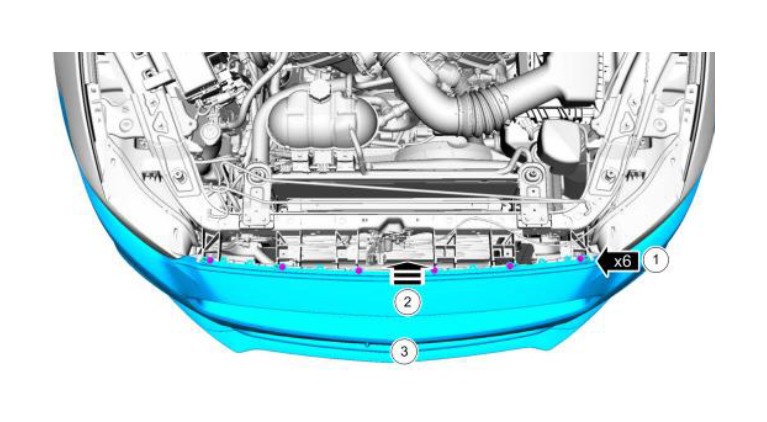
25. Install the front bumper cover.
1. Lift the front bumper cover up and on the alignment pins.
2. Install the Six (6) Top screws.
Torque: 48 lb.in (5.4 Nm)
26. NOTE: On both sides.
Position aside the outer edge of the hood seal and install the bolt.
Torque: 15 lb.in (1.7 Nm)
27. Install the Sight Shield and Push Pins.
28. NOTE: On both sides.
Attach the front bumper cover to the fender bracket and install the Retaining Screws.
Torque: 15 lb.in (1.7 Nm)
29. NOTE: Halogen foglamp shown, LED fog lamp is similar.
NOTE: On both sides.
Disconnect the electrical connectors.
30. NOTE: On both sides.
Position the inner fender liner and install the Push Pins.

31. NOTE: On both sides.
Remove the push pins.
32. Install the lower air deflector, the push pins and screws.
33. Install the Front Wheels
Torque: 140 ft/lb (190 Nm.)
34. Lower the Vehicle to the ground

