 FREE 1 to 3-Day Delivery on Orders $149+ Details
How to Install Ford Performance BOSS 302 Brake Line Upgrade (05-14 GT; 11-14 V6; 07-12 GT500) on your Ford Mustang
Installation Time
1.5 hours
Tools Required
- 3/8" Drive Wrench
- 10mm Socket
- 13mm Socket
- 13mm Boxed End Wrench
- 7/16" Boxed End Wrench
- Torque Wrench
- Lug Nut Socket (Sizes Vary)
- Jack
- Jack Stands
- 1 QT of Brake Fluid
- 3/16 ID Hose
- Drain Pan

Shop Parts in this Guide
1. Loosen all the wheels lug nuts. Use jack and jack stands (or lift) to raise your vehicle off the wheels. Remove wheels from vehicle.
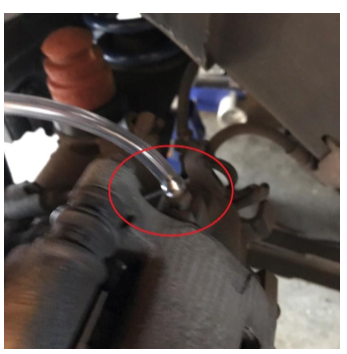
2. Starting with the rear passenger brake, firmly press the 3/16’’ hose onto the bleeder. Put the other end of the 3/16’’ hose in a bottle or drain pan.
3. Use a 7/16’’ boxed end wrench to open the bleeder (less than 1.5 turns). Remove the brake fluid reservoir cap and pump brake pedal to push out the old brake fluid, until the majority is removed. Retighten the bleeder.
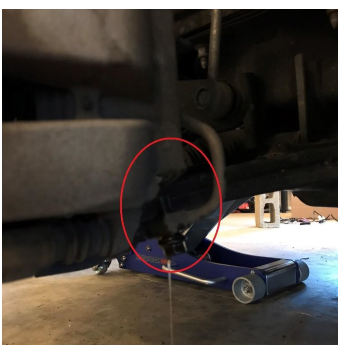
4. Place a drain pan under the caliper. Using the 3/8’’ drive wrench and 13mm deep socket, remove the banjo bolt.
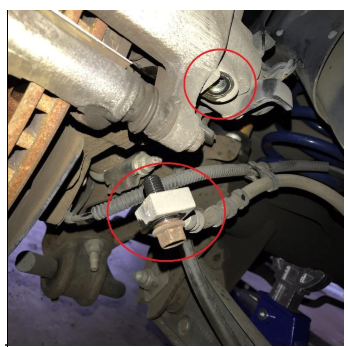
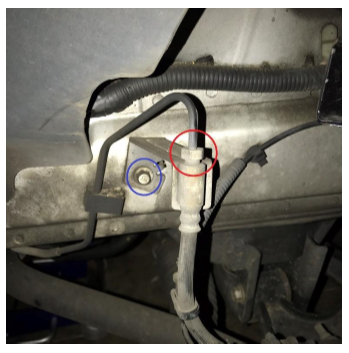
5. Using a 13mm boxed end wrench, remove the flair fitting (red). Next using the 3/8’’ drive wrench and 10mm deep socket remove the brake line bracket from car body (blue).
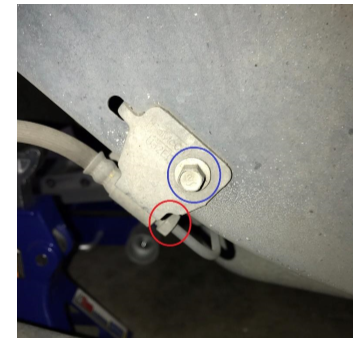
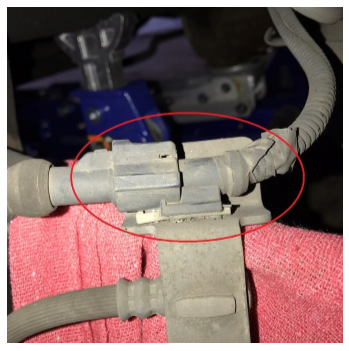
6. Remove clip that attached brake line to senor wire.
7. Remove electrical connector from brake line bracket.
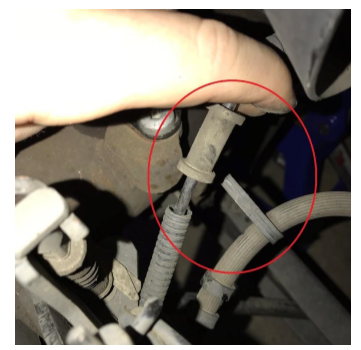
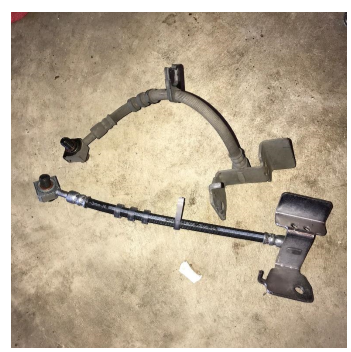
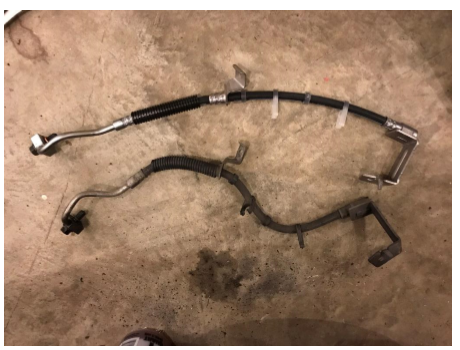
8. Find the correct brake line by comparing them (rears are not labeled left and right).
9. Push the electrical connector into place on the new brake line bracket.
10. Thread the flair fitting into the new brake line, do not tighten. Next attach the brake line bracket to the car body with the 10mm bolt. Torque to 15 lbs/ft. Tighten flair fitting and torque to 15 lbs/ft.
11. Reattach brake line clip to sensor wires.
12. Install new 13mm banjo bolt into caliper. Torque to 18 to 24 lbs/ft.
13. Move to driver’s side rear brake and repeat steps 4 through 12.
14. Move to passenger side front brake.
15. Place a drain pan under the caliper. Using the 3/8’’ drive wrench and 13mm deep socket, remove the banjo bolt.
16. Using a 13mm boxed end wrench, remove the flair fitting (red). Next using the 3/8’’ drive wrench and 10mm deep socket remove the brake line bracket from car body (blue).
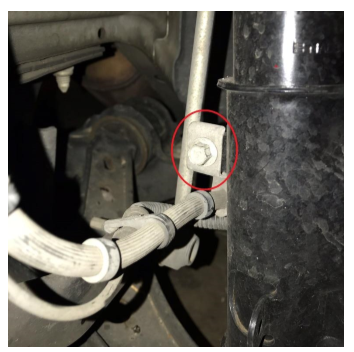
17. Using the 3/8’’ drive wrench and 10mm deep socket, remove brake line strut bracket.
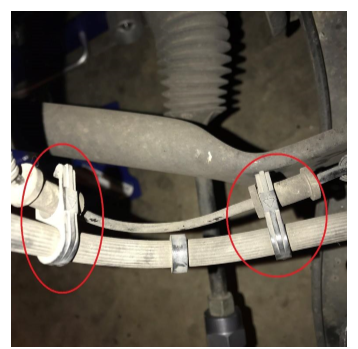
18. Remove both clips that attached brake line to senor wire.
19. Find the correct brake line by comparing them (fronts are labeled).
20. Thread the flair fitting into the new brake line, do not tighten. Next attach the brake line bracket to the car body with the 10mm bolt. Torque to 15 lbs/ft. Tighten flair fitting and torque to 15 lbs/ft.
21. Using the 3/8’’ drive wrench and 10mm deep socket, install the brake line strut bracket. Torque to 15 lbs/ft.
22. Install new 13mm banjo bolt into caliper. Torque to 18 to 24 lbs/ft.
23. Reinstall both wire and brake line clips.
24. Move to driver’s side front brake.
25. Repeat steps 15 through 24.
26. When finished bleed brakes with new fluid (directions not included in this guide).
27. Reinstall wheels, lower vehicle and torque lug nuts (98 lbs/ft typical for S197 mustangs).
Installation Instructions created by AmericanMuscle Customer Kyle Coplin on 3/10/18.