 FREE 1 to 3-Day Delivery on Orders $149+ Details
How to Install Ford Performance Motor Mount Kit (11-19 GT) on your Ford Mustang
Installation Time
4 hours
Tools Required
- Jack stands/Floor jack or Lift
- 13-19mm sockets and socket wrench
- Torque wrench
- Impact
- Thread Locker
These mount instructions are for replacing the engine bushings on a vehicle with OEM/short tube headers. Long tube header & vehicles that will need motor mounts instructions will need to follow the extra steps. Note: Per Ford Performance; 2011-2017 Mustang GT’s with the Coyote motor already come with the motor mounts in this kit and will usually only need the motor bushings, unless the mounts are damage. FP states that motor mounts are needed if adding a Coyote motor to a vehicle that had and original V6 or non-Coyote motor.
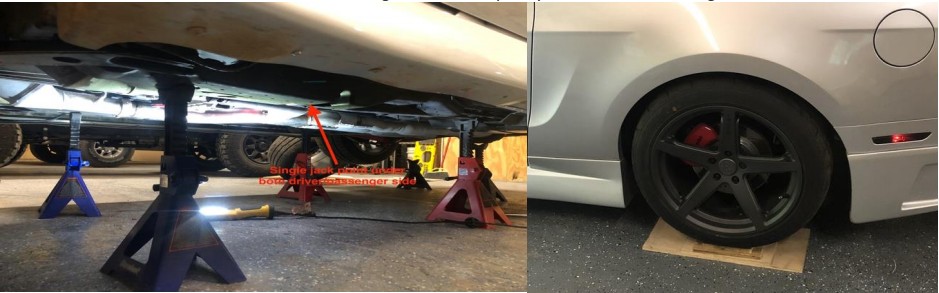
Safety: It is easier to replace these items with the car raised on jack stands so that the engine can be raised, and engine support lowered.
Step 1: Raise the vehicle either with a jack or auto lift. Support the car with 4 jack stands on the front/rear frame rails, or with 2 on the front frame rails, and 2 on the rear axle. If vehicle has been lowered, you can gain better access to the rail by placing the rear/front wheels on platform to allow you to get a jack under the body rail. (Independent suspension vehicles should be supported on all frame rails). Do not
place jacks under crossmembers or other body supports. They are not made to support the vehicle for extended periods and can cause damage that will impact your vehicles handling.
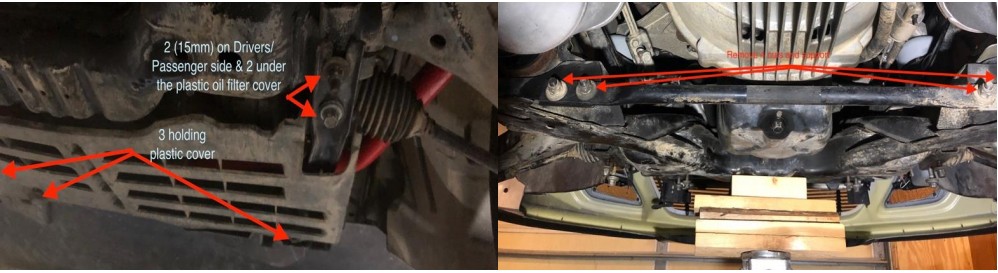
Step 2: Remove the front chassis brace (6-15mm bolts & 3 body screws that hold the cover) that holds the plastic cover for the oil filter area. This will allow for you to be able to remove the bushings. Remove the rear engine chassis brace that is below the transmission. This will allow you to jack up the motor to provide space to remove the engine bushings.
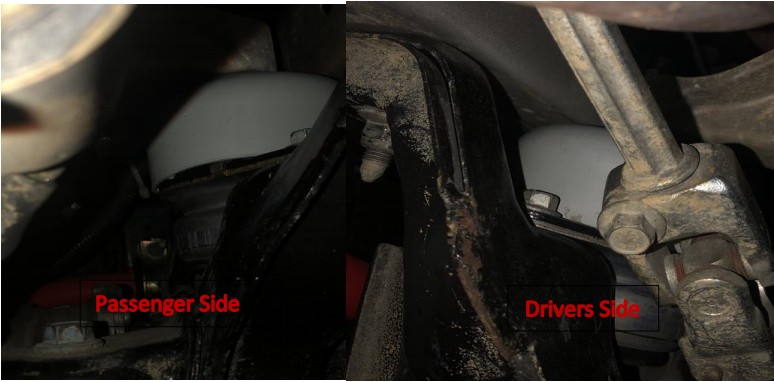
Step 3: Through the engine bay and using extensions socket remove the bushing nut (15mm) and the two frame bolts (13mm) on the sides of the bushing. (Long tube headers or other engine modifications may require you to access these by fully dropping the lower engine support)

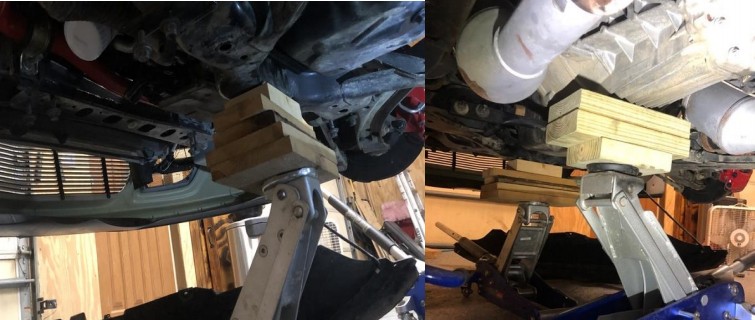
Step 4: Place a jack under the transmission where you removed the cross support. (the engine should not be raised using the oil pan, due to possible damage). Another jack can be placed under the front cross member that supports the engine to allow it to be lowered on the next step.
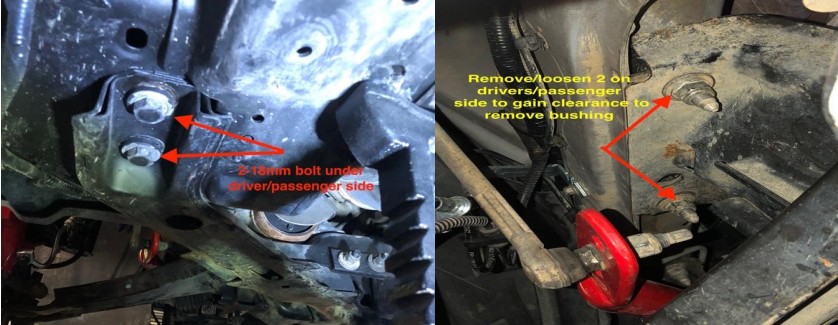
Step 5: Important-ensure that the motor is supported before proceeding with this step. Raise the motor up about an inch making sure that it moves up off the motor bushings. Loosen the 6 bolts (18mm) that hold the engine support/K-member (2 on each side of the frame and 2 each under the passenger/driver side). Slowly lower the engine support/K-member to allow you to reach/remove the engine mounts. It may be necessary the raise the motor up more or remove the air intake to allow it to raise up more. Some instructions call for removing the steering linkage but if the engine mount/K-member is lowered and engine raised, you should be able to remove/replace the engine bushing. Note: If you are replacing the motor mounts or have long tube headers it will be necessary to completely lower/remove the support/K-member to allow you to access the bushings/engine mounts.
Step 6: Reach up and remove OEM bushings out from each side and replace with the new on. Place the 13mm bolts on each side of the bushing mount and hand tighten. You will not be able to replace the 15mm top bushing nut yet.
Step 7: Raise the engine support/K-member up and replace the bolts. As you raise it check that the bushing top bolt is aligned up with the motor mount. Once engine mount/K-member is replaced, torque bolts to 129 ft/lbs
.
Step 8: Lower the motor back into place and ensure that the motor lowers onto the motor bushings bolt.
Replace the 15mm nut on the top of the bushings with Thread Locker.
• 13mm bolt is torqued to 35 ft/lbs.
• 15mm nut is torqued to 46 ft/lbs.
Step 9: Replace the front chassis brace with oil cover and rear transmission brace that was removed earlier. These can all be torqued to 35-41 ft/lbs. except the 3 cover bolts that require 5 ft/lbs.
Installation Instructions Written by AmericanMuscle Customer Daniel F. 7/21/2019
