 FREE 1 to 3-Day Delivery on Orders $149+ Details
How to Install a Ford Racing SVT Performance Cooling Fan on your 2005-2014 Mustang GT and Mustang GT
Installation Time
2 hours
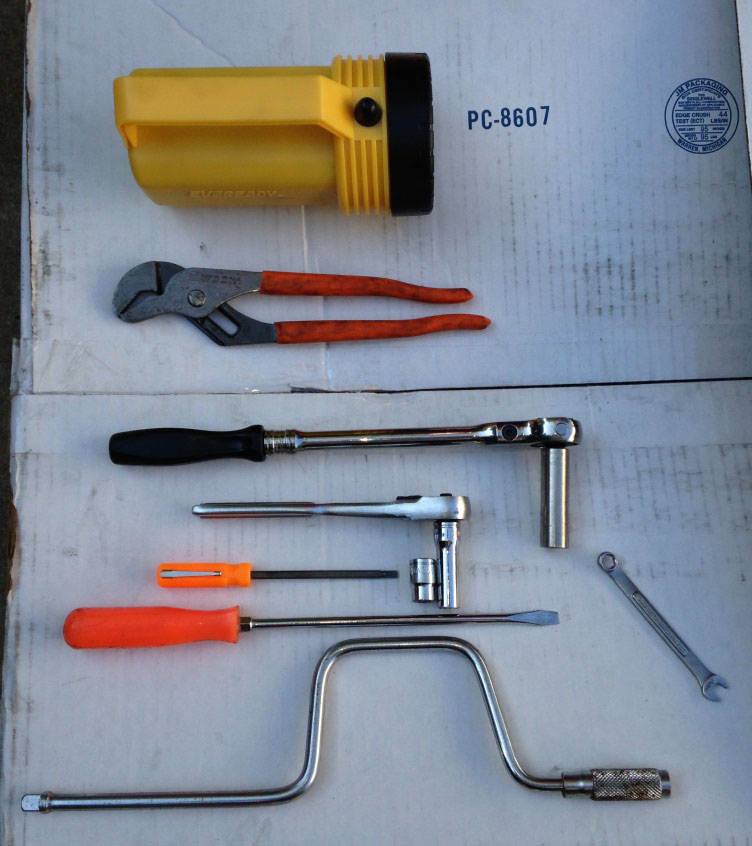
Tools Required
- 8mm Wrench
- 8mm Socket (3/8” drive, optional)
- 10mm Socket (3/8” drive)
- 10mm Deep Socket (3/8” drive)
- 13mm Deep Socket (3/8” drive)
- 3/8" Drive Ratchet
- 3/8” Drive Ratchet, Extended Handle (optional)
- 3/8” Drive Speed Handle (optional)
- 3/8” Drive Torque Wrench (optional)
- Flat-Tipped (Standard) Screwdriver
- Flat-Tipped (Standard) Screwdriver, Small
- Flashlight (optional)
- Slip-Joint Pliers
- Small Plastic Container, 1 Quart
Shop Parts in this Guide
Time Necessary: Approximately 60-90 minutes
Tools Required:
• 8mm wrench
• 8mm socket (3/8” drive, optional)
• 10mm socket (3/8” drive)
• 10mm deep socket (3/8” drive)
• 13mm deep socket (3/8” drive)
• 3/8” drive ratchet
• 3/8” drive ratchet, extended handle (optional)
• 3/8” drive speed handle (optional)
• 3/8” drive torque wrench (optional)
• Flat-tipped (Standard) screwdriver
• Flat-tipped (Standard) screwdriver, small
• Flashlight (optional)
• Slip-joint pliers
• Small plastic container, 1 quart
Please Note: This procedure was completed on a 2011 Mustang GT with an automatic transmission that had a K&N CAI and Redline Tuning hood lift supports previously installed. Some images shown may not be representative of your specific situation. The vehicle was allowed to cool down overnight as a precaution before performing this procedure.
Stock Cooling Fan Removal:
WARNING: Never work on a hot engine. Personal injury and new, creative use of profanity may occur.
1. Use an 8mm wrench (or 8mm socket with ratchet) to disconnect the battery.
2. Use a 13mm deep socket and a 3/8” drive ratchet to carefully remove the strut tower brace.
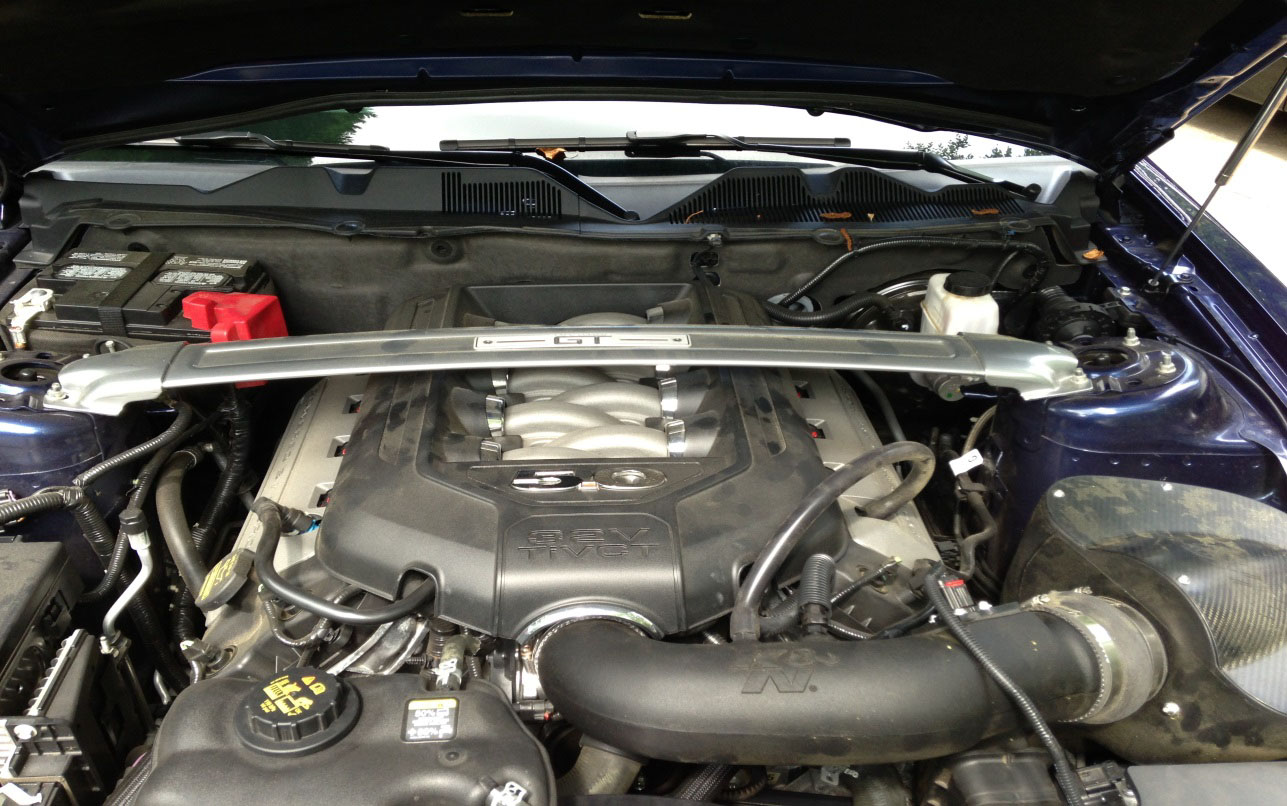
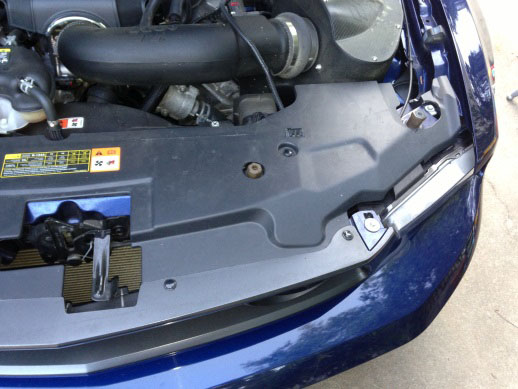
3. Carefully remove the plastic engine cover by gently pulling up at the front (radiator end) and both sides to unseat it from the grommets securing it to the top of the engine (4 places).
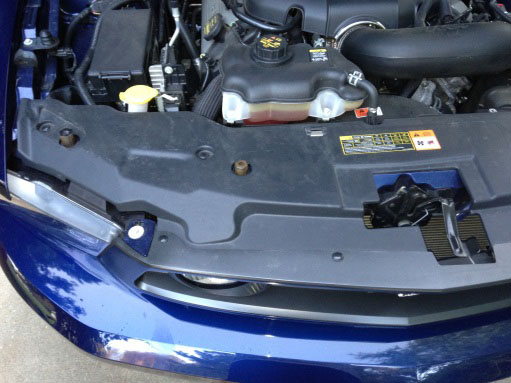
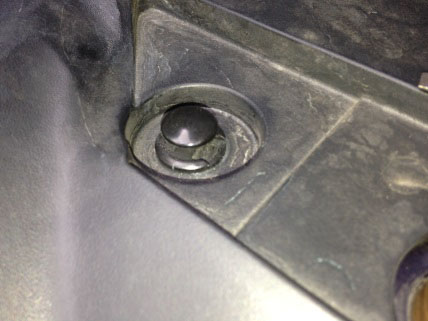
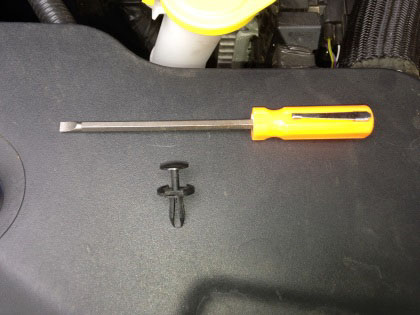
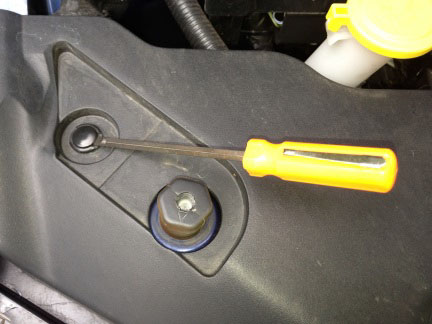
4. Carefully use a flat-tipped screwdriver to gently lift the center head portion of the 8 plastic retainers that hold the plastic radiator shroud in place. Once the center portion of the head is raised (approximately ¼”), the retainer assembly comes out. Save for re-use.
5. Disconnect the MAF sensor by sliding the red clip towards the wired end of the plug to unlock it and then gently pulling the plug from the sensor.
(Continued from #4 above)
(Illustration for #5)
6. Remove the stock air filter box and intake assembly (or cold air intake if installed) from the throttle body. Now is the best time to inspect/replace your stock air filter or swap to a cold air intake system from American Muscle!
7. Remove the plastic air inlet connector (if equipped). Some CAI kits remove this item when an aftermarket CAI is installed.

8. Open the coolant reservoir cap by slowly turning it counterclockwise until you hear the sound of air escaping the system. Tighten the cap.
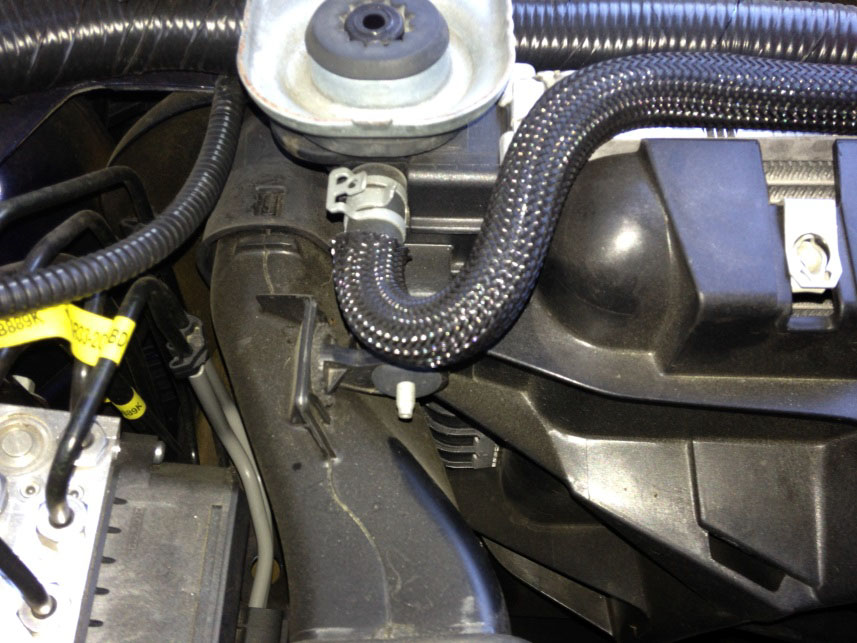
9. Use the slip-joint pliers to squeeze the rearward small hose clamp going to the top of the reservoir and use a slight twisting motion to pull the clamped hose away from the reservoir. Do not disconnect the larger hose going to the bottom of the tank, as a mess will result!

10. Use the slip-joint pliers to squeeze the small hose clamp going to the top of the radiator and use a slight twisting motion to pull the clamped hose away from the radiator. Use a plastic container to catch coolant if necessary.
11. Use a 10mm socket, extension, and ratchet (or speed handle) to remove the reservoir tank bolts.
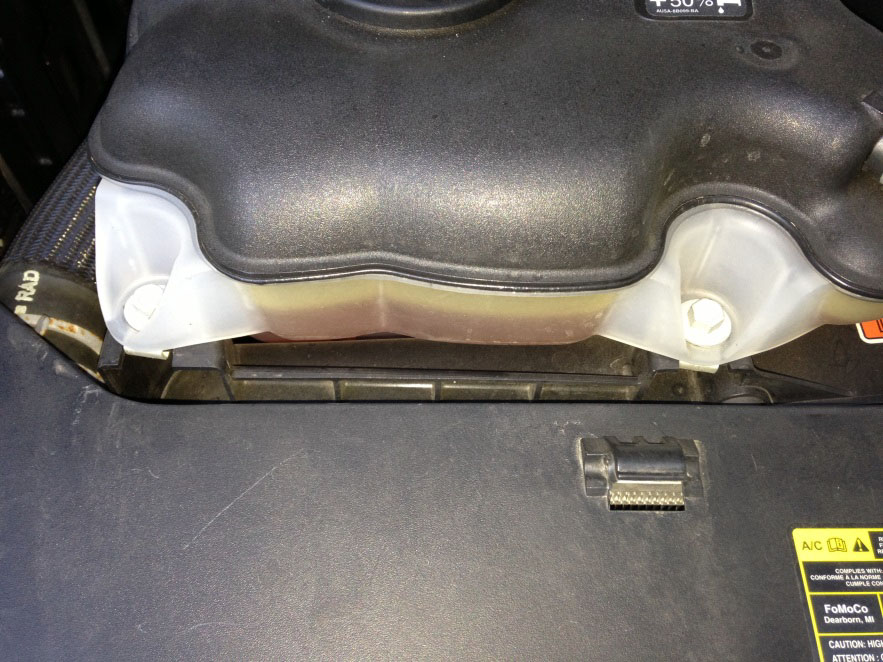
12. Pull the tank with the lower hose still attached up and set it on top of the engine in a manner that will minimize coolant loss. Use the plastic container to catch any escaping coolant or install vacuum caps on the exposed reservoir connections.
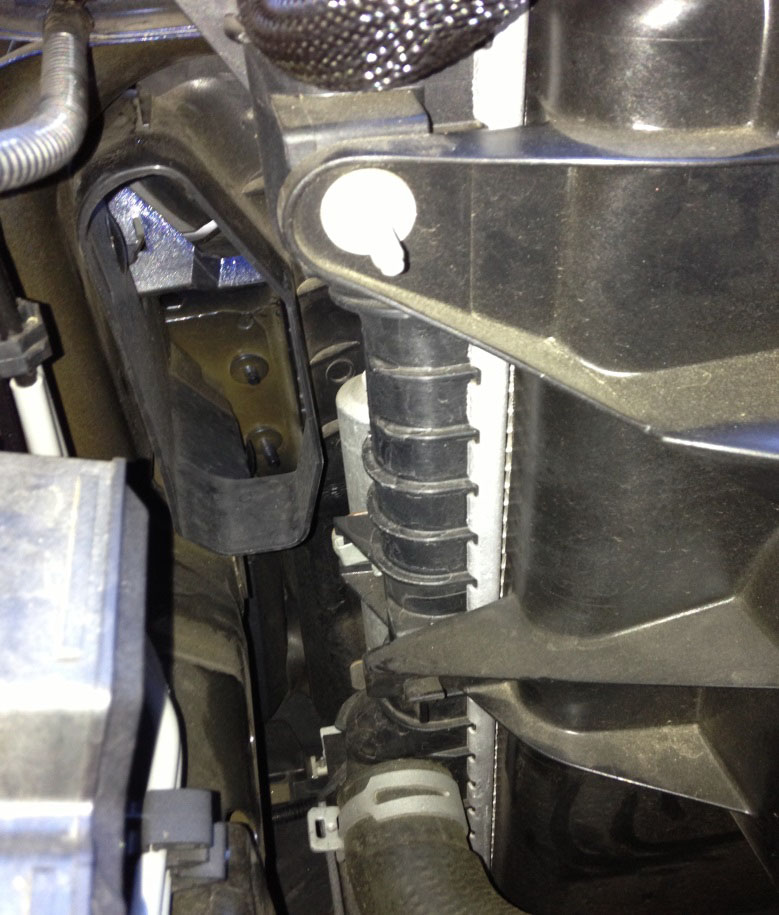
13. Use a 10mm deep socket and ratchet to remove the driver’s side radiator fan fastener as shown below:
14. If equipped, use a 10mm socket and ratchet to remove the hose bracket bolt at the bottom of the fan assembly. The SVT fan does not have a mounting area for this bracket and it will not be re-used. Cutting this bracket off is not recommended due to risk of damaging the lines which are attached.
15. Use a 10mm socket and ratchet to remove the passenger side radiator fan fastener as shown below (which has been removed for clarity):
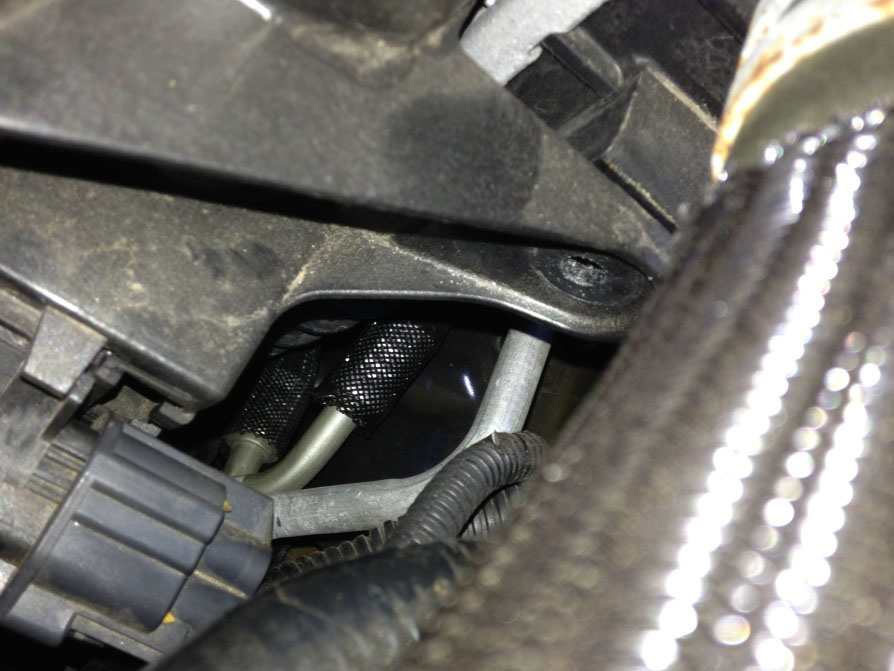
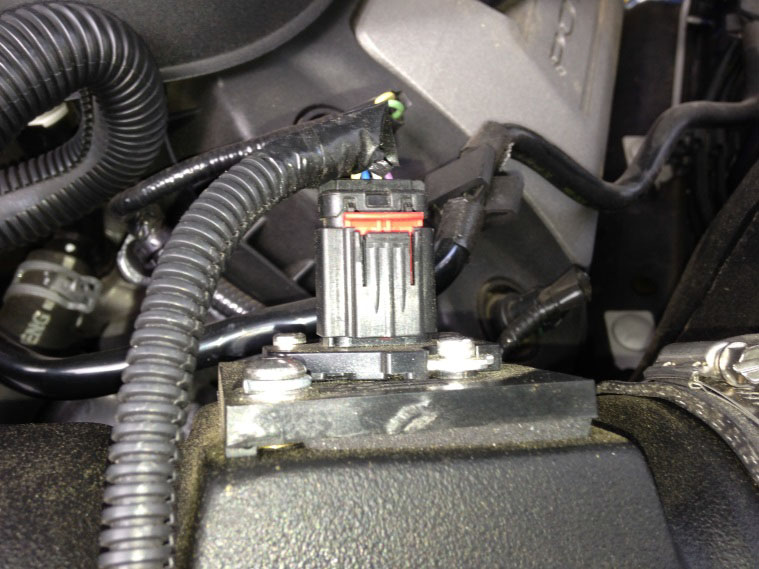
16. Use a small flat-tipped screwdriver and install it into the plug until you feel it push on the locking lever. Twist the screwdriver while pulling on the radiator fan plug to disconnect it.

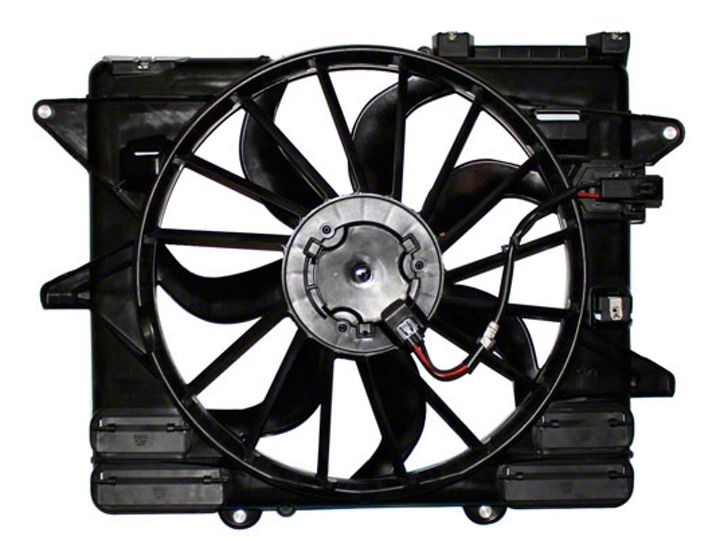
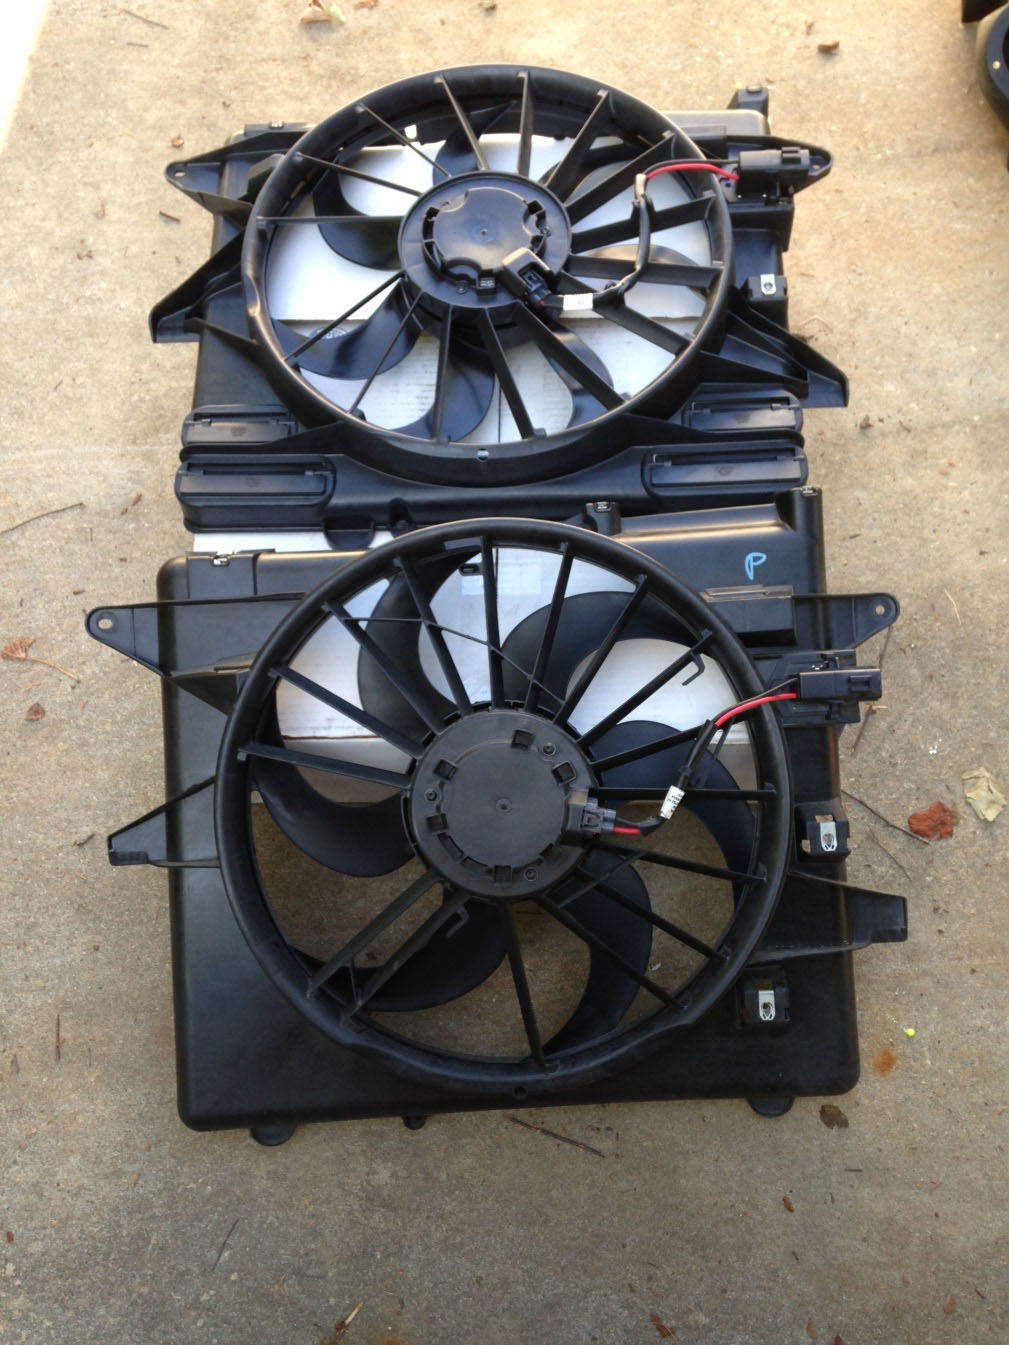
17. Remove the factory fan assembly by pulling it up, alternating between left and right until the fan clears the vehicle. Essentially, there were three bolts holding the stock fan in place (as shown by the yellow circles). The new fan only uses two bolts. The mounting boss for the bracket with hoses from Step 14 is shown by the red arrow. The new fan does not have this mounting boss.
SVT Cooling Fan Installation:
1. Install new SVT fan in reverse of removal steps.
2. Remove all tools from engine compartment.
3. Start engine and allow the car to reach operating temperature.
4. Check for fluid leaks; correct if required.
Installation Instructions Written By AmericanMuscle Customer Joseph Herrera 9.5.2013
