FREE 1 to 3-Day Delivery on Orders $149+ Details
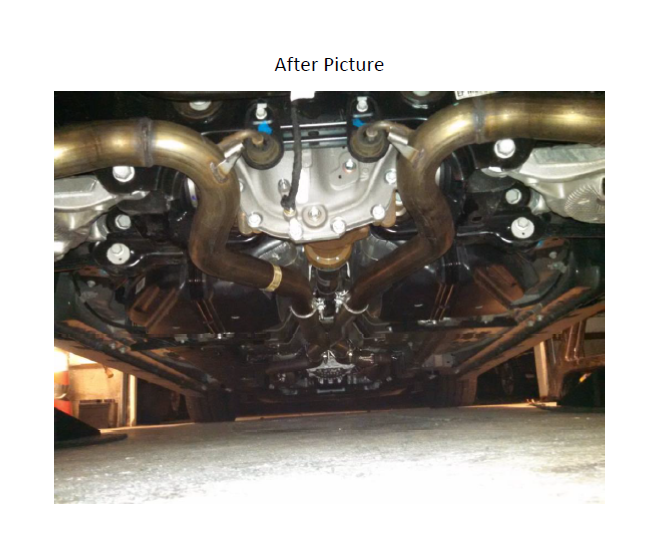
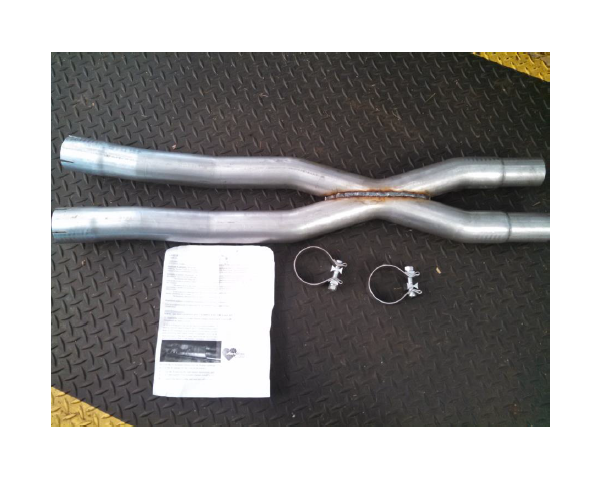
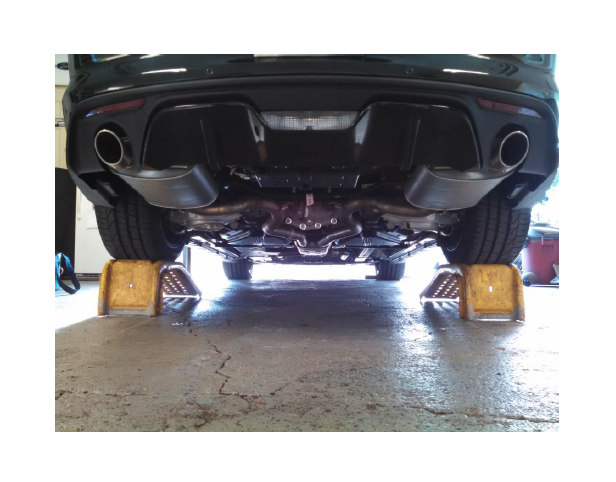
How to Install Heartthrob Cut and Clamp Resonator Delete - X-Pipe on your Mustang
Installation Time
2 hours
Tools Required
- Safety Glasses
- Ramps, jack and jack stands, or car lift
- Tail pipe cutter
- reciprocating saw
- or other preferred cutting tool
- Marker
- Ratchet
- 13mm, and 15mm (deep) sockets or respective sized wrenches
- Quarter round file (optional)
- Torque wrench (optional, preferred but not required)
- Liquid soap (optional, but may aid in installation)
- 2 zip ties (optional)
Note: this modification can be done without removing the exhaust from the car, however without the extra room from using a car lift, this is the recommended method. If you are using a lift and would prefer to keep the exhaust on the car, skip some of the steps and make the necessary changes to the rest to suit your situation. If you can't figure out which steps to skip and what to do differently, this may be too much of a project for you and you may want to pay a shop to do this. This modification requires cutting of the factory exhaust, and once cuts are made, there is no turning back.
Step 1:
Raise the rear of your car using a lift, ramps, or jack and jack stands.
DANGER – If you are using a jack, ALWAYS use jack stands! NEVER rely on just the jack to hold a vehicle! Trusting your life to a hydraulic system with cheap o-rings is never a good idea. If you are using ramps, ALWAYS chock the front wheels, place the transmission in Park for automatics, Reverse for manuals, and set the parking brake!
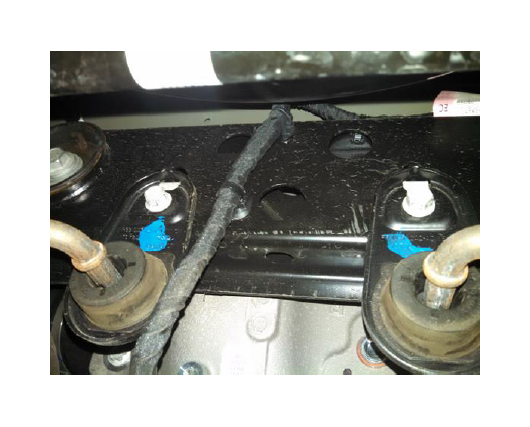
Step 2:
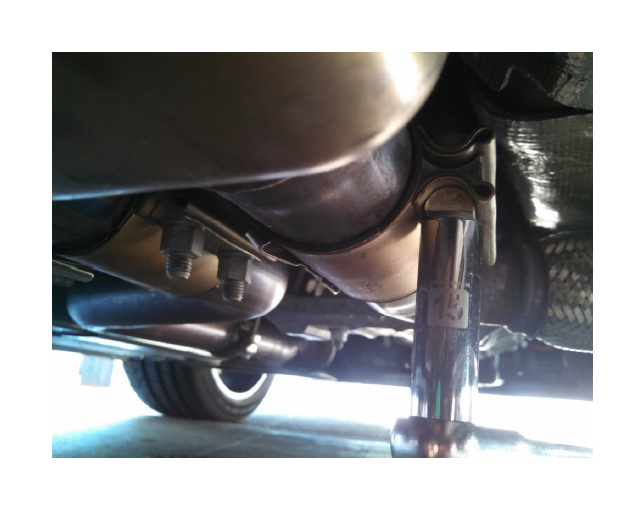
Remove the 2 13mm hanger bolts on the rear subframe. The hangers hook into the subframe so don't worry about it falling, it won't.
Step 3:
Loosen the 2 15mm clamps in front of the resonator and slide them forward as far as possible. Again the exhaust will not fall out. The pipes are slid into the pipe in front of it.
Step 4:
Remove the entire exhaust system from the car. Ford must have realized people would be messing with the exhaust system so they made it easy for us. A helper is nice but not really required. This step can be done by yourself, although I know from experience, it is a bit difficult. Optional: Putting some liquid soap on the end of the metal hanger at the rear of the car will help it slide through the rubber bushing, making removal easier.
Step 5:
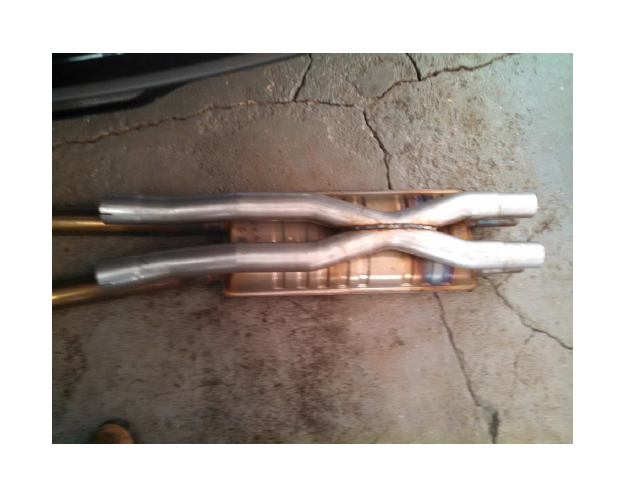
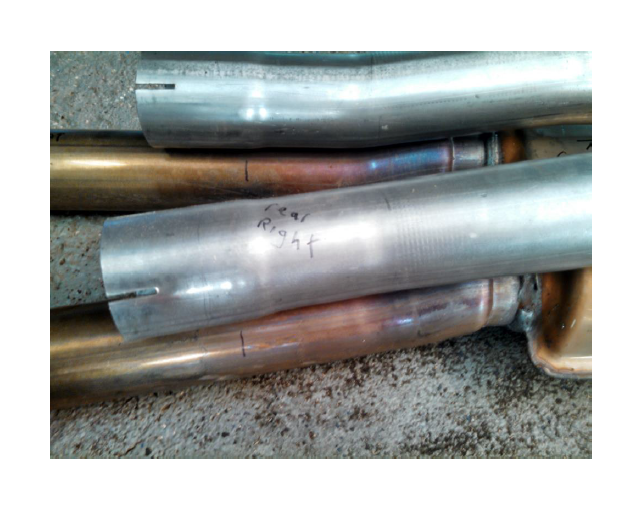
Set the X-pipe on the resonator and line the ends up as close as you possibly can. Make marks on each factory pipe in line with the front of the expanded section of the X-pipe. The marks should be about 6" from the rear of the resonator. Note: there is a left and right side. It's pretty obvious if you have it laid the wrong way, just make sure you look closely.
Step 6:
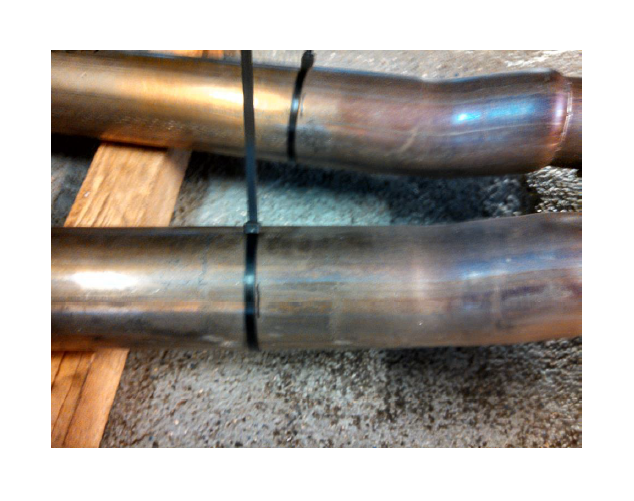
Cut the resonator off from the rest of the exhaust. I put zip ties on each pipe to use as a guide to help make the cut straight. Once the resonator is removed, use a file to clean up the edges of the pipes.
Caution: As with all cutting and power tools, wear proper PPE. Safety glasses at a minimum. Hearing protection is recommended as well.
Step 7:
Install X-pipe, supplied clamps, and the 2 rear pipes you removed from the resonator. The 2 factory clamps will be reused at the front. The supplied clamps attach the X-pipe to the 2 rear pipe sections. Leave all of the clamps loose or lightly snug until everything is aligned for clearance and to your visual satisfaction. Once everything is positioned, tighten all the clamps to 35 ft. Lbs, and the rear subframe hanger bolts to "pretty snug." About a half turn or so after the bolt head touches the subframe is good. Exact torque isn't exactly critical, but if you have the means to do it, it's a good idea. If adjustments are needed after final installation, simply loosen the clamps, reposition, and retorque the clamps.