 FREE 1 to 3-Day Delivery on Orders $149+ Details
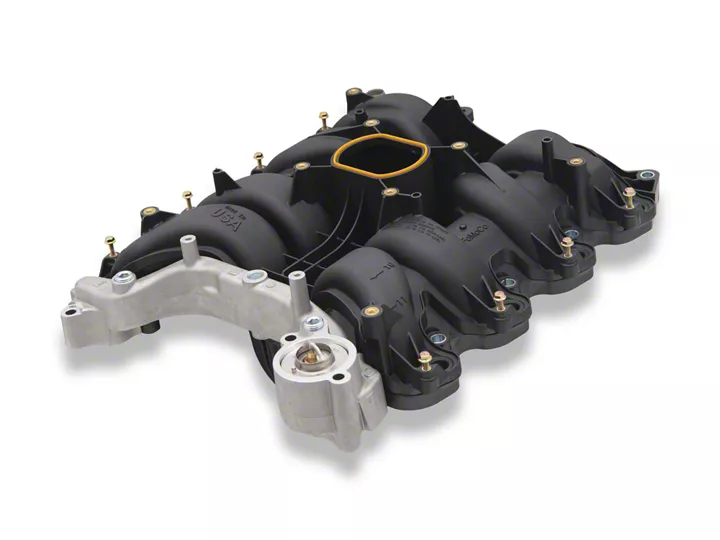
How to Install a Ford Racing Performance Improvement Intake Manifold on your 1996-2004 GT
Installation Time
4 hours
Tools Required
- Ratchet and Socket Set
- Torque Wrench
- Large Adjustable Wrench
- Needlenose Pliers
- A Dozen Clean Rags
- 3/8" Fuel Line Disconnect Tool
- New Intake Manifold Gaskets
- New Thermostat Housing Gasket
- Around 3 Gallons of Antifreeze
- Shop Vac
- Penetrating Oil
- Gasket Remover (Acetone)
- Plastic Scraper
- Flathead Screwdriver
- Fluid Catch Pan
Shop Parts in this Guide
Removal Procedure:
1. Raise and secure hood. Disconnect negative battery cable.
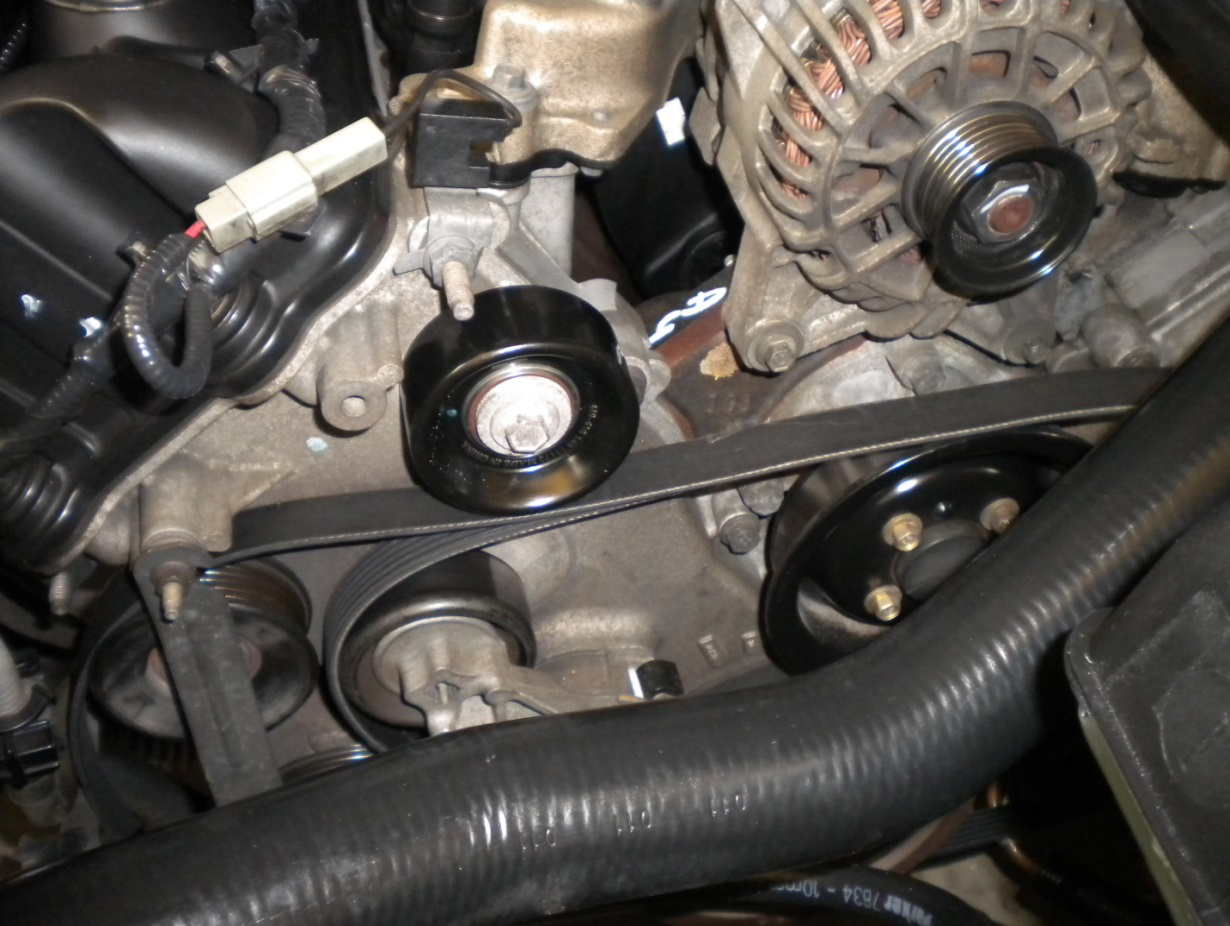
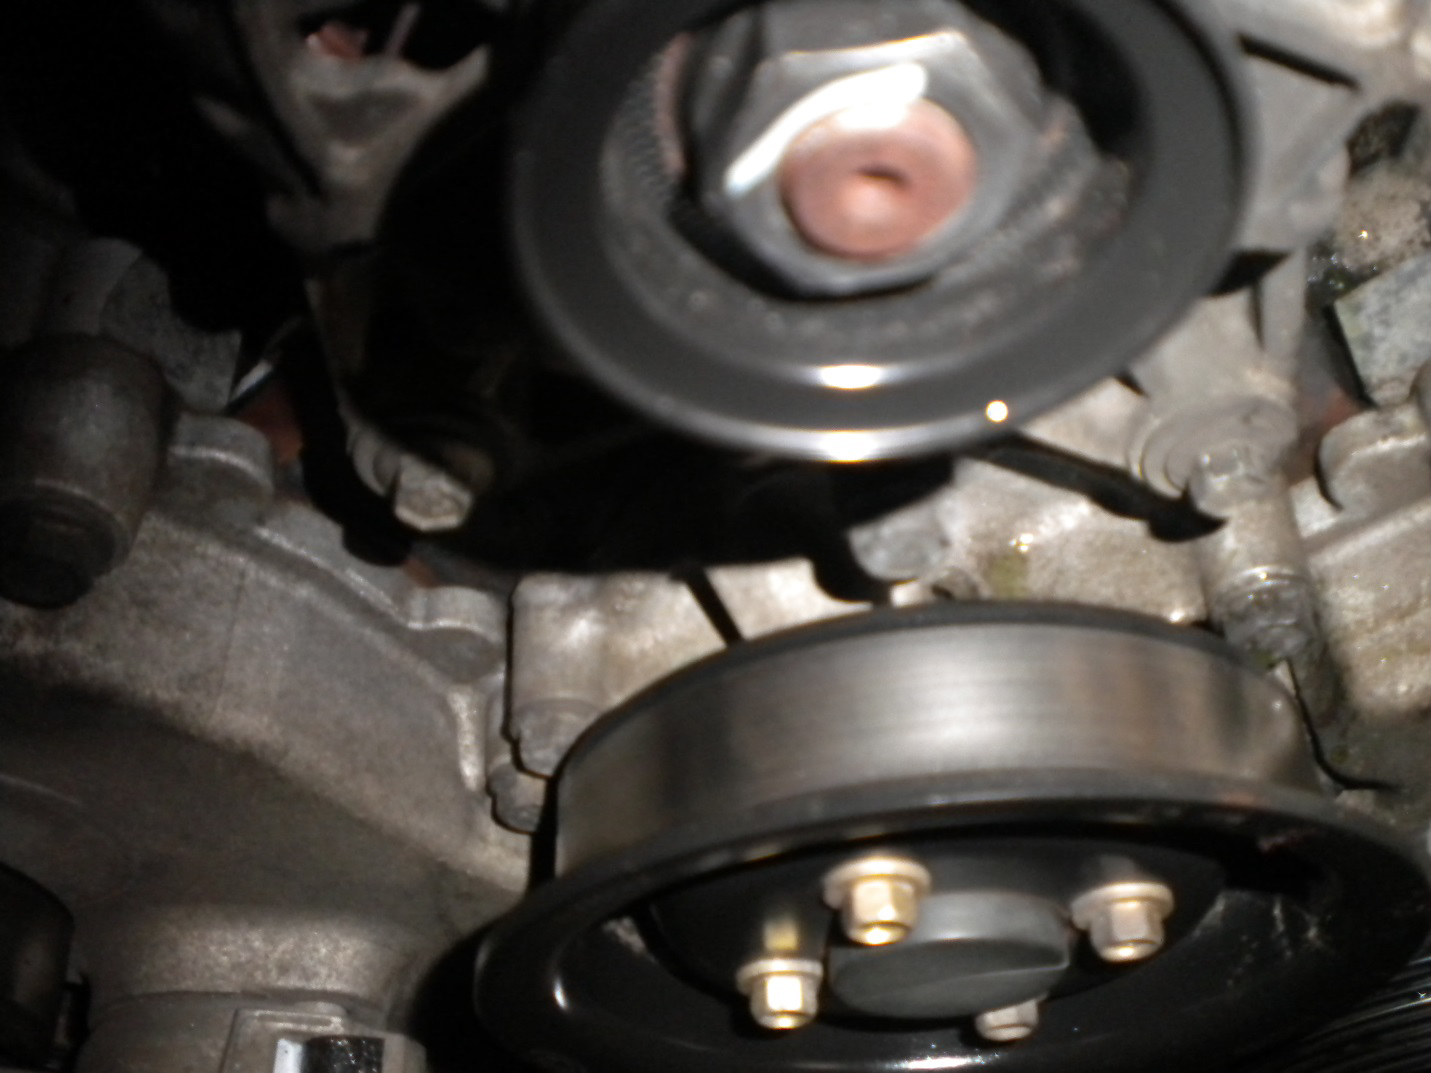
2. Using a 3/8” ratchet, push the belt tensioner forward and slip the serpentine belt off the alternator pulley. Remove ratchet and finished removing serpentine belt.
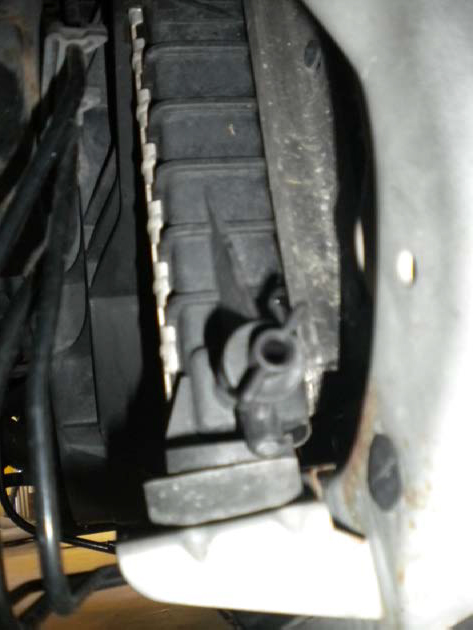
3. Remove the cap to the coolant reservoir, and then drain the radiator completely by twisting the drain valve located at the bottom of the passenger side of the radiator.
4. Remove the IAC and driver’s side crankcase breather vacuum tubes. Then remove the upper intake tube by loosening the two fitting clamps. Also disconnect the PCV tube at this time, located under the upper intake tube. The PCV tube connects from the valve cover to the upper intake plenum.
5. Unplug the IAC and TPS sensors from the upper intake plenum. Remove the red vacuum lines from the front of the plenum, and the vacuum tube that goes to the back of the intake plenum.
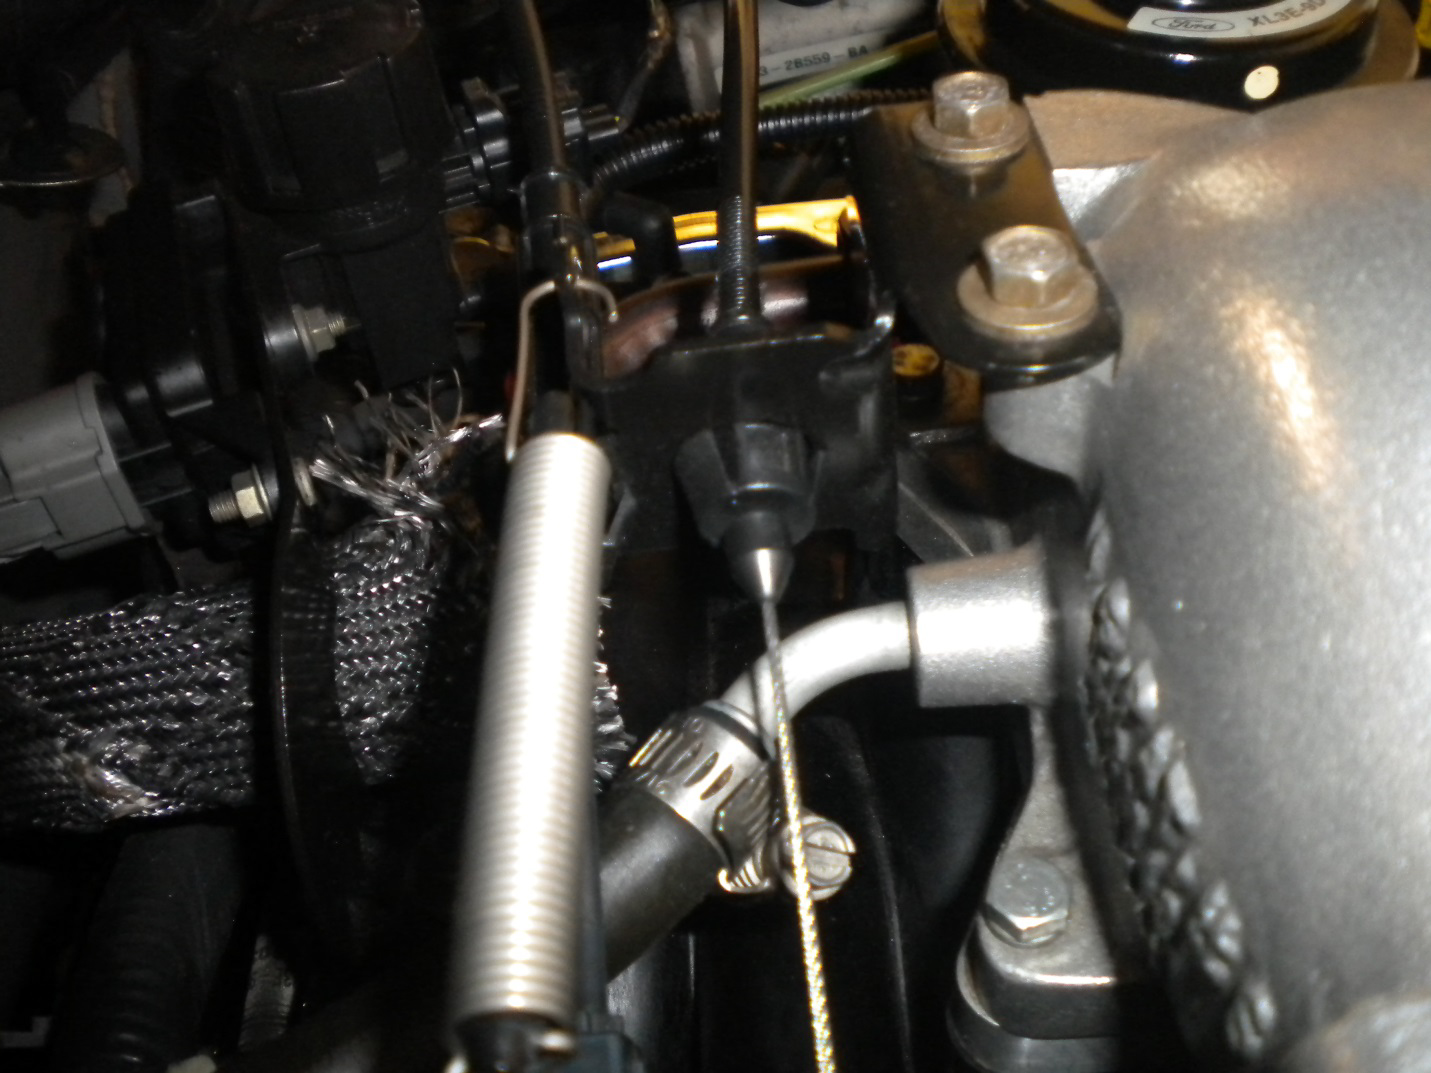
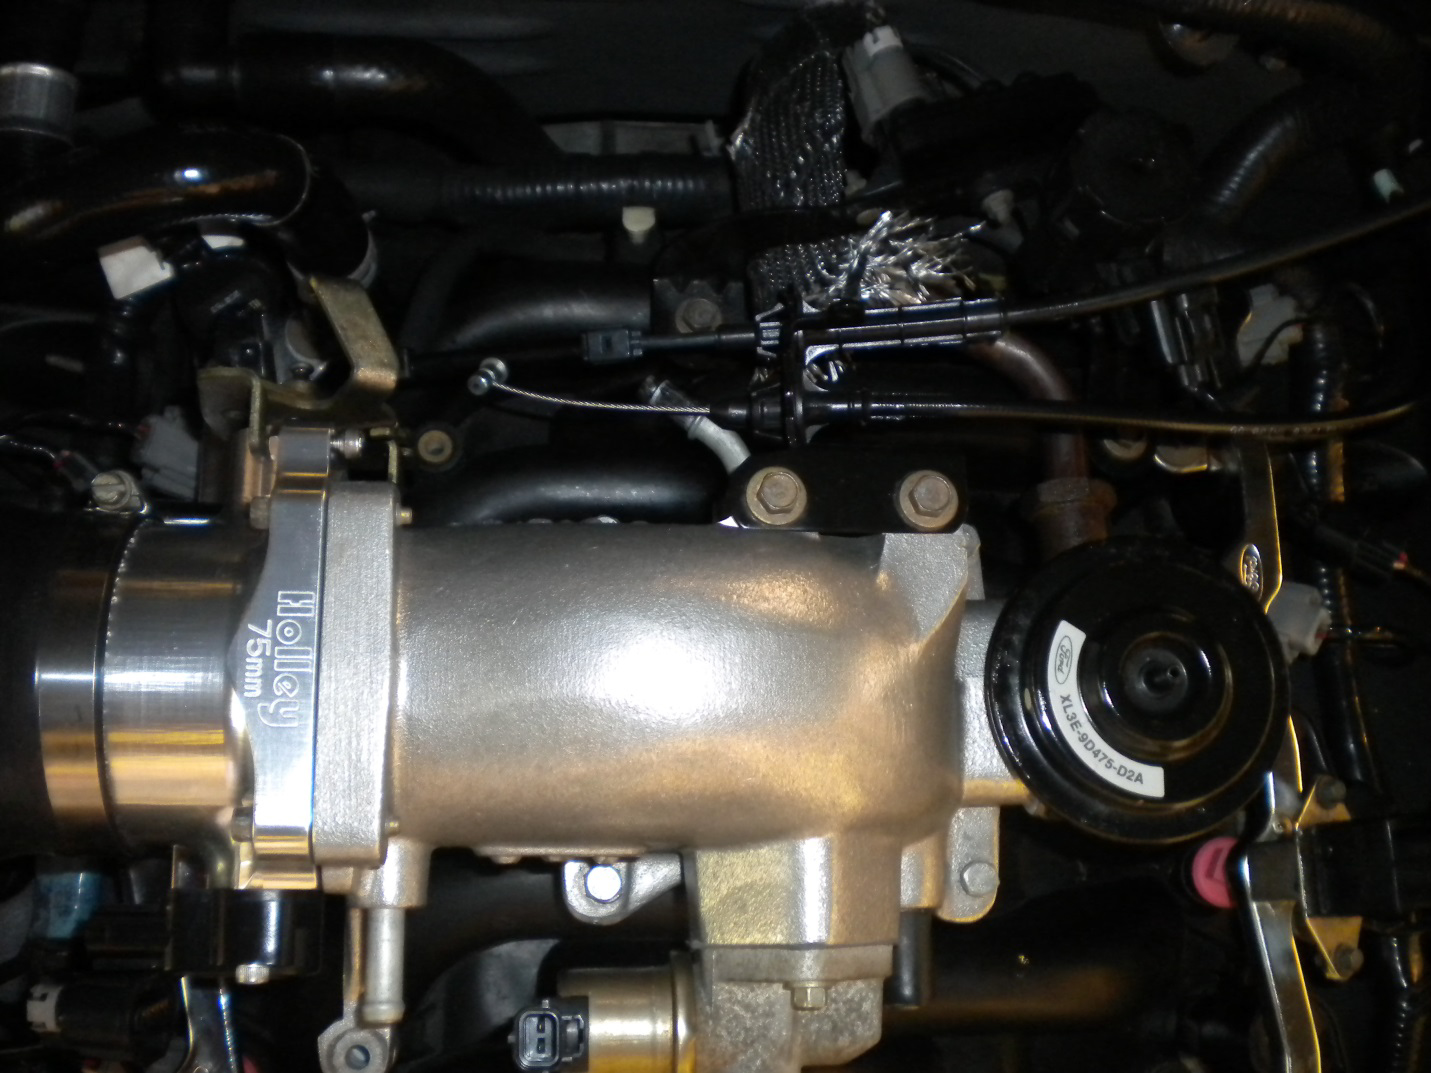
6. Disconnect the cruise control linkage from the throttle body by lifting up on it. Remove the throttle cable by first opening the throttle body slightly, and then removing the throttle cable from the throttle body. Remove the throttle spring from throttle body.
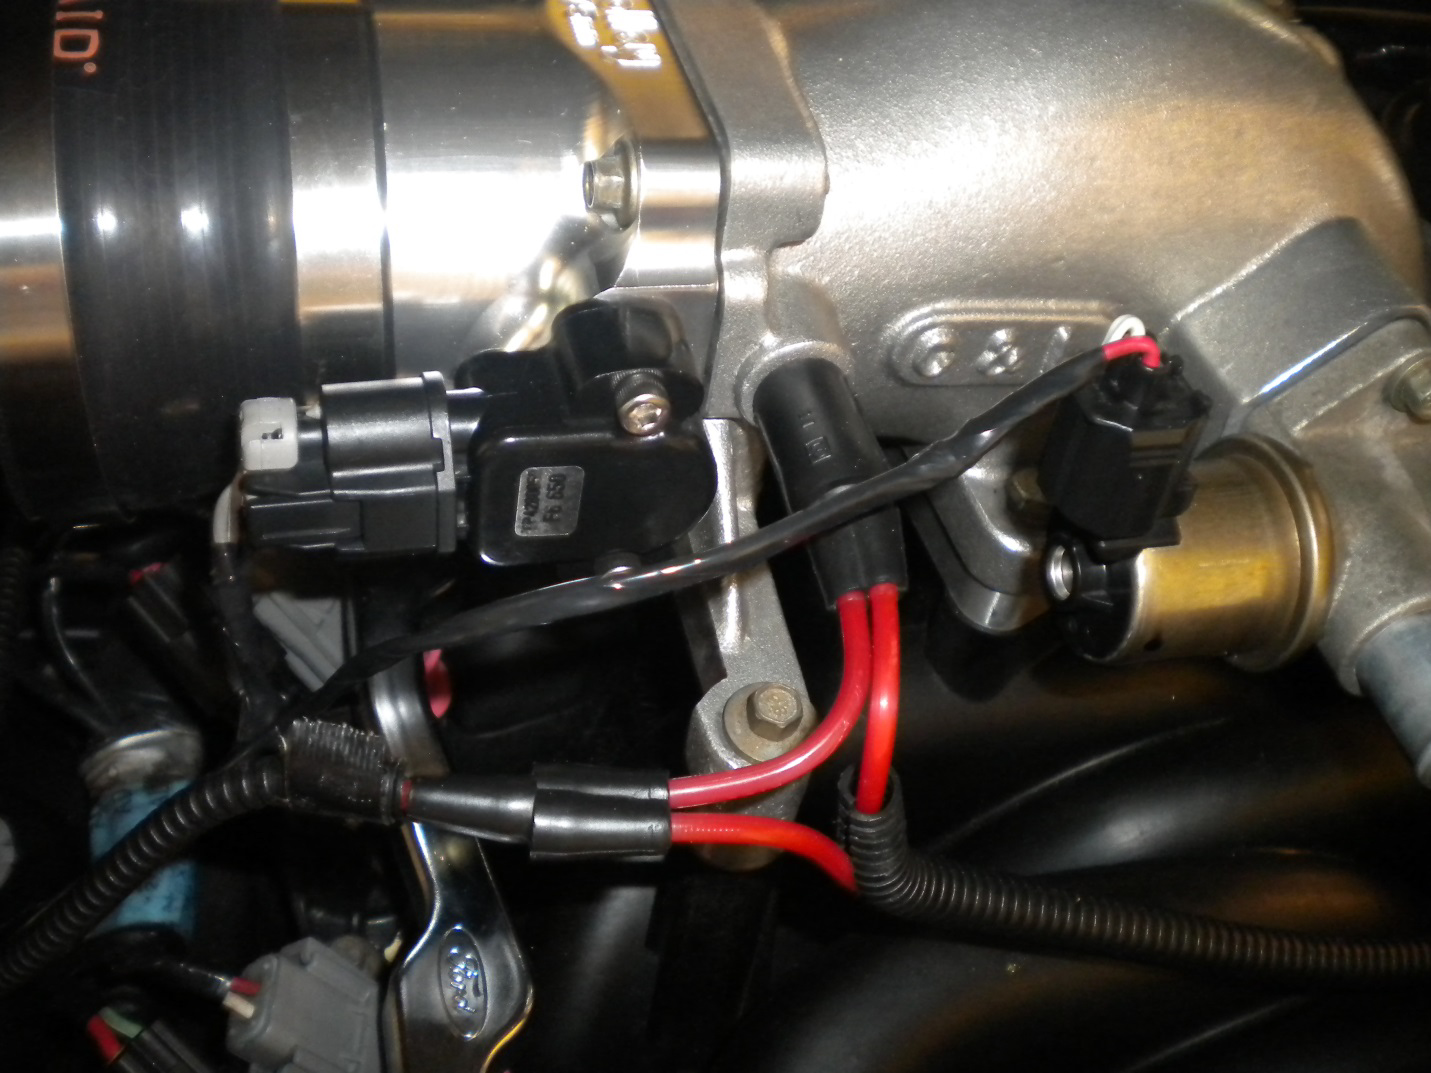
7. Remove the red and green vacuum lines: remove the green vacuum line from the top of the EGR valve, the red vacuum line that connects to the driver’s side fuel rail, and the red and green vacuum lines that run to the back of the intake manifold. With all of them disconnected, move them to the passenger side of the car out of the way. Be careful with these small vacuum lines as they become brittle over time. Stressing them can cause them to crack.
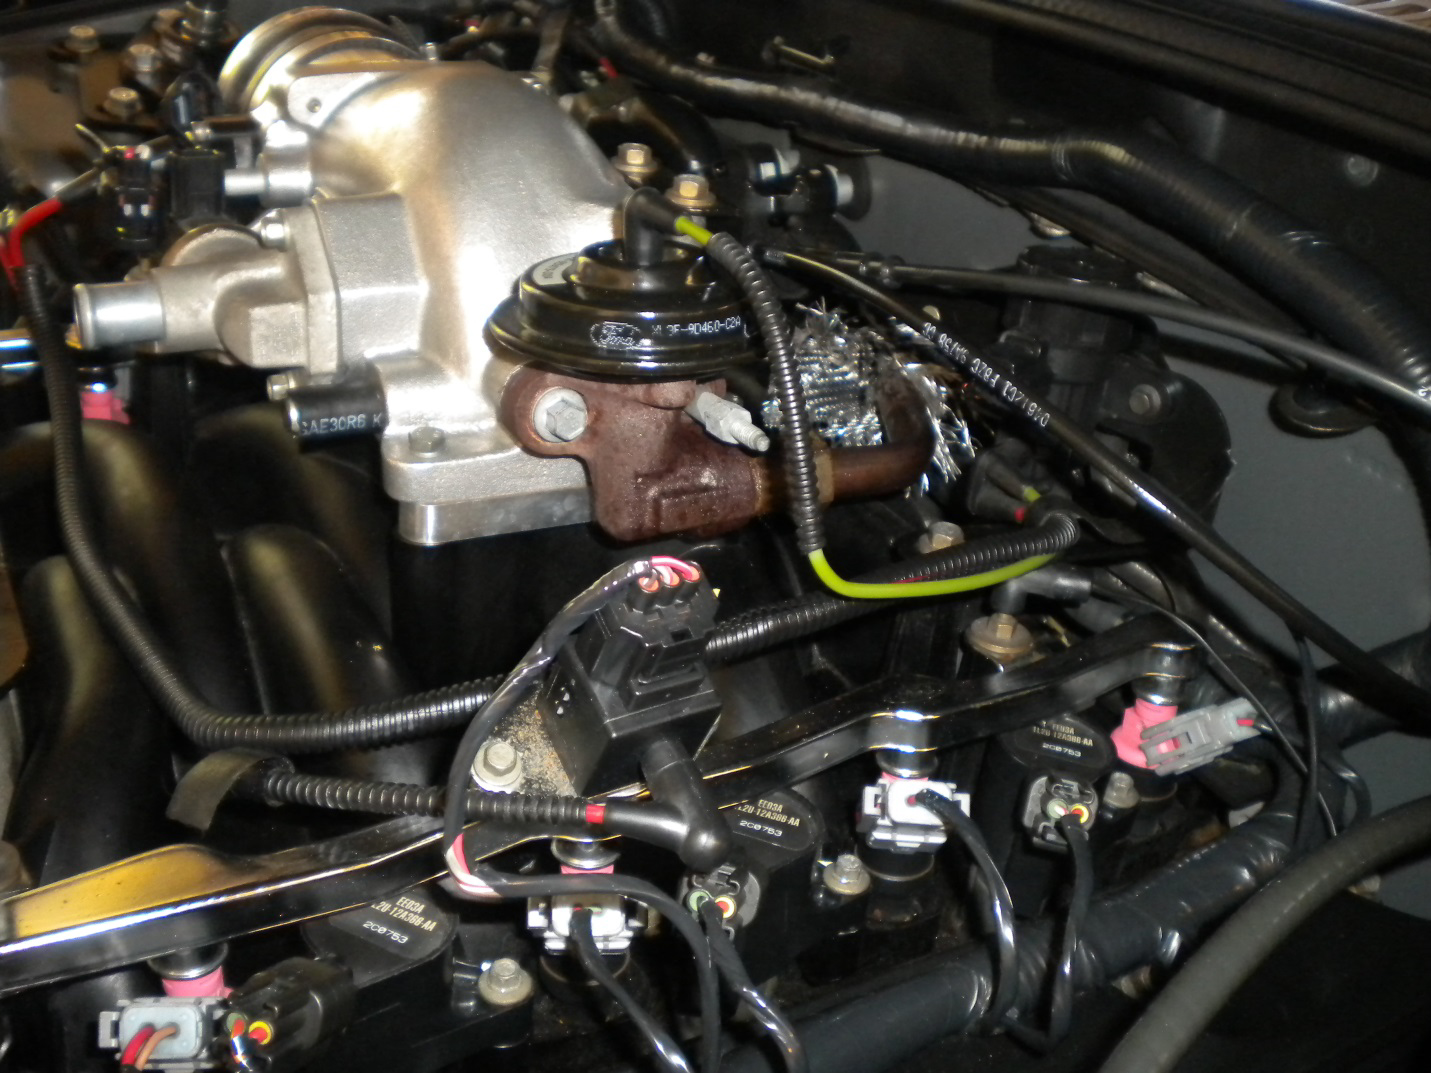
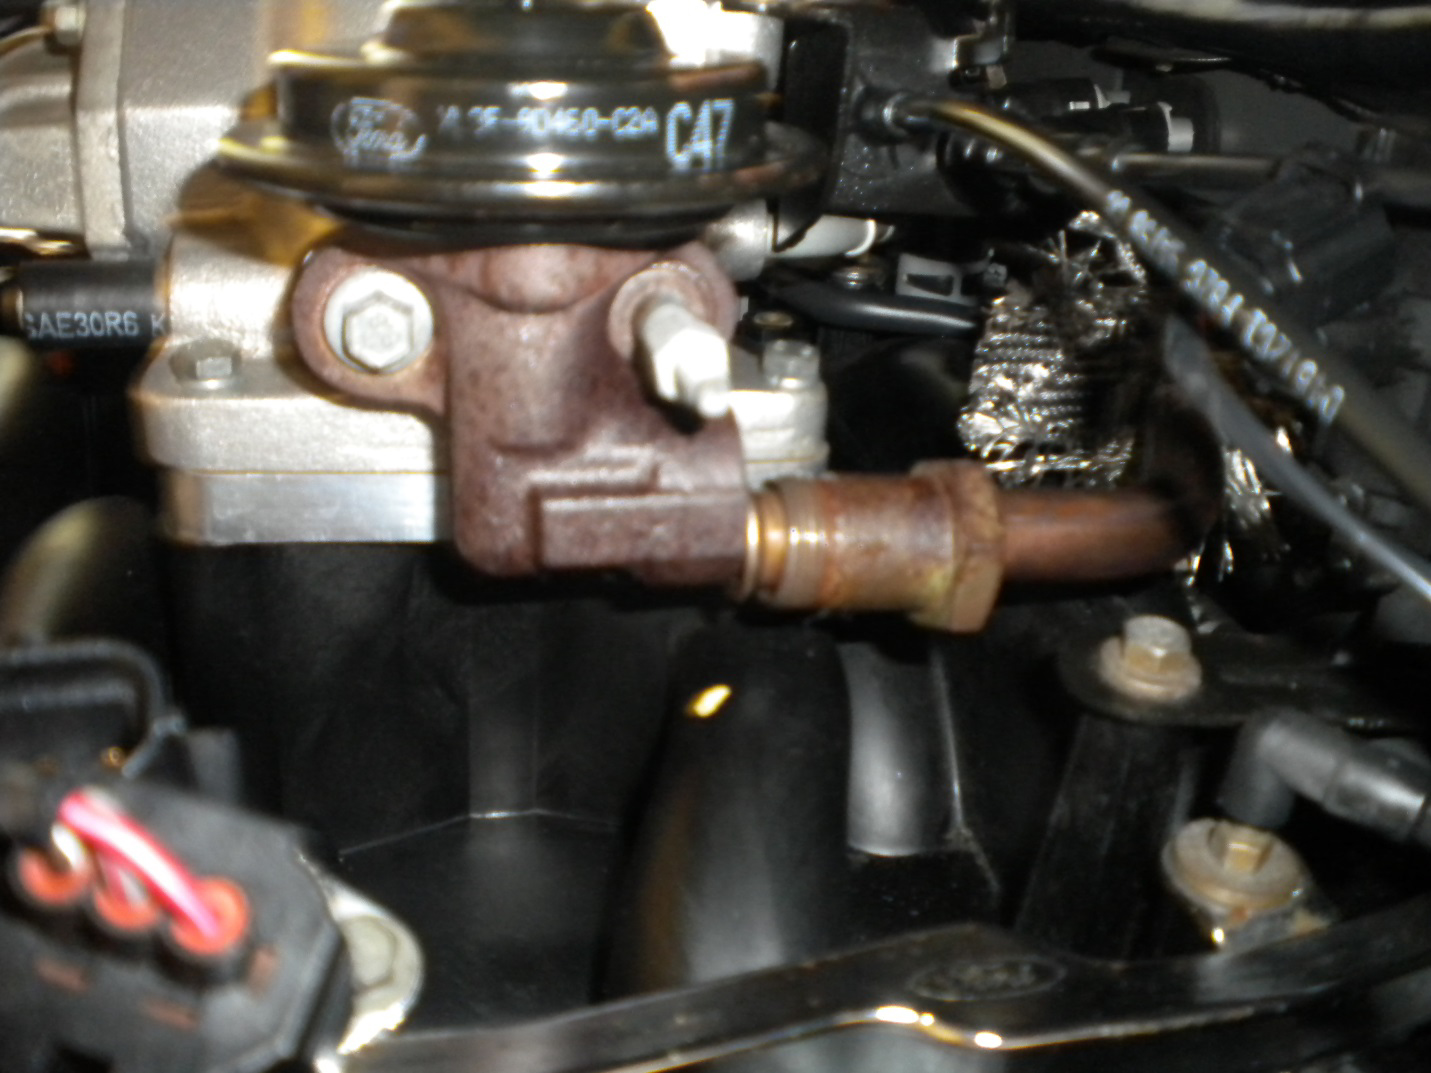
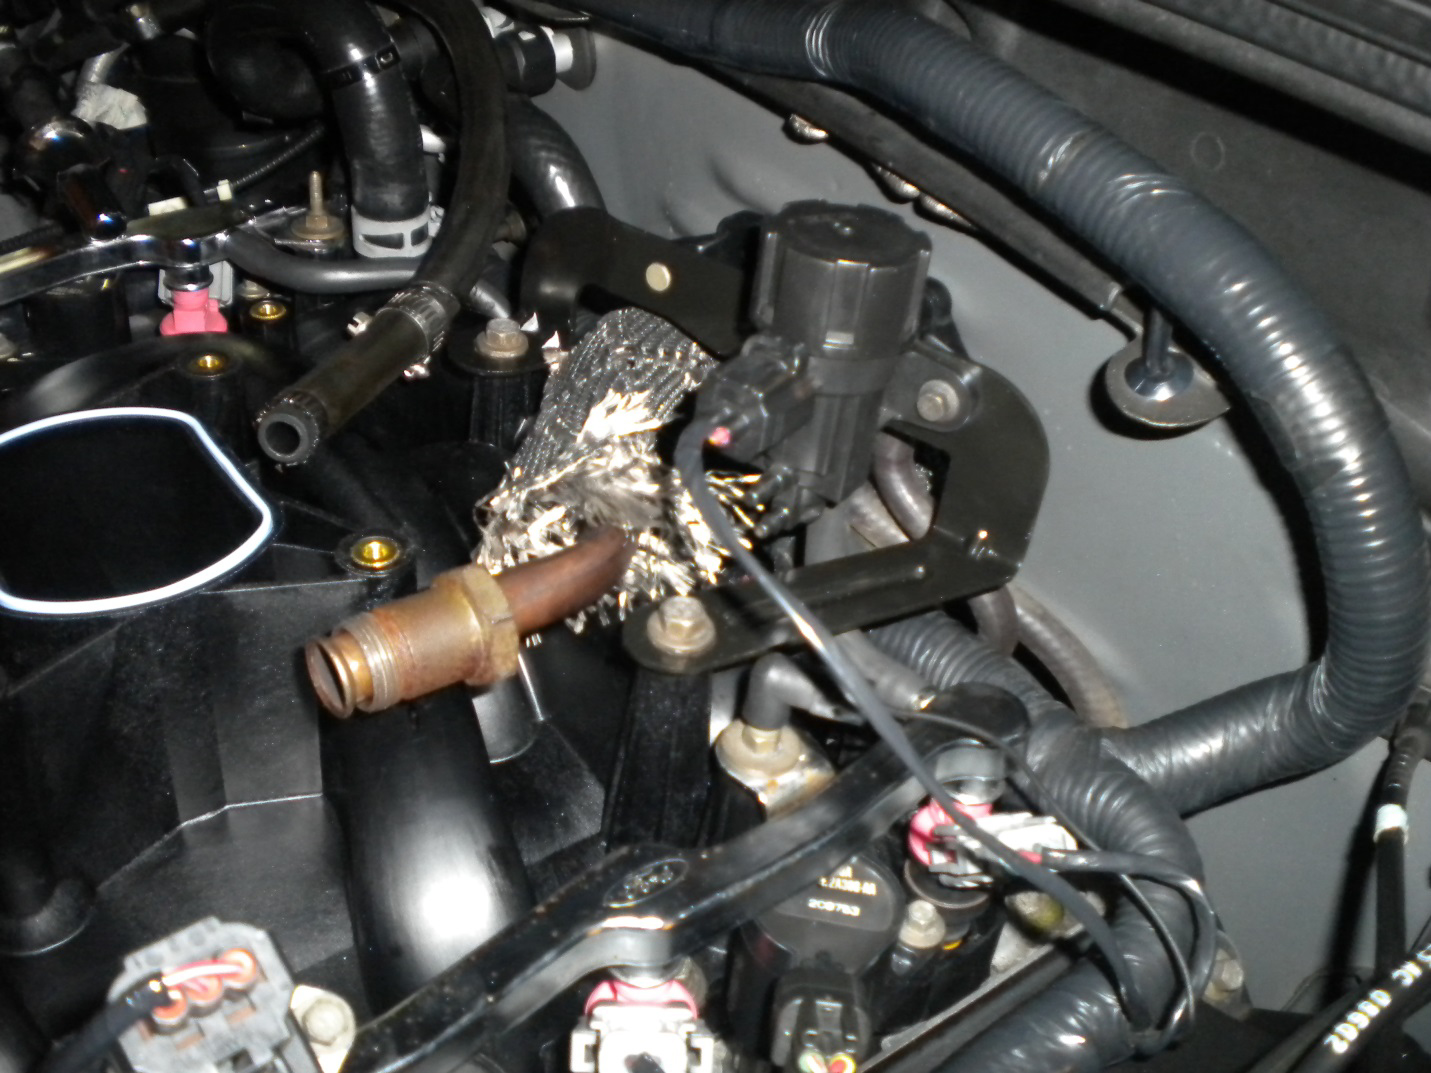
8. Remove the exhaust tube that goes to the EGR valve with a large crescent wrench. This fitting is very tight. Penetrating oil should be used as an aid to free the nut.
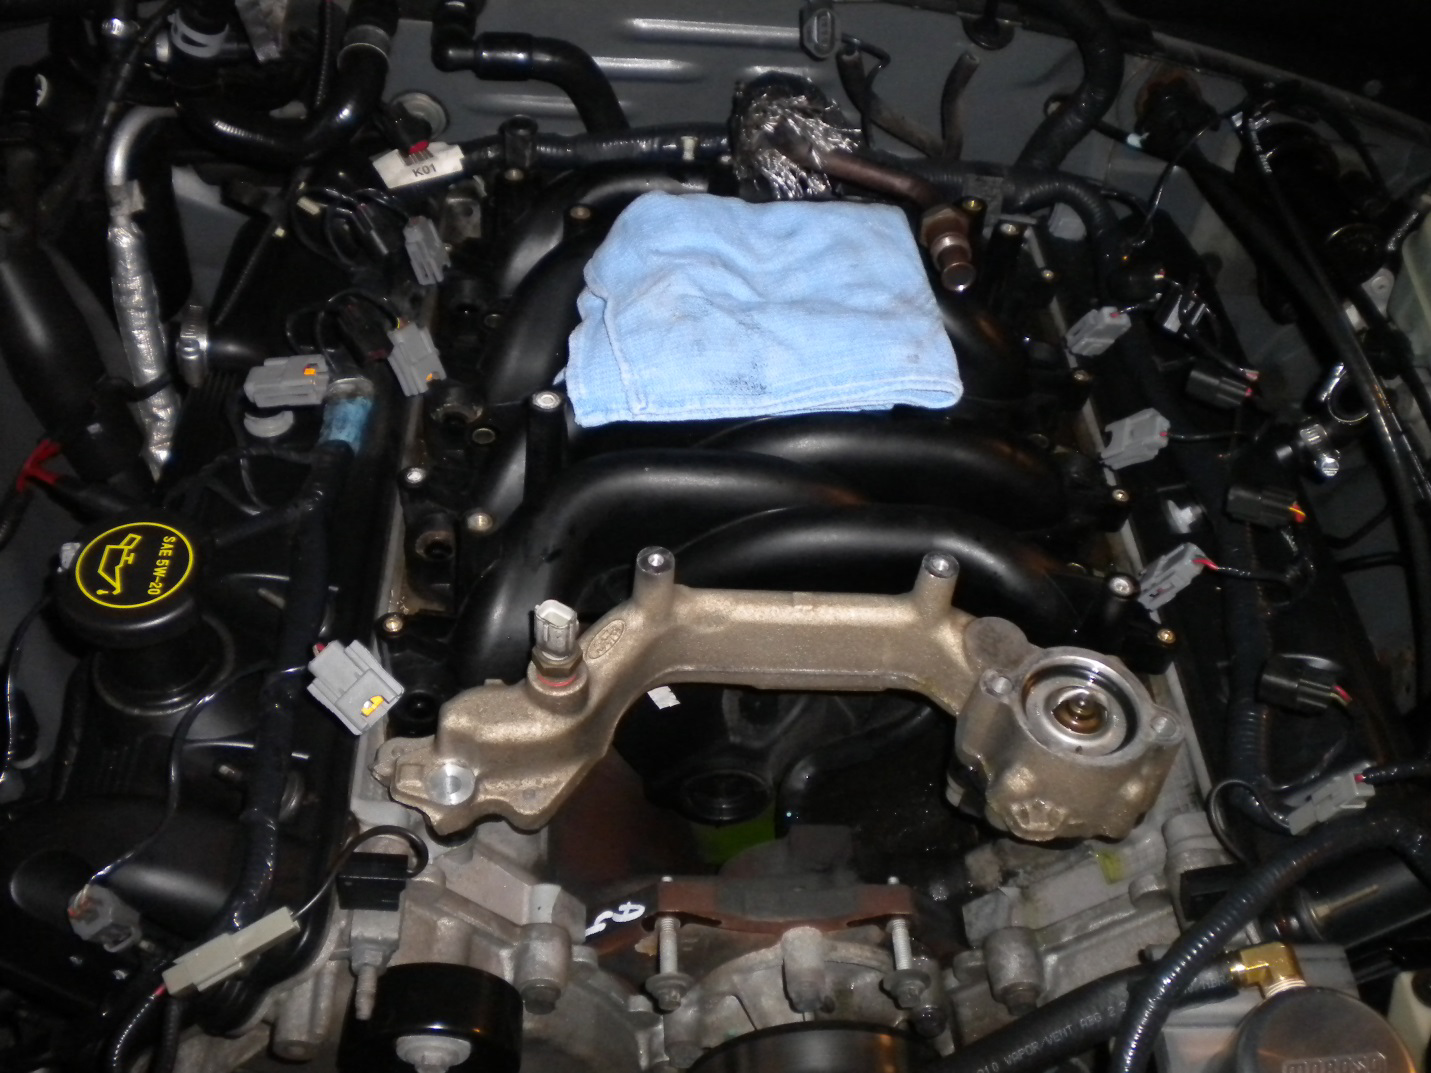
9. Remove the two 10mm bolts holding the throttle cable bracket from the intake plenum. Move this bracket close to the firewall. Then remove the five bolts that fasten the upper intake plenum to the intake manifold and remove the unit from the engine bay. Be sure to quickly cover the exposed top of the intake manifold with a clean rag.
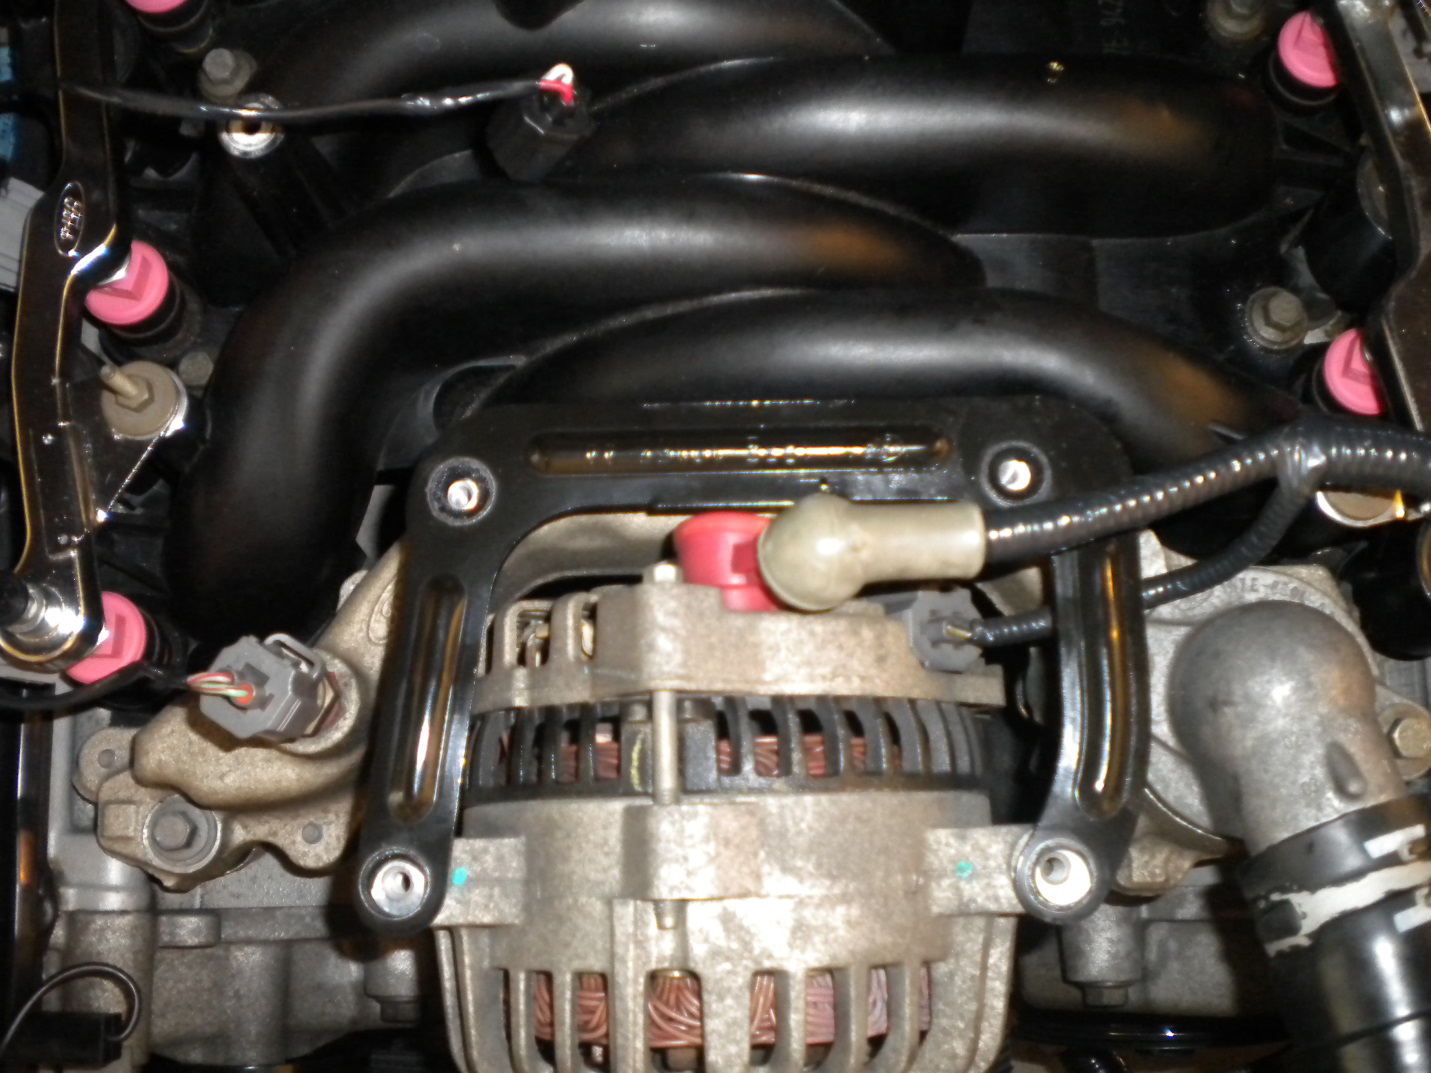
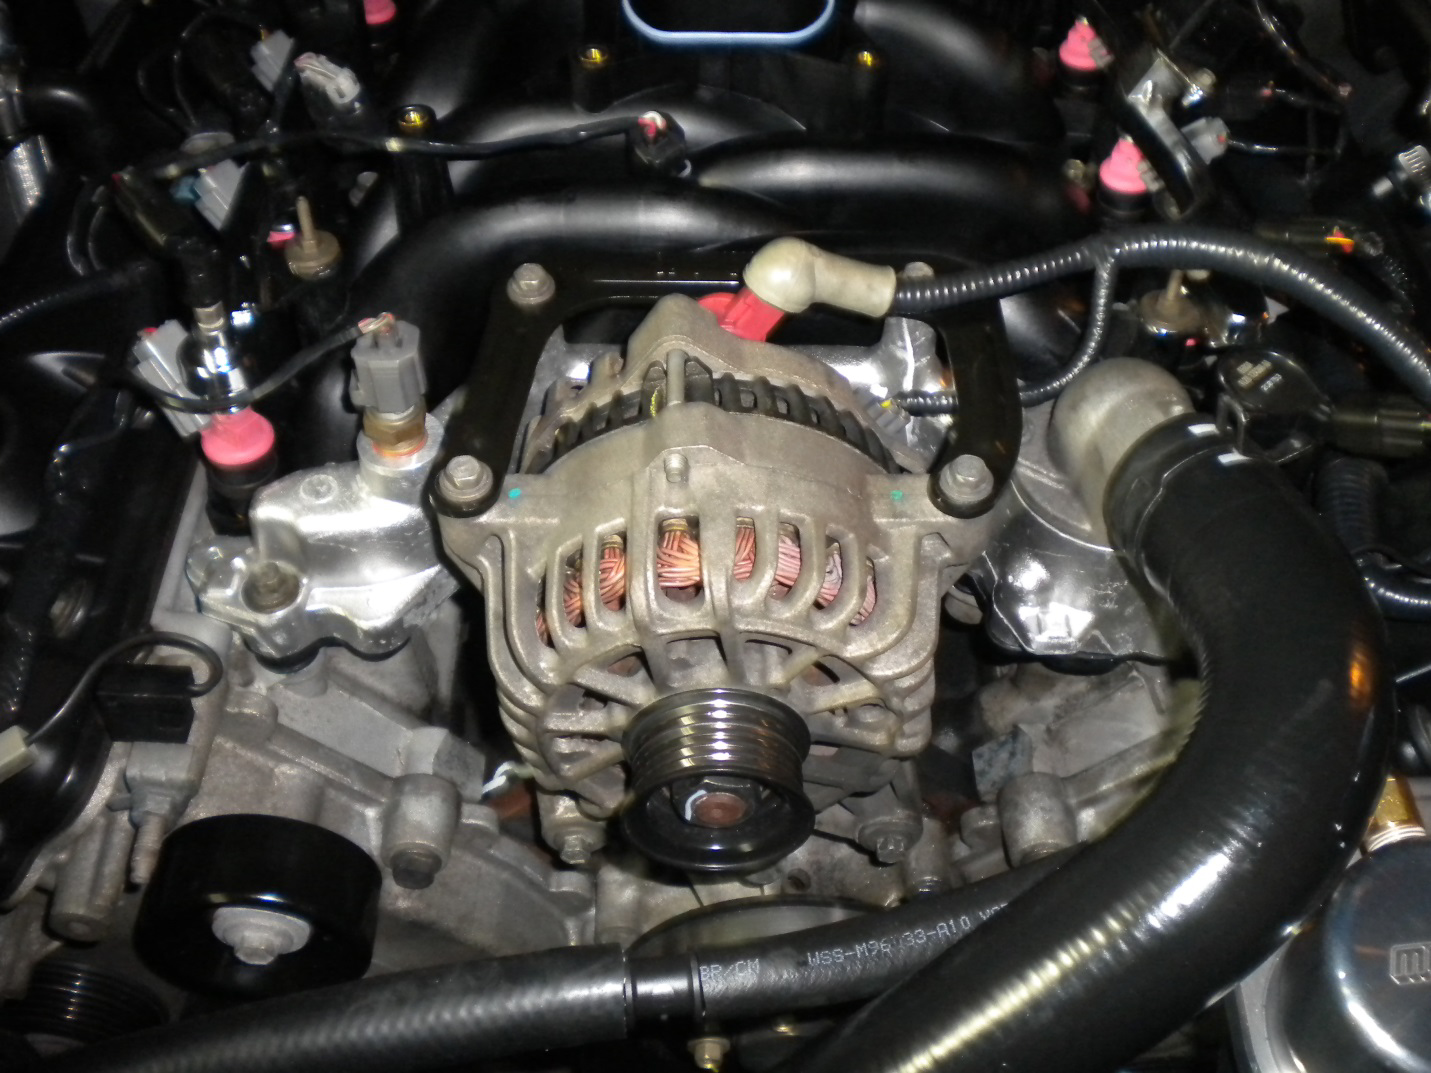
10. Remove the four 10mm bolts on the alternator bracket. Remove the bracket. Then unplug the connection on the side of the alternator, and scoot the rubber boot down to expose the 10mm bolt holding the wire to the alternator. Remove this bolt. Then loosen the two 10mm bolts that locate the alternator at its base. Lift the alternator out of the engine bay.
11. Remove the two 10mm bolts holding the thermostat housing. Once the bolts are removed, have several rags arranged around the thermostat housing, and then lift up. There will be antifreeze in this hose so be prepared. With the upper hose removed, move it away from the front of the motor. I stuffed a clean rag in the thermostat cap so no antifreeze would drip.

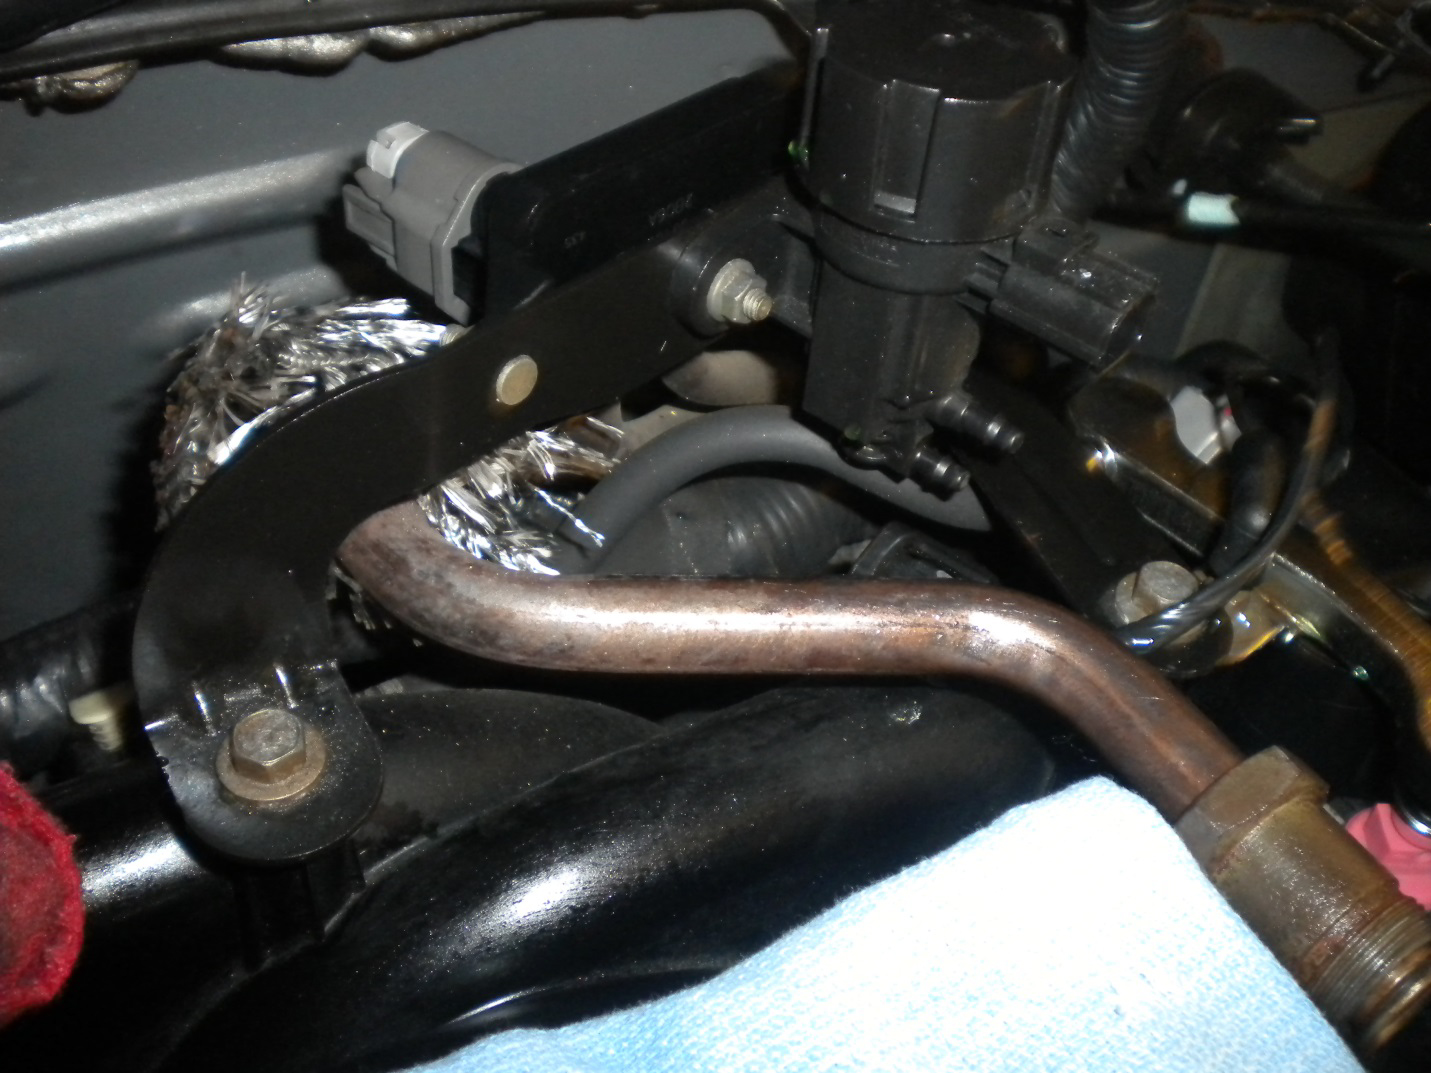
12. Using some pliers, disconnect the heater hose at the back of the intake manifold. Be sure to place some rags around the base of the hose, as some antifreeze will come out (Heater hose is removed and rotated in the picture).

13. Remove the bracket from the rear of the intake manifold. It is held on by two 10mm bolts. Unplug the connectors, one at the front and one at the back, from the bracket and remove it from the engine.
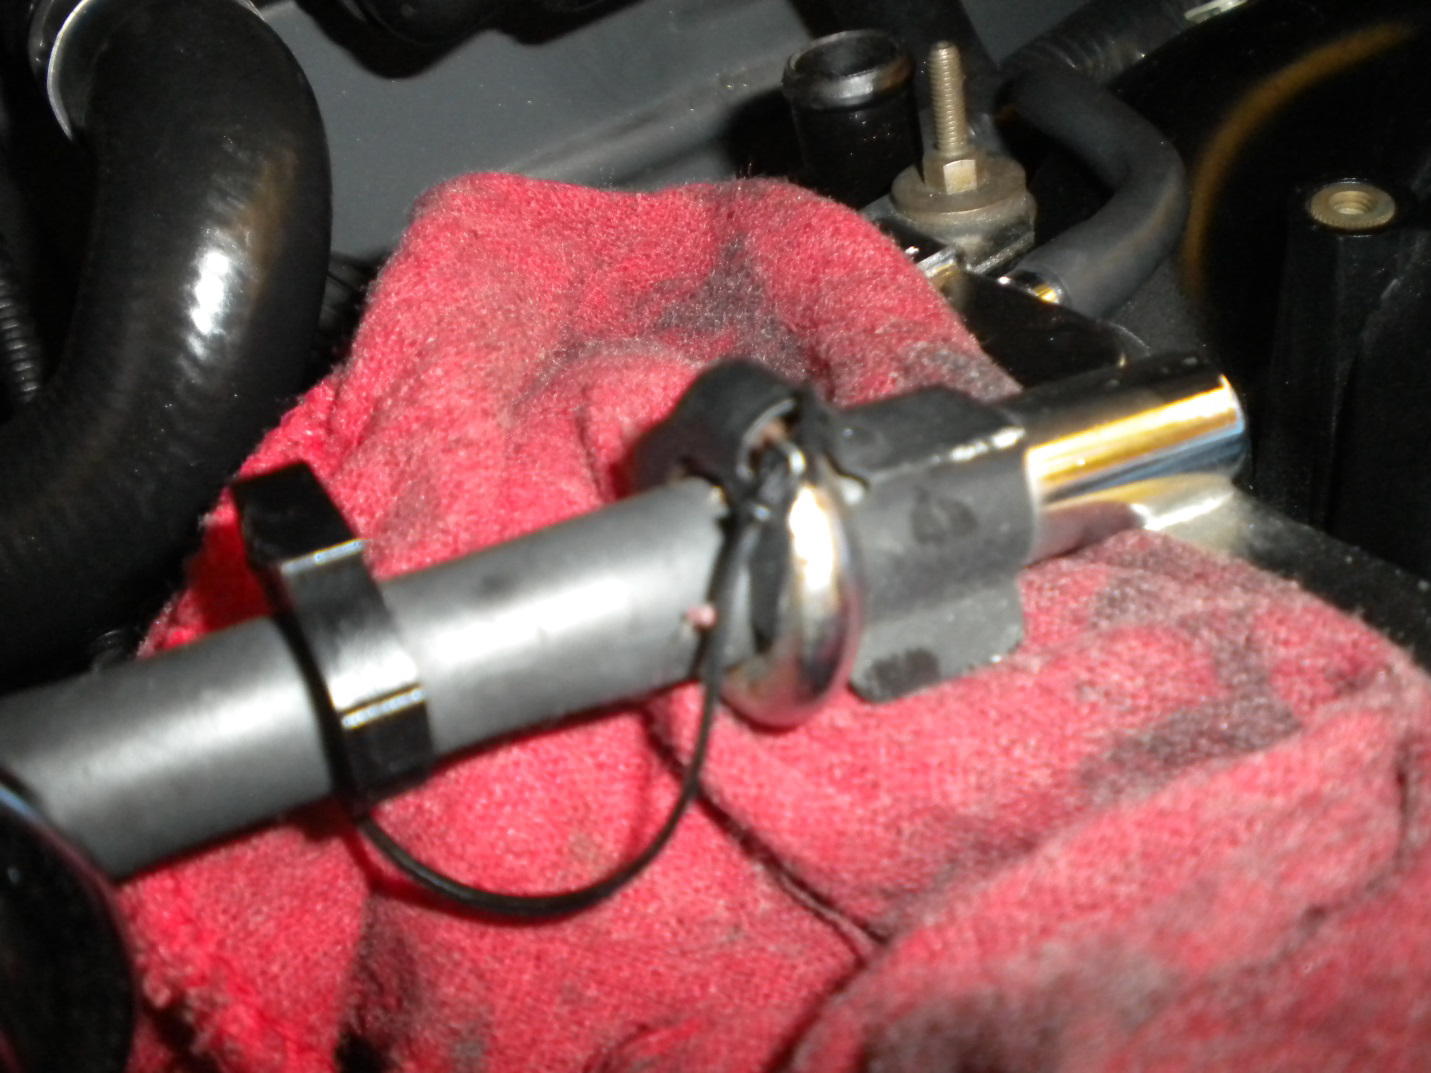
14. Remove the fuel supply line by removing the safety clip, and then use the fuel line removal tool to pop it off. Be sure to have a few rags under the connection as fuel will spill out. Move the hose to the side.
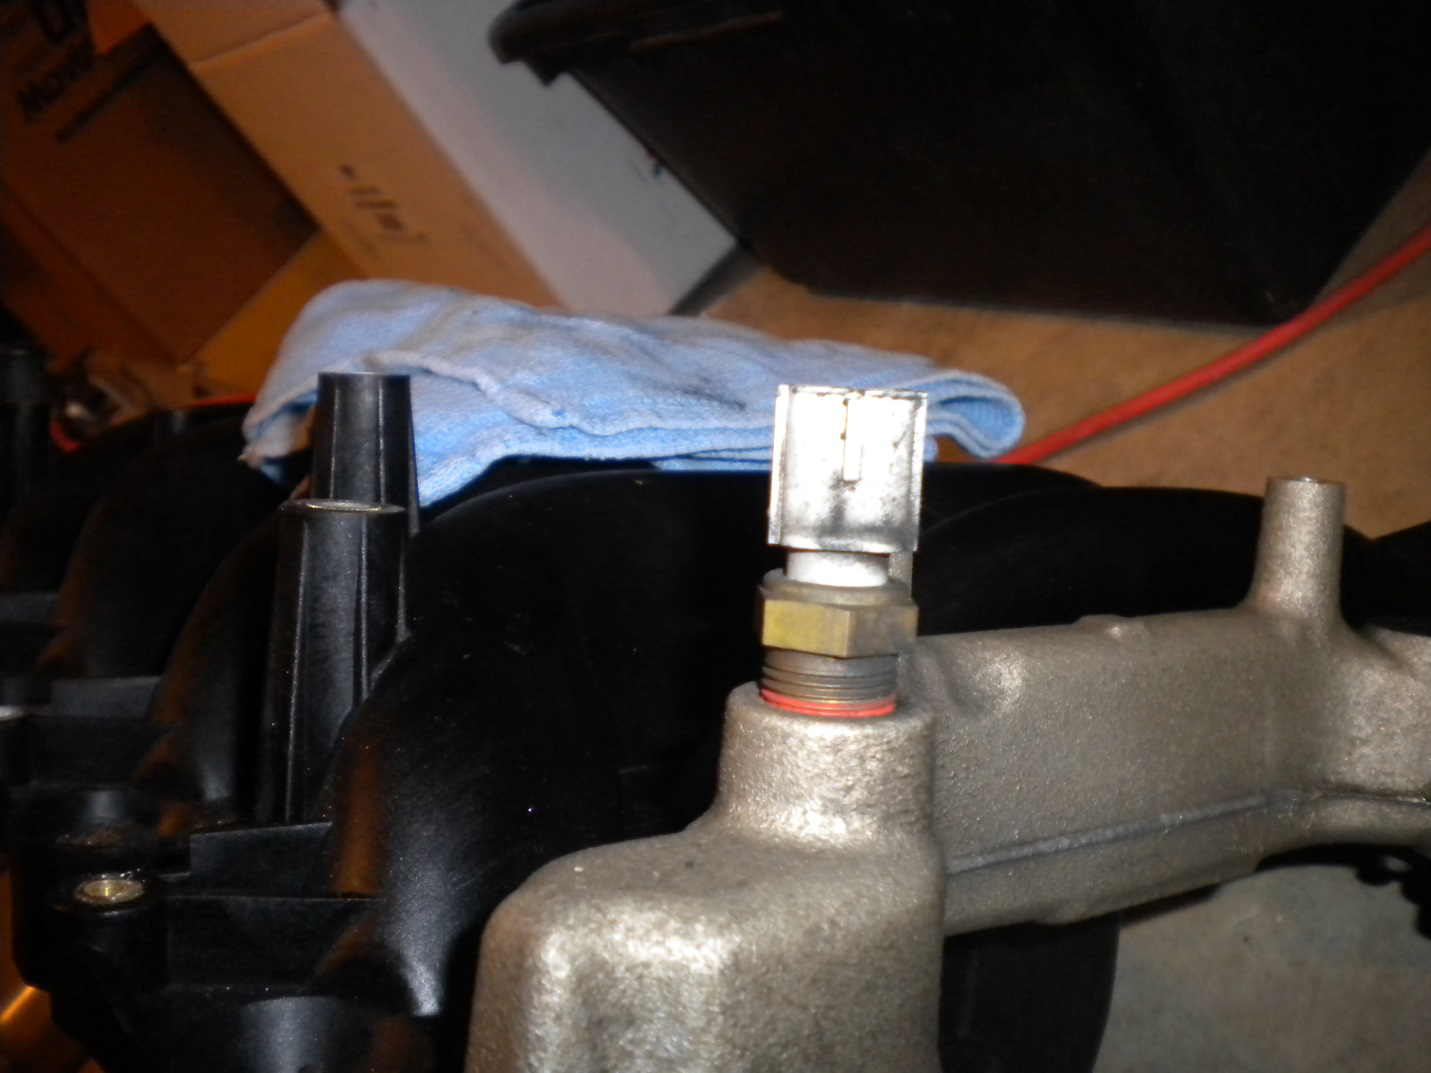
15. Unplug the coolant temperature sensor on the passenger side of the coolant crossover.
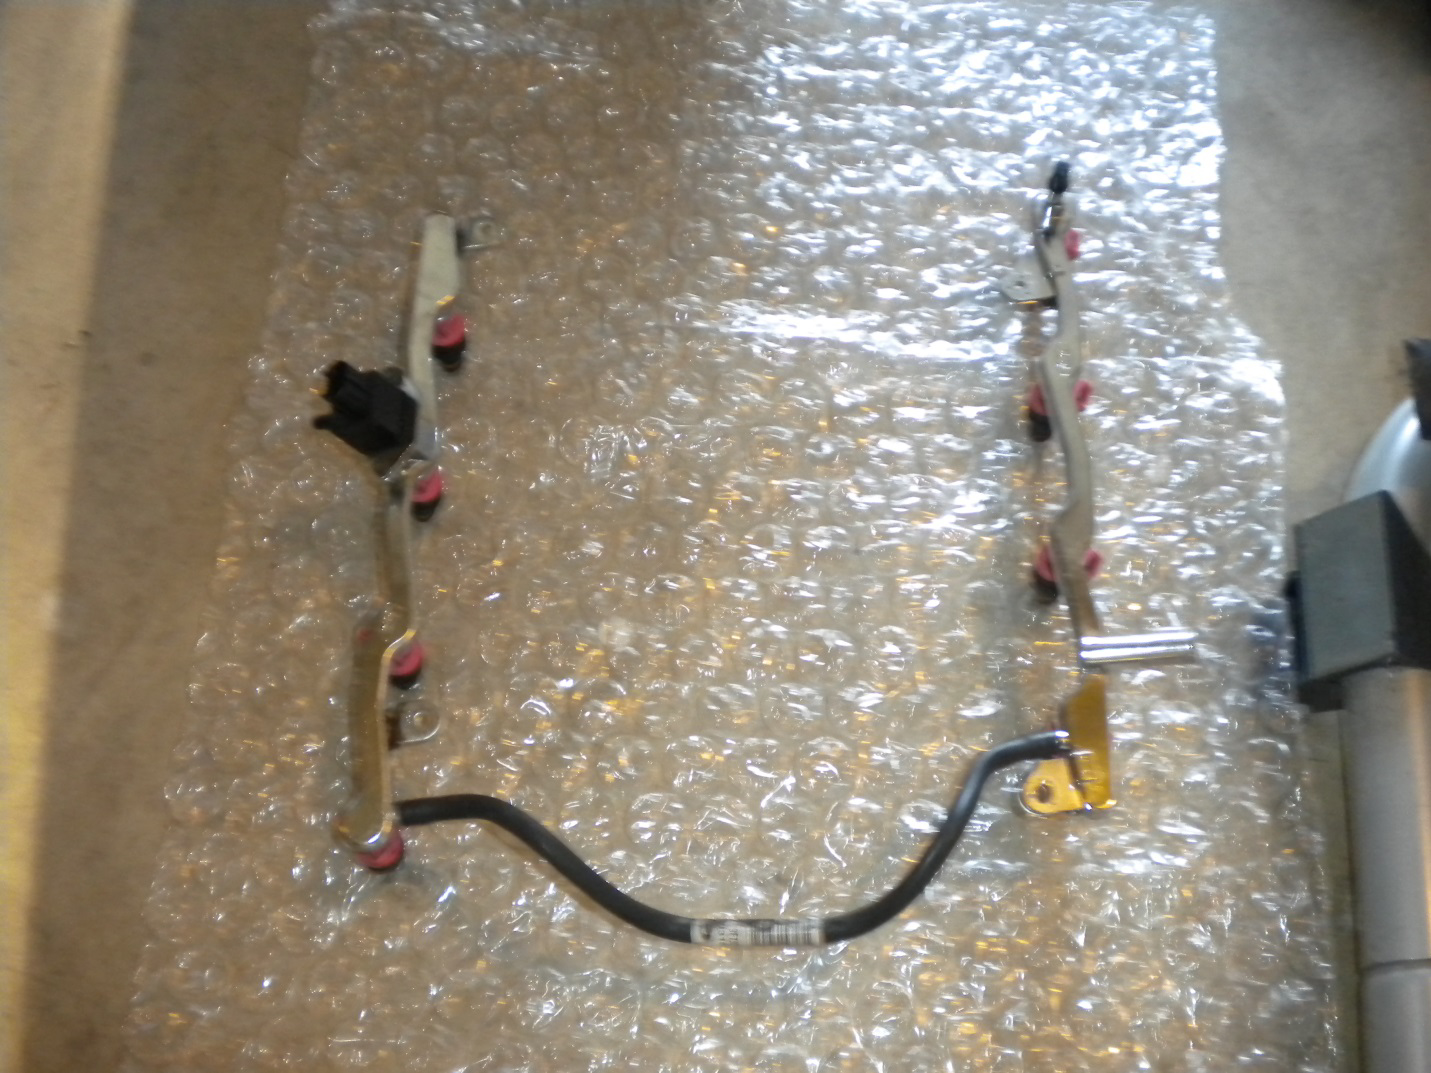
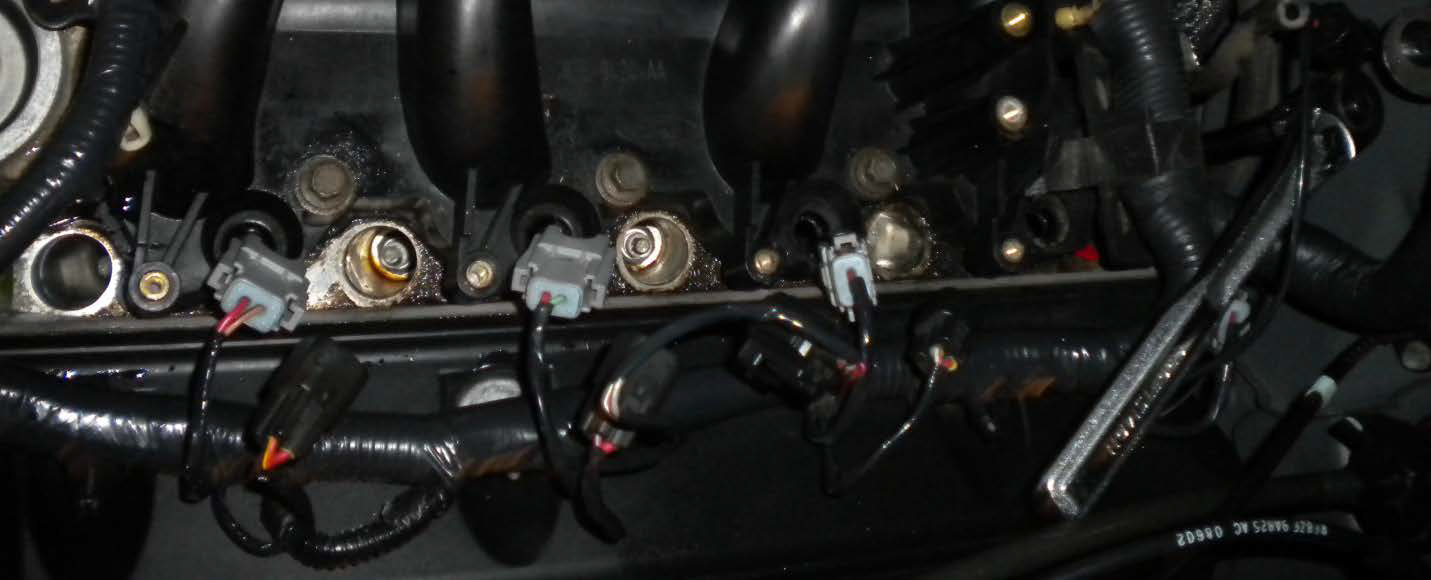
16. Unplug all of the fuel injectors and coil packs. Remove the four 5/16” nuts holding the fuel rails to the intake manifold. Wiggle the fuel rails, one at the time, to loosen the injectors. Remove the injectors and fuel rails from vehicle.
17. Label and remove coil packs.
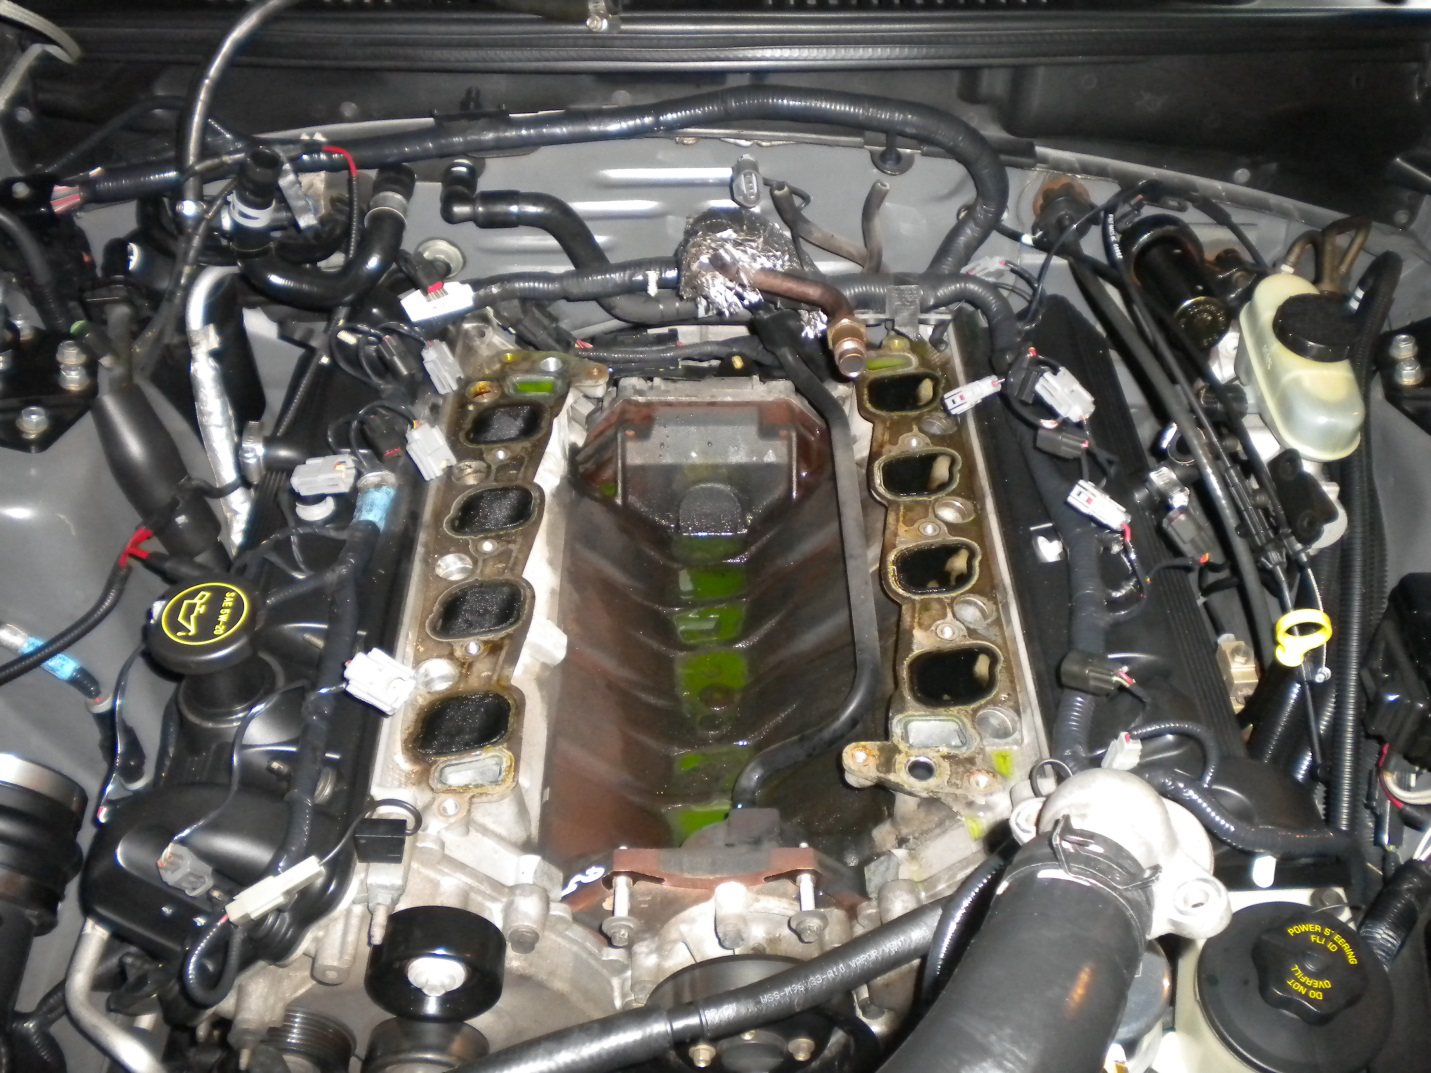
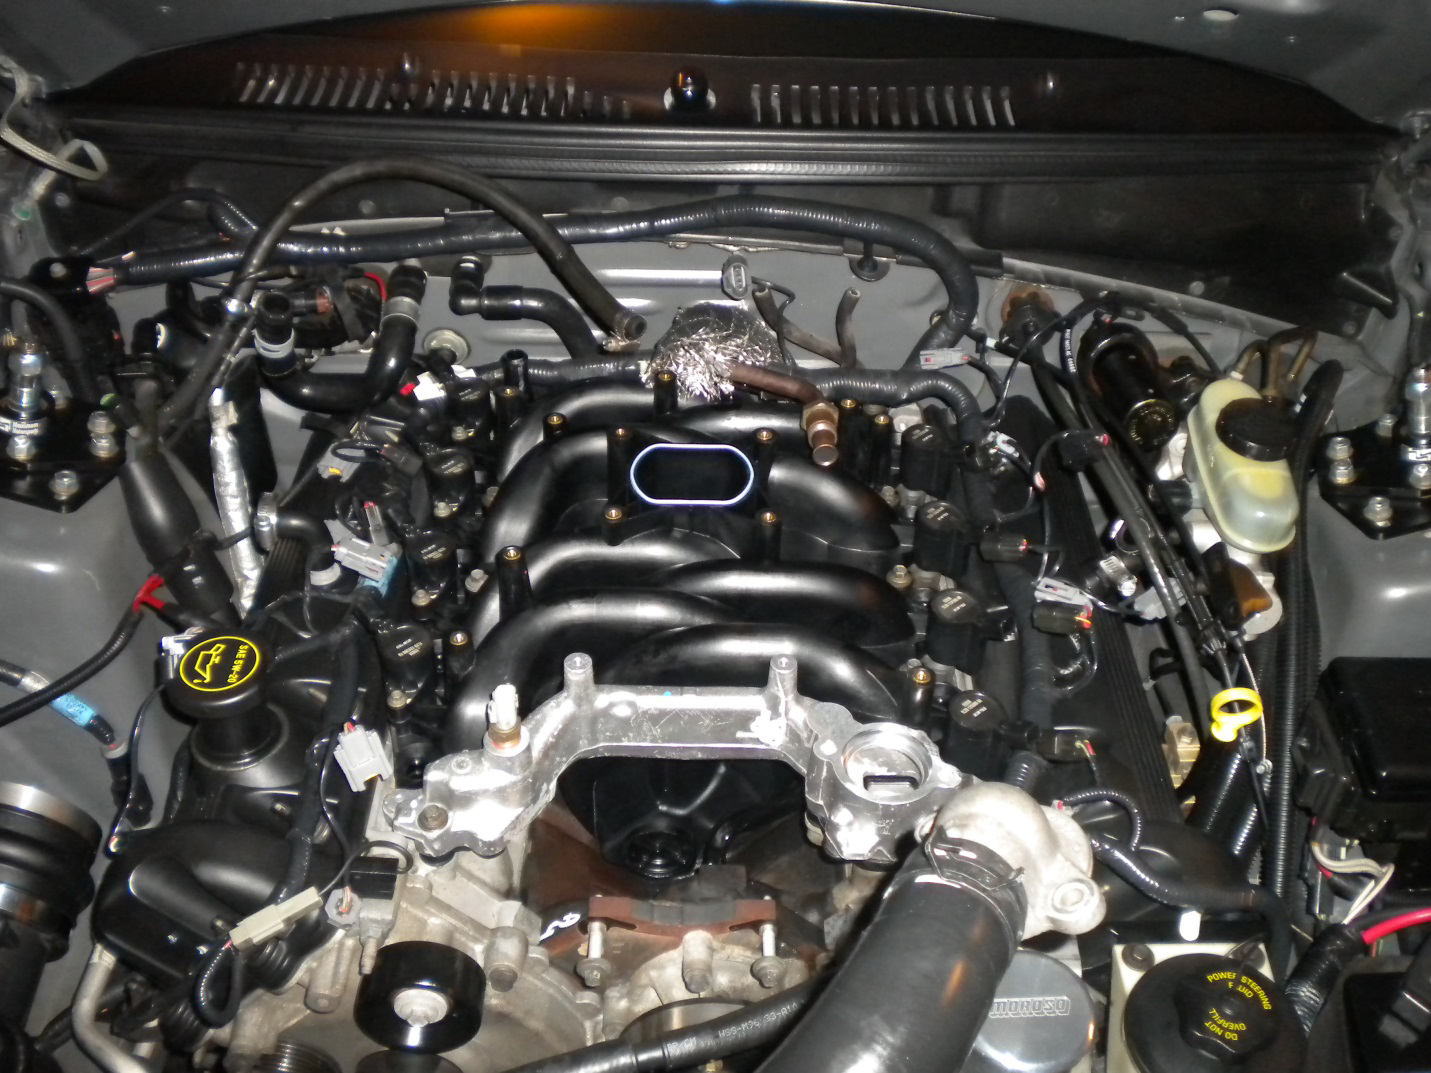
18. Now it is time to remove the intake manifold. Loosen the five 5/16” bolts on the passenger side (top picture) and the four bolts on the driver’s side (bottom picture, ratchet was left on the furthest back bolt as an indication to its location).

19. With everything clear of the intake manifold, carefully lift it out. The EGR valves hangs low, so it could be helpful to have a friend lightly lift up on it as the intake manifold is removed.
Installation Procedure:
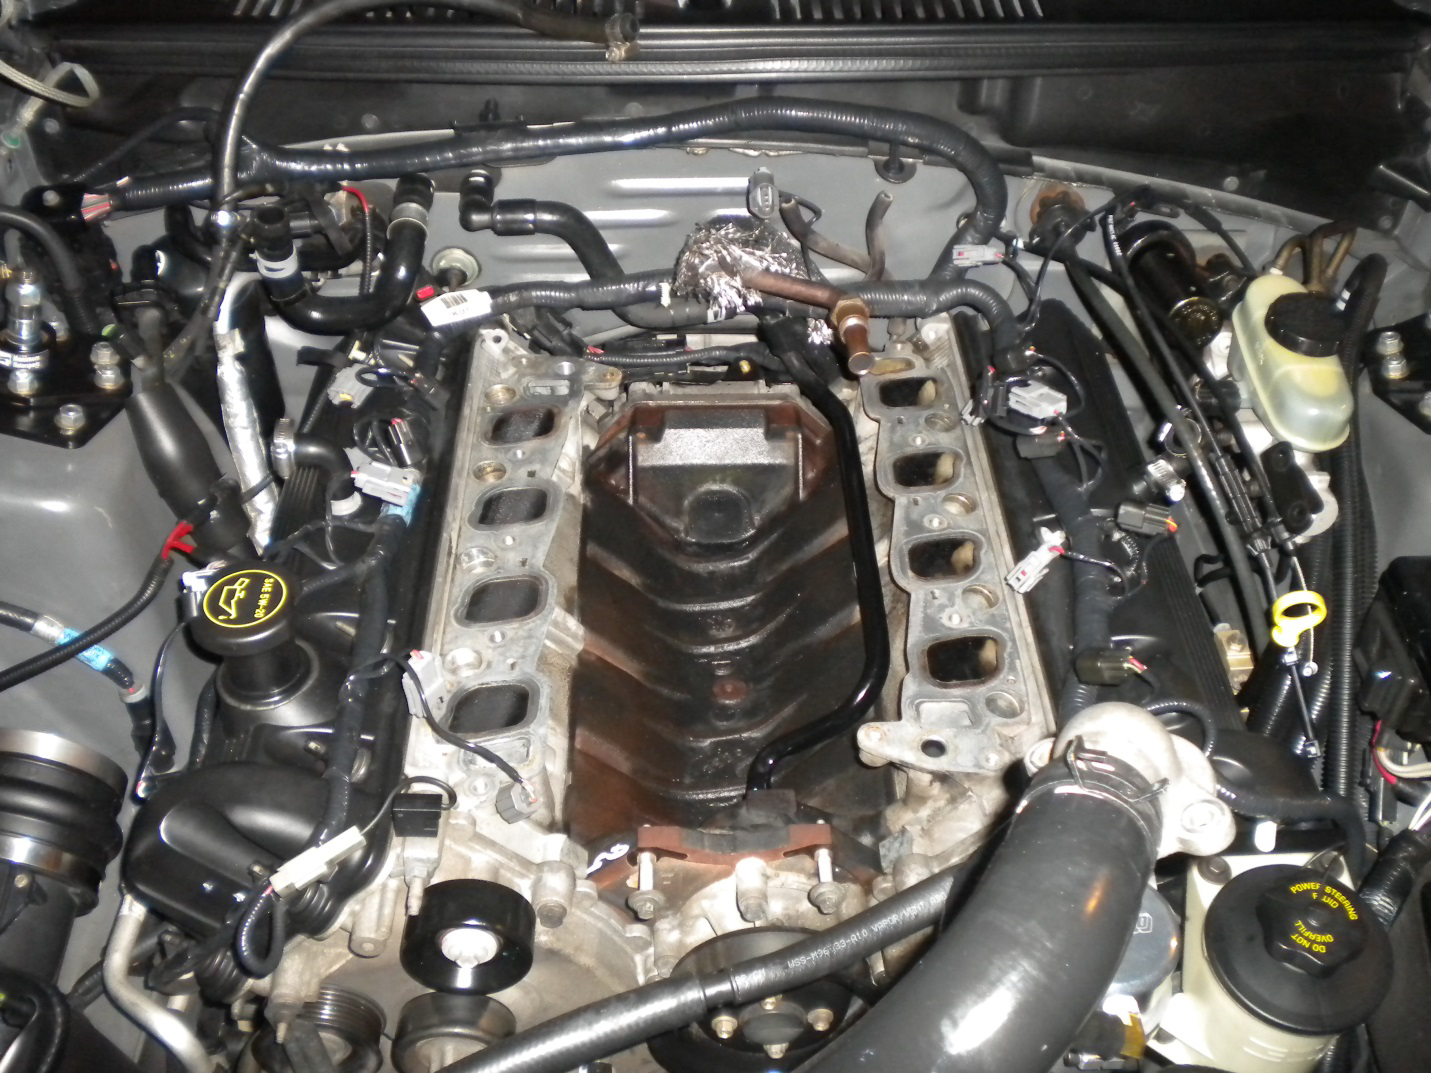
1. The most important part of the installation procedure is properly cleaning the heads where the intake manifold gaskets were. I stuffed a CLEAN brand new rag in each of the intake ports before cleaning anything. Remove the large debris with a shop vac, and then begin the cleaning. This is very tedious and requires some patients, but it is very important to scrape all of the old gasket material and debris off of the heads (I used a plastic kitchen food scrapper and acetone so I would not damage the mating surface with a blade). Once finished, I used the shop vac to clean any other finial debris before removing the rags from the intake ports. As an extra precaution, I vacuumed out all of the intake ports and spark plug sockets after removing the rags to ensure everything was clean.
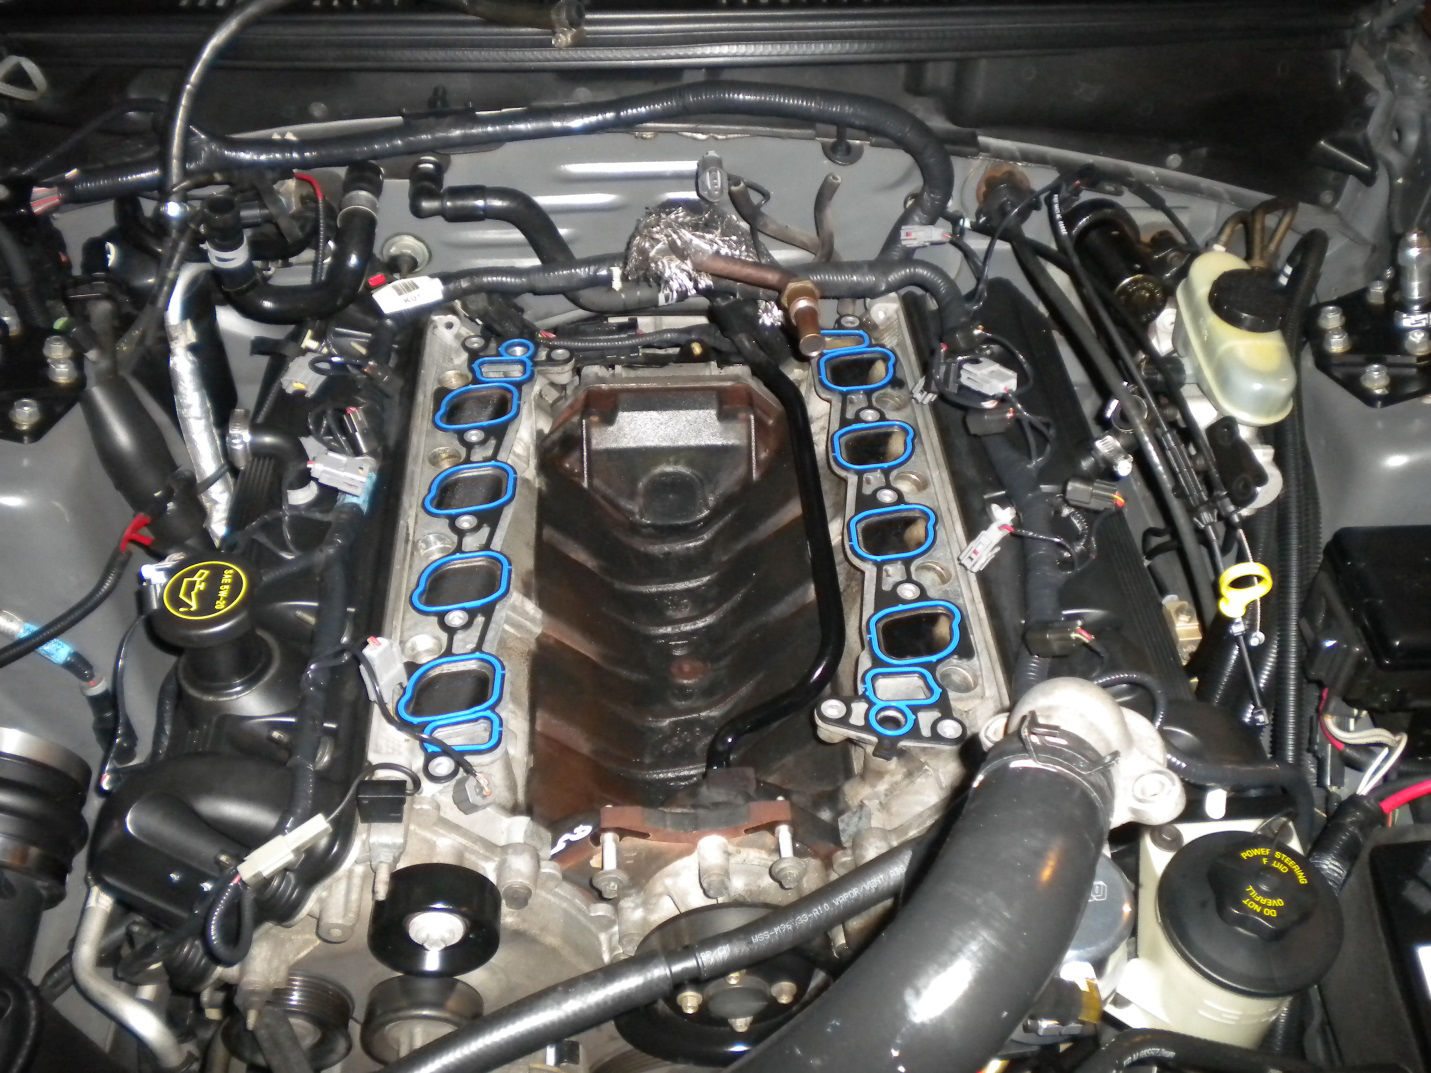
2. Next, it is time to lay down the intake manifold gaskets. Be careful and pay close attention to how they need to go. Make sure everything lines up and the little tabs on the underside of the gaskets fit into the dimples on the heads correctly.
3. Before installing the new intake manifold, transfer the coolant temperature sensor over to the new manifold. Clean the threads up really well before installing. Also, this is an opportune time to swap the thermostat to a new one. Be sure to put the new thermostat gasket on top of the installed thermostat.
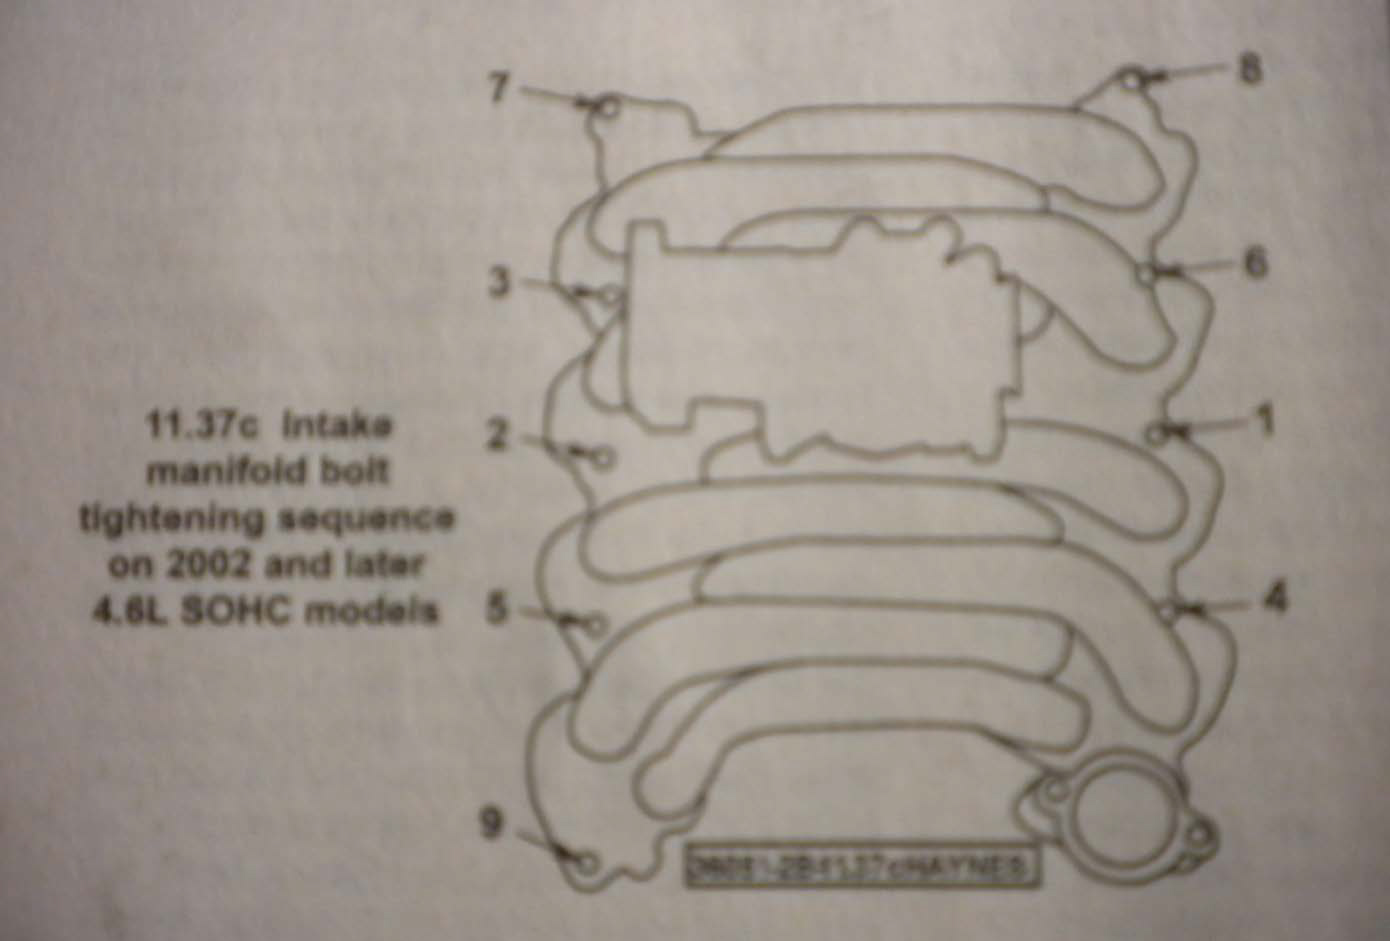
4. Now install the new intake manifold. Carefully set it into place, again being careful to not hit it on the EGR valve. Make sure the intake manifold is set on the gaskets correctly, and then place bolts in all nine of the mounting holes. Snug all bolts down finger tight. Tighten the bolts down using the tightening sequence shown below to 18 ft*lbs.
5. Next, mount the thermostat housing. Do not reuse the old gasket. Torque the bolts to 15-22 ft*lbs.
6. Install the coil packs and tighten the bolts snug. Do not over torque these bolts as they do not need to be very tight.
7. Now reinstall the fuel rails and fuel injectors. Before installing, tediously and very carefully inspect and clean the base of each injector. Be careful not to wipe debris over the exit ports on the fuel injectors. Apply a small amount of grease to the o-ring on the base of the fuel injectors, to prevent damage to the o-rings upon reinstallation. I slid my fuel rails in as a unit, starting on one end of the fuel rail and pressing the injectors into the intake manifold one by one. Use your fingers to give the injector a twist while pressing down to ease the installation. Tighten the nuts holding the fuel rails to the intake manifold. Again, only snugging these nuts is appropriate.
8. Reconnect all of the coil packs and fuel injectors. Be careful to plug each one in to its respective injector or coil pack. I started at the back of the motor and worked my way forward to prevent plugging them in in an incorrect order. The coolant temperature sensor can also be plugged back in. Reconnect the main fuel line to the passenger side fuel rail by pressing it until a click is heard. Then snap the safety clip over the connection.

9. Remount the bracket that sits on the back driver’s side of the intake manifold and plug in the electrical connectors. Reconnect the electrical connector for the fuel rails on the driver’s side fuel rail.
10. Set the alternator into place, having its bottom rest on the two studs that protrude right above the water pump. Snug these two studs down evenly, and do not torque them yet. Place the mounting bracket into position and snug those four bolts up. Then torque all bolts to 25-35 ft*lbs. Reconnect the electrical connector on the back side of the alternator, and replace the cable to the top of the alternator.
11. Reconnect the heater hose to the back of the intake manifold.
12. Now set the upper intake plenum assembly on top of the intake manifold. Insert the intake plenums five bolts, and tighten them to 20-25 ft*lbs. Reconnect the EGR valve, and plug in the electrical connectors for the IAC valve and TPS sensor. Reconnect the vacuum line to the back of the intake plenum, and mount the throttle cable bracket to the intake plenum. Then connect the throttle cable, cruise control, and throttle spring.
13. Install the small colored vacuum lines back to their respective locations (EGR valve, driver’s side fuel rail, intake plenum, and to the bracket on the back of the intake manifold). Also reconnect the PCV valve’s vacuum line to the upper intake plenum.
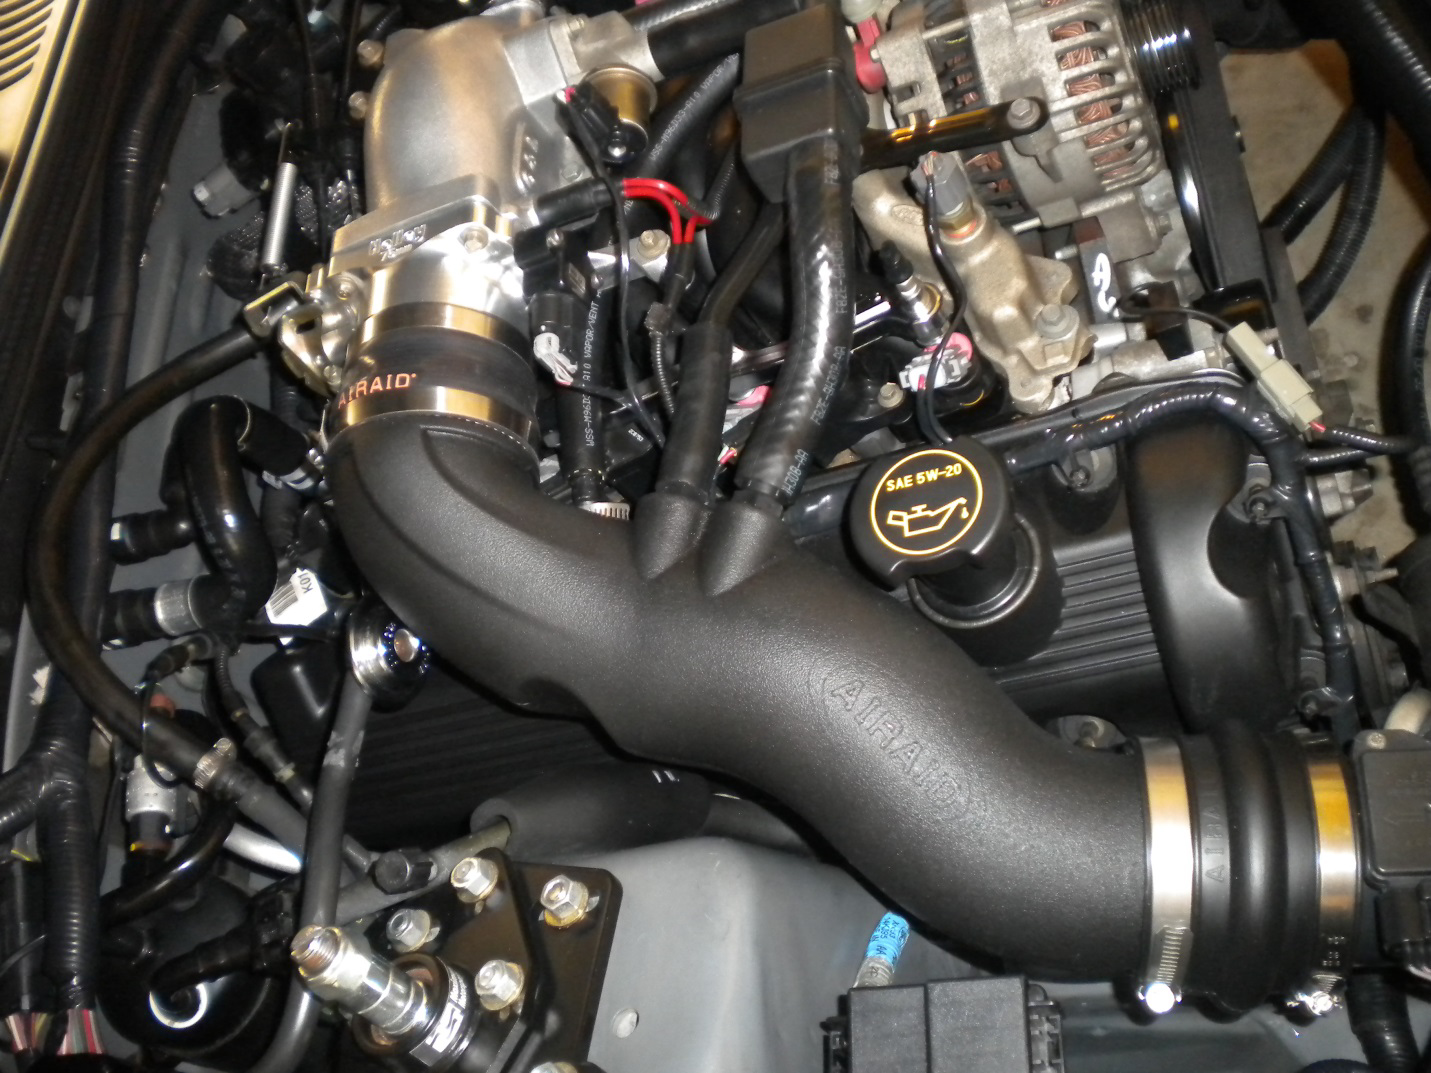
14. Reinstall the upper intake tube by sliding it into the MAF housing and then into the throttle body. Tighten the clamps with the flathead screwdriver. Reconnect the vacuum lines that run from the intake tube to the driver’s side valve cover and to the IAC valve.
15. Fill the radiator with antifreeze. Reinstall the serpentine belt and double check that it is on all pulleys correctly.
16. Installation is finished. Reconnect the negative battery terminal and recheck all electrical and vacuum line connections. Turn the car’s ignition to the ACCESSORY position. Do this several times to prime the fuel pump for a cleaner initial start-up. Once the motor is on, inspect under the hood with a flashlight for any leaks or strange noises. Monitor the gauges for a check engine light. Add coolant as needed.
Installation Instructions Written By AmericanMuscle Customer John Collmann 11.20.2013

