 FREE 1 to 3-Day Delivery on Orders $149+ Details
JLT Performance Cold Air Intake ('05-'09 Mustang GT) - Installation Instructions
Installation Time
60 minutes
Tools Required
- 5/16" Nut Driver
- 10mm Socket and Ratchet
- #20 Torx Driver
- Phillips Head Screwdriver

Shop Parts in this Guide
Installation
1. Verify you have all required parts (JLT painted pipe with PCV fitting and billet MAF housing, 90 degree rubber elbow with clamps, air filter, JLT heat shield, rubber PCV hose, and 2 MAF screws)
2. Remove the stock intake from the engine bay. It is best to have a cool engine so that you do not accidentally burn yourself while doing the install.
3. The intake box is only held down with 1 bolt. Use the 10mm socket and ratchet to remove. Do not lose this bolt because it will be reused for the heat shield.

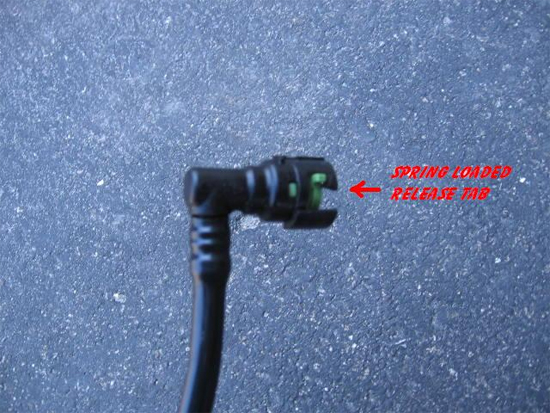
4. The PCV line that connects the intake to the passenger side valve cover is held on each end with a spring loaded tab. Just depress the green tab over and pull the tube off where it was connected. You should only remove the one end connected to the valve cover.
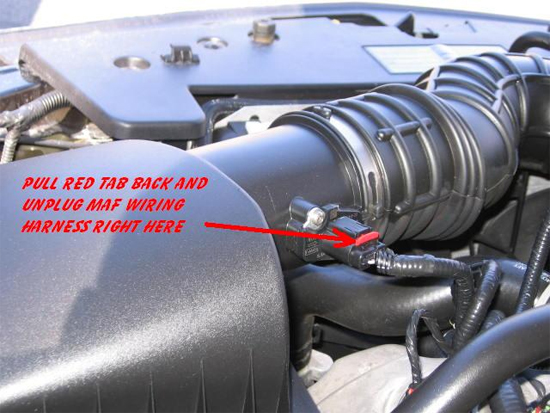
5. Remove the wiring harness from the MAF sensor. To do this, pull the red tab on the back and pull out the wiring harness from the MAF sensor. Remove the MAF sensor after you have assembled the new intake, so you do not lose it.
6. Next, using your 5/16 nut with ratchet or even just a screw driver, loosen up the clamp holding the intake tubing to the throttle body. Pull the tube off of the throttle body and pull out the entire intake assembly.
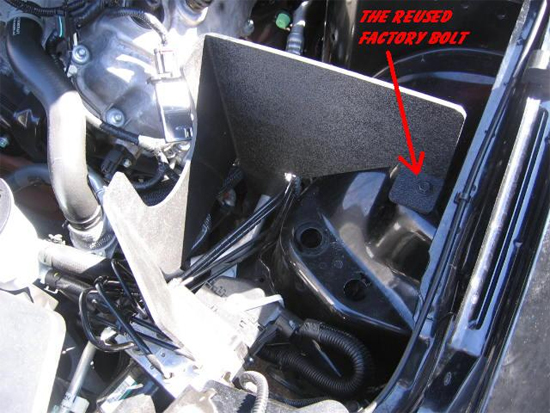
7. Grab your supplied heat shield and factory bolt from the air box. Install where the old air box was and bolt it down with the factory bolt. The new box should clear the brake lines on the bottom and on the master brake box. You may tighten the bolt all the way down now or you can leave it loose for now, so you can adjust and tighten it later.
8. Now it’s time to assemble the JLT intake. Do this BEFORE you install it into the engine bay.
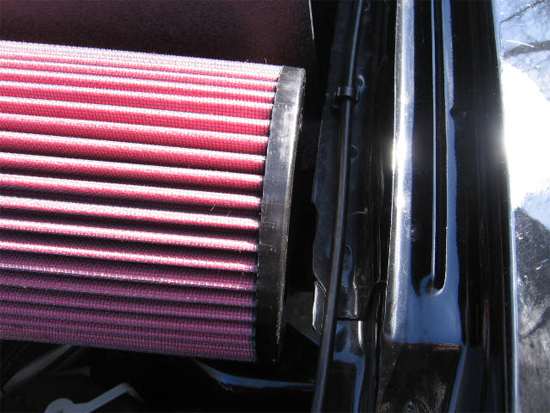
9. As you look at the new tube, you will see one end has a billet flange with the letters "JLT" engraved into it. That end will connect to the air filter. Slip the new clamp and filter onto the billet flange and slightly tighten so that it can be adjusted later. Make sure to not cover the MAF sensor opening on the flange and that the clamps will be accessible later on to be tightened in place.
10. On the other end of the tube, slip on the other new clamp and 90 degree rubber elbow. It will be very tight but it makes for a good seal. Tighten the clamp but leave some slack in it to be adjusted later.
11. Attach the PCV rubber tube to the fitting on the bottom of the intake tube. You do not need to clamp this.
12. Using the #20 Torx driver bit, remove the 2 screws holding the MAF sensor to the stock intake. Reattach the stock screws to the stock intake because they will not be used on the new intake. Using the 2 new screws, attach the MAF sensor to its new spot on the JLT intake.Note:Make sure the wording on the outside of the sensor is not upside down. Check to make sure the word "flow” on the JLT CAI is going toward the throttle body.
13. With everything together, place the intake into the groove of the heat shield and attach the 90 degree elbow with the last clamp to the throttle body. This is tricky because the elbow is not used to being an oval and the clamp must be completely loosened up to allow the elbow to expand to the throttle body. Also make sure your clamp will be accessible to be tightened once you've completed this.

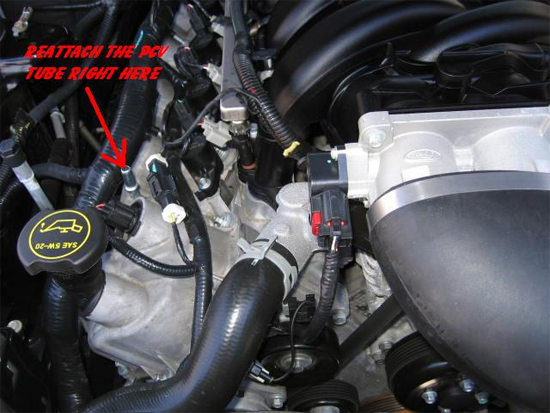
14. Once the elbow and clamp have been fitted on the throttle body, you may attach the PCV rubber tube to the valve cover, where it used to be attached.
15. Reattach the MAF wiring harness to the sensor and push the red tab back in to lock it

16. Once everything is together, adjust the intake so the filter is not touching the car and is only touching the shield. Tighten all 3 clamps, but do not over tighten them, they should just be snug.
17. Do not start the car yet. With your tuner, follow the instructions to load your new tune to the car. Starting the car before the tune is loaded could result in engine failure or damage.
18. Last step is to enjoy the JLT Cold Air Intake and drive safe.
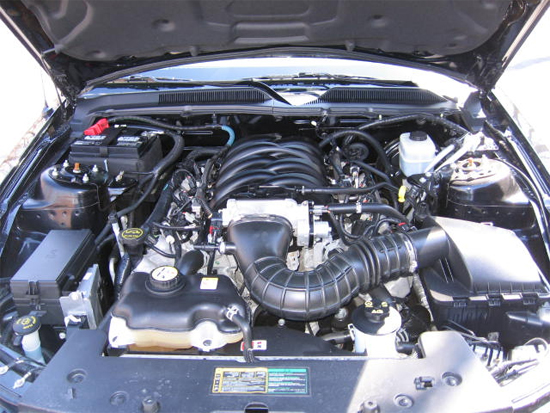
Before
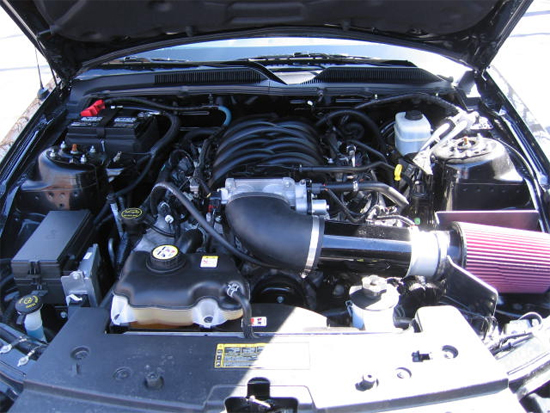
After
Installation instructions provided by AmericanMuscle customer Taylor Haupt 5.15.09
Related Guides
-
Installation
-
Installation
-
Installation

