 FREE 1 to 3-Day Delivery on Orders $149+ Details
How to Install JLT Performance Next Generation Cold Air Intake (2001 Bullitt) on your Ford Mustang
Installation Time
60 minutes
Tools Required
- Ratchet
- 8mm Socket
- 10mm Wrench
- Flat and Phillips Head Screw Drivers
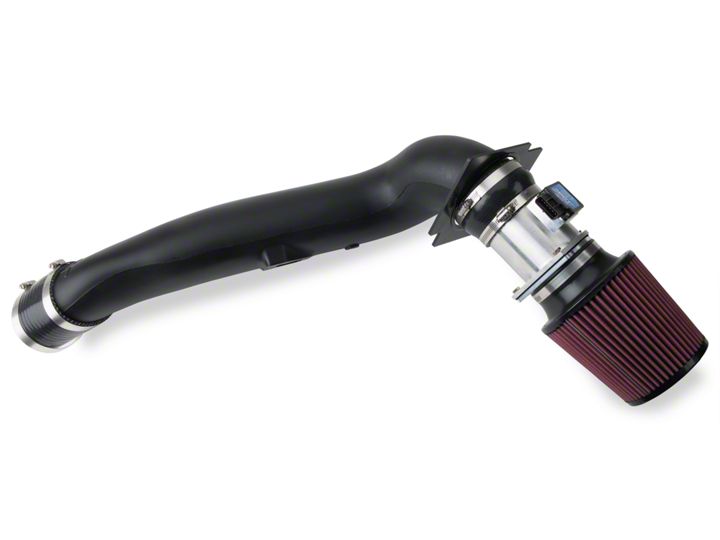
Shop Parts in this Guide
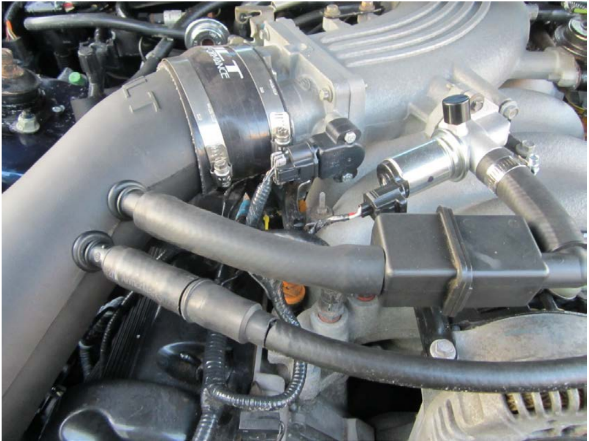
1. Pop your hood and disconnect your negative battery terminal. Now locate your stock air intake tube and loosen the hose clamps that hold the intake to the throttle, you can either use an 8mm socket or a flat head screw driver.
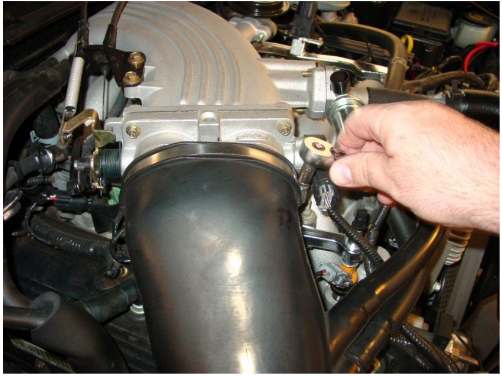
2. Now follow your intake tube down and loosen the hose clamp that holds the intake to the MAF housing. Again use either a 8mm socket or flat head.
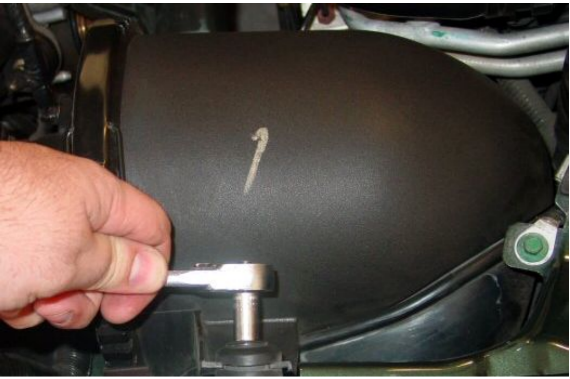
3. Now move on down to the air filter housing and remove the one 8mm bolt holder the air cleaner assembly to the fender using a ratchet.
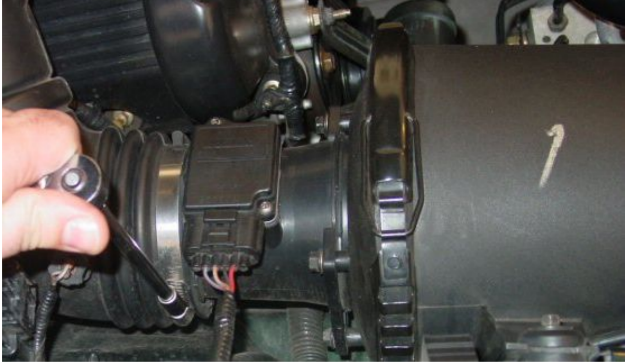
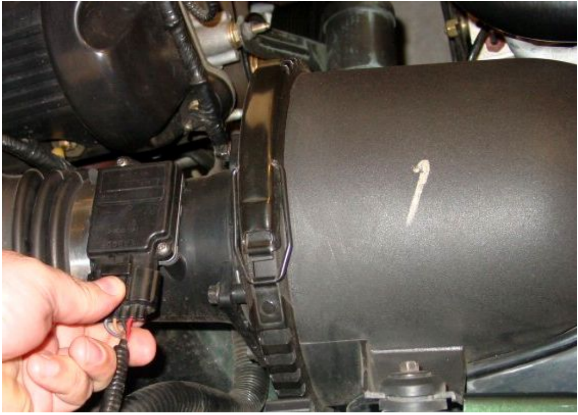
4. Now that everything is loose, before removing the intake assembly you must disconnect your MAF and IAT sensors. You do this by simply pushing down on the connectors and pulling them back and off. Also pull off your two PCV hoses near the throttle. Once everything is disconnected you can now completely remove your stock
intake tube.
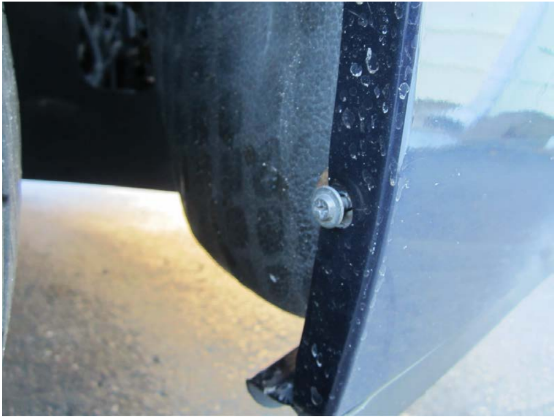
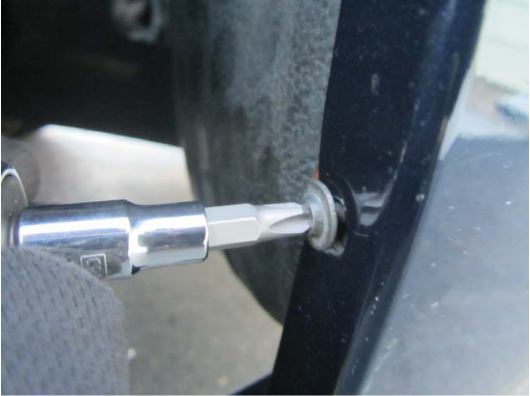
5. Now before installing your new JLT intake you want to peel back your wheel well on the passenger. You can do this by removing the one screw on your bumper as well as one push pin. Remove these and peel back your wheel well to gain access to the fenderwell.
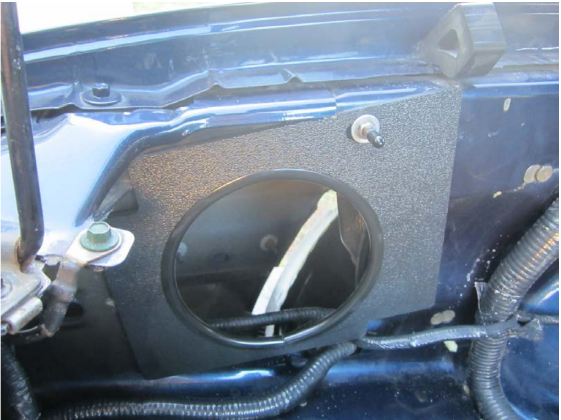
6. Before installing the new JLT intake tube it is best to bolt down your heat shield to your fender using your stock 8mm bolt removed earlier.
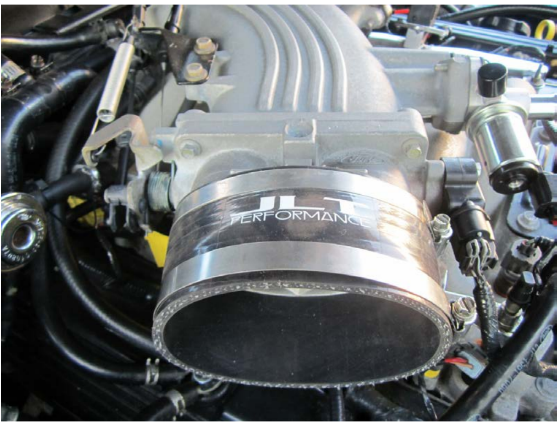
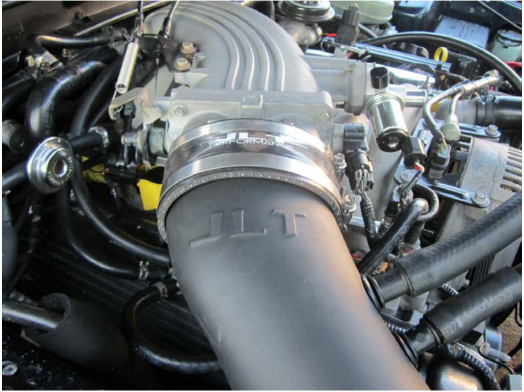
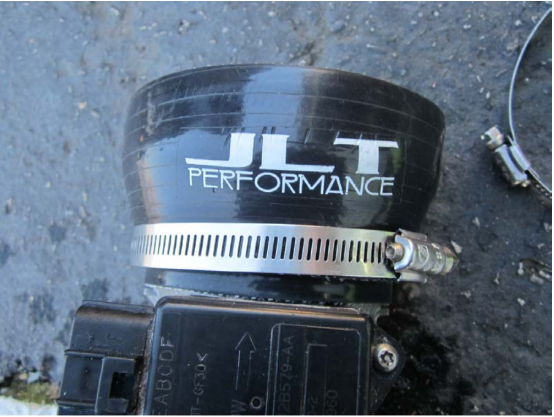
7. Next install your supplied throttle body to intake tube coupler and tighten the hose clamp on the throttle body end only.
8. Now you must prepare you JLT intake tube for install, slide your 2 PCV hoses over the adapters on the JLT intake and install your IAT sensor by simply pushing it into the grommet on the bottom of the tube.
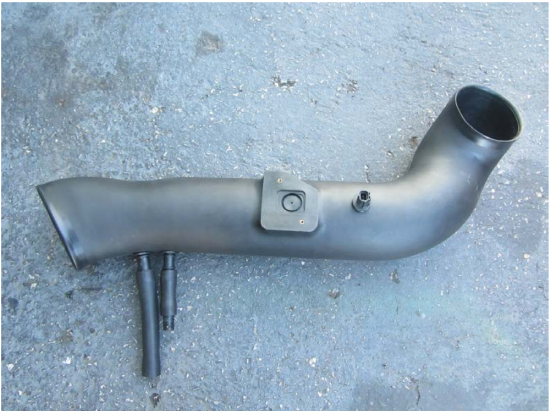
9. Now you are ready to install your new JLT intake tube, put the curved end of the tube through your fender first then slide the other end into the coupler at the throttle body but do not tighten it, just fit it into place.
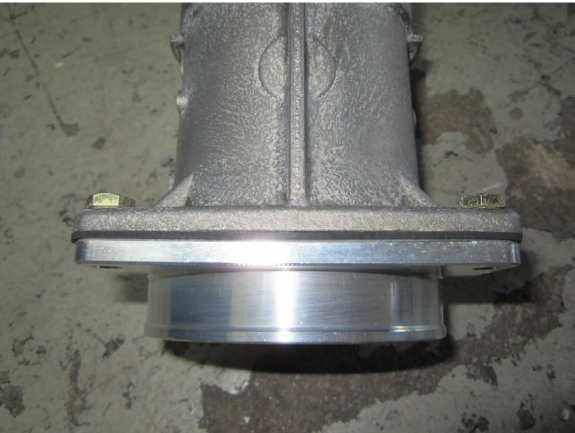
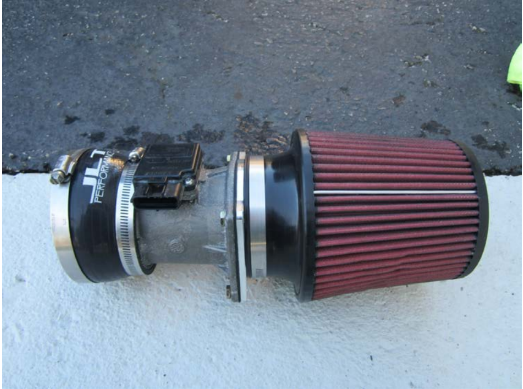
10. Now you must assemble the MAF and air filter part of the intake before attaching it to the intake tube in the fender. Remove your MAF housing from your stock air box by unbolting the 4 8mm bolts holding it on. Once your MAF housing is free take your new JLT MAF adapter plate and supplied gasket and using the 4 supplied 10mm bolts tighten the adapter plate to the MAF housing with the gasket in between the two using a wrench.
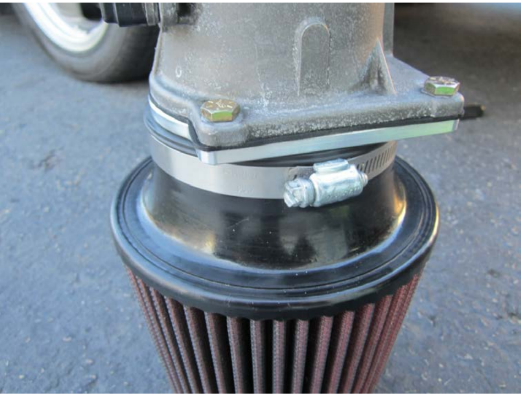
11. Now you can slide your new Air Filter over the MAF adapter plate and tighten the hose clamp with either a 8mm socket or flat head.
12. Now take the supplied rubber sleeve and slide it over the other end of the MAF housing, then take your JLT coupler and slide it over the sleeve and tighten the hose clamp down completely with an 8mm socket or flat head.
13. This is how the other half of your intake should look after you have tightened everything down prior to putting it into your fender and attaching it to your intake tube.
14. Now you are ready to connect the two parts in the fender. I did not jack up my car or even turn the wheels for this install, you may do either or both if you wish as this will only make the install easier however it is not necessary. Slide the air filter assembly into the fender through the bottom of your bumper as this has the most room if your car is on the ground. Once the air filter is in place in your fender slide it up and on to your JLT intake tube, once you have everything in place tighten the hose clamp to secure the intake tube to the air filter assembly. I did this using an 8mm socket and a long extension, but you may also use a long flat head. Once in place reconnect your MAF connector by simply pushing it on to the sensor until your hear it click into place.
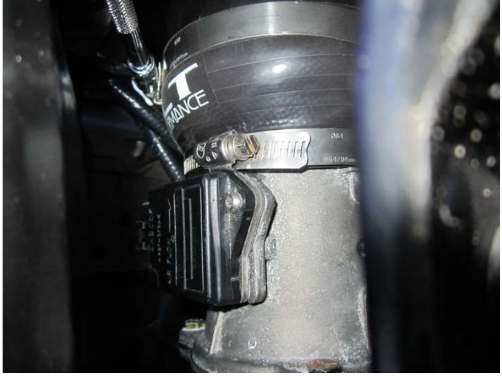
15. Once everything is tight in your fender well area go back and tighten the hose clamp holding the intake tube to the throttle using an 8mm socket or flat head. At this time it is also a good idea to reconnect your IAT sensor by pushing the connector on to the sensor until it clicks into place.
16. Connect your two PCV lines by simply sliding them back into place as they were before.
17. Now go back down to your fender and push your wheel well back into place and secure it using the screw and push pin removed earlier.
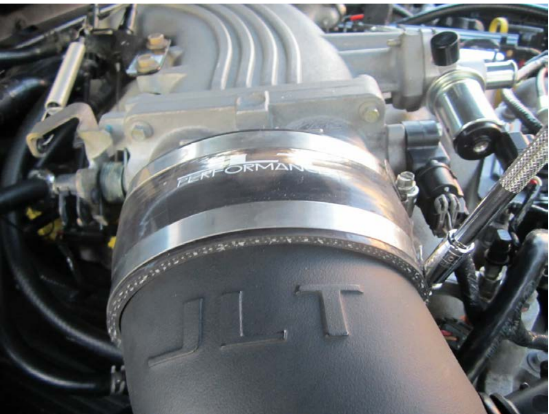
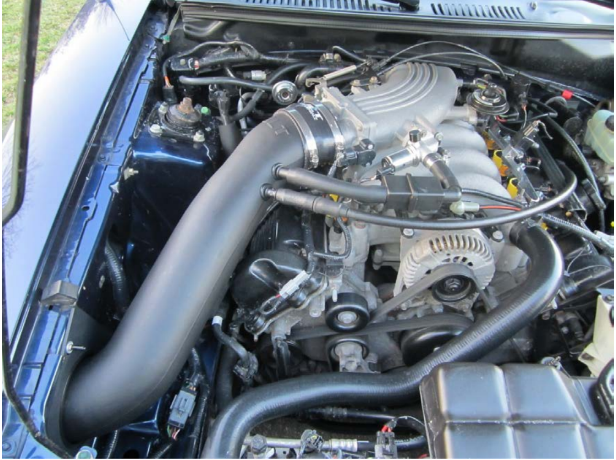
18. Your JLT intake install is now complete! Reconnect your negative battery terminal and start your car and let it idle untouched for at least 10 minute so it can relearn the proper idle with the new airflow.
Installation Instructions written by AmericanMuscle Customer Anthony Bragg 2/20/2013
