 FREE 1 to 3-Day Delivery on Orders $149+ Details
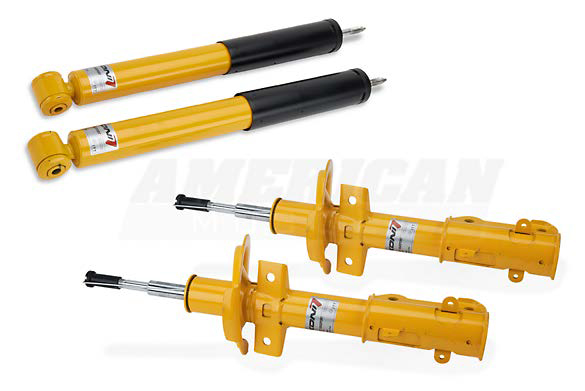
How To Install a KONI Adjustable Shock & Strut Kit for your 2005-2010 Mustang
Installation Time
5 hours
Tools Required
- Impact wrench recommended, otherwise a breaker bar
- 8mm wrench
- 10mm socket and/or wrench
- 13mm socket and/or wrench
- 15mm deep socket and/or wrench
- 18mm socket and wrench
- 19mm deep socket and/or wrench
- 22mm wrench
- Ratchet
- Strut Spring Compressing Tool
- Torque wrench
- Floor Jack
- Jack Stands
- Wheel Chocks

Shop Parts in this Guide
Rear Shock Procedure:
1. Place wheel chocks in front of front tires.
2. Jack up the rear of the Mustang in accord with procedure in the owners manual.
3. Support the raised rear-end with jack stands at proper points.
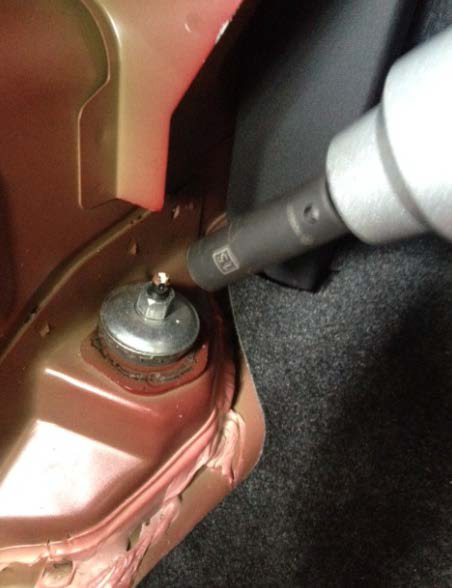
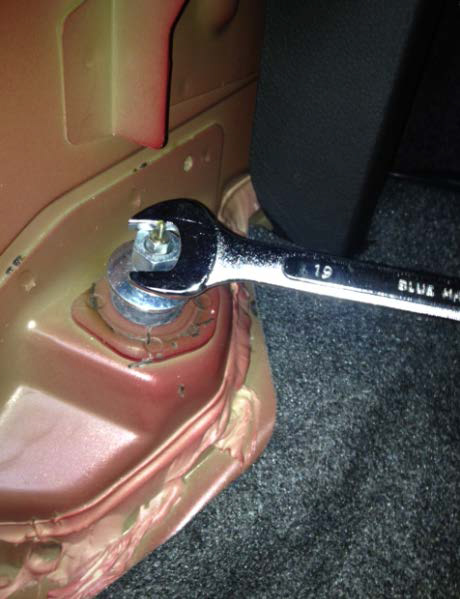
4. Pull back the side trunk lining, there are no fasteners, it simply pulls back exposing the top shock mounts.

5. Use a 15mm deep socket or wrench to remove the top nut.
6. Use the 15mm socket or wrench on the lower nut and pull the bolt out. Then pull the old shock down and out.
7. Place a washer and a rubber bushing included in the box on the new shock and insert up into the trunk floor hole, then use the original bolt to mount the lower shock mount in place.
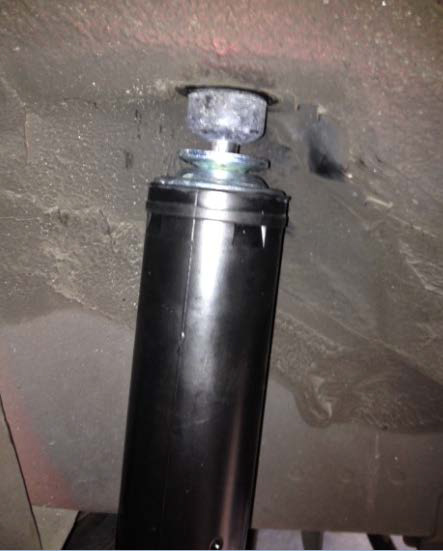
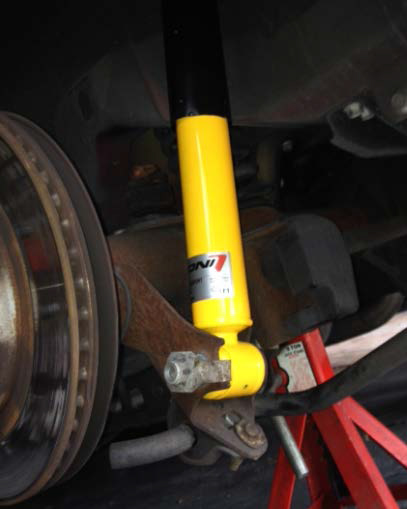
8. Then place another rubber bushing, metal washer, and nut included in the box on the top mount in the trunk. Use a 19mm wrench or socket to tighten the nut to the point where the rubber bushing is the same width of the metal washer; the rubber should not appear squished to the point of bulging on the sides.
9. Repeat for the other side.
10. Lower the car off the jack stands.
Front strut procedure:
11. Place wheel chocks behind the rear tires.
12. Jack up the front of the Mustang in accord with procedure in the owners manual.
13. Support the raised car with jack stands at proper points.
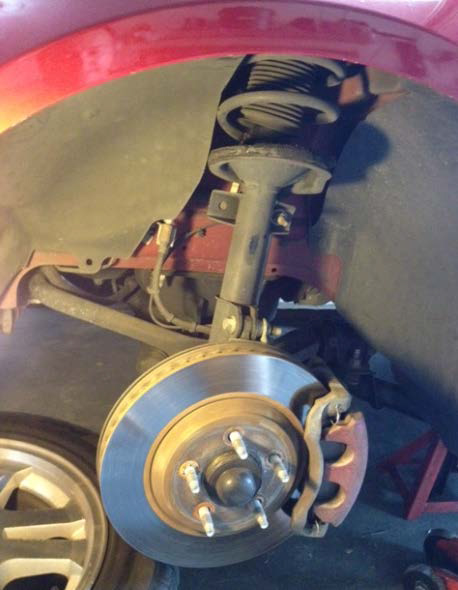
14. Remove the front wheel exposing the strut assembly.
15. At this point, if you are going to use the same springs, take a piece of chalk or other marking implement to mark the side of the spring facing out towards you.
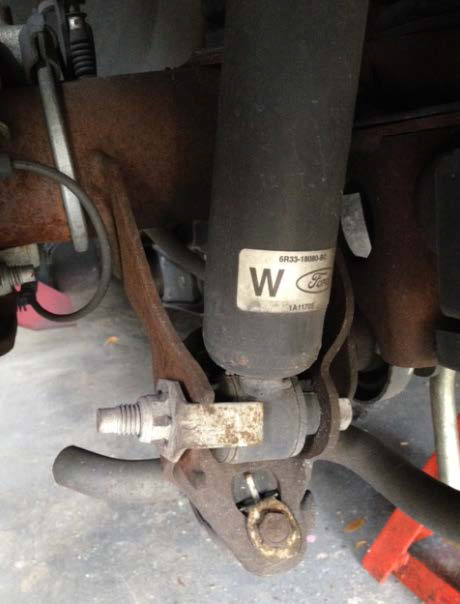
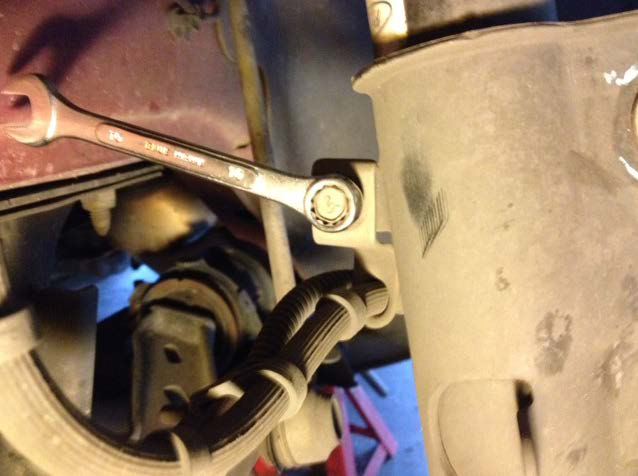
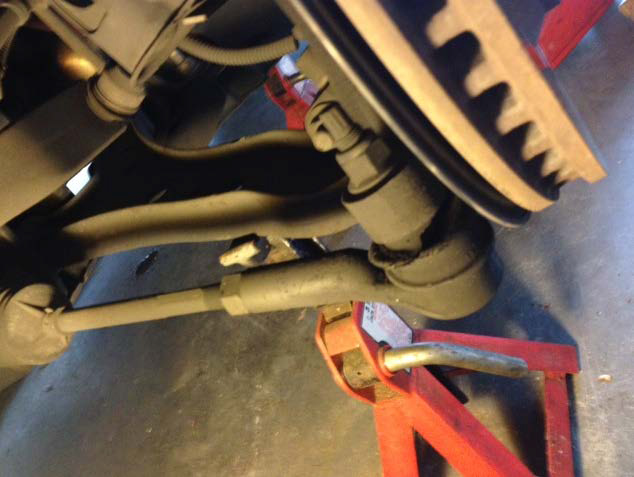
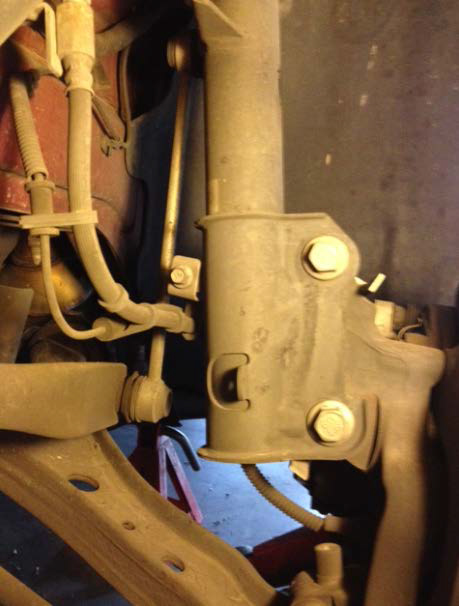
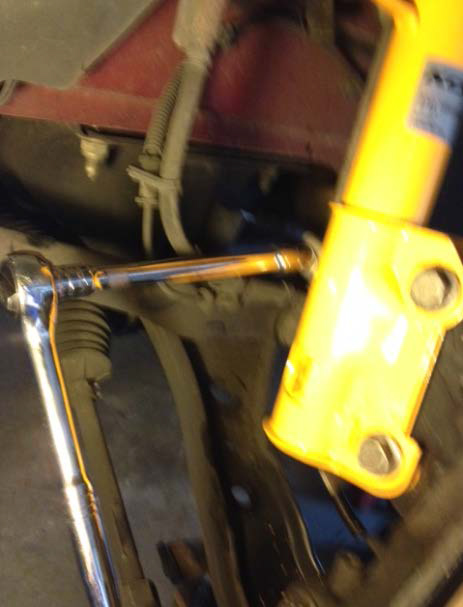
16. Use a 18mm deep socket to break free the nut on the sway bar end link, then use an 8mm wrench to hold the inner bolt while turning the 18mm nut to remove.
17. Then use a 10mm wrench or socket to remove the brake line support bracket. Also pull out the plastic fastener attached to the strut below it.
18. With the car high enough that the strut assembly is fully extended under its own weight, place a jack stand or other support under the lower control arm at this time.
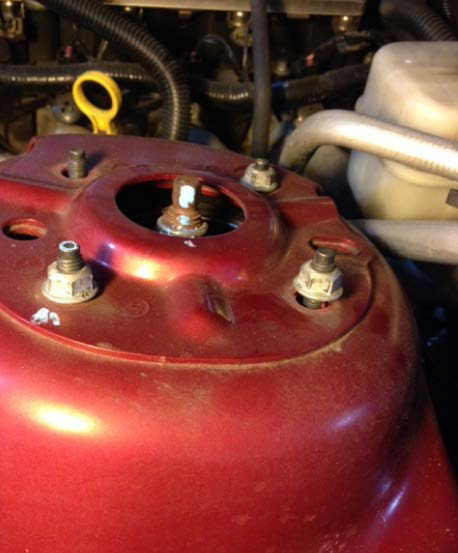
19. Now start loosening the four bolts on top using a 13mm socket or wrench. Do not remove them completely at this point so that the strut does not fall out when you remove the lower bolts.
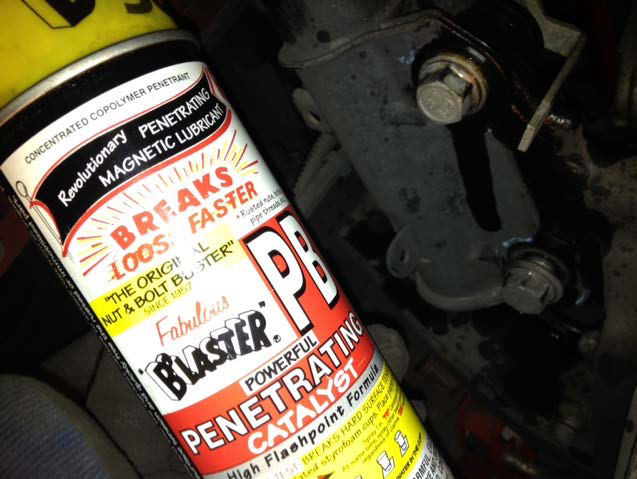
20. Some PB Blaster and an impact wrench may make removing the lower bolts easier.
21. Now ensure the strut is fully extended by jacking the car up a bit to make sure there isn't any more room for it to extend, you don’t want the spring to push the strut out at you when you remove the lower bolts.
22. Also when you remove the lower bolts, the spindle will hang free off the lower control arm, you will need to be prepared to place something under it to support it. I used some wood blocks as support.
23. Using a 18mm socket or wrench, an impact wrench is highly recommended to break these loose, remove the bolts attaching the spindle to the strut.
24. With the lower strut disconnected from the spindle, grip it with one hand while reaching over the top of the fender to finish removing the bolts on top. Then pull it down and out.

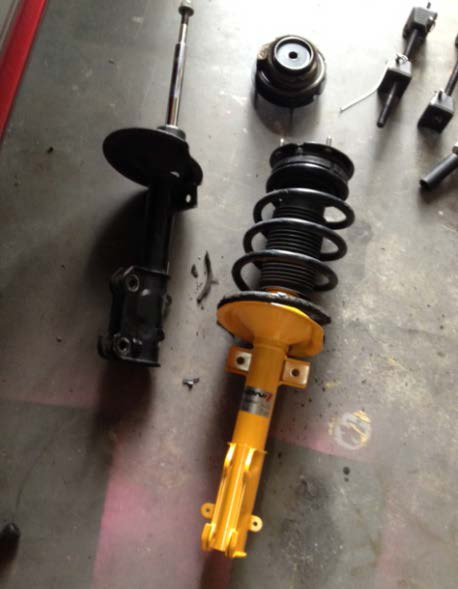
25. With the strut assembly out of the car, use a spring compressor according to its instructions to compress the spring. Be very careful to do this properly as a compressed spring carries a lot of harmful power.
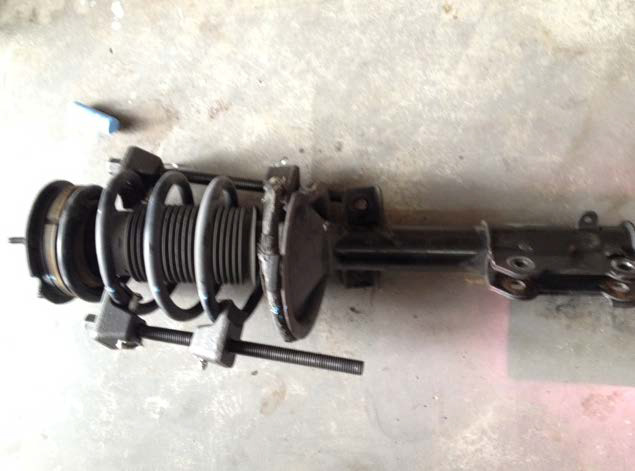
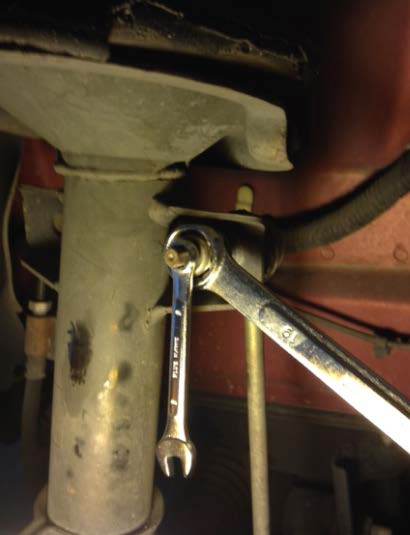
26. With the spring compressed, use a 22mm wrench and a 10mm wrench to remove the bolt on top of the strut mount. At this point if you have a bad strut mount you may discover it if ball bearings come out of it. If you have a bad strut mount you will want to replace it, you may want to replace it anyway with one of more hardness (higher durometer). See http://search.americanmuscle.com/search?query=strut mount
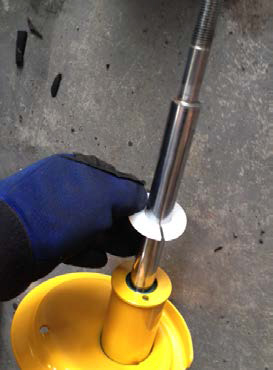
27. With the strut mount removed, place the plastic washer included in the box onto the piston rod of the new strut and transfer the bump stop and dust cover to the new strut.
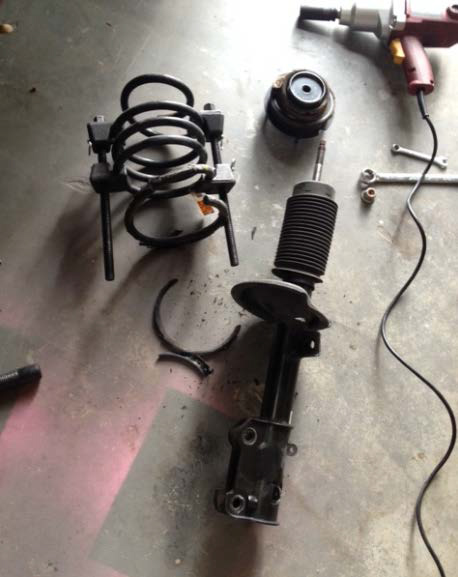

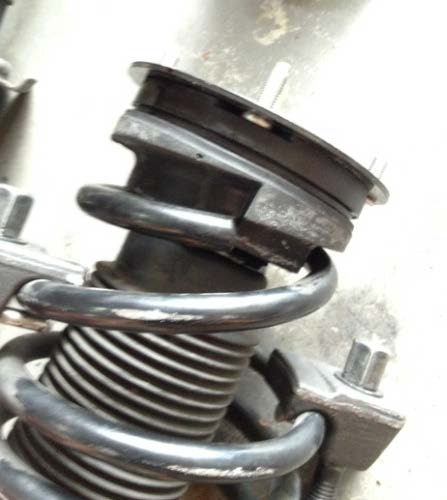
28. Now place the spring into the strut with the side you marked facing outward facing the same direction on the new strut. The bottom end of the spring should seat in the notch intended for it. Likewise when you put the strut mount on the top, there is a notch in the rubber to coincide with the spring end. The strut mount has a notch and/or arrow on it that should point the same direction as the outside marks you made on the spring.
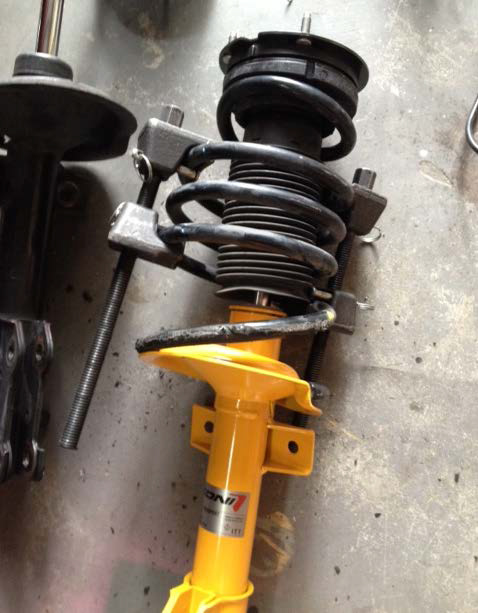
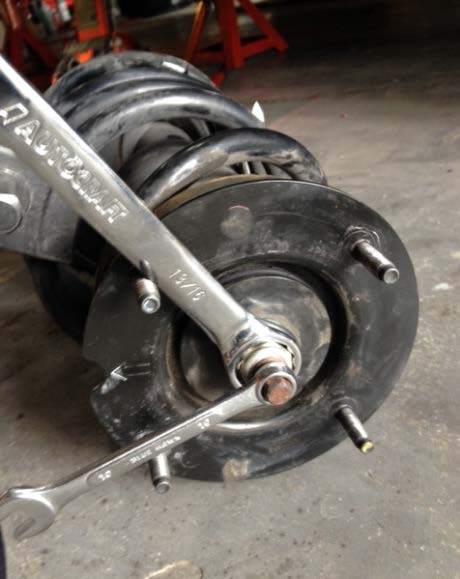
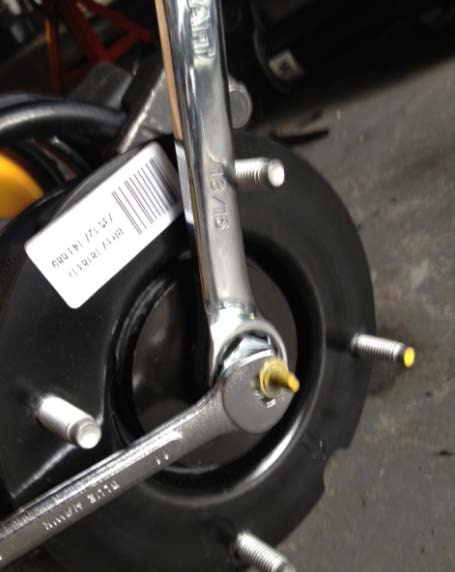
29. Tighten the nut on the strut mount with 22mm and 11mm wrenches. (The photograph shows a 13/16 wrench.) DO NOT use an impact wrench to tighten this nut, you can damage the piston rod. Torque the nut to 38-49 ft./lbs. Then remove the spring compressor tool according to its instructions.
30. Now lift the strut assembly into place, guiding the bolts on top of the strut mount into position. Finger tighten the nuts to hold the strut in place.
31. Guide the spindle back into position on the strut and insert the two large bolts and nuts. Torque these to 146 ft./lbs. Reattach the sway bar end link with 18mm and 8mm wrenches and torque to 86 ft.lbs. Reattach the brake line with the 10mm nut and reattach the plastic support.
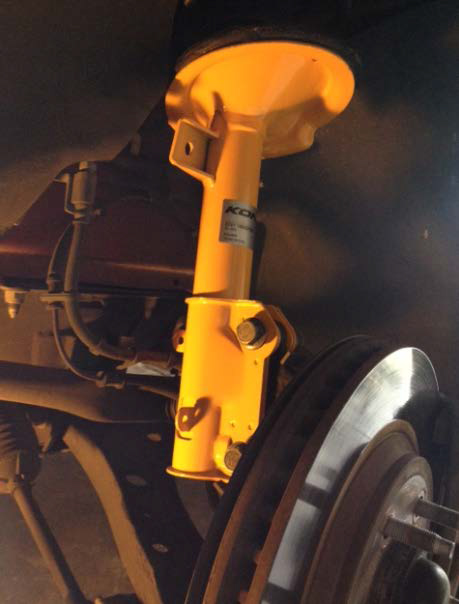
32. Now tighten the four bolts on top to 26 ft/lbs. with the 13mm socket or wrench.
33. Reinstall the wheel.
34. Repeat for the other side.
Installation instructions written by AmericanMuscle customer Steven Sock 8.04.2014

