 FREE 1 to 3-Day Delivery on Orders $149+ Details
How To Install a KONI STR.T Front Strut for your 1994-2004 Mustang
Installation Time
30 minutes
Tools Required
- Jack
- Jack Stands
- Wheel Chocks
- Large Flat Head Screwdriver
- 1/2" Breaker Bar
- 1/2 " Drive Ratchets
- 21 mm Socket
- 15/16" Socket
- 15/16" Wrench
- #9 Allen Wrench
- Liquid Wrench
- Bungie Cord

Shop Parts in this Guide
Installation Instructions:
1) Place wheel chocks behind rear tires. Using the 1/2" breaker bar and 21 mm socket, break loose the lug nuts. Raise the front of the car with the jack and place jack stands under the body on each side. This way you have the floor jack to raise the control arms later.
2) Remove the wheels.
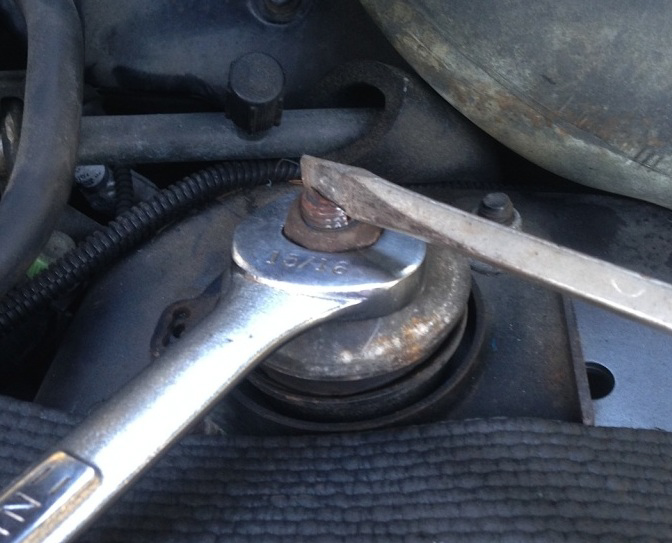
3) Leave the car resting on the jack stands and use the flat head screwdriver and 15/16" wrench to loosen the top nut of the strut. Leave the nut barely threaded on to keep the strut from falling out when you take out the bottom two bolts. I also used some liquid wrench on nuts and bolts for easier access.
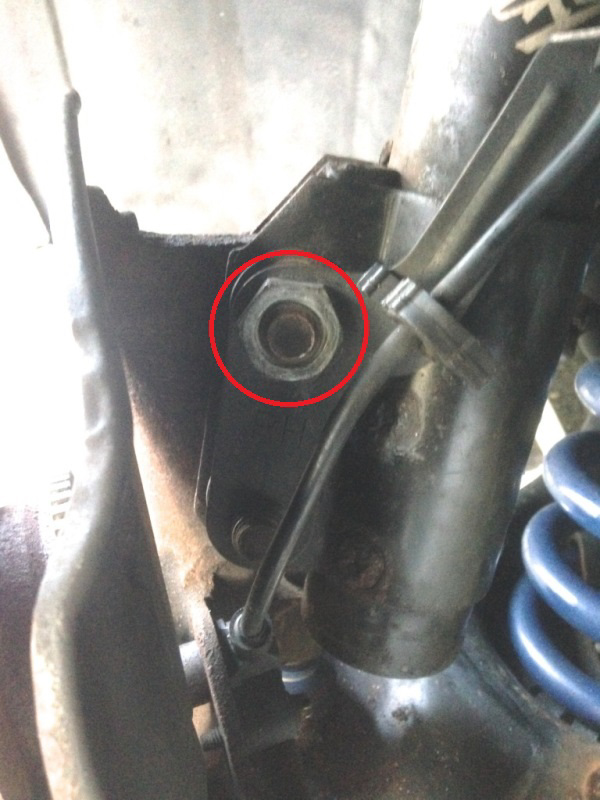
4) Use the 15/16" socket to take off the both holding the bracket for the abs sensor wire.
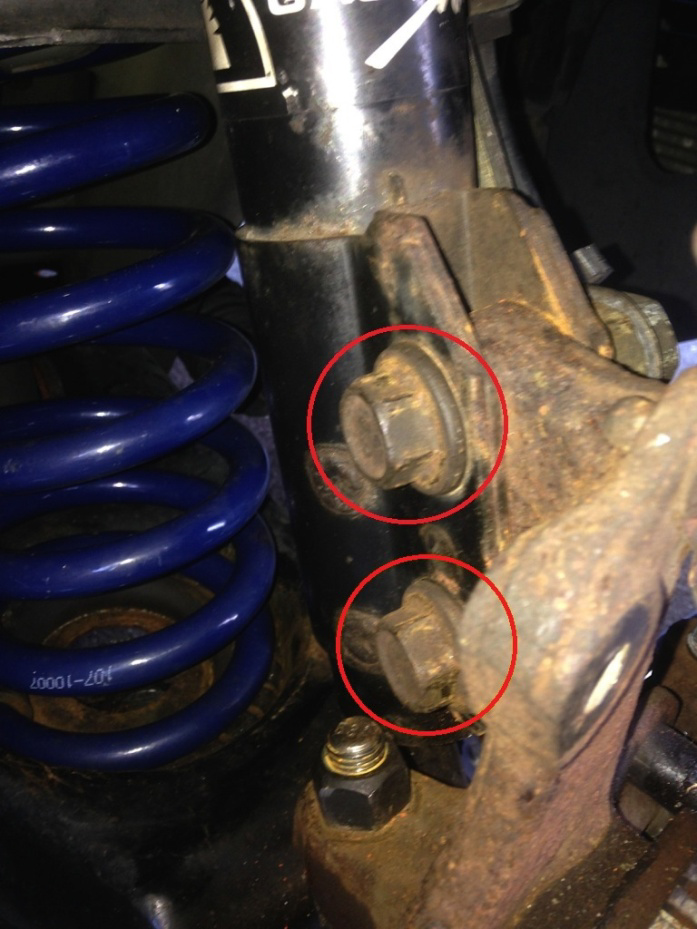
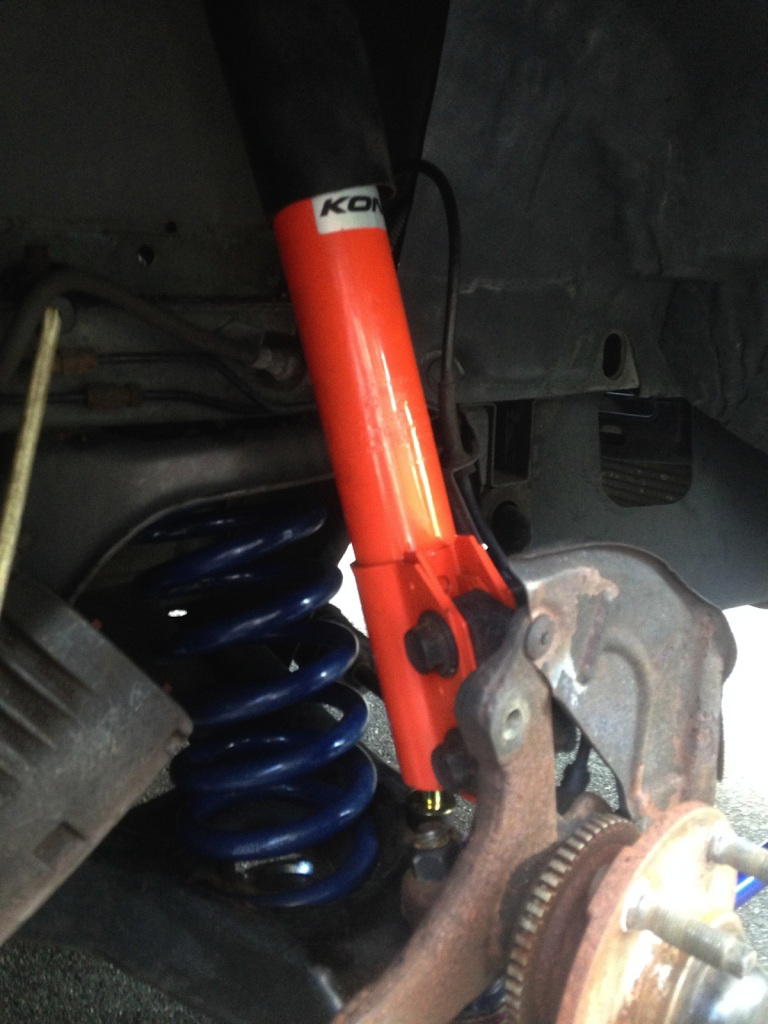
5) Use both the 21mm and 15/16" sockets to take the nut off of the two bolts pictured below that are holding the strut to the spindle. Leave these bolts in for now until you complete the next step.
6) Now place the floor jack under the control arm and lift the car slightly off the jack stands to remove pressure from the bolts. Be advised, the spindle may fall forward after you remove those two bottom bolts. As you are removing the last bold, you will need to applying a little upward pressure on the strut to allow the bolt come out, while pulling the bolt out and holding the spindle from falling too forward. My knee worked as a good support to hold up the spindle. 7) Have a bungee cord handy to secure the spindle to keep it from falling forward.
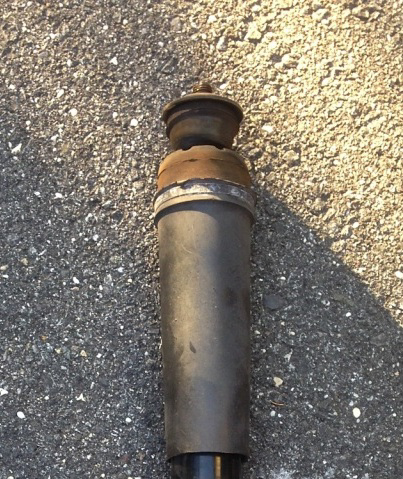
8) Remove the top nut and pull the strut down and out.
9) They say you should cycle the new Koni strut a few times before installation. It makes it a little easier to compress the strut while it half way installed to align the mounting holes. You can do this by pushing down on the black plastic thread cover while the strut is standing up off the floor.
10) Remove the dust booth and the bump stop underneath the dust booth and install them on the new Koni Strut.
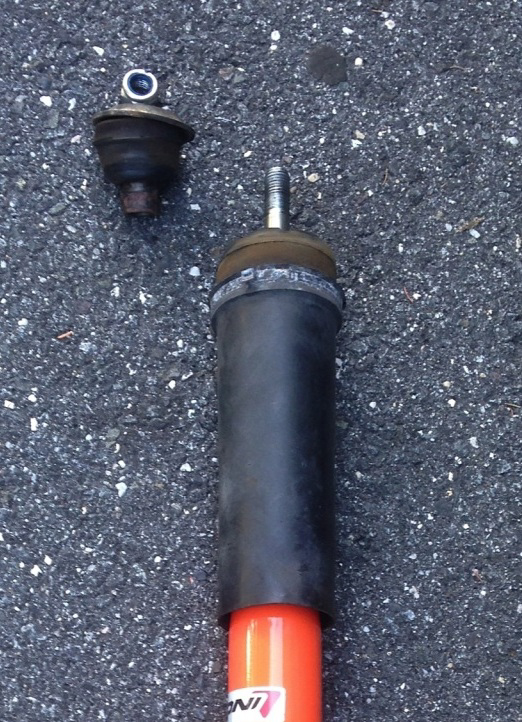
11) Push the strut up through the strut tower. Install the spacer, bushing, and thread the top nut a few turns to hold it in place.
12) Remove the bungee cord and line up the bottom strut mounting flange with the spindle and slide them together until the mounting holes line up. Lining up the bottom hole and sliding that nut in first made it easier for the top bold for me. Removal the brake caliper may be necessary. I did as I prefer to have as much room as possible. Remove the c-clip pull the bolt out, set aside, and pull off the caliper and let hang using the bungee cord.
13) Install the top bolt. Don't worry about the nuts right now. As long as you maneuver the spindle to align both bolt holes and install the bolts. Safe to remove floor jack at this point allowing car to rest on jack stands.
14) Now put on the two nuts and tighten. Tighten to 148 ft/lb.
15) Reinstall the abs bracket and nut.
16) Using the #9 Allen wrench and the 15/16" wrench, tighten the top nut.
17) Reinstall the wheels, only hand tightening the lug nuts. Using the floor jack, remove jack stands, and SLOWLY lower the car to place a load on the tires. Tighten lug nuts completely at this point. Once both wheels are secure, lower car all the way and remove floor jack.
18) Take your car to get your alignment checked and enjoy your new struts.
Installation Instructions written by AmericanMuscle Customer Michael Siciliano 10.1.2014
