 FREE 1 to 3-Day Delivery on Orders $149+ Details
J&M Mustang Rear Lower Control Arms Installation Guide ('99-'04)
Tools Required
- 3/8" Ratchet
- 3/8", 4" Extender
- 3/4" Socket
- 1/2" Socket
- 7/8" Wrench
- Rubber Mallet
- Metal Mallet
- Jack Stands, At Least 2
- Portable Jack Lift
- Small Flat-Head Screwdriver
- Crescent Wrench
- Minimum 1/4" Hex/Allen Key

Shop Parts in this Guide
Installation
1. Remove the J&M lower control arms from packaging.
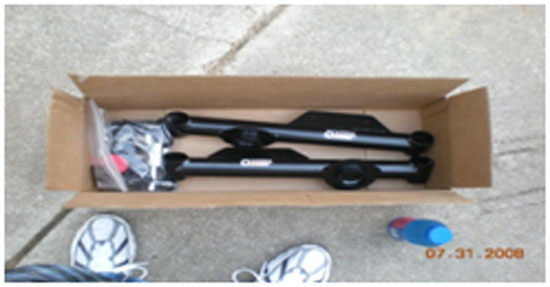
2. Ensure that they lower control arms, bushings, sleeves and silicone grease have been included.
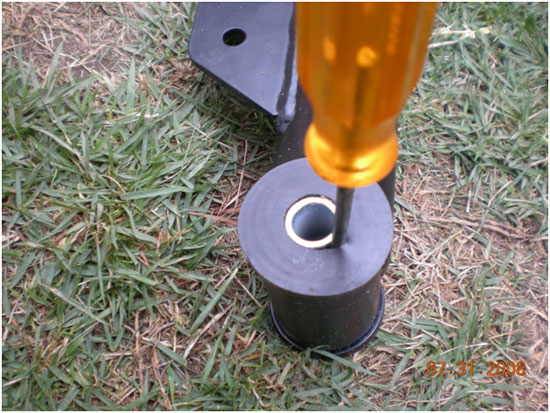
3. Using the silicone grease, apply grease to both the inside and outside of the bushings.
4. Install the ball bushing, first onto sleeves, and then on one side of the lowering control arm bushing.
5. Now place the other lower control arm bushing on other side. NOTE: You will notice that you can’t push the bushings in to be flush with the lower control arms, because of trapped air between the bushing.
6. Stick a small screwdriver between the sleeve and the bushing, push in 2 inches and gently pry up. You will hear air escaping. Push the bushing in further and repeat these steps for both sides of bushings, until they become flush.
7. Repeat for other lower control arm.
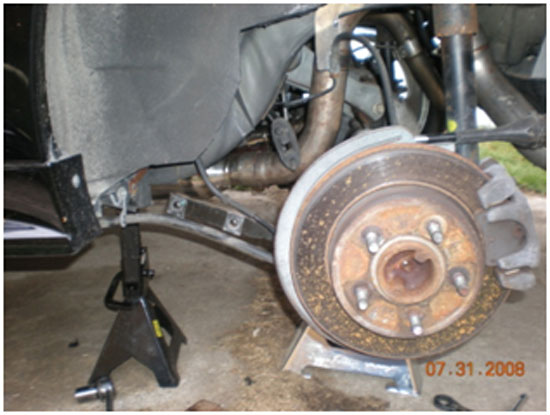
8. Block front and back of front tires and set emergency brake.
9. On both sides of the rear of the car, place jack stands to secure vehicle.
10. Remove both rear wheels.
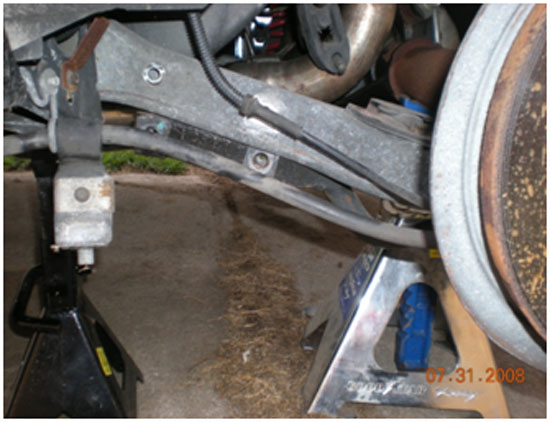
11. Remove the ABS cable from the holder on the stock lower control arm.
12. When pushing the strut down through the hole and clear of the bottom plate, be careful not to let it spring back up and hit the fender. To gain clearance, compress the strut until the rod is below the strut tower.
13. Using the 1/2" socket and drive, remove the rear sway bar.
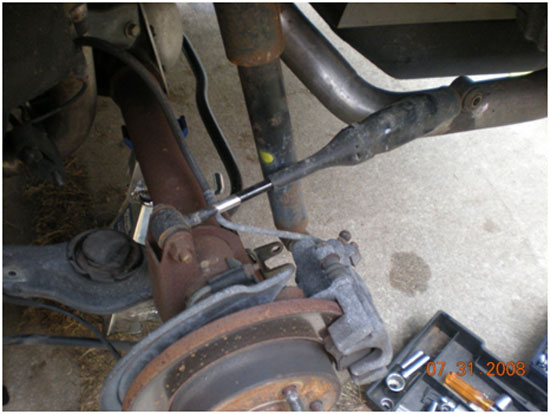
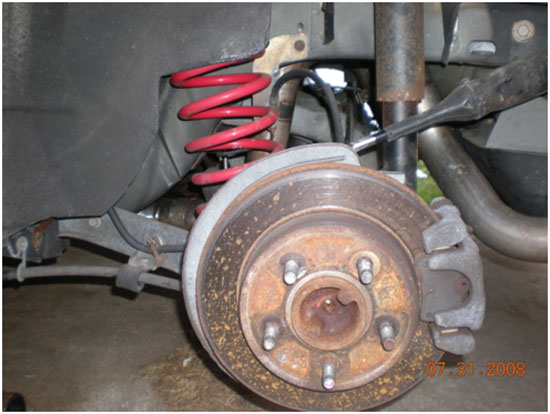
14. With a jack lift, lift one side of the axle and remove the 2 shocks.
15. SLOWLY lower the axle.
16. Now you can remove the spring. It all should look like the picture below. I used another jack stand to support the axle, so that I had more room to work on the lower control arms.
17. Remove the lower control arms. You will have to use the allen/hex key to tap the bolt out once the nut is removed.
18. Use the rubber and metal hammers to help the lower control arm come out.
19. Now put some grease on either side of box that the lower control arm goes in to, in order to help the new control arm go in.
20. Install the new lower control arm. The J&M sticker will face toward the outside of the vehicle; install the forward side first.
21. Once you get that side close to matching up with the hole, use the small screwdriver and the allen/hex key to line it up further. This is the real pain of the install; if you can get another person to help move the axle around to install the back part of the control arm, that would make the process go more smoothly.
22. Install the bolt and nut, and torque it until you can’t tighten it anymore.
23. Now, once you have the forward and back of the control arm installed, re-use the rubber pads for the springs and install the springs again. The springs will be somewhat loose for now.
24. With the help of a jack lift, raise the axle up so you can install the 2 shocks and bolt it up.
25. Repeat steps 4-16 for the other side.
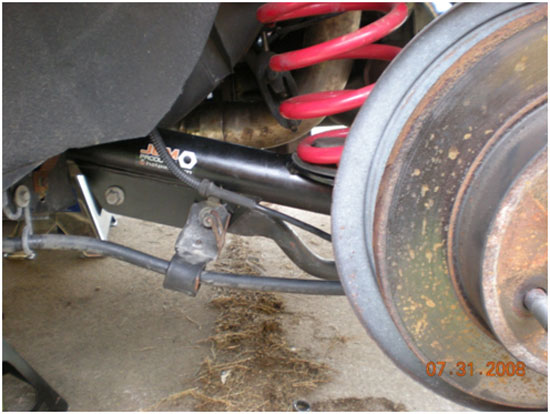
26. Now install the rear sway bar. The sway bar will go on the inside of the control arms. I re-used the emergency brake cable guide and ABS holder on the new lower control arm and have had no issues with it, plus the clearance is good. You will have to bend the tab on the guide to make it sit flush against the control arms.
27. Remove all jacks and blocks from car and take for a test drive.
28. This install took me about 4 Hrs to complete, with just myself working on it.
BEFORE
AFTER
Installation instructions provided by AmericanMuscle customer Jeremiah Campbell 8.11.08
