 FREE 1 to 3-Day Delivery on Orders $149+ Details
How to Install MAC 1-5/8 in. Ceramic Shorty Headers (11-14 V6) on your Ford Mustang
Installation Time
5 hours
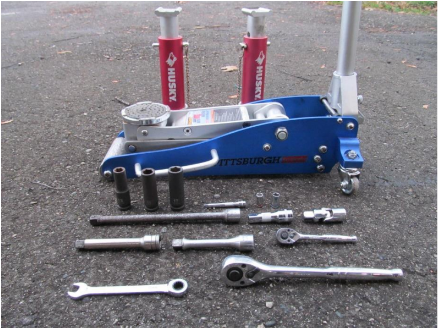
Tools Required
- 1 Jack
- 2 Jack Stands
- 1 Ratchet ( 1⁄4” Drive)
- 1 Ratchet ( 1⁄2” Drive)
- 1 1⁄2” Drive Breaker Bar
- 1⁄2” Drive Extension (1: 3-inch, 2: 4-inch, 1: 8-inch)
- 1⁄2” Drive Swivel Socket
- 1⁄2” Drive 13 & 15 mm Deep Socket
- 1⁄4” Drive 5/16 Socket
- 1⁄4” Drive 8mm Socket
- 1⁄4” Drive 3 inch Extension
- 12 mm Wrench (Ratchet Wrench)
- New Exhaust Gasket (Optional) BBK Item # 386976 at AM website
Note: This Installation guide is for MAC Ceramic Shorty Headers but can be referenced for any 2011-2014 shorty header installations.
Stock Manifold Removal Procedure:
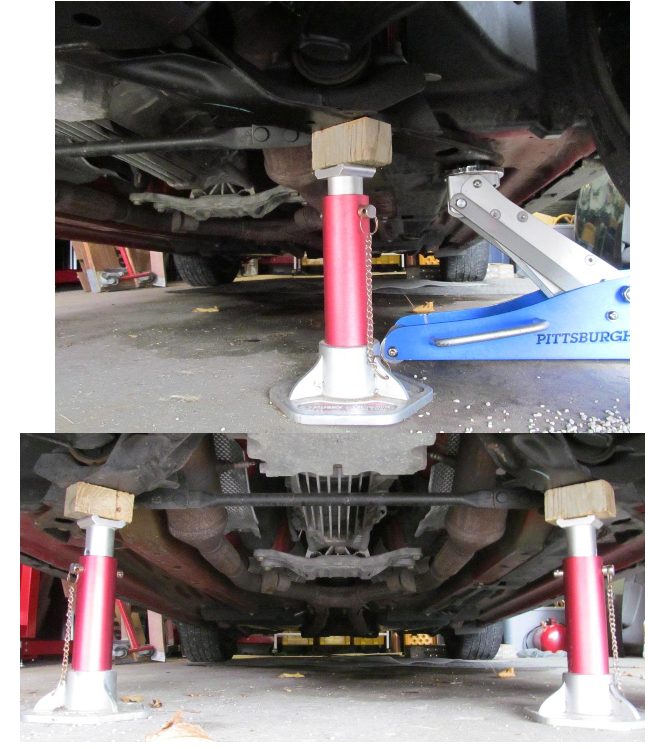
1. First make sure the emergency brake is engaged and the car is in gear.
2. Place stops behind the rear wheels for added safety. Scrap 4x4 wood works great.
3. Open the hood and disconnect the battery (You will be working by the starter). You will need a 5/16” socket and ratchet. *To properly unhook any battery, take the negative lead (black) off first, and the positive lead (red) second.
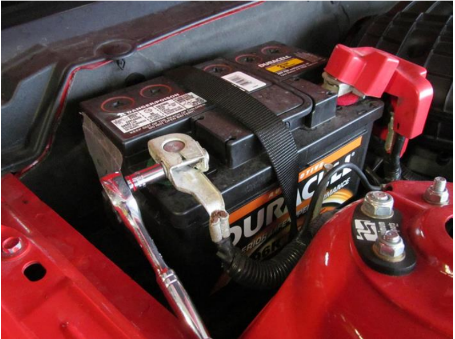
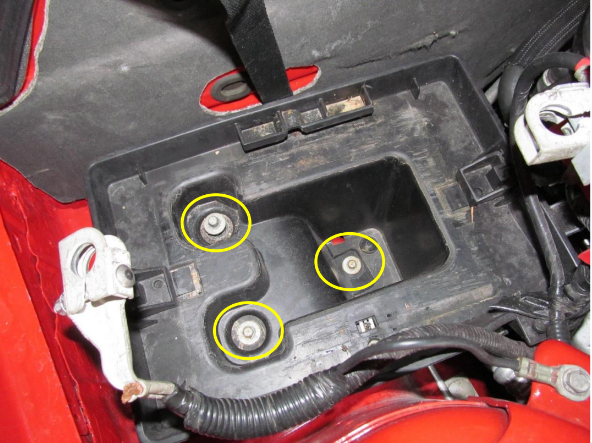
4. (Optional) Remove the battery tray to make room on the passenger side of the vehicle using the 5/16” socket, extension, and 1⁄4” Drive ratchet.
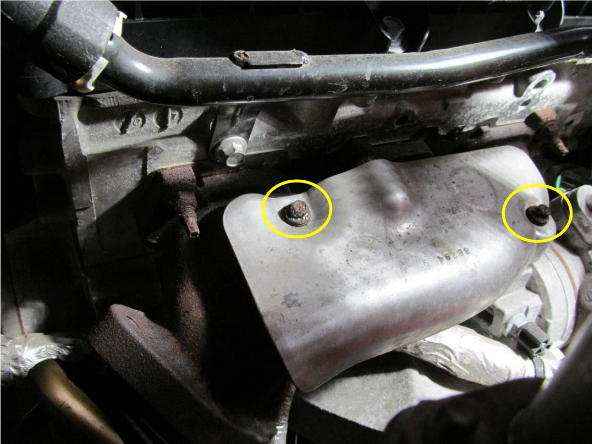
5. Next remove the heat shields on the stock manifolds with the 8mm socket and 1⁄4” Ratchet.
6. Next jack up the car one side at a time in the proper locations and place jack stands to suspend the front of the car. The front of the car is being lifted to access the connector bolts on the stock manifold.
7. Remove the 6 nuts connecting each manifold from the engine block using the 1⁄4” Drive Ratchet, 3 inch extension, and 13mm socket.
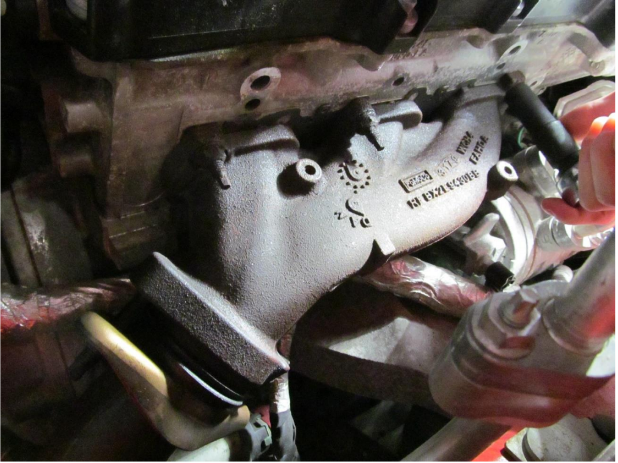
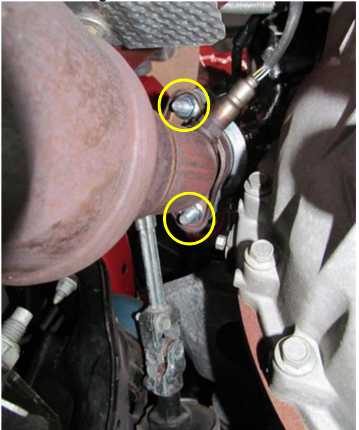
8. From underneath the vehicle use a combination of the 1⁄4” Drive extensions, breaker bar, swivel, and 15mm socket to unhook the manifolds from the rest of the exhaust.
MAC Shorty Header Installation Procedure:
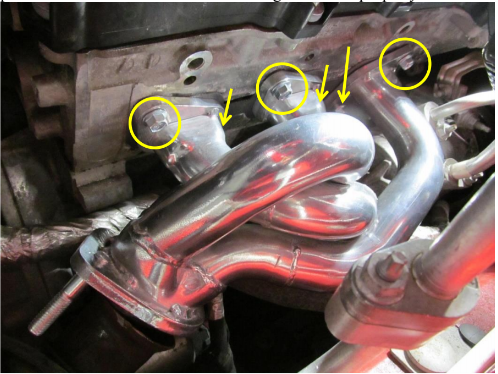
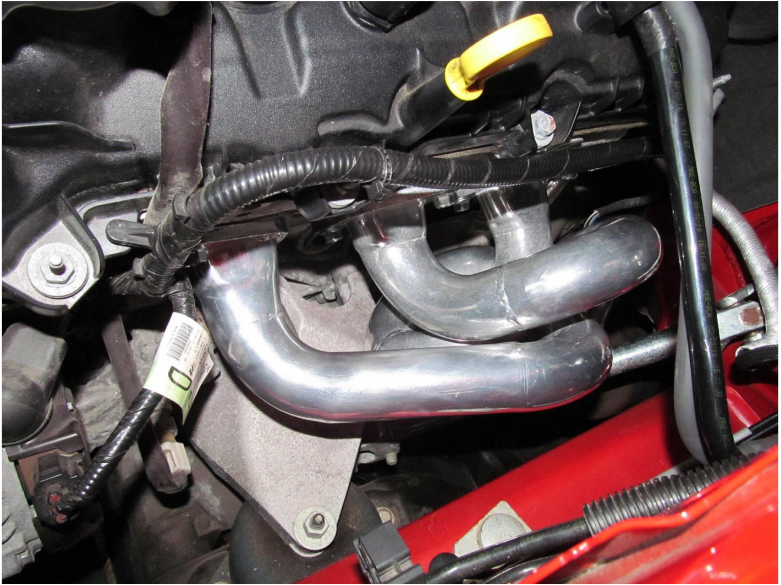
1. Starting with the driver’s side of the engine, hand tighten each bolt to hold on the MAC Shorty Header (Don’t forget the exhaust gasket. Repeat on passenger side.You will not have room for a socket or ratchet so use the 12mm wrench to tighten the nuts (This will be very tedious). Tighten in an even pattern around the header to ensure the gasket seals properly.
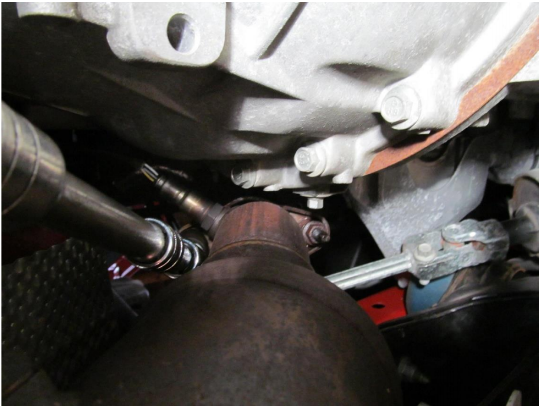
2. Next, from underneath the car connect the rest of the exhaust to the headers using the same combination of 1⁄2” Drive extensions, swivel, and Ratchet with a 17mm deep socket used during removal. Switch between the two bolts to tighten evenly. A torque wrench cannot be used due to the tight space so use the nice and tight method.
3. Check the bolts after 20 miles of driving to ensure they are all still tight.
4. Go enjoy your new MAC Shorty Headers!

Installation Instructions provided by AmericanMuscle Customer
