 FREE 1 to 3-Day Delivery on Orders $149+ Details
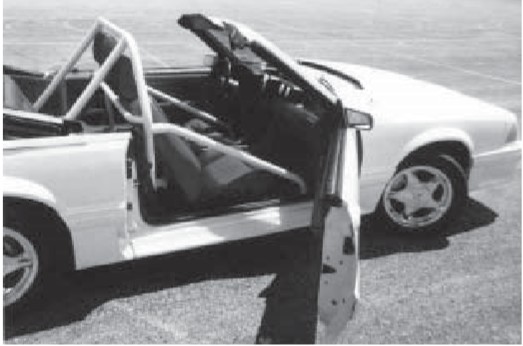
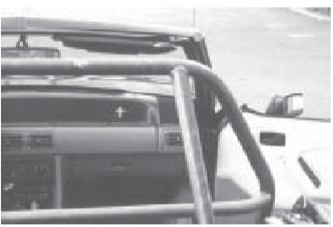
How to Install Maximum Motorsports 4-Point Street Roll Bar (83-93 Convertible) on your Ford Mustang

Shop Parts in this Guide
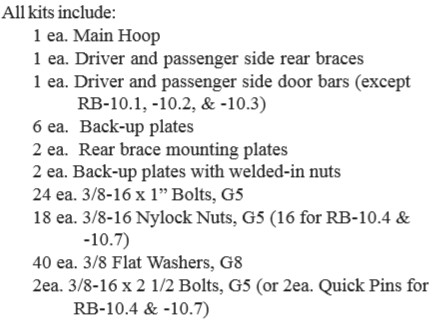
The Maximum Motorsports RB-10.1 to -10.7 Roll Bars are made from 1-3/4" x 0.134" wall DOM tubing. The harness brace, on models so equipped, is 1-1/2" x 0.134" wall DOM. Mounting pads and reinforcing plates are all at least 6" x 6" x 1/8". The versions with removable swing-out door bars allow easy access for daily driven cars.
The rear braces must be welded to the main hoop. Also, on a convertible, four reinforcing plates must be welded into the chassis behind the rear seat. These plate must be added because the convertible chassis is not structurally strong enough at the rear brace mounting points. Only the reinforcing plates are welded to the chassis—the roll bar itself is still installed so that it bolts in and is therefore removable. Have a qualified welder, preferably certified, use either a MIG or TIG welder. Take care to keep warpage to a minimum. Welding must be free of any slag and/or porosity.
NOTE: Due to the required welding for installation, the MM Roll Bars are shipped uncoated. For best results, we suggest that you complete the installation, then remove the roll bar for either painting or powdercoating, and reinstall. That way you will avoid wear and tear on the finish while drilling holes.
NOTE: The MM RB-10.1 to -10.7 Roll Bars are NOT legal for NHRA Competition use. If you plan to drag race your car in sanctioned NHRA or NMRA competition events, please consult with the Maximum Motorsports sales staff to choose one of our NHRA-legal Roll Bar offerings.
NOTE: These instructions cover several different Roll Bars. Some steps may not apply to your installation.
Read all instructions before beginning work. Following instructions in the proper sequence will ensure the best and easiest installation.
Remember to carefully protect the interior and exterior of your car during all grinding and welding operations.
1. Put the top down. Remove the front seats, the rocker trim panel, the kick panel trim forward of the doors, the mounting bolt for each seat belt (on the rocker panel), the rear seats, the plastic trim on each side of the rear seat covering the convertible top mechanism, and the mounting bolts for the shoulder strap of the front seat belts.
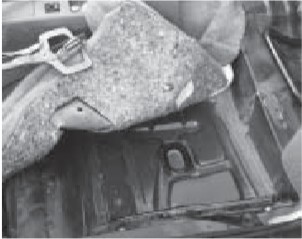
2. Pull up the rear, outer corners of the carpet and pull them towards the center console. TIP: Use some type of clamp or tape to hold the carpet to the seat belts.
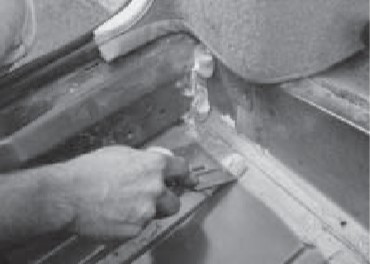
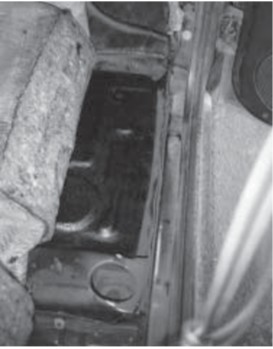
3. Remove excess body seam sealer in the corner where the main hoop mounting pads will rest on the floor pan. TIP: Use a hammer and sharp chisel to remove seam sealer. Use a hammer to flatten down the pinchweld seam. Tip: Use a backup hammer or dolly underneath the floor pan.
4. Clean the paint off of the seam where the backrest frame meets the rear panel. You need to get to bare metal because this seam requires welding.
5. The reinforcing plates need to be welded to the panel behind the backrest of the rear seat.
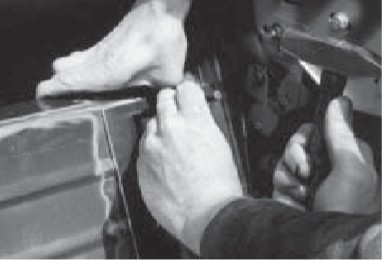
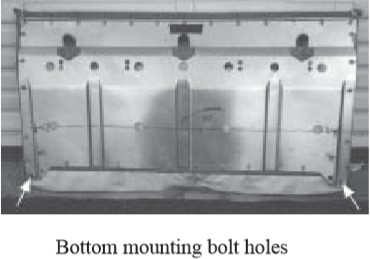
6. Hold plate in position as shown in photo. Use a felt pen to mark the outline of the plate on the chassis. The plate is flush with the top of the rear panel, and outboard as far as possible, to the frame of the seat backrest.
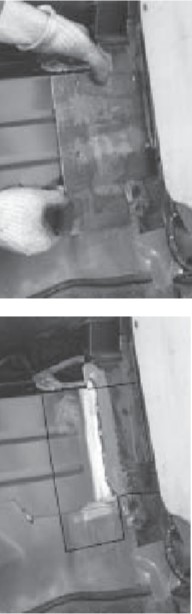
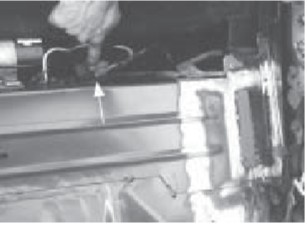
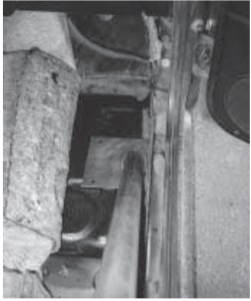
7. Clean off the paint from the chassis where the edges of the reinforcing plates will be welded in. There is an electrical plug (shown in photo) attached to the chassis. This plug must be moved to allow installation of the rear support plate.
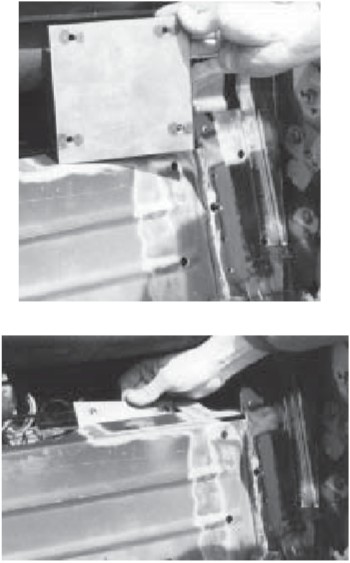
8. Place the rear support plates in position. On cars with rear shoulder harnesses the plate will touch the gusset surrounding the retractor mechanism. On cars without shoulder harnesses the outboard edge of the rear support plate should be 1 inch outboard of the inner edge of the reinforcing plate. (See photo of reinforcing plate, step 6)
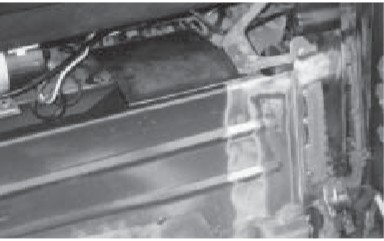
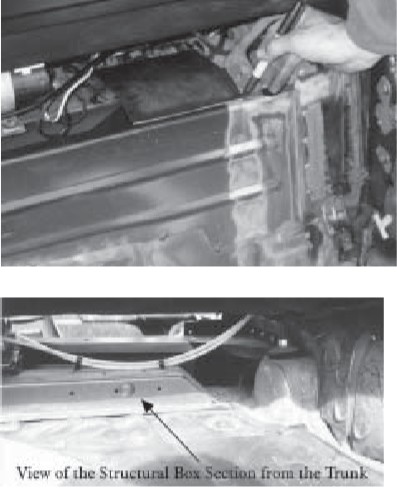
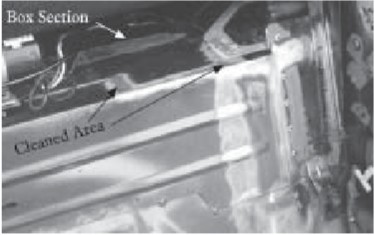
9. Using a felt tipped pen, mark the edges of the rear support plate. This plate ties the rear panel to the structural box section in the trunk area.
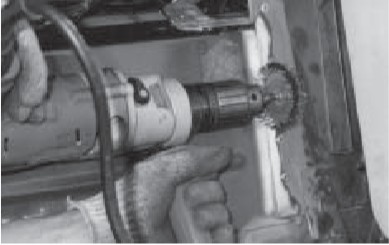
10. Sand off the paint for welding. Be sure to sand both the rear panel and the structural box section.
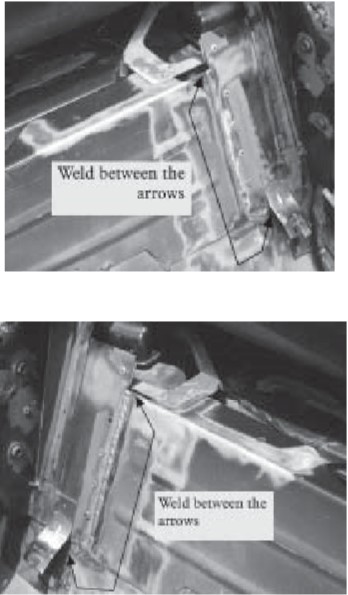
11. Weld the backrest frame to the rear panel on both the passenger and drivers’ sides of the car. After welding grind the weld smooth to the frame.
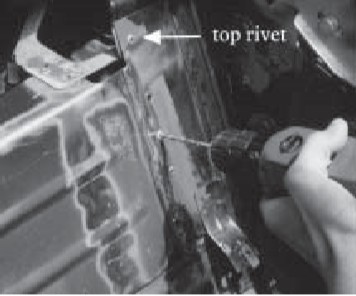
12. Drill out the pop rivets that attach the backrest frame to the rear panel. Leave the top-most rivet, as it will not interfere with the weld-in reinforcement plates.
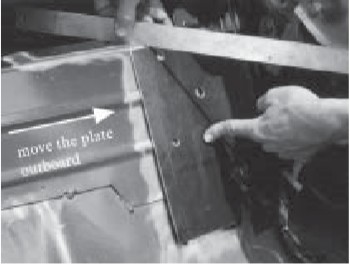
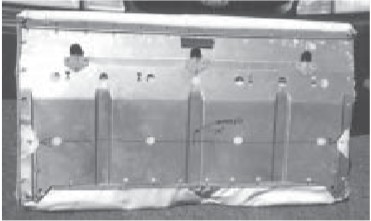
13. Hold the reinforcing plates in position. Use a straight edge to align the plate flush with the top of the rear panel. Move the plate outboard until it touches the backrest frame. Photo shows drivers’ side.
14. Mark each of the 5 holes for drilling through the rear panel.
15. Remove the rear shoulder harness retracting mechanism so that you don’t accidentally drill into it. In addition, the shoulder harness needs to be removed to slide in the backing plate shown in step 16.
16. After drilling and deburring the holes, slide the rear back-up plate behind the rear panel. Orient it as shown in the photo so the holes will align with the holes drilled in the rear panel.
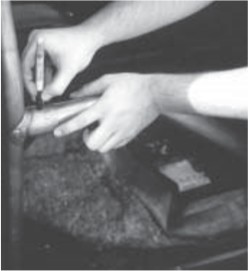
17. Bolt the reinforcing plate to the back-up plate. Use four of the 3/8” x 1” bolts with flat washers. Torque the bolts to 33 ft-lb.

18. Using the center hole in the reinforcing plate, plug weld the back-up plate and reinforcing plate together. This holds the back-up plate in position when the bolts are removed. Weld the reinforcing plates and rear support plates into position. Tip: be careful to protect the seatbelts from welding heat and sparks. Let the plates cool before removing the bolts.
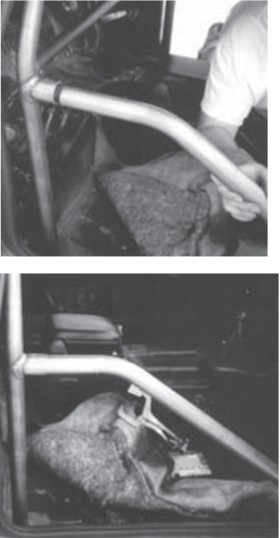
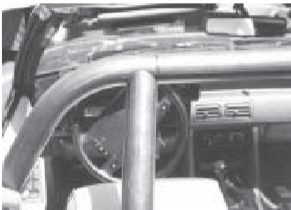
19. Place the main hoop into position. Slide it rearwards so the mounting pads are in the correct position. The main hoop mounting pads should be centered side to side and flush with the rear seat bulkhead.
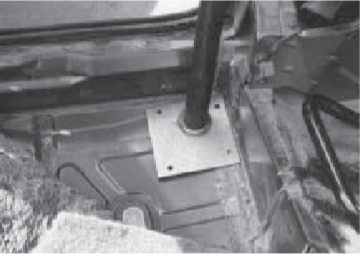
20. Mark and drill the holes for the main hoop. Check the bottom side of the car before drilling (fuel lines may need to be moved slightly).
21. Place each back-up plate in position and put the bolts into place with flat washers under the bolts and nuts. Tip: Use a floor jack to compress the floor upwards enough to get the nuts started onto the bolts. Leave the bolts loose, they will be torqued in step number 27.
22. Pull up the carpet along the rocker panel and forward of the doors for the installation of the door bars. Remove sound deadening from the mounting area.
23. Slide the door bars into their mounting sockets on the main hoop, making sure that they are fully seated. Swing-out door bars: insert the door bar tube into the floor socket, then pin the door bar into the tabs on the main hoop.
24. The door bar mounting pads should be flush with the rocker panel. Swing-out door bars: the edge of the mounting plate which the socket tube is closest to, is the edge to place next to the rocker panel.
25. Mark the door bars at the main hoop socket for their mounting bolts. Remove and drill 3/8” holes for the attachment bolts.
26. Place the door bars into position and insert the 2 1/2” bolts at the main hoop.
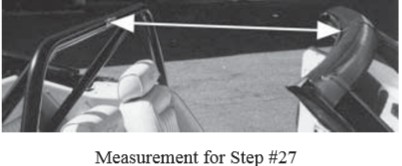
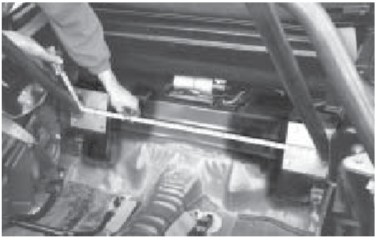
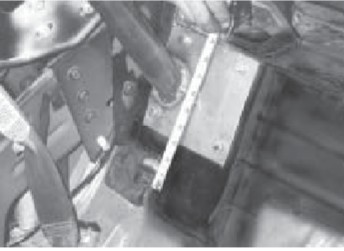
27. Measure the distance from the front of the main hoop at its’ center to the center, top, rear of the windshield frame (see illustration at the top of the next column). This distance should be about 27 7/8” plus or minus 1/2”. Mark and drill the holes for the door bar mounting plates. Place the back-up plates into position, and loosely attach the bolts. Tighten in the following order. Torque the bolts on the main hoop mounting plates to 33 ft-lb. Torque the bolts for the door bar mounting plates to 33 ft-lb. Torque the bolts holding the door bars to the main hoop to 33 ft-lb.
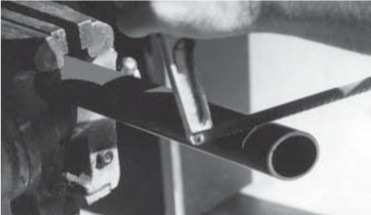
28. There are some major production tolerances in the construction of the convertibles. The rear braces must be trimmed to length to fit your car. They are prenotched to mate to the main hoop. The angled cut on the bottom (rearward) end is at the correct angle. When trimming to the correct length for you car, cut the tube at this same angle. Note that the tubes are specific to the P and D sides.
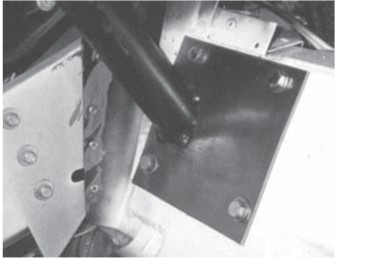
29. Bolt the rear brace mounting plates to the welded-in reinforcing plates. Torque the bolts to 33 ft-lb.
30. Measure the distance between the main hoop and the center of the rear brace mounting plates. Cut the tube parallel to the existing diagonal cut. Tip: deliberately cut the tube too long - ease up on the correct length to ensure that you don’t cut the tube too short.
31. See photos (steps 33 & 34) for placement of the rear braces on the main hoop. The rear braces should be centered top to bottom and located about 1/4” from the outside edge of the rear mounting plates. Tack weld the rear braces to the rear mounting plates in at least four places.
32. Unbolt the rear braces from the car. Fully weld the tube to the mounting plate.
33. Bolt the rear braces back into the car. Torque the bolts to 33 ft/lb. Position the rear brace tubes to the main hoop. Tack weld both tubes in position.
34. Fully weld the rear braces to the main hoop. Let the welds cool.
35. Check your final fit before painting or powder coating.
36. Close the doors and check for armrest clearance. The door bars may press lightly against the armrests. TIP: If the door bars contact the arm rest, you can heat up the arm rest with a heat gun and close the door. The arm rest will mold to match the shape of the door bar. You may have to repeat this procedure several times. Be careful not to apply too much heat.
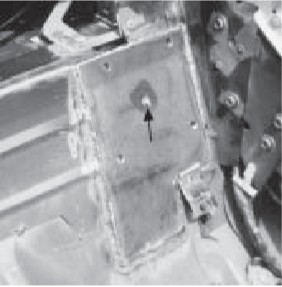
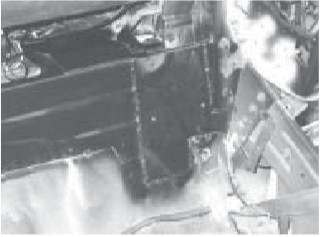
37. Remove the roll bar assembly. Paint the area shown below to prevent rusting.
38. After the paint is dry, reinstall the rear shoulder harness reel. Reinstall the side trim covering the top mechanism.
39. At this point you can have your roll bar painted or powdercoated. Reinstall the rear interior panels.
40. Reinstall your roll bar in the car. For ease of threading the bolts, start all of the rear support bolts first. Place the remainder of the bolts into position before fully tightening anything. Remember to use flat washers under the heads of all bolts and nuts. Torque all 24 bolts to 33 ft-lb.
41. To install the backrest for the rear seat you will need to trim the metal backing panel to clear the roll bar rear support tubes.
42. Measure the distance between the inside of the two rear supports.
43. On the chassis, measure up from the bottom mounting hole for the backrest to the center of the rear support tube.
44. Find and mark the center of the backrest. From the center mark, measure outward and mark the location of the inner edge of the two rear support tubes. The distance from the seat center to the tube edge is 1/2 of the distance you measured in step 42. Measure and mark upwards from the bottom mounting holes - the distance you measured in step 43.
45. With tin snips make a semicircular cut in the sheetmetal to provide clearance for the rear support tubes.

46. The upholstery will easily push inboard to allow room for the tubes.
47. To install the seat back in the car, place one side into position, with the opposite side pulled forward, towards the front of the car. Protect your finished roll bar with a towel or plastic bag. Push the forward side rearwards, aligning the cut-out in the backrest with the tube. The upholstery will give and allow the backrest to go back into its’ correct position.
48. Trim the carpet to accommodate the main hoop and door bars.
49. Re-install the carpet, seats, etc.
NOTE: Some kits may include additional hardware not required for the installation of your particular roll bar.
