 FREE 1 to 3-Day Delivery on Orders $149+ Details
How to Install Maximum Motorsports Bumpstops (05-14 All) on your Ford Mustang

Shop Parts in this Guide
Congratulations on purchasing Maximum Motorsports’ high-performance cellular foam short bumpstops for 2005-14 Mustang rear axle. These are designed to increase bump travel for lowered S197 Mustangs.
MM’s cellular foam bumpstops feature a rapid increase in rate as the suspension bottoms out, cushioning the impact at the end of bump travel before damaging metal-on-metal contact can happen.
The short height increases suspension travel on lowered Mustangs, which along with progressive cushioning improves both ride quality and handling ability.
Why is handling improved when bump travel is increased? Lowering a car reduces the available travel when the suspension compresses. If the suspension bottoms hard onto a bumpstop, the effect is the same as if the spring rate suddenly skyrocketed. That causes a loss of grip at whichever corner of the car bottomed out.
Increasing bump travel lessens the likelihood of the suspension bottoming out. That improves handling, and obviously also improves ride quality.
Read all instructions before beginning work. Following instructions in the proper sequence will ensure the best and easiest installation.
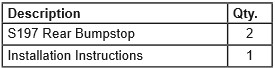
This Kit Contains
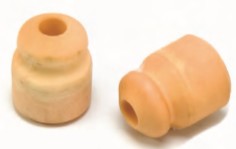
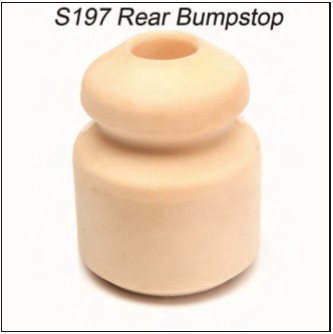
Component Identification
Installation
1. Support the rear of the vehicle on jack stands.
2. Remove the rear wheels from the vehicle.
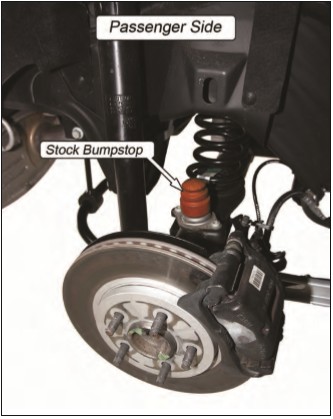
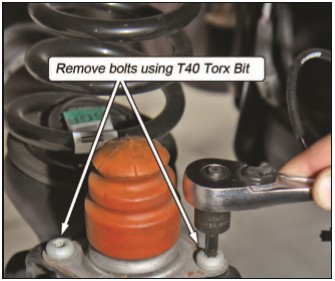
3. Starting on the rear passenger side, use a T40 Torx bit to remove the stock rear bumpstop and attached sheet metal bracket from the axle.
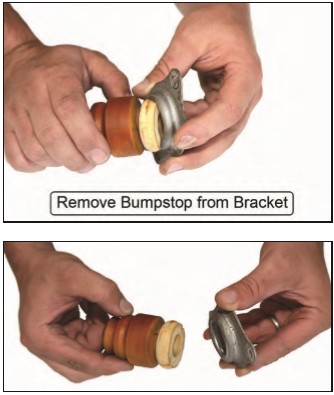
4. Remove the stock bumpstop from the sheet metal bracket by firmly pulling the bumpstop at an angle as shown below.
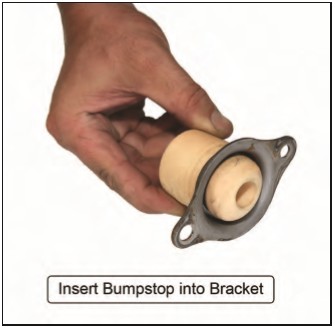
5. Take the provided MM bumpstop and force it into the original sheet metal bracket, as shown.
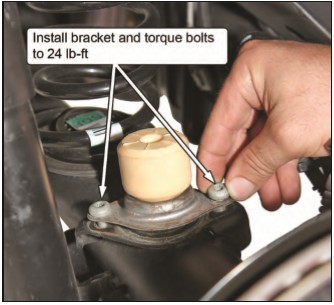
6. Reattach the sheet metal bracket/bumpstop assembly onto the axle. Use the existing Torx bolts and torque them to 24 lb-ft.
7. Repeat Steps 3-6 for the driver side wheels of the vehicle.
8. Reinstall the rear wheels.
9. Safely lower the vehicle to the ground.
10. Test drive the vehicle and enjoy.
