 FREE 1 to 3-Day Delivery on Orders $149+ Details
How to install a Maximum Motorsports High Performance Clutch Cable on your Mustang
Installation Time
2 hours
Tools Required
- 3/8" socket or wrench
- 5/16" socket and extension
- 3/16" socket and extension
- Socket wrench
- Needle-nose pliers
- Floor jack and 2 jack stands
Shop Parts in this Guide
Read all instructions before beginning work. Following instructions in the proper sequence will ensure the best and easiest installation.
These instructions detail the replacement of a stock clutch cable with the MMCL-11 Universal Clutch Cable. If you are replacing an aftermarket cable and quadrant some steps may not apply.
The latest version, high quality COLOR instructions are available online at www.maximummotorsports.com. Check the revision date at the bottom of these installation instructions and compare it to the copy available online.
Recommended
• Automotive lift
• Masking tape
• 13mm socket (only if removing the seat)
• 15mm socket (only if removing the seat)
Preparation
• The vehicle must be safely supported off of the ground using either jack stands or an automotive lift.
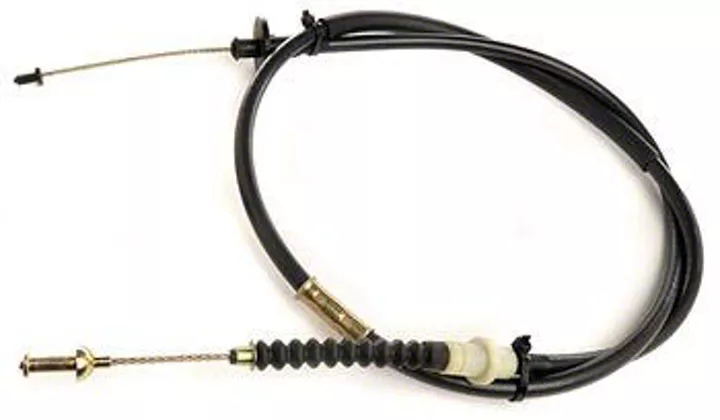
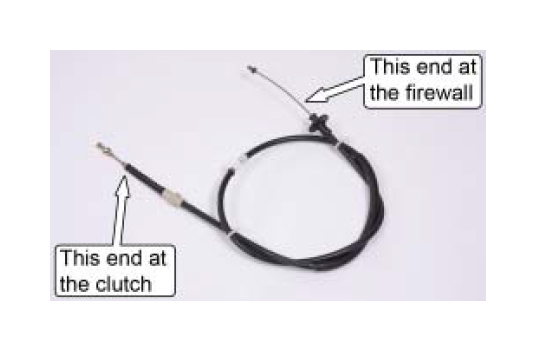
• Unpack the clutch cable. Identified below is the cable:
Removal of Stock Cable
1. Slide the driver’s seat to its rearmost position and recline it as much as possible so that you are able to reach the underside of the dash.
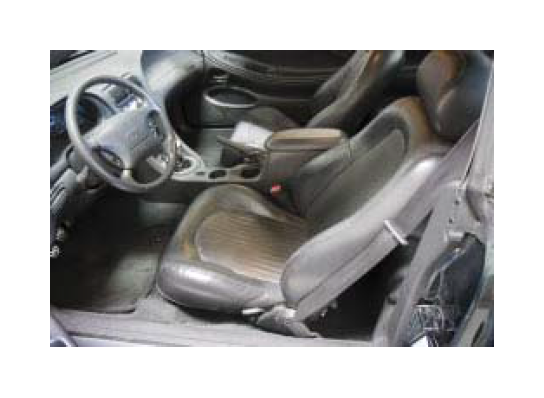
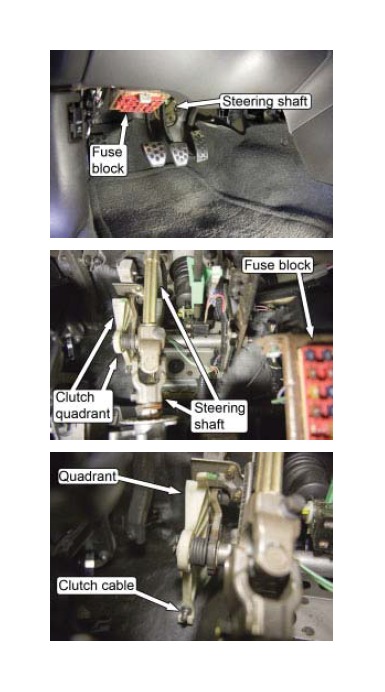
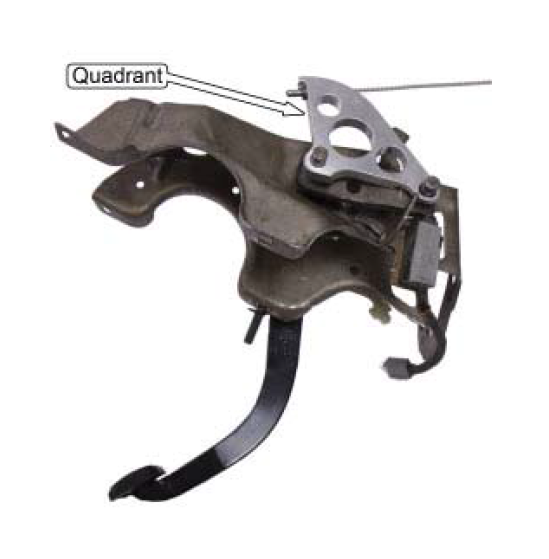
2. Position yourself so that you can reach both the clutch pedal and the quadrant (the interface between the pedal and the cable, located directly above the throttle pedal near the center of the vehicle.)
NOTE: Removing the driver’s seat will give you more room but is not required in most cases. If you do remove the driver’s seat, the front seat mounting studs can be removed from the floorpan of the car by double nutting and unscrewing them.
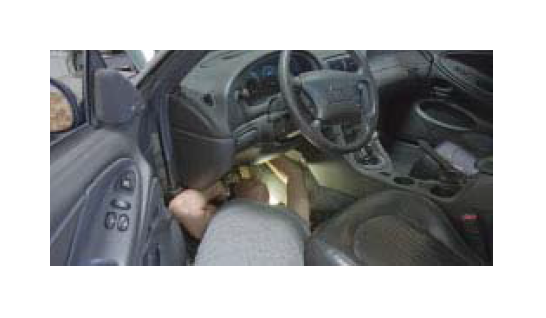
3. Lift and hold the clutch pedal in its most upright position (pull towards the rear of the vehicle until you feel a gentle click.) This will release the mechanism that holds the quadrant in place. Reach up to the quadrant and rotate it towards the front of the vehicle. Hold it in this position. Release the pedal and use your free hand to unhook the inner cable from the quadrant. Rotate the quadrant forward to release the tension on the inner cable and remove it.
NOTE: The second and third photos below were taken from underneath the dash. For reference, the firewall is located at the top of each image.
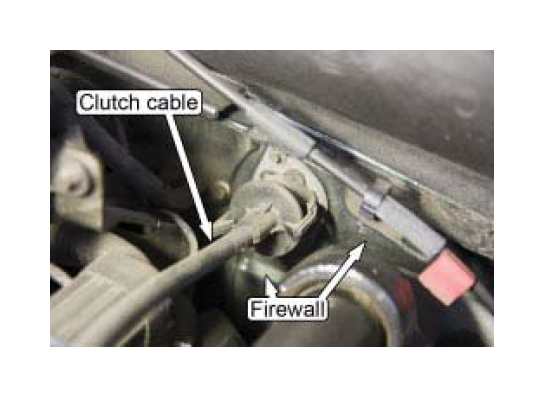
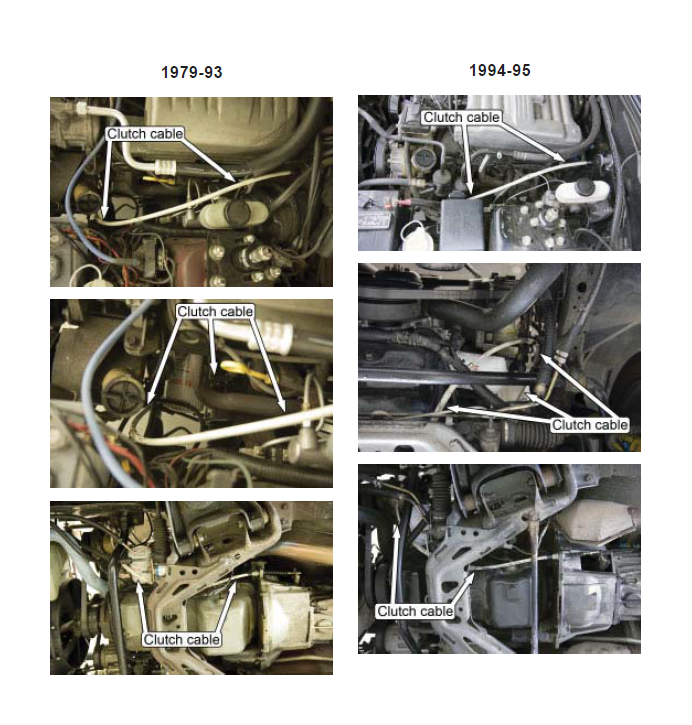
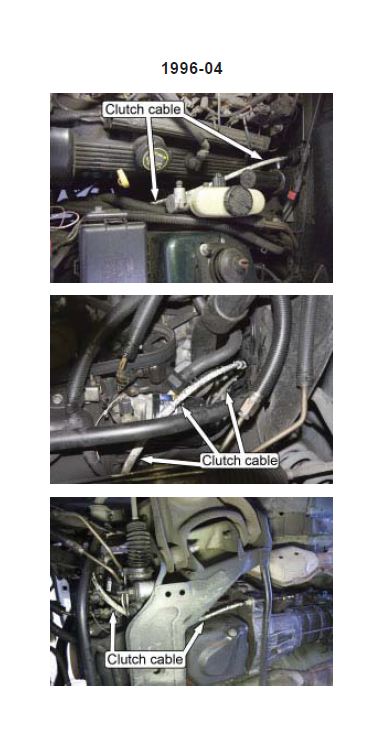
4. Open the hood and locate the clutch cable. It passes through the firewall high up on the driver’s side, between the valve cover and the master cylinder. Remove the hex head screws that retain the cable with the 3/16" socket and extension. NOTE: There is only one hex head screw retaining the cable to the firewall on the 1979-95 cars. The 1996-04 cars have two screws (as pictured below).4. Open the hood and locate the clutch cable. It passes through the firewall high up on the driver’s side, between the valve cover and the master cylinder. Remove the hex head screws that retain the cable with the 3/16" socket and extension.
NOTE: There is only one hex head screw retaining the cable to the firewall on the 1979-95 cars. The 1996-04 cars have two screws (as pictured below).
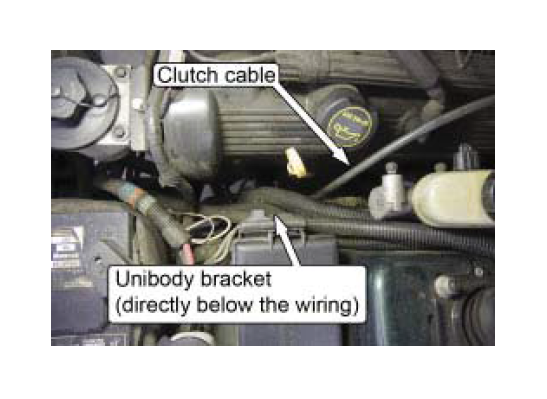
5. Remove the hex head bolt and bracket holding the cable to the unibody with the 5/16" socket and extension.
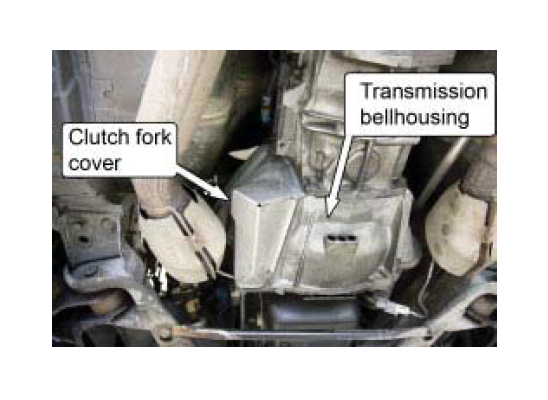
6. Remove the dust cover for the clutch fork from the driver side of the transmission bell housing.
7. Remove the C-clip from the cable housing using the needle-nose pliers.
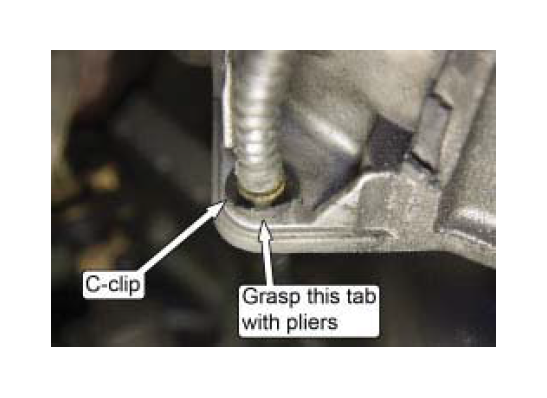
8. Unhook the inner cable from the clutch fork by pulling the end of the inner cable out of the smaller hole, then sliding it towards the transmission and out of the larger hole. Then carefully remove the cable from the vehicle by pulling it out from either the top or bottom of the car. Gently free the cable if it gets stuck or entangled. Do not attempt to force it out, as this can damage other components.
Installation of New Cable
9. Route the cable from the firewall to the clutch fork as shown. It should travel over the master cylinder, down, around, and in front of the oil filter, then towards the clutch fork and transmission along the side of the oil pan. The bracket on the unibody that was removed in Step 5 will NOT be reattached. Routing the cable to the side of the car and through the bracket may put unnecessary strain on it and will misalign it at both ends. Ensure that the cable does not interfere with any other wiring or tubing. Avoid routing the cable near the exhaust manifold, as the heat exposure can cause damage over time. A properly routed cable will be in an approximate Ushape with one large continuous bend.
NOTE: To make it easier to see, our cable housing was painted white for the following photos.
Examples of proper routing
10. Feed the end of the new cable through the bellhousing and reinstall the C-clip removed in Step 7 onto the cable housing. Slide the end of the inner cable into the clutch fork, making sure that the end of the cable is properly seated at the very end of the clutch fork. To keep the inner cable in place during the remainder of the installation, wrap two turns of masking tape around the clutch fork just inboard of the inner cable.
NOTE: If using an aftermarket bellhousing, the thickness of this flange on the bellhousing may be less than stock. If this is the case, washers with the correct inner diameter and thickness will need to be placed over the end of the cable housing to take up the extra clearance. Once the C-clip is reinstalled, there should be very little fore and aft movement between the cable housing and the bellhousing.

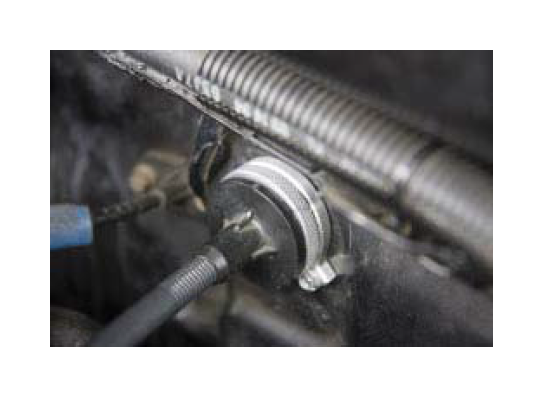
11. Under the hood, feed the cable through the MMCL-3 Firewall Adjuster (if using another aftermarket firewall adjuster, consult their installation instructions). Ensure that the firewall adjuster is screwed all the way in (close to the firewall) before proceeding.
12. Install the MMCL-7 Clutch Quadrant following its instructions (if using another aftermarket clutch quadrant, consult their installation instructions).
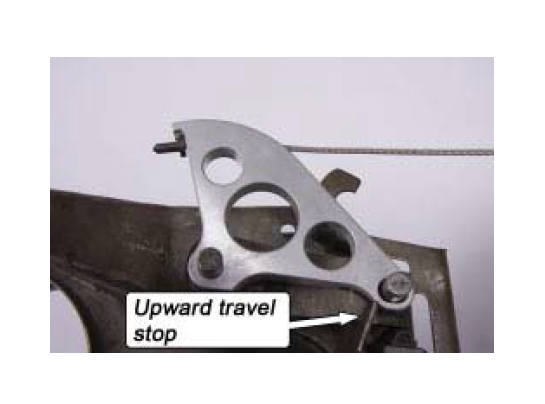
13. Position yourself under the dash again. Lift and hold the clutch pedal in its most upright position (push towards the rear of the vehicle.) You should see the loose end of the inner cable poking through the firewall. Reach up and guide the end of the inner cable over the top of the quadrant and into the hook. The photos below show a clutch pedal assembly that has been removed from the car and the interface between the quadrant and a properly installed inner cable.
14. Underneath the vehicle, ensure that the inner cable is still attached to the clutch fork. If it has come undone, go back and unhook the cable from the quadrant, then reattach it at the clutch fork and complete Step 13 again.
15. Extend the firewall adjuster until there is some tension in the cable. Test the pedal operation. If it feels too stiff, adjust 5-10 turns clockwise (thread the adjuster into the firewall) to reduce the tension and lower the point of engagement. If it feels too loose, adjust 5-10 turns counterclockwise (thread the adjuster out of the firewall) to increase the tension and raise the point of engagement. Alternate between adjusting the tension and testing the pedal until it operates smoothly and feels normal. See Step 17 for notes about the ideal adjustment.
• If the pedal feels extremely stiff, check that the cable has been properly routed and that it does not have any tight bends or interference with the vehicle.
• If the pedal drops to the floor with no resistance, check that the inner cable is still connected to the quadrant and clutch fork.
NOTE: If you removed the driver’s seat, it can now be reinstalled. 16. Remove the masking tape from the clutch fork. Reinstall the clutch fork dust cover and lower the vehicle back to the ground.
17. Place your hand on the clutch pedal pad and press down lightly and release. You will hear a slight clink when the pedal is released. This is the sound of the clutch quadrant contacting its upwards stop. Rotate the firewall adjuster counter-clockwise to increase the tension on the clutch cable some. Press down on the clutch pedal pad with 3-5 lb of force. You should still hear a slight clink and feel the quadrant come on and off the stop. If the pedal didn’t come off of the stop with 3-5 lb of force, decrease the cable tension some with the firewall adjuster. Repeat this process until the clutch pedal just comes off of the stop with 3-5 lb of force.
Remember to periodically readjust the clutch cable tension as the clutch wears. This is very important. As the clutch friction disc wears, the clutch cable will become tighter, engaging the clutch more and more. If the cable tension is not reduced as the clutch wears, the clutch will eventually start slipping, which leads to greater wear, more cable tension and even faster wear.
• If the point of engagement is too high (too far from the floor): it is likely that (even with the pedal released), the clutch is not fully engaged. This will cause clutch slippage, resulting in dramatically increased wear of the disc and heat damage to the flywheel and pressure plate.
• If the point of engagement is too low (below the point where the pedal hits the floor): it is likely that you will not be able to fully disengage the clutch. This will damage the transmission and make it more difficult or impossible to change gear.

