 FREE 1 to 3-Day Delivery on Orders $149+ Details
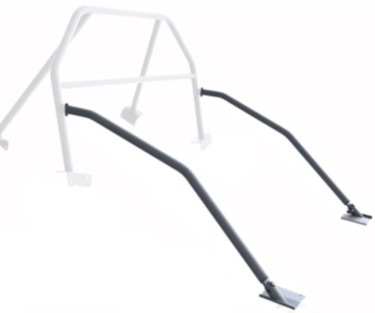
How to Install Maximum Motorsports Easy Removable Door Bars Field Install Kit (05-14 Coupe) on your Ford Mustang
Installation Time
2 hours
Tools Required
- Standard assortment of hand tools
- 8mm socket or wrench
- 10mm deep socket
- 13mm wrench and socket
- 15mm wrench and socket
- 9/16" wrench and socket
- 3/4” socket
- Drill
- 7/16" drill bit (more than one may be useful)
- Floor jack and 4 jack stands
- MIG or TIG Welder
- Center punch
- 1/8" pilot drill

Shop Parts in this Guide
Read all instructions before beginning work. Following instructions in the proper sequence will ensure the best and easiest installation.
The latest version, high quality COLOR instructions are available online at www.maximummotorsports.com
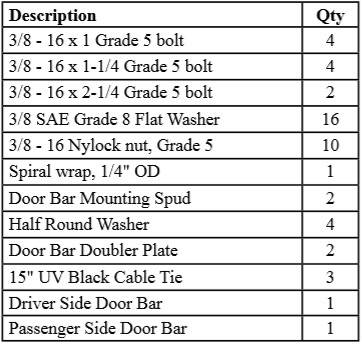
This Kit Contains
Preparation
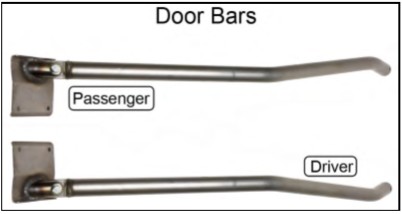
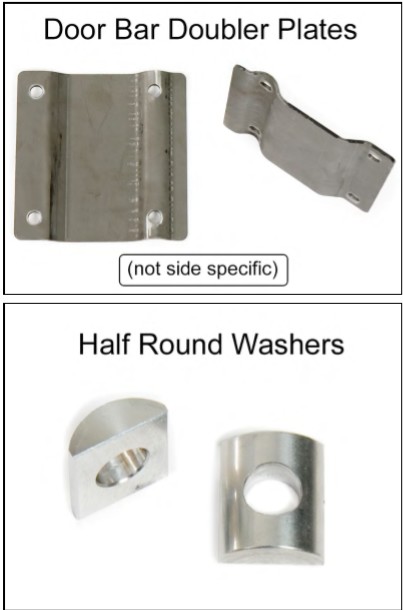
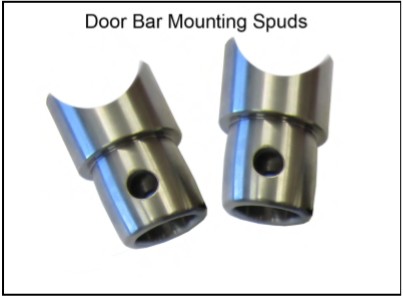
• Unpack the door bars and remove the supplied hardware kit. Verify that the items in the hardware list at the end of these instructions are present. Identified below are the main components of the kit.
• The vehicle must be safely supported on jack stands.
Interior Removal/Preparation
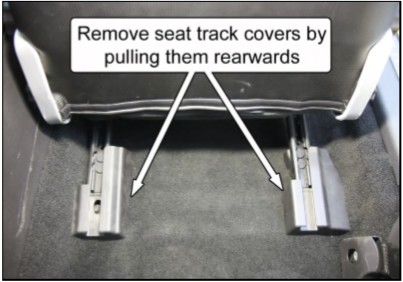
1. If currently installed, remove the front seats. Slide the seats forward to remove the two seat track covers.
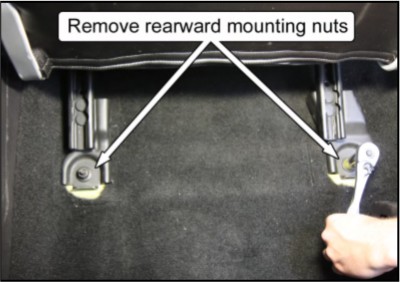
2. Next, remove the two rear hex nuts using a 15mm socket.
3. Slide the seats all the way back to remove the two front hex bolts using a 13mm socket.

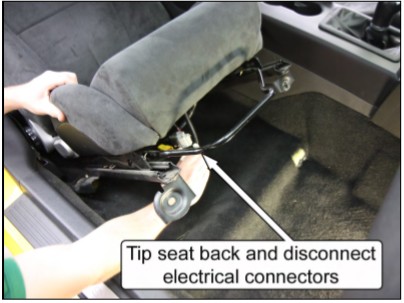
4. Tip the seat back, to disconnect the wiring harness connectors for the air bag module and seat. Carefully pull the seats out of the car and place aside.
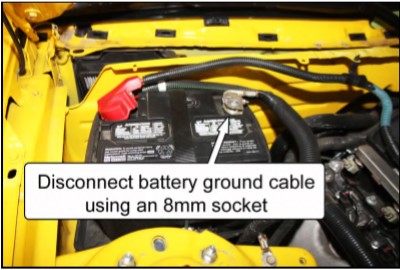
5. Disconnect the battery ground cable by using an 8mm socket.
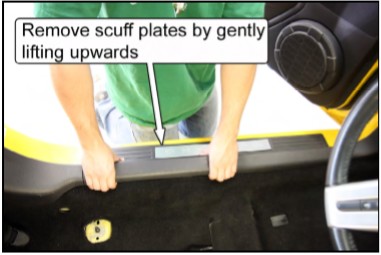
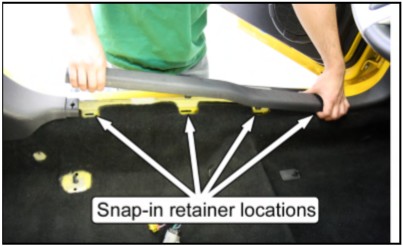
6. Remove the door scuff plates. Pull up at the ends and middle of the plates to disengage the snap-in retainers.
NOTE: Some scuff plates may have an electrical connection to light up the nameplate. Uplug the connector if present.
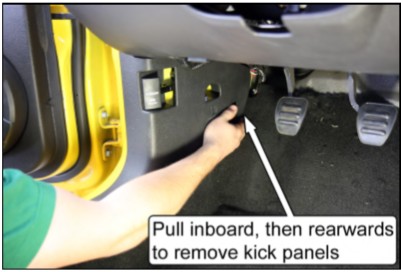
7. Remove both front plastic kick panels. Pull the portion closest to the firewall inboard to disengage the push-pin retainer, and then pull the panels rearward.
NOTE: The passenger side panel may have an alarm switch connected to it. Be sure to remove the switch before pulling the panel out of the vehicle.
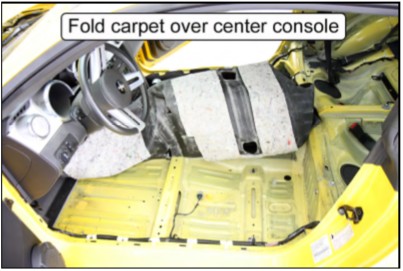
8. Pull the driver and passenger sides of the carpet up and fold them over the center console to protect it during the remaining installation. Use one of the provided zip-ties to hold the two halves of the carpet together.
Door Bar Positioning
9. Slide the Door Bar Spuds into the Door Bars. Use two of the provided 3/8”-16 x 2 ¼” long bolts and 3/8”-16 Nylock nuts to loosely secure the items together. Make sure the longer notched leg is oriented at the top.
10. Using a tape measure, place a mark on the Main Hoop Legs 13.75” up from the Main Hoop Mounting Pads. The measurement is taken at the center of the leg.
11. Starting on the driver side, place the door bar into position with the Door Bar Spud resting on the Main Hoop and the Door Bar Mounting Pad resting on the floorpan, against the rocker panel. The top of the Door Bar Spud should be flush with the mark made on the Main Hoop Leg in the previous step.
12. Use a Vice-Grip or welding magnet to hold the door bar in positon on the Main Hoop. NOTE: Make sure the door can still be closed.
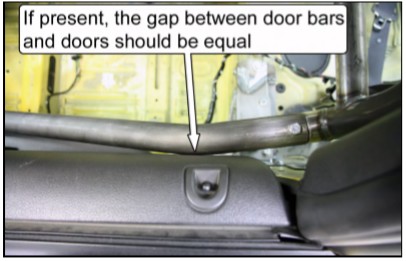
13. Close the door and check that there is no major interference between the door panel and the outside of the door bar. Slight contact is expected.
NOTE: Make sure to double check that the Door Bar Mounting Pad is touching the rocker panel and resting flat on the floor once the door has been closed.
14. Tack weld the Door Bar Spuds in position.
15. Remove the Door Bars from the vehicle.
16. Unbolt the Roll Bar and remove it from the vehicle.
Welding the Door Bar Spud
17. Have a certified/professional welder weld the Door Bar Spud to the Main Hoop. NHRA rules require that “welding must be done by approved MIG wire feed or approved TIG heliarc process. Welding must be free of slag and porosity. Any grinding of welds is prohibited.”
Painting the Roll Bar
18. We recommend painting or powder coating the roll bar and its components to protect them from rust. Do NOT grind on any of the welds when prepping the roll bar for paint.
NOTE: If the barrel shaped portion of the Door Bar Mounting Spuds are painted or powder coated, the INNER DIAMETER OF THE DOOR BAR MAY NEED TO BE ENLARGED slightly so that the Door Bar may slide over the spud. Use a round file or sandpaper to help enlarge the inner diameter.
Roll Bar Installation
19. Follow the included Mm5RB-24 instructions to complete the installation starting at Step 25: Main Hoop Installation.
NOTE: Many of the steps will have previously been done during the original installation of the Roll Bar. Skip the steps that have be done and move on to the next step.
