FREE 1 to 3-Day Delivery on Orders $149+ Details
How to Install Maximum Motorsports SN95 Caliper Stainless Steel Brake Hose Kit - Front (79-93 All) on your Ford Mustang

Shop Parts in this Guide
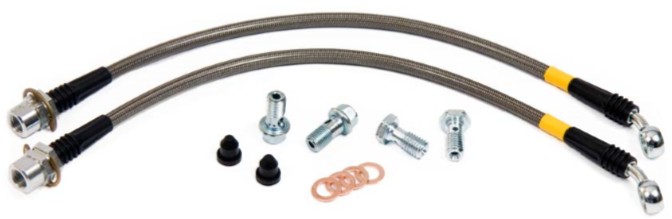
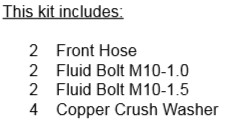
Thank you for purchasing Maximum Motorsports’ Stainless Steel Brake Hoses. MM brake hoses are designed to maximize the braking performance of your car. You will find that the following features make these hoses the best on the market:
• A unique design allows the hose to swivel during installation. This allows the banjo fitting at the caliper to be perfectly aligned, without twisting the hose or modifying the chassis mounting bracket.
• Banjo fittings are machined specifically for 10mm fluid bolts. These kits do not use a universal banjo fitting for all applications.
• Each individual hose is pressure tested.
• A brake fluid resistant, clear urethane covering is added to help protect the steel braid.
• New fluid bolts and crush washers are included.
• DOT approved.
These brake hoses are designed to fit 1987-93 5.0L frame rail mounting brackets. If installing these lines on a 1979-86 or a 1987-93 4-cylinder vehicle, the frame rail mounting brackets will need to modified (Step 5).
Read all instructions before beginning work. Following instructions in the proper sequence will ensure the best and easiest installation.
Warnings
Do NOT torque the provided brake fluid bolts to the higher specification of OEM brake fluid bolts. Only torque the provided fluid bolts to 14 ft-lbs, or they WILL break.
Do NOT use an OEM brake fluid bolt:
• The banjo fitting on the end of the MM brake hose is thinner than the fitting on an OEM brake hose. The holes in the side of an OEM fluid bolt may be blocked by the banjo fitting, reducing the flow of brake fluid.
• When an OEM fluid bolt is used with the MM brake hose, the extra length will protrude further into the caliper. The end of the OEM fluid bolt can interfere with the retraction of the piston. This may become evident only when attempting to install new brake pads.
Installation
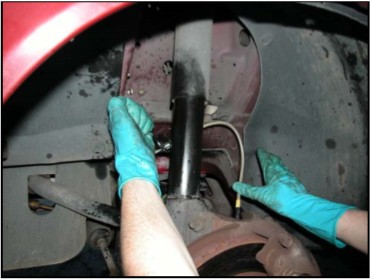
1. Jack up car and support it securely on jack stands under the k-member or the subframe connectors.
2. Remove the front wheels.
3. Completely de-grease the brake caliper and chassis where the factory hoses attach. Dirt and grime will contaminate the brake system, and if allowed on the sealing surfaces of the new hoses, will cause leaks.
4. Remove factory front brake hose assemblies. Use a flare-nut wrench to avoid rounding off the fittings.
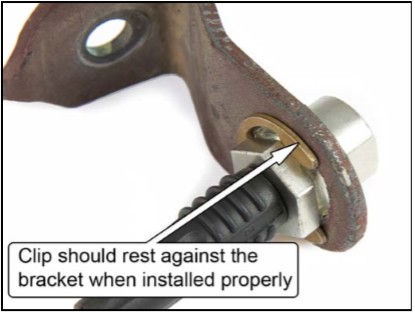
5. Insert the MM hose fitting through the chassis bracket until the ‘E clip’ seats against the bracket. The flat hose end has both a flat and a notch that align the hose end in the bracket.
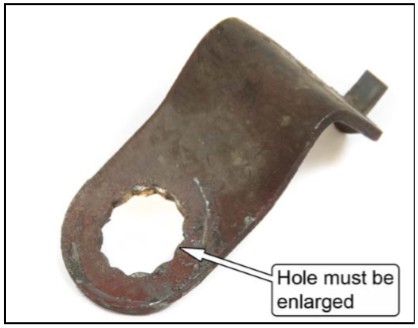
NOTE: For 1979-86 and 1987-93 4 cylinder vehicles, the hole in the bracket must be enlarged to accommodate the brake hose.
6. Thread the flare-nut of the chassis hard line into the MM hose end, but leave the flare-nut loose so that the MM hose can swivel.
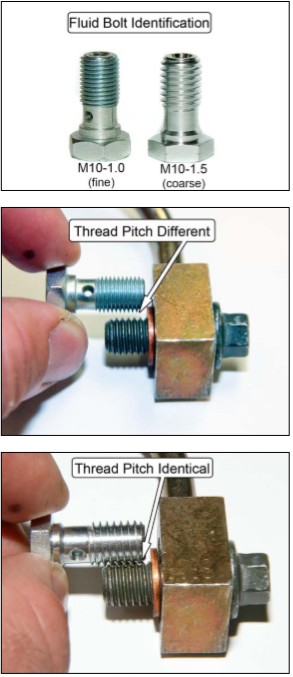
Determine Fluid Bolt Pitch
Two different fluid bolt thread pitches were used for the 1994-04 calipers. One is an M10-1.0 fine pitch and the other is an M10-1.5 coarse pitch. Determine the factory fluid bolt thread pitch by holding the threaded sections of the provided fluid bolts adjacent to the OEM fluid bolts and confirm that the threads mesh together with no air gap.
7. Loosely attach the MM brake hose to the caliper with the correctly identified fluid bolts and crush washers. Orient the banjo fitting so that the bend in the fitting is pointing toward the center of the car.
8. Turn the steering wheel full lock to the right. On the driver side of the car, rotate the caliper end of the MM hose clockwise from vertical so that it is oriented approximately as shown.
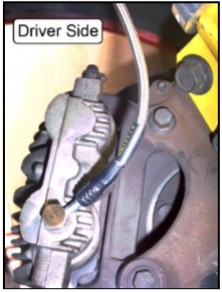
9. Torque the fluid bolt at the caliper to 14 ft-lb while holding the black plastic strain relief of the hose to keep the hose from rotating.
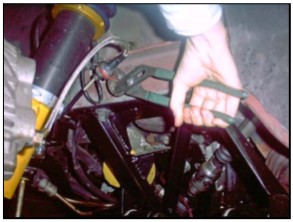
10. Turn the steering wheel full lock to the left. On the passenger side of the car, rotate the caliper end of the MM hose counter-clockwise from vertical so that it is oriented approximately as shown.
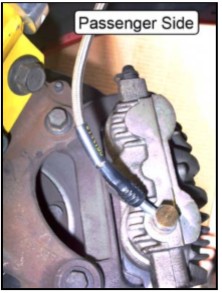
11. Torque the fluid bolt at the caliper to 14 ft-lb while holding the black plastic strain relief of the hose to keep the hose from rotating.
12. Turn the steering wheel back to center. On both sides of the car, gently push the hose toward the center of the car with one finger. Tighten the flare-nut on the chassis’ hard line into the MM hose end. Use a flare-nut wrench to avoid rounding off the flare-nut.
NOTE: If the chassis bracket was modified in Step 5, it will be necessary to use a wrench to stop the hose end from rotating while tightening the flare nut.
13. Secure the hose end to the chassis bracket by re-using the factory ‘C-clip’.
14. Temporarily re-mount the wheels. Check clearances to ensure the hoses will not contact the tire, wheel or K-member. Have a helper turn the steering wheel from lock to lock. If it does rub, the tire or wheel will wear through the hose.
If the hose rubs the tire or wheel, you can bend the chassis tab toward the rear of the car to gain more hose to tire clearance.
If the hose rubs the K-member, but has good clearance to the tire and wheel, you can bend the chassis tab toward the front of the car.
15. Bleed the brake system in the order shown below.

NOTE: If you are unfamiliar with brake bleeding techniques, consult a service manual for further information on bleeding air from the brake system.
16. Have a helper firmly depress the brake pedal multiple times while you inspect the brake lines and fittings for leaks.
17. Reinstall the front wheels and torque the lug nuts to factory specifications. Lower the car to the ground.
18. Firmly block the rear tires to prevent the car from rolling. Now that the suspension is compressed, inspect the brake hose clearance with a mechanic’s mirror while a helper turns the steering wheel from lock, to lock as in Step 14.
19. Test Drive and enjoy.