
Installation Time
(approx) 2 Hours
Difficulty Level:
Light to Moderate mechanical skill required.
 FREE 1 to 3-Day Delivery on Orders $149+ Details

Description, Q&A, Specs & Installation
CA Residents:  WARNING: Cancer and Reproductive Harm - www.P65Warnings.ca.gov
Installation Info
Installation Time
(approx) 2 Hours
Difficulty Level:
Light to Moderate mechanical skill required.
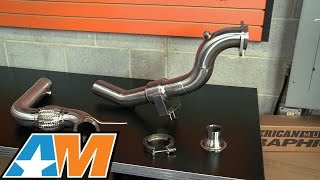
What's in the Box
| Piping Material: | 304 Stainless Steel | Piping Size: | 3" (includes 2.25" step down adapter) |
| Catalytic Converter: | "Yes" - Intended for off-road use only | Type Cat-Back Required: | Stock, 2.25" or 3" aftermarket |
| Tune Required | Yes | Fitment: | 2015-2021 EcoBoost |
Tech Guides:

