FREE 1 to 3-Day Delivery on Orders $149+ Details
How to Install Maximum Motorsports Caster Camber Plates on your Mustang
Installation Time
4 hours
Tools Required
- Floor Jack
- Jack stands
- Spring compressor
- 17mm open end wrench
- 15mm socket
- 18mm deep socket
- 21mm deep socket
- 24mm socket
- Ratchet
- Torque wrench
- Flat head screwdriver
- Needle nose pliers
- 3lb sledge hammer
- Zip ties
- Snips to cut zip ties

Shop Parts in this Guide
Pre-Installation Instructions: Before attempting install, be sure you are comfortable and know how to use your spring compressor. These can be very dangerous and can cause severe injury if not used properly. Be sure to read the manual for your particular compressor before starting ANY work.
Installation Procedures:
1. Jack up car from underneath and support with jack stands. Be sure that the car is securely held by the jack stands with the car in gear before beginning any work.
2. Remove front wheels, you will need a 21mm to remove factory lugs.
3. Once the wheel is removed, you will need to remove the brake caliper and rotor to gain better access to the strut bolts. Using a 15mm socket, remove the 2 bolts on the back side of the caliper that hold it to the spindle. Leave at least a couple of threads in on the top bolt to support the caliper.
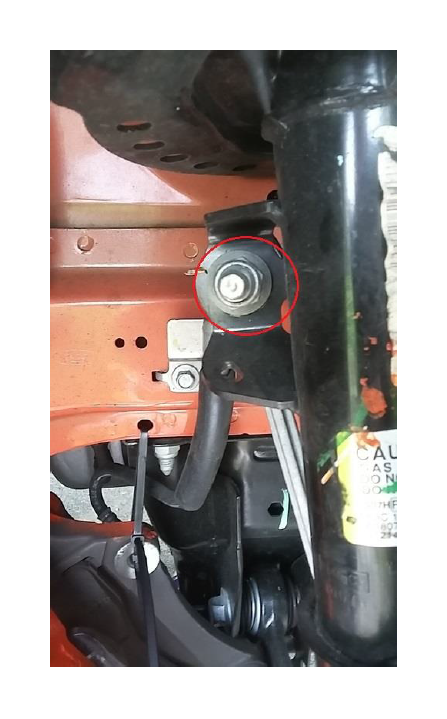
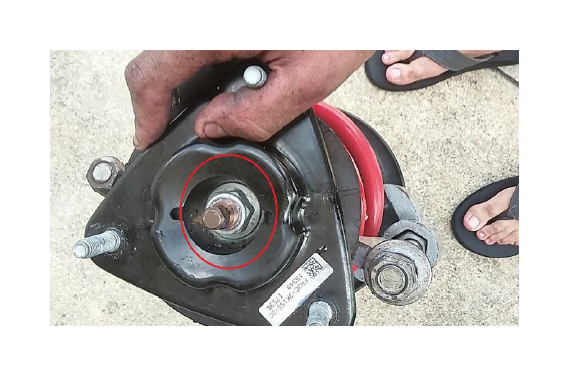
4. Take one of your zip ties and run it through one of the holes in the body just above the front sub frame (circled in red in picture below), you will use this to hang your caliper from. Once you have done this you can now remove the top caliper bolt and slide the caliper off the rotor. Put the zip tie through the top bolt hole on the brake caliper and secure it. This will prevent damage to your brake hose from supporting the weight of the caliper.

5. Now remove the rotor and set aside.
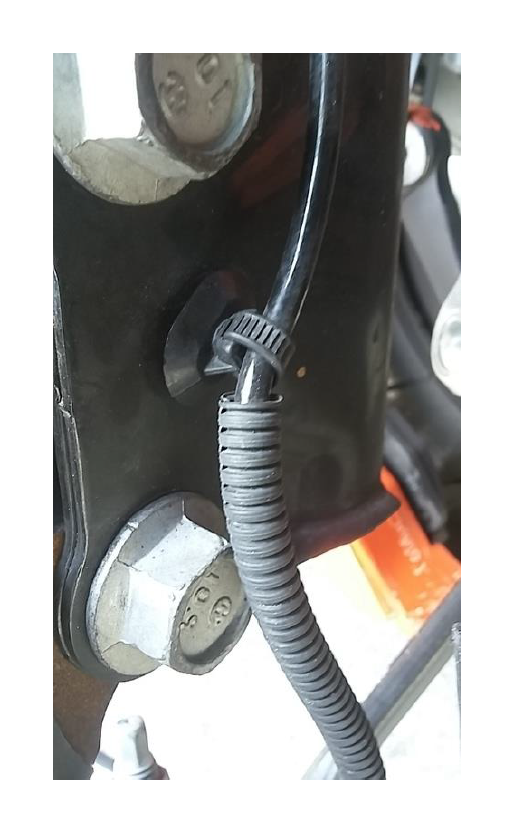
6. Locate the 2 plastic clips that hold the abs wire to the strut (pictured below) and remove them from the strut. I used a flat blade screwdriver to pry them out, with a bit of additional help from a set of needle nosed pliers.

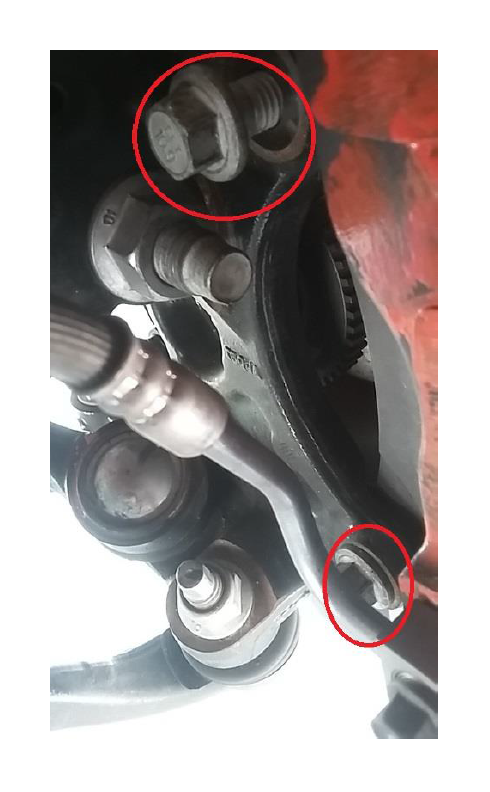
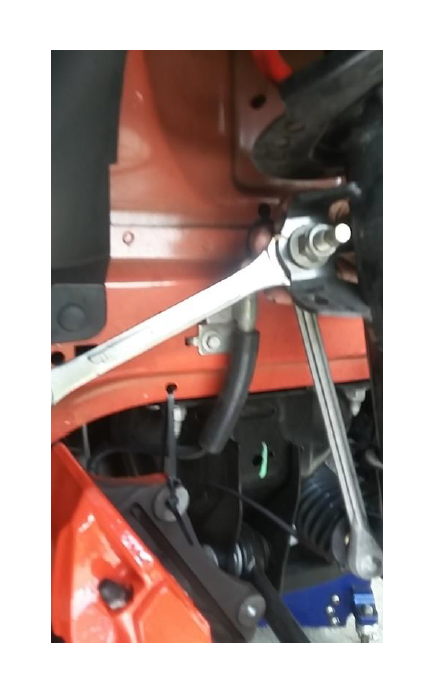
7. Remove the sway bar end link where it attaches to the front strut. You will need an 18mm deep socket to remove the nut (circled in red). There is a hex on the back of the end link bolt that you will need to hold with your 17mm wrench while you remove the nut (pictured below). Once the nut is removed, remove the end link from the strut and move it out of the way.
8. Loosen the nuts on the bolts that hold your strut to the spindle (circled in red in picture below) using a 24mm socket. Do not fully remove the nuts off the bolts yet. The bolts are splined and therefore will need to be driven out with a hammer. This is why you leave the nuts on to protect the threads and bolt when you drive it out.

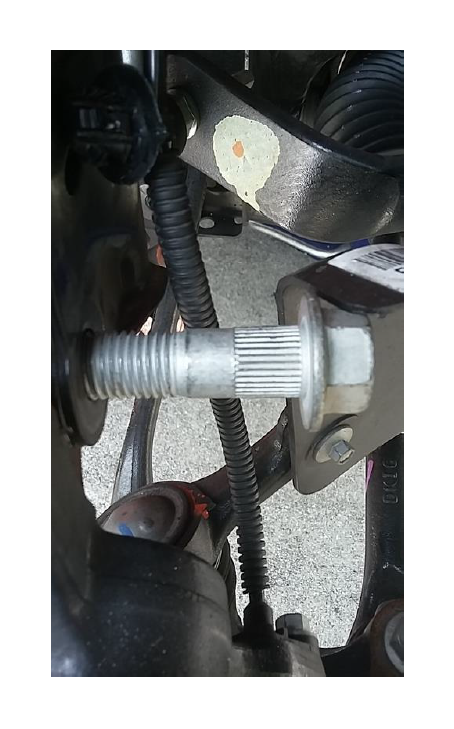
9. With the nuts on the end of the bolts, hammer them out with your hammer. Ensure that the nuts are far enough on the bolt shaft, otherwise hitting them could damage the threads. You can remove the bolt by hand once the splines are visible (pictured below).

10. Next you will need to pop the hood and move to the strut towers inside the engine bay. Loosen but do not remove the 3 nuts (circled in red) holding the strut mount to the strut tower with a 15mm socket. Once loosened support the strut from underneath and remove the nuts. The strut assembly can now be removed from the car.
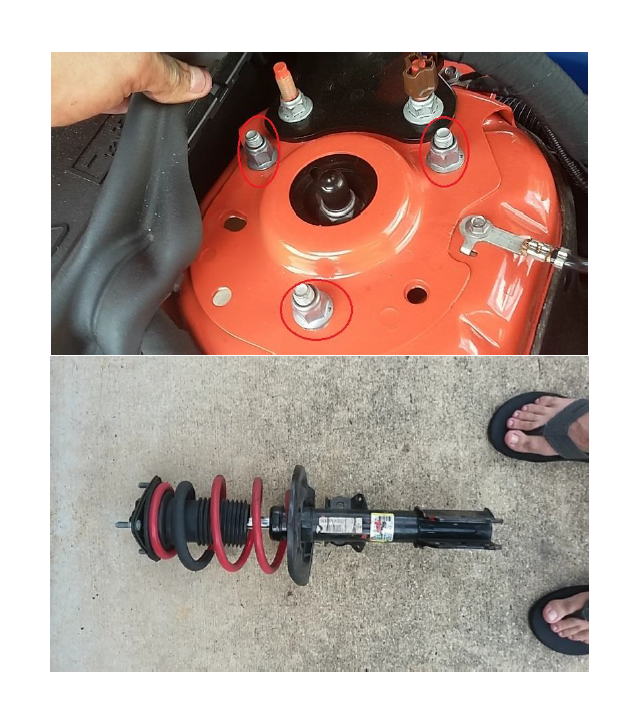
11. Install your spring compressor on the spring. NOTE: Springs are under great pressure and can cause serious injury if not removed correctly. Be sure to read the owner’s manual for your spring compressor and fully understand how it works BEFORE using it.
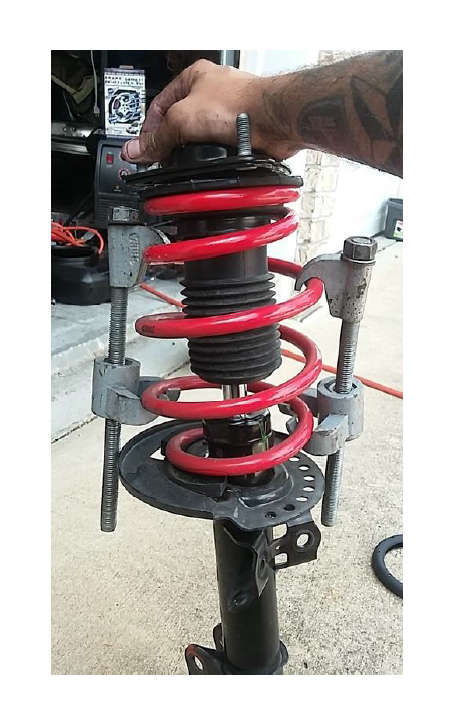
12. Tighten your compressor until there is no pressure from the spring against the strut mount. Next loosen (but do not remove) the strut shaft nut (circled in red below) with a 21mm socket. The spring should not decompress as you loosen this nut, if it does you haven’t fully compressed the spring and need to do so before going any further. This is where people can get seriously injured if they don’t do things right.
13. Once you are sure the spring is fully compressed, you can remove the strut shaft nut the rest of the way and then remove the strut mount from the strut assembly.
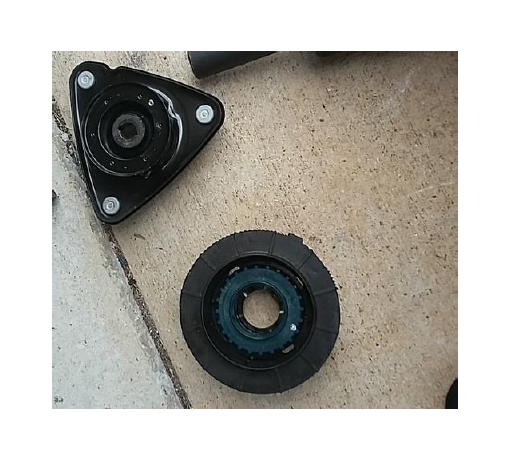
14. With the strut mount removed, you will need to separate the top and bottom halves of the mount by simply pulling them apart. Many times they will separate on their own when removing it from the spring. Once this is done you will have this sitting in front of you.
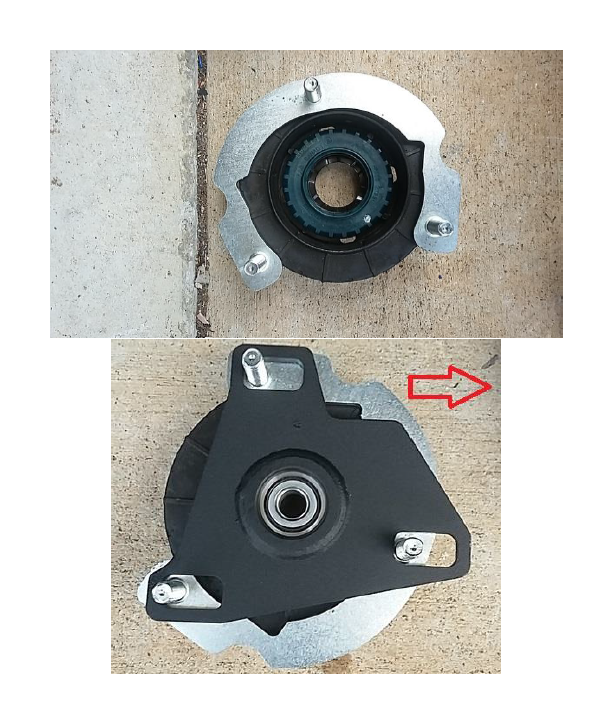
15. Now it’s time to assemble the camber plates. You will only be reusing the bottom portion of the factory strut mount. The silver stud plate with the threads goes on first with the opening of the “C” facing inwards towards the engine when installed on the vehicle. They simply lay over the factory bottom mount, which will look like this. Now lay the black bearing plate on top with the threads from the stud plate going through the bolt holes. Note the orientation of both the silver and black plates in the picture below, the red arrow points towards the outside of the vehicle when installed.
16. Now install the strut mount/camber plate assembly on the strut and spring and tighten the strut shaft nut down. Note that there are cut outs in the rubber isolators that the spring sits against at both ends. Be sure the spring is properly aligned in these cut outs before torqueing down the strut shaft nut to 76ft/lb on OEM strut (use manufacturers specs if using aftermarket strut) using a 21mm socket. Once you have done this you can loosen your spring compressor and remove it from the spring.
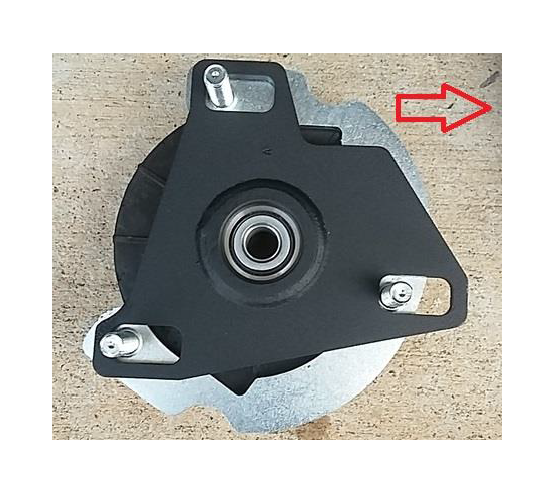
17. Now it’s time to install the strut in the car. Start by lifting the strut assembly into the fender well and inserting the camber plate studs through the holes in the strut tower. BE SURE TO REMEMBER THE ORIENTATION OF THE CAMBER PLATE (pictured below), install with arrow pointing towards the outside of the vehicle. Thread one of the supplied 10mm flange nuts to each of the studs to hold the assembly in place using a 15mm socket. Do not tighten them yet.
18. Attach the strut to the spindle using the 2 splined bolts. Note that you will need to drive the bolt in with your hammer so the splines lock into the spindle. Once you have done this install the nuts and torque to 184 ft/lb using a 24mm socket.
19. Slide the sway bar end link through the mounting hole in the strut and torque nut to 85 ft/lb using an 18mm deep socket. Be sure to remember the 17mm wrench on the back to keep the shaft from spinning.
20. Reinstall front brake rotor. I find that threading one of the lug nuts on keeps the rotor from moving when installing the caliper.
21. Cut the zip tie with your snips holding your caliper in place while supporting the caliper. Slide caliper onto the rotor and reinstall the 2 mounting bolts to the spindle. Torque to 85 ft/lb.
22. Reinstall the 2 clips that hold your abs line to the strut.
23. Remove the rear and outer flange nuts holding the camber plate to the strut tower.
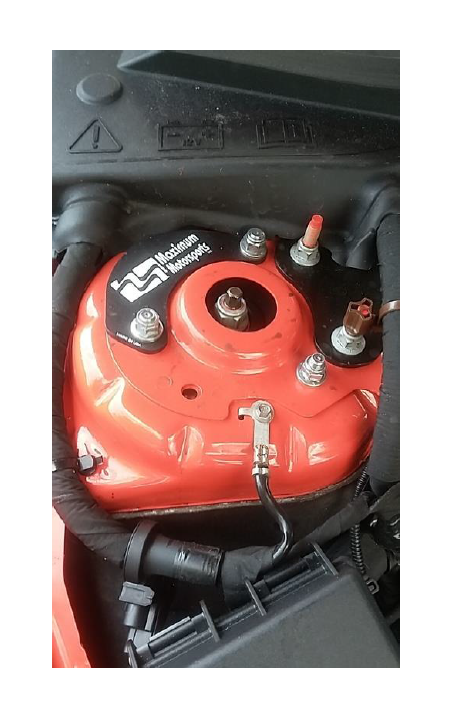
24. Take the camber plate support bracket (moon shaped brackets with Maximum Motorsport logo on them) and ensure you have the right one as they are side specific. Install it over the 2 studs that you just removed the flange nuts from.
25. Reinstall the 2 flange nuts using one of the supplied 3/8 washers under each nut. Also install one of these washers under the front flange nut on the camber plate. Your camber plates should now look like this.
26. Torque the flange nuts slowly, ensuring that they pull up evenly. Push the strut shaft towards the rear of the vehicle while doing this and center the strut side to side. This gives you your initial caster and camber settings.
27. Torque the flange nuts to 46 ft/lb.
28. Mount wheel and torque lug nuts to 148 ft/lb.
29. Repeat for other side.
30. Remove jack stands and lower car to ground. Be sure to take car for alignment and enjoy your new camber plates.